Saffron Rice: Easy Recipe for a Flavorful, Healthy Dish

Saffron rice served with chicken skewers and fresh salad.
Saffron rice served in a bowl with golden color
Golden saffron rice ready to enjoy.

I remember the first time we tried saffron rice. The grains looked golden on the plate, and the aroma filled the whole room. One spoonful showed me rice could be more than just a side — it could feel like the highlight of a meal. Rice is one of the easiest staples to cook, but when it’s touched with saffron, it turns into something warm, colorful, and full of flavor.

Later, when med and I felt out of shape, we made a 100-day pact to change. We promised real workouts, real meals, and real accountability. Most of the time, med took care of dinner. I became the queen of breakfast, and we often rushed through lunch together because that was the busiest part of our day. That balance helped us stay consistent and discover meals that gave us energy instead of slowing us down. You can read more about that journey here.

Saffron rice is quick, healthy, and versatile. With just a few threads of saffron, plain rice becomes fragrant and inviting. It pairs beautifully with chicken, beef, or vegetables and adds a touch of celebration to any table. If you’ve been looking for a saffron rice recipe that feels special yet easy, this is it.

What Makes Saffron Rice Special

The Story of Saffron

Saffron rice starts with one of the most prized spices in the world — saffron. These are the tiny red threads taken from the flower of the crocus plant. It takes thousands of flowers to collect just a small handful, which is why saffron is often called “gold in the kitchen.” Even though it costs more than most spices, a little goes a long way. Just a few strands can change the look, smell, and taste of a whole pot of rice.

Making saffron rice is simple. First, the saffron threads are soaked or “bloomed” in warm water or milk. This step releases the golden color and signature aroma. When stirred into rice, saffron turns an everyday grain into a dish that feels both comforting and special. For centuries, families in the Middle East, India, and Spain have enjoyed saffron rice at gatherings and celebrations. It is also a staple in Moroccan cuisine, often considered one of the greatest cuisines in the world, where saffron brings both flavor and color to festive meals.

Aromatic Appeal

So, what does saffron rice taste like? The flavor is soft and earthy, with light notes of honey and flowers. It’s not bold like chili or pepper. Instead, it’s gentle, smooth, and balanced, which makes every bite enjoyable. The golden grains also look beautiful on the plate, making the dish stand out next to grilled chicken, roasted beef, or even a simple salad.

Saffron rice served with chicken skewers and fresh salad.
Golden saffron rice paired with chicken skewers and a crisp salad.

This is why saffron rice is loved worldwide. It takes a common base — plain rice — and transforms it into something colorful, fragrant, and unforgettable. Whether you’re making a quick weeknight dinner or cooking for guests, saffron rice always feels like the centerpiece.

Health Benefits of Saffron Rice

Nutritional Profile

This golden dish is more than just pretty on the plate. The saffron threads used in cooking are packed with antioxidants, which help protect your cells and may even support better mood and memory. Some studies suggest saffron can reduce stress and improve sleep. When added to rice, it creates a side that is both filling and nourishing.

A serving usually offers steady carbs for energy, along with small amounts of manganese and iron from the spice itself. The calories mostly come from the grain, but the saffron lifts the dish with extra wellness benefits. Many people also drink saffron tea to help with digestion and relaxation. Because you only need a pinch for cooking, a jar of saffron can last a long time.

Health Comparisons

So, is this dish healthy? Yes, when eaten in moderation. The rice gives clean energy, while saffron adds flavor and nutrients without extra fat or sugar. Compared to plain white rice, it feels more satisfying because the color, aroma, and taste all affect how full you feel.

In Moroccan cuisine, often ranked among the world’s finest, saffron is used to balance rich stews and meats. It pairs beautifully with lean proteins, whether it’s a juicy Sous Vide Chicken Breast Recipe for a low-carb plate or a hearty Mediterranean Ground Beef Skillet for something more filling. Unlike fried rice dishes, this recipe is usually steamed or simmered, which keeps it light and easy on digestion.

Enjoying it regularly can be part of a healthy lifestyle, especially when combined with fresh vegetables and balanced portions. It’s proof that even a simple grain can feel elegant with just a touch of spice.

Cooking Saffron Rice at Home

Step-by-Step Instructions

Making saffron rice at home is easier than it looks. The most important step is blooming the saffron. This simply means soaking the threads in a little warm water before cooking. That way, the saffron releases its bright color and aroma into the dish. Once bloomed, the liquid is added to rice while it cooks.

Some cooks use broth instead of plain water to add more depth of flavor. Broth is optional, though — if you prefer a lighter, simpler dish, plain water works just fine.
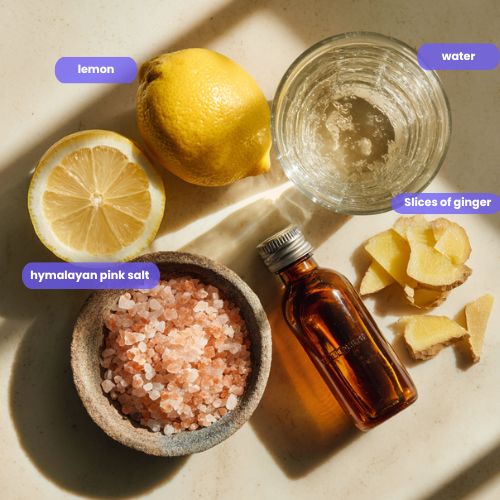
Ingredients Table

Ingredients for saffron rice recipe.
Fresh and simple ingredients for saffron rice.
Ingredient Amount
Basmati Rice 1 cup
Saffron Threads 8–10 strands
Warm Water (for blooming) 2 tbsp
Water or Broth (optional) 2 cups
Olive Oil or Butter 1 tbsp
Salt ½ tsp (to taste)

Instructions Table

Saffron rice step by step: grind saffron, bloom in water, sauté rice, add saffron water, simmer, then fluff—six-photo collage.
Saffron Rice, step by step — from grinding saffron to fluffy golden grains.
Step Instructions
1 Rinse the rice in cold water until the water runs clear.
2 Soak saffron threads in warm water for 5–10 minutes to release color and aroma.
3 Heat oil or butter in a pot, add rice, and stir for 1–2 minutes.
4 Add water or broth (if using), the saffron liquid, and salt. Stir gently.
5 Bring to a boil, then cover and simmer on low for 15 minutes.
6 Remove from heat, keep covered, and let rest 5 minutes before fluffing with a fork.

Pairing Ideas with Saffron Rice

Protein Partners

One of the best things about saffron rice is how well it pairs with protein. The gentle flavor and golden color make it the perfect base for almost any main dish. You can keep it simple with grilled chicken or baked salmon, or go hearty with roasted beef and short ribs.

For a juicy, tender option, try it with Grilled Chicken Bites. The smoky flavor of the chicken highlights the subtle sweetness of the rice, making it a balanced plate. If you enjoy seafood, shrimp or salmon adds freshness without overpowering the delicate taste of saffron. For beef lovers, a skillet dish or oven-roasted steak creates a satisfying pairing that feels complete.

Vegetable Mix-Ins

Since rice already provides carbs, the best choice is to mix in light vegetables or fruits that add texture and color. Carrots and zucchini bring brightness, while corn adds a little crunch. Some cooks like to stir in dried apricots for a hint of sweetness that balances the flavor.

These mix-ins turn saffron rice into a more colorful and flavorful dish without making it heavy. Whether you’re aiming for a full dinner or just a side to complement lean proteins, saffron rice adapts beautifully.

Its warm aroma and golden grains elevate even the simplest plate, proving that with the right pairings, this dish can stand out as both healthy and unforgettable.

Saffron Rice vs. White Rice

Flavor and Appearance

The main difference between saffron rice and plain white rice shows up the moment you see and smell them. White rice is simple and mild, with little aroma. It’s a blank canvas for sauces or stews. Saffron rice, on the other hand, glows with golden color and gives off a warm, floral fragrance. A spoonful tastes slightly earthy with hints of honey, while white rice stays neutral.

Because of its flavor and look, saffron rice often feels more special. It turns a basic grain into something festive, which is why many people serve it when they want a meal to stand out. White rice may be the everyday choice, but saffron rice has that “wow” factor.

Nutritional Difference

From a nutrition standpoint, both dishes share the same base: rice. That means they provide carbs for energy but not much protein or fat. The difference comes from the saffron. Even though only a small amount is used, saffron adds antioxidants, trace minerals, and compounds that may help with mood, digestion, and sleep.

While saffron rice does not suddenly become a “superfood,” it is a little more nutrient-rich than plain rice. It’s also more satisfying because its aroma and color make the eating experience fuller. For someone looking to upgrade a meal without changing much, saffron rice is a great option.

Why Is Saffron Expensive?

Saffron is known as “red gold” for a reason. Each thread comes from the crocus flower, and each flower produces only three strands. It takes thousands of flowers and careful hand-picking to gather even a small amount, which is why saffron is so costly.

If you’re looking for more budget-friendly spices with a similar look or aroma, there are a few options you can try. I’ll be covering those saffron alternatives in detail in my next blog — so stay tuned if you want easier ways to get a golden rice dish without the high price tag.

For now, try serving saffron rice with Sous Vide Chicken Breast for a lean, balanced plate, or with Beef Stir Fry for a heartier dinner. In both cases, the golden grains lift the meal beyond what plain white rice could do.

Tips and Variations for Saffron Rice

Simple Cooking Tips

Cooking saffron rice is straightforward, but a few small tricks can make a big difference. Always rinse the rice until the water runs clear. This removes extra starch and keeps the grains fluffy. Blooming saffron properly in warm water before adding it to the pot is also key. If you skip that step, the color and aroma won’t spread evenly through the rice.

Another tip is to keep the heat low once the pot comes to a boil. Rice cooks best when it simmers gently. Letting it rest for a few minutes after cooking also helps the grains settle and separate. These little details make saffron rice taste like something you’d get in a restaurant, but right in your own kitchen.

Creative Variations

Saffron rice with dried grapes and cashews.
Fluffy saffron rice mixed with dried grapes and cashews.

Once you’ve mastered the basic method, you can play with add-ins to create your own twist. A handful of raisins or dried apricots adds gentle sweetness. Toasted almonds or pistachios bring crunch and richness. If you like a fresher taste, stir in chopped herbs such as parsley or cilantro before serving.

For a full meal, pair saffron rice with lean proteins like Yogurt Marinated Chicken or enjoy it next to Grilled Chicken Drumsticks. Both options balance the golden rice without overpowering its flavor.

These small touches show that saffron rice isn’t only a side dish. With the right pairings and add-ins, it becomes the centerpiece of the table — simple, healthy, and unforgettable.

Let’s StayFit — together. Follow us on facebbok and pinterest for more

How to make saffron rice?
To make saffron rice, rinse the rice well, bloom saffron threads in warm water, and then cook everything together with water or broth until the grains are fluffy and golden. A little saffron goes a long way.
What is saffron?
Saffron is a spice made from the red threads of the crocus flower. Each flower produces only three strands, which is why saffron is one of the most expensive spices in the world. Even so, a few strands are enough to flavor an entire dish.
What does saffron rice taste like?
Saffron rice has a mild earthy flavor with subtle notes of honey and flowers. It is smooth and fragrant without being spicy or strong, which makes it a perfect base for chicken, beef, or seafood dishes.
Is saffron rice healthy for you?
Yes. Saffron rice is healthy when enjoyed in moderation. The rice provides energy, while saffron adds antioxidants and trace minerals that may support mood, digestion, and sleep. Pairing it with lean proteins makes it a balanced meal.
What is the difference between white rice and saffron rice?
White rice is plain, mild, and has little aroma. Saffron rice is golden in color, fragrant, and carries a richer flavor thanks to the saffron threads. It also offers extra antioxidants compared to plain rice.
Print
clock clock iconcutlery cutlery iconflag flag iconfolder folder iconinstagram instagram iconpinterest pinterest iconfacebook facebook iconprint print iconsquares squares iconheart heart iconheart solid heart solid icon
Saffron rice served in a bowl with golden color

Saffron Rice: Easy Recipe for a Flavorful, Healthy Dish


5 Stars 4 Stars 3 Stars 2 Stars 1 Star

No reviews

  • Author: Chef Dodos
  • Total Time: 30 minutes
  • Yield: 4 servings 1x
  • Diet: Vegetarian

Description

Saffron rice is a golden, fragrant dish that adds color, aroma, and flavor to any meal. This easy recipe shows you how to bloom saffron properly and cook fluffy rice every time.


Ingredients

Scale

1 cup basmati rice

810 saffron threads

2 tbsp warm water (for blooming saffron)

2 cups water or broth (optional)

1 tbsp olive oil or butter

½ tsp salt (to taste)


Instructions

1. Rinse the rice in cold water until the water runs clear.

2. Bloom saffron threads in warm water for 5–10 minutes.

3. Heat oil or butter in a pot, add rice, and stir for 1–2 minutes.

4. Add water or broth (optional), saffron liquid, and salt. Stir gently.

5. Bring to a boil, then cover and simmer on low for 15 minutes.

6. Remove from heat, keep covered, and let rest 5 minutes before fluffing with a fork.

Notes

Serve saffron rice with chicken skewers and salad, sous vide chicken breast, or roasted vegetables. Garnish with dried grapes, cashews, or fresh herbs for extra flavor and texture.

  • Prep Time: 10 minutes
  • Cook Time: 20 minutes
  • Category: Side Dish
  • Method: Stovetop
  • Cuisine: International

Nutrition

  • Serving Size: 1 portion
  • Calories: 190
  • Sugar: 0g
  • Sodium: 200mg
  • Fat: 4g
  • Saturated Fat: 1g
  • Unsaturated Fat: 3g
  • Trans Fat: 0g
  • Carbohydrates: 35g
  • Fiber: 1g
  • Protein: 4g
  • Cholesterol: 0mg

Conclusion

Saffron rice takes one of the simplest foods in the world and turns it into something golden, fragrant, and memorable. From its rich color to its gentle flavor, this dish proves that even small details can change the whole meal. It’s healthy, versatile, and easy enough for any home cook.

If you haven’t tried it yet, now is the perfect time. Grab a few saffron threads, cook a pot of rice, and see how it transforms your dinner. Share it with your family or serve it at your next gathering — either way, it’s sure to impress.

Ready to give it a try? Start with the recipe above and enjoy your first homemade saffron rice today.

Overnight Oats for Weight Loss: high protein, easy & Healthy Breakfast

Overnight oats for weight loss in a mason jar with berries
Creamy overnight oats for weight loss topped with fresh berries.

Overnight oats for weight loss quickly became my answer when I got bored of eggs at breakfast. I wanted something simple, tasty, and light, but still filling enough to carry me through the morning. This recipe turned out to be just that—high in protein, low in calories, gluten-free, and so satisfying. With every spoonful, it feels more like a treat than a diet food, yet it supports real progress on the scale.

When Med and I committed to our 100-day challenge, meals like this kept us on track. We promised to focus on real workouts, real meals, and daily accountability. I handled breakfast and snacks, while Med prepared our hearty lunches and dinners. That teamwork helped us stay consistent, and you can read the full story here: our journey.

The best part about this overnight oats recipe is its flexibility. You can keep it basic for a lighter option or add toppings to keep things exciting. Either way, overnight oats for weight loss make healthy eating easy, quick, and delicious—exactly what a busy morning needs.

Why Overnight Oats Are Great for Weight Loss

Nutritional Power of Oats

Overnight oats for weight loss work because oats are naturally rich in fiber, especially beta-glucan. This soluble fiber slows digestion and helps you feel full longer, which reduces the urge to snack. A single serving of oats delivers a steady release of energy without the crash you often get from sugary breakfasts. That makes overnight oats one of the most reliable choices when you’re trying to cut calories but still need fuel for your day.

Unlike processed cereals, overnight oats also keep their nutrients intact. They provide plant-based protein, complex carbs, and important minerals like magnesium and iron. When you prepare them with low-fat milk or a dairy-free alternative, you create a balanced base that supports metabolism and keeps cravings under control. In fact, many people find that starting their morning with overnight oats helps them manage portions better throughout the day.

Satiety, Flexibility, and Results

The key to sustainable weight loss is satiety, and that’s where overnight oats shine. A jar can be customized with Greek yogurt, protein powder, or chia seeds to boost protein and improve fullness. That combination of protein and fiber helps control appetite, making it easier to stick to a calorie deficit without feeling deprived.

Even better, this meal is flexible. You can keep it simple with a light, basic mix for low-calorie mornings or build creative variations like the berry cheesecake overnight oats when you want something fun but still supportive of your goals. The creamy texture and natural sweetness from fruit make it feel indulgent, even though it’s designed to help with fat loss.

For those who enjoy variety, oats pair beautifully with other healthy recipes. For example, alternating overnight oats with high-protein breakfasts such as quick cottage cheese pancakes keeps your routine fresh and prevents boredom. That variety matters because the best weight loss plan is the one you can enjoy and maintain long term.

In short, overnight oats are nutrient-dense, filling, and versatile. They check all the boxes for a weight-loss-friendly breakfast: easy prep, lasting satisfaction, and delicious flavor without excess calories.

Step-by-Step Instructions for Overnight Oats for Weight Loss

Basic Overnight Oats Recipe

Overnight oats for weight loss ingredients on a table
Fresh and simple ingredients for overnight oats for weight loss.

One of the best things about overnight oats for weight loss is how fast and easy they are to prepare. You can make them in just a few minutes before bed and wake up to a creamy, ready-to-eat meal that fits perfectly into a calorie-controlled plan. The base recipe is simple, yet it delivers the protein, fiber, and flavor you need to stay full and satisfied.

Here’s a light and balanced version of overnight oats for weight loss:

Ingredients Quantity
Rolled oats (gluten-free) ½ cup
Low-fat milk or almond milk ½ cup
Greek yogurt ¼ cup
Chia seeds 1 tbsp
Cinnamon ½ tsp
Vanilla extract ½ tsp
Sweetener (vanilla stevia or zero-sugar maple syrup) Few drops or 1 tsp
Fresh berries ¼ cup

Instructions

Step-by-step making overnight oats for weight loss
Mixing oats, milk, yogurt, and chia seeds for overnight oats.
  1. Add rolled oats, milk, and Greek yogurt to a jar.
  2. Stir in chia seeds, cinnamon (to help control insulin spikes), and vanilla extract.
  3. Sweeten with a few drops of vanilla stevia or zero-sugar maple syrup.
  4. Cover the jar and refrigerate overnight (6–8 hours).
  5. In the morning, top with berries or your favorite mix-ins.

Topping Options for Flavor and Variety

The secret to enjoying overnight oats for weight loss long-term is variety. Peanut butter or almond butter adds healthy fats and richness, while a sprinkle of dark chocolate chips brings a dessert-like twist without going overboard. Banana slices provide natural sweetness, but if you want to keep it low in calories, stick to berries.

I’ve used cranberries, blueberries, and raspberries, and they’re my favorite low-calorie fruit options. Fresh or frozen berries work equally well, so choose what’s in season or what you have on hand. Blackberries and strawberries also make excellent additions. The beauty of overnight oats for weight loss is that you can mix and match toppings to suit your taste and calorie needs.

With these topping ideas, your overnight oats for weight loss will never feel boring—just delicious, satisfying, and weight-loss friendly.

Nutrition Information & Serving Suggestions for Overnight Oats for Weight Loss

Calories and Macronutrients

One of the biggest advantages of overnight oats for weight loss is their nutrient balance. A single serving made with oats, low-fat milk, Greek yogurt, and berries delivers protein, fiber, and healthy carbs in the right proportions. This combination helps regulate hunger hormones, improves digestion, and supports steady energy without spikes or crashes.

Here’s the approximate nutrition breakdown for the basic recipe:

Nutrient Per Serving
Calories 280–320 kcal
Protein 18–22 g
Carbohydrates 35–40 g
Fiber 7–9 g
Fat 7–9 g

This balance makes overnight oats for weight loss an excellent breakfast choice, especially if you’re trying to maintain lean muscle while burning fat.

Serving Suggestions

You can enjoy overnight oats for weight loss in different ways depending on your schedule. For busy mornings, prep several jars at once so you’re set for the week. If you want to see exactly how I batch-prep my jars, you can check the step-by-step video on my Instagram reel. This method keeps your mornings stress-free and ensures you always have a healthy meal ready.

A chilled jar straight from the fridge works great on hot days, while warming your oats in the microwave makes them feel cozy in cooler months. Rotate toppings—berries one day, bananas the next, or even a spoon of peanut butter for extra creaminess—to keep flavors exciting.

To add balance, alternate oats with high-protein options like protein bread or a homemade protein bar. This variety makes healthy eating enjoyable and sustainable.

The flexibility of overnight oats for weight loss ensures you’ll never get bored while staying consistent with your plan.

Overnight Oats in a Weight Loss Plan

7-Day Overnight Oats Plan

The most effective way to use overnight oats for weight loss is to make them part of your weekly routine. Preparing a few jars in advance not only saves time but also helps you stick to your calorie goals. Here’s a simple 7-day plan you can follow:

7-day overnight oats for weight loss meal prep jars
Seven jars of overnight oats for weight loss, prepped for a full week.
  • Day 1: Basic overnight oats with cinnamon and blueberries.
  • Day 2: Banana slices with a teaspoon of peanut butter.
  • Day 3: Chocolate version with cocoa powder and raspberries.
  • Day 4: Mixed berry combo—strawberries, blackberries, and cranberries.
  • Day 5: Almond butter swirl with chopped apple.
  • Day 6: Vanilla oats topped with frozen blueberries.
  • Day 7: Light version with chia seeds and zero-sugar maple syrup.

This rotation keeps your meals fresh and exciting while still low in calories. The beauty of overnight oats for weight loss is how customizable they are—you can adjust toppings, portion sizes, and flavors without losing their core benefits.

Best Times to Eat Overnight Oats

When it comes to timing, overnight oats for weight loss fit almost anywhere in your day. Most people enjoy them as a quick, filling breakfast that prevents mid-morning cravings. However, they also work well as a post-workout meal, especially if you add extra protein like Greek yogurt or whey.

For lighter evenings, you can even enjoy a smaller jar as a healthy dessert replacement. Pairing oats with antioxidant-rich fruit makes them a smarter choice than ice cream or sugary snacks.

To keep your plan sustainable, balance oats with other clean recipes. For example, alternating with savory meals like rice paper rolls or a fiber-rich roasted sweet potato salad ensures variety and helps you stay consistent over the long run.

By following a structured plan, you’ll see how easy it is to use overnight oats for weight loss as a reliable tool in your journey. They provide the satiety, nutrition, and flexibility you need to succeed without ever feeling restricted.

Why You’ll Love This Recipe?
You’ll love this overnight oats for weight loss recipe because it’s quick, high in protein, and low in calories. It’s gluten-free, filling, and customizable with toppings like berries, nut butter, or even chocolate chips. It tastes amazing while keeping you on track with your plan.
Is overnight oats good for weight loss?
Yes! Overnight oats for weight loss are excellent because they are rich in fiber and protein, which help control hunger. They’re naturally portion-controlled and can be made with low-calorie add-ins, making them a smart breakfast or snack for fat loss.
What not to put in overnight oats?
Avoid adding high-calorie extras like heavy cream, large amounts of sugar, or flavored syrups. These make overnight oats less effective for weight loss. Instead, use cinnamon, vanilla extract, stevia, or zero-sugar maple syrup for natural sweetness.
How to eat oats for weight loss in 7 days?
The best way is to prepare several jars of overnight oats for weight loss in advance and rotate flavors daily. Try blueberries one day, banana with almond butter the next, or raspberries with cocoa powder. This variety keeps your meals exciting and helps you enjoy oats every day for a week.
How do you do overnight oats?
To make overnight oats for weight loss, mix rolled oats, milk, Greek yogurt, chia seeds, and cinnamon in a jar. Add a few drops of stevia or zero-sugar maple syrup, then refrigerate overnight. In the morning, top with fruit or nut butter and enjoy a ready-to-eat, healthy breakfast.

Let’s StayFit — together. Follow us on facebbok for more

Print
clock clock iconcutlery cutlery iconflag flag iconfolder folder iconinstagram instagram iconpinterest pinterest iconfacebook facebook iconprint print iconsquares squares iconheart heart iconheart solid heart solid icon

Overnight Oats for Weight Loss: high protein, easy & Healthy Breakfast


5 Stars 4 Stars 3 Stars 2 Stars 1 Star

No reviews

  • Author: Chef Dodos
  • Total Time: 8 hours
  • Yield: 1 serving 1x

Description

These overnight oats for weight loss are high in protein, low in calories, and perfectly creamy. Made with oats, Greek yogurt, chia seeds, cinnamon, and berries, they are gluten-free and easy to prep ahead.


Ingredients

Scale

½ cup rolled oats (gluten-free)

½ cup low-fat milk or almond milk

¼ cup Greek yogurt

1 tbsp chia seeds

½ tsp cinnamon

½ tsp vanilla extract

Few drops vanilla stevia or 1 tsp zero-sugar maple syrup

¼ cup berries (blueberries, raspberries, or strawberries)

Optional: 1 tsp peanut butter, almond butter, banana slices, or a sprinkle of dark chocolate chips


Instructions

1. Combine oats, milk, and Greek yogurt in a jar.

2. Mix in chia seeds, cinnamon, and vanilla extract.

3. Add sweetener such as stevia or zero-sugar maple syrup.

4. Stir well, cover, and refrigerate overnight (6–8 hours).

5. In the morning, top with berries or nut butter and enjoy chilled or warm.

Notes

Prep several jars at once for busy mornings. Rotate toppings like blueberries, raspberries, or nut butter to keep flavors exciting while staying low in calories.

  • Prep Time: 5 minutes
  • Cook Time: 0 minutes
  • Category: Breakfast
  • Method: No-Cook
  • Cuisine: Healthy, Gluten-Free

Nutrition

  • Serving Size: 1 jar
  • Calories: 280-320
  • Sugar: 6g
  • Sodium: 150mg
  • Fat: 7-9g
  • Saturated Fat: 2g
  • Unsaturated Fat: 6g
  • Trans Fat: 0g
  • Carbohydrates: 35-40g
  • Fiber: 7-9g
  • Protein: 18-22g
  • Cholesterol: 10mg

Conclusion

Overnight oats for weight loss are proof that healthy eating doesn’t need to be boring or complicated. With just a few ingredients and an overnight chill, you wake up to a high-protein, low-calorie breakfast that’s creamy, filling, and endlessly customizable. From cinnamon and vanilla to berries and nut butter, every jar can taste fresh and exciting while still supporting your 100-day challenge. Prep ahead, keep it simple, and enjoy a recipe that helps you stay consistent without feeling restricted. One jar at a time, these overnight oats make weight loss both delicious and sustainable.

Pink Salt Trick Recipe for Weight Loss

Ingredients for pink salt trick recipe for weight loss

Himalayan Pink Salt Trick Recipe for Weight Loss

Ingredients for pink salt trick recipe for weight loss

I still remember the first morning Kiko handed me a warm glass with a pinch of pink crystals swirling at the bottom. It looked simple—just warm water, lemon, apple cider vinegar, and a dash of Himalayan pink salt—but that single sip changed how we started every day. During our 100-day pact to get healthier, this ritual became our anchor. We promised real workouts, real meals, and accountability: Kiko handled the early snacks, and I covered the dinners. Together, we built balance and discovered that the pink salt trick recipe for weight loss wasn’t just hype—it actually worked for us. You can read our full story here: our transformation journey.

What makes this pink salt trick recipe for weight loss stand out is how fast and approachable it is. In under three minutes, you create a tonic that supports hydration, digestion, and appetite control—three essentials when you’re aiming to lose weight without gimmicks. Unlike sugary detox drinks, it keeps you light and steady all morning. We’ve also paired it with other simple routines, like the green juice benefits guide and our daily protein meals, for lasting results. This isn’t just another trend; it’s a recipe that fits real life.

What is the Pink Salt Trick?

Origins of Himalayan Pink Salt in Weight Loss Rituals

The pink salt trick recipe for weight loss might sound new, but using mineral-rich salts in healing tonics goes back centuries. Himalayan pink salt, mined from ancient sea beds in Pakistan, has long been prized for its trace minerals and natural purity. Unlike heavily processed table salt, it delivers over 80 micro-minerals that help balance hydration and digestion. When dissolved in warm water with lemon and apple cider vinegar, it becomes more than just a drink—it turns into a tool that helps your body wake up, flush bloating, and prepare for the day. Many wellness experts now include this drink as part of their morning routine because of its simplicity and impact.

We discovered it while building healthy habits and were surprised by how quickly it eased morning sluggishness. It’s not a “miracle cure,” but it does prime the body to burn fuel more efficiently. If you’re exploring natural methods to boost metabolism, you’ll also appreciate insights from how to fix your metabolism, which pairs perfectly with this pink salt ritual.

Science of Hydration, Electrolytes, and Digestion

What makes this recipe effective isn’t magic—it’s the science of minerals and hydration. Pink salt provides sodium and trace electrolytes that support adrenal function. Lemon juice adds vitamin C and aids detox pathways. Apple cider vinegar balances blood sugar and calms cravings. Together, they improve fluid balance, digestion, and energy levels.

This combination also helps reduce the kind of belly bloating linked to water retention. When you start your day with proper hydration, your metabolism runs more smoothly. And since digestion sets the tone for appetite, this ritual often makes it easier to avoid overeating later. Curious about targeting stubborn areas? The belly fat guide shows how hydration and mineral balance contribute to long-term results.

The pink salt trick recipe for weight loss is not a fad—it’s a smart, mineral-based approach to starting your mornings with focus and balance.

How the Pink Salt Trick Recipe Works

Key Ingredients – Salt, Lemon, ACV, Warm Water

The pink salt trick recipe for weight loss works because of how its ingredients interact with your body. Himalayan pink salt delivers minerals like magnesium, calcium, and potassium, which help regulate hydration and ease bloating. Lemon juice provides vitamin C, boosts digestion, and supports liver detox pathways linked to fat metabolism. Apple cider vinegar contributes acetic acid, known to balance blood sugar and improve satiety so you naturally eat less. Warm water gently activates the digestive system and makes the drink easy to absorb.

This recipe takes only a couple of minutes to prepare. And because it uses simple pantry items, it feels practical instead of complicated. If you enjoy variety, try the Japanese pink salt recipe for a slightly different mineral balance while keeping the same benefits. Both drinks highlight how simple choices can help you move toward lasting fat loss.

Role in Supporting Belly Fat Reduction and Appetite

Ingredients for pink salt trick recipe for weight loss
All the simple ingredients for the pink salt trick recipe.

When people ask if the pink salt trick recipe for weight loss can flatten the belly, the truth is in how hydration and minerals reduce bloat. Pink salt eases water retention, while lemon and apple cider vinegar support liver health and stable blood sugar. Together, these effects improve digestion, lower cravings, and make fat loss more manageable over time.

This drink is not extreme like detox teas. Instead, it works with your body’s natural systems so you feel steady and light. Pairing it with balanced meals, workouts, and hydration builds sustainable results. For more ways to pair this tonic with daily nutrition, check out the insulin control for fat loss guide.

The pink salt trick recipe for weight loss does not promise miracles—it creates a foundation for healthier mornings and long-term progress.

Step-by-Step Pink Salt Trick Recipe

Exact Recipe & Preparation Method

Ingredients for pink salt trick recipe for weight loss

The pink salt trick recipe for weight loss takes less than three minutes to make, yet it sets the tone for your whole morning. Below is the exact formula we’ve been using since our 100-day pact. Use warm water (not boiling) to protect the enzymes in lemon juice and apple cider vinegar. Drink it slowly on an empty stomach, then follow with another glass of plain water to stay hydrated.

Here’s the structured recipe table:

Ingredient Amount
Warm filtered water 1 cup
Himalayan pink salt ¼ teaspoon
Raw apple cider vinegar 1 tablespoon
Juice of fresh lemon ½ lemon
Optional: ginger slices or honey 1–2 slices / ½ tsp

Common Mistakes to Avoid When Making the Drink

The pink salt trick recipe for weight loss is simple, but small errors can reduce its benefits. Using boiling water can destroy vitamin C in lemon. Too much salt may overwhelm your kidneys. Over-sweetening with honey cancels out appetite control benefits. And drinking it more than once daily can irritate the stomach. For variety without mistakes, try pairing it with the refreshing pickle lemonade mocktail or the nutrient-packed natural Zepbound recipe.

Follow the steps mindfully, and this drink becomes a sustainable ritual that supports hydration, appetite balance, and digestion every morning.

Benefits Beyond Weight Loss

Detox, Mineral Balance, and Energy Support

The pink salt trick recipe for weight loss offers more than fat-burning benefits. Himalayan pink salt is packed with trace minerals that support hydration, adrenal balance, and consistent energy. When combined with lemon juice and apple cider vinegar, this morning tonic encourages natural detoxification and smoother digestion. Drinking it daily can reduce bloating, boost circulation, and help your body absorb nutrients more efficiently.

People often notice steady energy instead of mid-morning crashes. That’s because this drink stabilizes fluid balance and gently wakes up the digestive system. For best results, pair the pink salt trick recipe for weight loss with light, nutrient-packed meals like the roasted sweet potato salad. Unlike stimulant-heavy detox products, this ritual hydrates and nourishes your body with real, natural ingredients.

With consistent use, many find better skin clarity, improved sleep, and reduced morning sluggishness. These “bonus” effects build confidence and make long-term wellness goals easier to achieve.

Difference Between Pink Salt and Regular Salt

A big reason the pink salt trick recipe for weight loss works is the difference between pink salt and table salt. Regular table salt is processed, stripped of minerals, and often contains additives. Himalayan pink salt, by contrast, contains over 80 natural minerals that improve hydration, digestion, and cellular function.

That mineral depth is why this drink feels so refreshing compared to plain water with lemon. It’s also why many combine the pink salt trick recipe for weight loss with mineral-rich habits like the green juice benefits guide. Together, they help regulate cravings, reduce belly bloat, and support fat loss in a sustainable way.

Choosing pink salt over processed salt ensures your body gets cleaner minerals to power digestion, metabolism, and daily energy.

Lifestyle Integration Tips

Best Time to Drink It for Maximum Results

The most effective way to use the pink salt trick recipe for weight loss is first thing in the morning, before food or coffee. Your body is naturally dehydrated after sleep, and this warm tonic helps restore fluid balance, reduce bloat, and prepare your digestive system for the day. Drinking it on an empty stomach allows the minerals, lemon, and apple cider vinegar to activate more quickly.

For best results, follow the tonic with a plain glass of water about ten minutes later. This ensures proper hydration and prevents any lingering taste of vinegar or salt. Many people find that starting their day this way reduces cravings until lunchtime. Pairing the pink salt trick recipe for weight loss with a balanced high-protein breakfast sets the tone for steady energy. If you want more guidance on building fat-burning mornings, check out how to lose belly fat guide, which expands on practical daily routines.

Pairing with Whole Foods, Movement, and Hydration

This tonic is not meant to replace meals or workouts—it’s a tool to make healthy habits easier. Drinking the pink salt trick recipe for weight loss alongside a diet rich in lean proteins, fiber, and fresh produce amplifies the benefits. Add simple movement, like morning walks or light strength training, to maximize results.

Hydration also plays a huge role. Because pink salt helps balance electrolytes, it works best when you’re also drinking enough plain water throughout the day. Think of it as a primer: it sets up your system so meals and workouts are more effective. Many readers combine this ritual with drinks like the natural Zepbound recipe for variety and metabolism support.

By weaving the pink salt trick recipe for weight loss into your mornings and pairing it with real food and movement, you create a sustainable path to fat loss and better energy.

Building a Long-Term Wellness Habit

Creating Consistency Without Overdoing It

The pink salt trick recipe for weight loss works best when used consistently but not excessively. One glass each morning is plenty—you don’t need more to see benefits. Overusing pink salt or apple cider vinegar can upset digestion, so moderation is key. A good rhythm is five days on and two days off each week. This keeps your system balanced while making the ritual sustainable for months at a time.

Consistency also builds trust in your own routine. When you start each day with a small, intentional act, it sets the tone for better choices throughout the day. Pair the pink salt trick recipe for weight loss with mindful meals and hydration, and you’ll notice steady improvements without extreme restrictions. For more balanced recipe ideas, explore the Mediterranean ground beef skillet, a dish that delivers protein and flavor without weighing you down.

Pairing With Balanced Lifestyle Choices

This drink shines when it becomes part of a bigger wellness plan. Movement, sleep, and nutrition all contribute to fat loss and energy balance. The pink salt trick recipe for weight loss helps reduce bloat and cravings, but pairing it with high-quality meals and activity magnifies the results. Think of it as the “spark” that starts your morning, not the entire fire.

Add fresh produce, lean proteins, and whole grains to your meals for sustainable weight management. Small swaps—like choosing lighter options such as the protein bread recipe instead of processed carbs—make a big difference over time. Combine these habits with consistent exercise, and you’ll find the drink enhances, rather than replaces, your progress.

When used thoughtfully, the pink salt trick recipe for weight loss is more than a morning tonic. It’s a supportive ritual that builds discipline, encourages hydration, and helps create a healthy rhythm you can maintain long-term.

Frequently Asked Questions

What is the Himalayan pink salt trick for weight loss?
It’s a warm morning drink made with Himalayan pink salt, lemon, apple cider vinegar, and warm water. This combo supports hydration, digestion, and appetite control—all important for weight loss.
How do you use pink salt to lose belly fat?
Drink the tonic on an empty stomach each morning. The minerals in pink salt help reduce water retention and support adrenal function, which may contribute to less belly bloating over time.
Is Himalayan pink salt better than regular salt for dieting?
Yes. It contains over 80 trace minerals that support better hydration and metabolic function. Regular salt is heavily processed and can lead to bloating.
Can pink salt detox your body?
It can support detoxification by improving hydration and supporting kidney and liver function, especially when paired with lemon and apple cider vinegar. But it’s not a “cleanse”—it works best with whole foods and proper hydration.
Print
clock clock iconcutlery cutlery iconflag flag iconfolder folder iconinstagram instagram iconpinterest pinterest iconfacebook facebook iconprint print iconsquares squares iconheart heart iconheart solid heart solid icon
Ingredients for pink salt trick recipe for weight loss

Pink Salt Trick Recipe for Weight Loss


5 Stars 4 Stars 3 Stars 2 Stars 1 Star

No reviews

  • Author: Chef Dodos
  • Total Time: 3 minutes
  • Yield: 1 glass 1x
  • Diet: Low Calorie

Description

A simple Himalayan pink salt morning tonic with lemon and apple cider vinegar that supports hydration, digestion, and fat loss.


Ingredients

Scale

1 cup warm filtered water

¼ teaspoon Himalayan pink salt

1 tablespoon raw apple cider vinegar

Juice of ½ fresh lemon

Optional: 1–2 slices fresh ginger

Optional: ½ teaspoon raw honey


Instructions

1. Warm water until it reaches body temperature (not boiling).

2. Stir in the Himalayan pink salt until dissolved.

3. Add apple cider vinegar and lemon juice.

4. Optional: Add ginger slices or honey if desired.

5. Drink slowly on an empty stomach, then follow with a plain glass of water.

Notes

Enjoy once daily on an empty stomach. Do not exceed recommended amounts of salt or vinegar. Pair with balanced meals and exercise for best results.

  • Prep Time: 3 minutes
  • Cook Time: 0 minutes
  • Category: Drinks
  • Method: No-cook
  • Cuisine: Wellness

Nutrition

  • Serving Size: 1 glass
  • Calories: 8
  • Sugar: 0 g
  • Sodium: 350 mg
  • Fat: 0 g
  • Saturated Fat: 0 g
  • Unsaturated Fat: 0 g
  • Trans Fat: 0 g
  • Carbohydrates: 2 g
  • Fiber: 0 g
  • Protein: 0 g
  • Cholesterol: 0 mg

Conclusion

The pink salt trick recipe for weight loss is not a gimmick—it’s a simple, sustainable ritual that supports hydration, digestion, and appetite control. When paired with whole foods, exercise, and mindful habits, it becomes a steady tool for long-term wellness. Start small, stay consistent, and let this morning tonic set the tone for healthier choices throughout your day.

Ready to experience it yourself? Try making your first glass tomorrow morning and see how energized and light you feel.

let’s stayfit together ! Follow us on facebook for more recipes.

Yogurt Marinated Chicken: Easy, Delicious & Never Boring

Featured yogurt marinated chicken with rice and vegetables
Featured yogurt marinated chicken

This yogurt marinated chicken recipe was born during my travels in Thailand. One evening, all I had was Greek yogurt, a few Moroccan spices, rice, and a bag of frozen vegetables. I mixed the yogurt with the spices, let the chicken soak for a bit, and then cooked everything together. The result was a simple yet flavorful meal that left me amazed. The yogurt made the chicken tender and juicy, while the spices added warmth and depth. Paired with rice and veggies, it turned into a wholesome dish that felt both comforting and energizing.

Later, when Med and I committed to our 100-day pact—real workouts, real meals, and accountability—we realized recipes like this made the difference. I focused on breakfast and snacks, while Med handled lunches and dinners. That teamwork changed everything. You can read our full story here: our transformation journey.

What I love about yogurt marinated chicken is its versatility. You can grill it, bake it, or pan-sear it, and each method brings out different flavors. It’s healthy, protein-rich, and never boring because small tweaks make big results. Try pairing it with sides like roasted sweet potato salad or quinoa salad for meals that keep you satisfied and excited every time.

The Secret Behind Yogurt Marinated Chicken

Why Yogurt Works Better Than Other Marinades

The magic of yogurt marinated chicken comes from science. Yogurt contains lactic acid, which gently breaks down proteins in the meat. Unlike vinegar or citrus-based marinades that can toughen the surface, yogurt tenderizes slowly and evenly. This process locks in moisture, so when the chicken cooks, it stays juicy instead of drying out. The yogurt also acts like a flavor sponge, allowing garlic, spices, and herbs to soak deep into the meat. That’s why a yogurt marinade often gives more balanced seasoning compared to oil-heavy marinades.

When I first cooked yogurt marinated chicken in Thailand with just yogurt, Moroccan spices, rice, and frozen vegetables, I noticed how well the flavors blended. The yogurt gave the dish a creamy tang while carrying the spice mix evenly over every bite. That smooth base makes yogurt one of the most reliable marinades for home cooks who want both taste and tenderness without fuss.

Benefits for Health and Cooking

Yogurt marinated chicken is not only flavorful but also a healthy choice. Yogurt is packed with protein, calcium, and probiotics, which support digestion. Using yogurt as the base cuts down on oil, making the dish lighter without losing richness. Chicken itself is a lean protein, and pairing it with vegetables or grains turns it into a complete, balanced meal.

Baked yogurt marinated chicken in a mold

Another benefit is versatility. You can grill yogurt marinated chicken outdoors for smoky flavor, bake it for a hands-off dinner, or try sous vide for restaurant-quality tenderness. Each method transforms the dish while keeping the benefits intact. Meals like this prove you don’t have to sacrifice taste for health. For inspiration, you can check out this tender sous vide chicken breast recipe or upgrade your plate with zesty lemon chicken orzoBoth pair beautifully with yogurt chicken for a fit-friendly spread.

Preparing the Perfect Yogurt Marinade

Essential Ingredients for a Balanced Flavor

The beauty of yogurt marinated chicken is that the base is simple yet powerful. Plain Greek yogurt is the foundation, offering creaminess and lactic acid for tenderizing. To that, I usually add garlic, lemon juice, and a drizzle of olive oil. Herbs like cilantro, parsley, or mint bring freshness, while spices such as paprika, cumin, ginger, or turmeric add depth. Pink salt and pepper tie everything together.

When I first crafted this marinade during my travels, I only had yogurt, Moroccan spices, and rice on hand, yet it worked beautifully. Since then, I’ve learned that small additions can completely change the character of yogurt marinated chicken. For example, smoked paprika creates a bold flavor perfect for grilling, while fresh dill gives it a Mediterranean vibe. If you enjoy experimenting, try adding ginger or chili flakes for a little kick.

How Long Should You Marinate Chicken in Yogurt?

The length of marination makes a big difference. With yogurt, you don’t need endless hours. Even 30 minutes can improve tenderness and flavor. For best results, marinate chicken for 4–6 hours in the fridge. Overnight is ideal if you want maximum juiciness, but avoid leaving it for more than 24 hours because the lactic acid can start to break down the texture too much.

Stayfit recipes tip: coat the chicken evenly, then cover it well before chilling. The yogurt locks in moisture, so even lean cuts like chicken breast stay flavorful. When you’re ready to cook, remove excess marinade but don’t rinse—it helps create a golden crust while sealing flavor inside.

This simple prep works with so many dishes. For example, you can draw inspiration from teriyaki chicken for a sweet-savory twist or try pairing it with chocolate strawberry yogurt clusters as a fun dessert after a protein-packed dinner. But remember, it’s best to enjoy yogurt marinated chicken at least 2 hours before sleep, so your body has time to digest and recover.

Cooking Yogurt Marinated Chicken Without Curdling

Best Cooking Methods

Once your chicken is marinated, the fun begins—choosing how to cook it. Grilling is a classic choice because the high heat locks in flavor and adds smoky char. Baked yogurt marinated chicken is another easy option, especially for family dinners. Simply spread the chicken on a lined sheet pan and let the oven do the work. Pan-searing on the stovetop also creates a quick weeknight meal, giving you golden crust in minutes. For those who love precision, sous vide is unbeatable. Cooking the chicken in a vacuum-sealed bag keeps it perfectly tender, and finishing with a quick sear adds the final touch.

The key across all these methods is patience. Let the yogurt marinade cling to the meat, but don’t overload the pan or grill. Cooking in smaller batches ensures even heat and avoids steaming instead of searing.

Preventing Yogurt From Curdling

One of the common worries with yogurt marinated chicken is curdling. It happens when yogurt gets exposed to very high heat too quickly. To prevent this, always cook over medium to medium-high heat rather than blasting it on high. Brushing a little olive oil or butter on the chicken before cooking helps, too, since it creates a barrier that protects the yogurt coating.

Another tip is to scrape off extra marinade before cooking. A light coating sticks and caramelizes better, while excess yogurt tends to break apart. If baking, cover with foil for the first half of the cook, then remove it to brown the surface. These small steps keep the chicken moist without losing that creamy tang.

Flavor Variations You’ll Love

Mediterranean-Style Yogurt Marinade

One of the best things about yogurt marinated chicken is how easily it adapts to different cuisines. For a Mediterranean twist, start with plain Greek yogurt, olive oil, garlic, lemon zest, and oregano. The yogurt tenderizes while the herbs and citrus create a bright, sunny flavor. This version tastes amazing baked or grilled, especially when paired with roasted vegetables or a fresh salad.

ngredients for yogurt marinated chicken recipe

If you want to go further, add a pinch of smoked paprika for depth or fresh dill for a lighter profile. The balance of creamy yogurt and zesty herbs makes this marinade refreshing yet satisfying. It’s perfect for weeknight meals that feel both simple and elevated. You can enjoy it alongside cottage cheese ranch dip for a fun appetizer spread.

Spicy Indian-Inspired Yogurt Marinade

For those who crave bold flavors, an Indian-inspired yogurt marinade is a must-try. Start with yogurt, then mix in turmeric, cumin, coriander, chili powder, and fresh ginger. This combination infuses the chicken with vibrant color and deep, earthy spice. Unlike heavy cream-based curries, the yogurt keeps the dish light while delivering incredible flavor.

This version shines when grilled or roasted, as the spices form a fragrant crust while keeping the meat tender inside. Serve it with basmati rice or warm naan bread, and you’ve got a complete, protein-rich dinner that’s both satisfying and balanced.

Sweet-Savory Fusion Twist

If you love mixing savory with sweetness, try adding ground cinnamon and a handful of chopped grapes to your yogurt marinade. The cinnamon adds warmth while the grapes bring bursts of natural sweetness that balance the tang of yogurt. Cooked on the grill or baked in the oven, this combination creates an unexpected but delicious twist on classic yogurt marinated chicken. It’s proof that you can get creative with flavors and never run out of ways to enjoy this dish.

Serving and Pairing Ideas

Side Dishes That Complement Yogurt Chicken

A good meal is all about balance, and yogurt marinated chicken makes pairing easy. Because the chicken is creamy and tangy, it works beautifully with fresh, hearty sides. A simple bed of rice or quinoa is classic, but roasted vegetables bring out even more depth. Think zucchini, carrots, or sweet potatoes roasted until caramelized. For a lighter option, crisp salads with lemon vinaigrette cut through the richness while keeping the meal refreshing.

Family-style serving of yogurt marinated chicken with sides

Creative Leftover Ideas

Leftovers don’t have to feel boring. Yogurt marinated chicken is so versatile that it easily transforms into new meals. Slice it thin and tuck it into wraps with lettuce, tomatoes, and a drizzle of tahini for a quick lunch. Shred it and toss into a grain bowl with quinoa, avocado, and roasted peppers for a nutrient-packed dinner. You can even top a green salad with cold yogurt chicken for a refreshing high-protein meal prep option.

If you’re cooking a bigger batch, try adding leftover pieces to a stir-fry or chopping them into bite-sized chunks for protein bowls. The yogurt marinade’s lingering flavor blends beautifully with both savory and slightly sweet ingredients, so you can mix and match without limits. The best part is, with every variation, yogurt marinated chicken tastes fresh and new. That way, you’ll never get stuck eating the same thing twice in a row.

Step-by-Step Instructions + Nutrition & Serving Suggestions

Detailed Step-by-Step Cooking Guide

Here’s a simple breakdown to make yogurt marinated chicken at home. The ingredients are flexible, so you can adjust to your taste

Ingredients Quantity
Plain Greek Yogurt 1 cup
Chicken (breast or thighs) 1.5 lbs
Garlic (minced) 3 cloves
Fresh Ginger (grated) 1 tbsp
Spices (paprika, cumin, turmeric, or mix) 2–3 tsp
Lemon Juice 2 tbsp
Step Instructions
1 Mix yogurt, garlic, ginger, lemon, and spices in a bowl.
2 Add chicken and coat evenly. Marinate for 4–6 hours.
3 Grill, bake, or pan-sear until chicken reaches 165°F inside.
4 Serve with rice, vegetables, or a fresh side salad.

The nutrition table remains the same. Adding ginger not only boosts flavor but also supports digestion, making it an essential part of yogurt marinated chicken

let’s stayfit together ! Follow us on facebook for more recipes.

What does marinating in yogurt do to chicken?
Marinating chicken in yogurt gently breaks down proteins with lactic acid. This process keeps the meat tender, juicy, and flavorful without making it tough. Yogurt also helps spices and herbs stick better, giving yogurt marinated chicken a rich taste.
How long can you marinate chicken with yogurt?
You can marinate chicken in yogurt for as little as 30 minutes for flavor. For best results, let it rest in the fridge for 4–6 hours. Overnight marination gives even more tenderness, but avoid going past 24 hours or the texture of yogurt marinated chicken may break down too much.
Should you rinse off yogurt marinade?
No, you should not rinse off the yogurt marinade. Instead, scrape off any excess before cooking. Leaving a light coating helps create a golden crust and locks flavor into the chicken. Rinsing would wash away the benefits of the yogurt marinade.
How to cook yogurt marinated chicken without curdling?
To prevent curdling, cook yogurt marinated chicken over medium or medium-high heat rather than very high heat. Remove excess marinade before cooking, brush lightly with oil, and if baking, cover with foil for the first half. These steps keep the yogurt coating smooth and the chicken moist.
Print
clock clock iconcutlery cutlery iconflag flag iconfolder folder iconinstagram instagram iconpinterest pinterest iconfacebook facebook iconprint print iconsquares squares iconheart heart iconheart solid heart solid icon
Baked yogurt marinated chicken in a mold

Yogurt Marinated Chicken: Easy, Delicious & Never Boring


5 Stars 4 Stars 3 Stars 2 Stars 1 Star

No reviews

  • Author: Chef Dodos
  • Total Time: 40 minutes
  • Yield: 4 servings 1x

Description

This yogurt marinated chicken recipe is juicy, tender, and full of flavor. With Greek yogurt, garlic, ginger, lemon, and spices, it’s healthy, protein-rich, and versatile.


Ingredients

Scale

1 cup plain Greek yogurt

1.5 lbs chicken (breast or thighs)

3 cloves garlic, minced

1 tbsp fresh ginger, grated

23 tsp spices (paprika, cumin, turmeric, or blend)

2 tbsp lemon juice

Salt and pepper to taste


Instructions

1. Mix yogurt, garlic, ginger, lemon juice, and spices in a bowl.

2. Add chicken and coat evenly. Cover and refrigerate 4–6 hours, up to overnight.

3. Preheat grill, oven, or skillet. Remove excess marinade before cooking.

4. Cook until chicken reaches 165°F internally. If baking, cover with foil for 20 minutes, then uncover to brown.

5. Serve with rice, roasted vegetables, or salad. Eat at least 2 hours before sleep for best digestion.

Notes

Serve with rice, roasted vegetables, or a fresh salad. Try Mediterranean herbs, Indian spices, or a sweet-savory twist with cinnamon and grapes. Great for meal prep or family dinners.

  • Prep Time: 15 minutes
  • Cook Time: 25 minutes
  • Category: Main Course
  • Method: Grill, Bake, Pan-Sear
  • Cuisine: Fusion

Nutrition

  • Serving Size: 1 portion
  • Calories: 310
  • Sugar: 3g
  • Sodium: 220mg
  • Fat: 10g
  • Saturated Fat: 2.5g
  • Unsaturated Fat: 7.5g
  • Trans Fat: 0g
  • Carbohydrates: 4g
  • Fiber: 0g
  • Protein: 38g
  • Cholesterol: 95mg

Conclusion

Yogurt marinated chicken proves that simple ingredients can deliver incredible results. With yogurt tenderizing the meat and spices layering on flavor, every bite feels comforting yet fresh. Whether you grill, bake, or sear it, this dish stays juicy and versatile. Try new variations, mix in bold or sweet notes, and you’ll never get bored of chicken again. Start your own flavorful journey today with this easy yogurt marinated chicken recipe

Japanese Pink Salt Recipe for Weight Loss: Simple & Effective

Japanese pink salt recipe healthy weight loss drink
Refreshing Japanese pink salt drink for natural weight loss.

Japanese pink salt recipe — that’s the simple trick Med and I learned from a Japanese friend during our trip to Thailand. Back then, I was fit, but my face told a different story. Puffy cheeks, swollen look, constant water retention. It was frustrating, because no matter how much I trained, the bloating stayed.

Our friend pulled me aside one morning and said, “Your body doesn’t just need water; it needs electrolytes. If you don’t give it enough, it will hold on to water like an emergency reserve.” That one line explained everything. And then she showed us this Japanese pink salt recipe.

Med and I started drinking it daily. Within weeks, my face slimmed down, the puffiness faded, and my energy felt balanced all day. It wasn’t magic — it was simply giving the body the right minerals.

This discovery fit perfectly with our 100-day pact: real workouts, real meals, and real accountability. You can read our full story here: About Us. And for anyone struggling with bloating or slow progress, pairing this recipe with insulin control for fat loss makes a powerful routine.

What is the Japanese Pink Salt Recipe?

The Origins and Purpose

The Japanese pink salt recipe isn’t some modern fad. It comes from the long-standing belief in Japan that balance is key — not just balance in meals, but in hydration too. Unlike plain water, this recipe uses pink Himalayan salt, a natural source of trace minerals like magnesium, potassium, and calcium. These minerals act as electrolytes, which help regulate fluid balance and fight bloating.

When Med and I first heard about it, I thought, “Salt for weight loss? That makes no sense.” But then I realized: most bloating isn’t from eating too much, it’s from the body holding water because it feels deprived. Adding electrolytes through Japanese pink salt water signals to the body that it can release the excess. That’s why so many people use this recipe to slim the face and reduce water retention. For those focused on body fat, it often works well alongside plans like how to fix your metabolism or even green juice benefits.

How the Recipe Is Made

Making the Japanese pink salt recipe at home is quick. All you need is a glass of filtered water, a small pinch of pink Himalayan salt, and sometimes a squeeze of lemon for freshness. Stir until dissolved and drink it first thing in the morning on an empty stomach. That’s it.

Japanese pink salt recipe ingredients flat lay
Simple ingredients for the Japanese pink salt weight loss drink.

This simple drink sets the tone for the day. Instead of feeling heavy or swollen, you start hydrated with the minerals your body craves. Med and I like to sip it slowly, almost like a morning ritual. Over time, this routine made my face less puffy and gave me steady energy without coffee.

How Japanese Pink Salt Recipe Supports Fat Loss

Minerals, Metabolism, and Belly Fat

One of the biggest surprises we learned is that fat loss isn’t only about calories. It’s also about how well your body manages fluids and minerals. Pink Himalayan salt is rich in trace minerals that act like tiny switches for your metabolism. Magnesium helps regulate blood sugar, potassium balances sodium, and calcium supports fat-burning enzymes.

When your body gets these electrolytes first thing in the morning, it can release stored water instead of holding on to it. That’s why so many people notice their belly looking flatter within days of starting the Japanese pink salt recipe. It doesn’t melt fat overnight, but it does make it easier for the body to burn energy efficiently. Pairing this habit with structured workouts and insulin control for fat loss speeds things up even more.

Why It Beats Other Detox Drinks

You’ve probably seen dozens of “detox drinks” promising miracles. Most are loaded with sugar, artificial powders, or laxatives that only give temporary results. The Japanese pink salt recipe is different. It works with your body, not against it. Instead of forcing quick loss through dehydration, it balances electrolytes so your system naturally lets go of excess water.

Med and I tested this against other morning drinks. Lemon water alone gave a boost, but bloating stayed. Apple cider vinegar felt harsh on the stomach. With Japanese pink salt water, the results were steady: less swelling, better digestion, and improved energy. It was simple, sustainable, and actually enjoyable to drink.

For anyone who struggles with stubborn belly fat, this recipe works best when combined with overall healthy habits like the strategies we share in how to lose belly fat guide.

Best Times & Ways to Drink Japanese Pink Salt Water

Morning vs Evening: When It Works Best

The time you drink the Japanese pink salt recipe makes a difference. I both prefer it first thing in the morning, before breakfast. Why? Because after a night’s sleep, your body is slightly dehydrated and low on electrolytes. Drinking pink salt water then gives your system the minerals it needs to wake up, balance fluids, and gently kickstart digestion. That’s when I noticed my face puffiness easing the most.

Some people also like sipping it in the evening. If you’ve had a long, sweaty workout or a salty meal, this can help restore balance. Just keep the portion small so it doesn’t disrupt your sleep. Think of it as a tool: morning for fat loss and bloating, evening for recovery and hydration.

Pairing With Meals and Workouts

Drinking Japanese pink salt water works even better when paired with a balanced routine. I often use it alongside light stretches or a morning walk. It feels like a natural way to prepare the body for movement. During heavy training days, we sometimes take a second, smaller glass post-workout to replace minerals.

Another tip: combine the salt drink with simple meals rich in protein and fiber. This keeps digestion smooth and prevents water retention from coming back. Recipes like protein bread or even a fresh Sous Vide Chicken Breast pair well because they’re light yet nourishing.

The goal isn’t to overthink it — it’s to build a habit. One glass in the morning, paired with good food and steady activity, can make a big difference over time.

Safety & Daily Use of Japanese Pink Salt

How Much Is Safe Daily?

When we first started with the Japanese pink salt recipe, I worried about overdoing it. After all, we always hear that too much salt is bad. The key is in the amount. You only need a small pinch of pink Himalayan salt — about 1/4 teaspoon in a glass of water. That’s enough to give your body trace minerals without overloading sodium levels.

Japanese pink salt recipe step-by-step preparation
Step-by-step preparation of Japanese pink salt recipe with water, salt, lemon, and final drink.

Drinking one glass in the morning is more than enough for most people. If you train hard or sweat a lot, you can have a second glass later in the day, but keep it light. Remember, the goal isn’t to chug salt water. It’s to gently provide electrolytes so your body releases stored fluids and feels balanced. For longer-term success, pairing it with routines like how to fix your metabolism makes the habit even safer and more effective.

Who Should Avoid or Be Careful

Not everyone should drink Japanese pink salt water daily. If you have high blood pressure, kidney problems, or are on a low-sodium medical plan, it’s best to talk to your doctor before trying it. Too much sodium in those cases can add stress to the system.

Also, avoid using regular table salt. It’s highly processed and stripped of minerals. The whole benefit of this recipe comes from the natural electrolytes in pink Himalayan salt. If you stick to the right type and keep the dose small, side effects are rare.

When we tested this against other morning routines, it was the one drink that made me feel lighter without any discomfort. It’s safer, more natural, and more sustainable than extreme detoxes. That’s why we recommend it alongside resources like our how to lose belly fat guide

Practical Tips & Variations of the Recipe

Step-by-Step Recipe and Swaps

Making the Japanese pink salt recipe is as simple as it gets. Here’s how Med and I prepare it each morning:

Ingredient Amount
Filtered water 1 glass (8–10 oz)
Pink Himalayan salt ¼ teaspoon (a pinch)
Optional lemon juice Few drops

Just stir and sip. Some mornings, we swap lemon for a slice of cucumber or a dash of apple cider vinegar. These tiny tweaks give variety without changing the benefits.

Serving Ideas and Pairings

Drinking it on an empty stomach works best, but you can also enjoy it before workouts for a mineral boost. On training days, Med and I sometimes pair it with a light protein-rich breakfast like Protein Bagels in the Air Fryer or cottage cheese pancakes.

The key is consistency. Over time, this recipe becomes less of a “trick” and more of a daily ritual. It’s quick to make, easy to adapt, and supports the body in natural ways. For us, it turned into a habit that keeps bloating away and energy steady all day.

What is the Japanese pink salt drink for weight loss?
The Japanese pink salt drink is a simple recipe of water and a pinch of pink Himalayan salt. It provides electrolytes that help balance hydration, reduce bloating, and support natural weight loss.
How does Japanese pink salt help with belly fat?
It doesn’t burn fat directly, but it reduces water retention around the belly. The electrolytes tell your body it’s safe to release excess water, which flattens the stomach and supports metabolism for fat loss.
When is the best time to drink Japanese pink salt water for weight loss?
The best time is in the morning on an empty stomach. This hydrates your body, restores minerals, and reduces puffiness. You can also drink a small glass after workouts to replace lost electrolytes.
Is Japanese pink salt safe to consume daily for weight loss?
Yes, if consumed in moderation. One glass with a small pinch of salt daily is safe for most healthy adults. If you have high blood pressure, kidney problems, or sodium restrictions, check with your doctor first.
How much pink Himalayan salt do I add to a glass of water?
Use only 1/4 teaspoon, or a small pinch, per 8–10 oz glass of water. More is not better and could overload your sodium intake.
Print
clock clock iconcutlery cutlery iconflag flag iconfolder folder iconinstagram instagram iconpinterest pinterest iconfacebook facebook iconprint print iconsquares squares iconheart heart iconheart solid heart solid icon
Japanese pink salt recipe healthy weight loss drink

Japanese Pink Salt Recipe for Weight Loss: Simple & Effective


5 Stars 4 Stars 3 Stars 2 Stars 1 Star

No reviews

  • Author: Chef Dodos
  • Total Time: 2 minutes
  • Yield: 1 glass 1x

Description

This Japanese pink salt recipe is a quick, natural drink made with water, a pinch of pink Himalayan salt, and lemon. It helps reduce bloating, supports hydration, and provides essential electrolytes for weight loss and energy.


Ingredients

Scale

1 glass (8–10 oz) filtered water

1/4 teaspoon pink Himalayan salt (a pinch)

Few drops of fresh lemon juice

1/2 teaspoon honey (optional)


Instructions

1. Pour filtered water into a glass.

2. Add a small pinch (1/4 tsp) of pink Himalayan salt.

3. Squeeze in a few drops of fresh lemon juice.

4. Stir well and add honey if you prefer sweetness.

5. Drink fresh, ideally in the morning on an empty stomach.

Notes

Best consumed in moderation — 1 glass daily is enough.

Those with high blood pressure or kidney issues should consult a doctor before daily use.

Pair it with balanced meals and exercise for better fat loss results.

  • Prep Time: 2 minutes
  • Cook Time: 0 minutes
  • Category: Drink
  • Method: No Cook
  • Cuisine: Japanese Inspired

Nutrition

  • Serving Size: 1 glass
  • Calories: 5
  • Sugar: 0.5g
  • Sodium: 250mg
  • Fat: 0g
  • Saturated Fat: 0g
  • Unsaturated Fat: 0g
  • Trans Fat: 0g
  • Carbohydrates: 1g
  • Fiber: 0g
  • Protein: 0g
  • Cholesterol: 0mg

Conclusion

The Japanese pink salt recipe isn’t just a quick fix — it’s a small daily habit that helps your body let go of stubborn bloating, balance electrolytes, and feel lighter. When I first tried it, I thought it was too simple to work. But over time, the puffiness in my face faded, my energy felt steady, and I understood why this Japanese trick has stood the test of time.

If you’re looking for a natural way to reduce water retention and support fat loss, give this recipe a try. Start with one glass in the morning and let your body feel the difference. And if you’re ready to take things further, explore more of our fat-loss tips and recipes to build a routine that lasts.

Your journey doesn’t have to be complicated — sometimes the simplest tricks make the biggest impact.

let’s stayfit together ! Follow us for more on facebook

Natural Zepbound Recipe for Weight Loss – Simple & Effective

natural zepbound recipe weight loss drink in glass mug
Natural zepbound recipe, a fat-loss drink served warm.

When Med and I first created our natural zepbound recipe, we weren’t just looking for flavor—we were desperate for a natural way to lose weight without endless hunger. Years ago, when we made our 100-day pact, we promised ourselves no shortcuts: just real meals, consistent workouts, and accountability. Kiko handled the light snacks and drinks, Med prepared hearty meals, and together we learned how whole foods can change the body. You can read more about that transformation in our full story.

The natural zepbound recipe works because it mimics the appetite-curbing effect of GLP-1, the same hormone that modern weight loss drugs target. Instead of relying on a prescription, this recipe uses ginger, cinnamon, apple cider vinegar, and honey to stabilize blood sugar, fight cravings, and keep you satisfied for hours. That’s the key to dropping pounds without feeling deprived.

Some of our readers first discovered it after trying insulin control for fat loss, and they loved how quickly cravings disappeared. If you’ve been struggling with constant hunger on your weight loss journey, this natural zepbound recipe might be the food-first answer you’ve been searching for.

What Is Natural Zepbound Recipe?

The Concept Behind Natural Zepbound

The natural zepbound recipe is a drink designed to support fat loss by activating the body’s own satiety signals. Its key ingredients—ginger, cinnamon, honey, apple cider vinegar, and warm water—work together to mimic the effects of GLP-1, a hormone that slows digestion and makes you feel full longer. That means you naturally eat less without fighting willpower every hour.

Unlike harsh diet pills or fad cleanses, this recipe relies only on whole, accessible ingredients. Ginger and cinnamon are powerful for digestion and blood sugar balance. Apple cider vinegar has been shown to reduce appetite and improve metabolism. A touch of honey adds natural sweetness, while warm water helps everything blend smoothly.

Many people who’ve tried this natural zepbound recipe noticed they had fewer cravings between meals and felt more energy. If you’ve ever wondered how to fix your metabolism, this drink is one of the simplest ways to start.

Why Choose a Natural Alternative

Weight loss doesn’t have to mean hunger or risky side effects. While prescription Zepbound suppresses appetite through medication, the natural version achieves a similar outcome by supporting your body’s natural pathways. That means safer, longer-lasting progress.

Plus, this recipe is easy to make in minutes and can be consumed daily. Pair it with a fat-burning option like the pink salt trick recipe for weight loss, and you’ll have a toolkit of natural methods that make weight management feel achievable again.

Ingredients and Preparation

Core Ingredients in Natural Zepbound Recipe

This natural zepbound recipe is quick, simple, and perfect for weight loss. It only takes a handful of ingredients, but each one supports fat loss by stabilizing blood sugar and curbing cravings. Here’s what you’ll need:

Ingredients Table

Ingredient Quantity
Freshly grated ginger 1 tbsp
Cinnamon powder 1 tsp
Honey 1 tbsp
Apple cider vinegar 1 tbsp
Warm water 2 cups

Step-by-Step Preparation Guide

Making this recipe takes less than 10 minutes. Follow these easy steps:

Preparation Table

Step Instruction
1 Gather ginger, cinnamon, honey, apple cider vinegar, and warm water.
2 Mix ginger and cinnamon into warm water and stir well.
3 Add apple cider vinegar and stir again to blend flavors.
4 Sweeten with honey and let the drink steep for 2–3 minutes.
5 Sip warm or allow to cool to your preferred temperature.

This natural zepbound recipe is easy to prep and works well as part of a weight loss plan. Many people enjoy pairing it with high-protein snacks like the homemade protein bar recipe or fiber-packed sides like roasted sweet potato salad.

Note: This is a wellness drink, not a medication or substitute for Zepbound/tirzepatide. If you have reflux, ulcers, or take meds that interact with acids/sugars, check with a professional first.

Health Benefits and Side Effects

Proven Benefits for Weight Loss

The natural zepbound recipe is more than a soothing drink—it’s a strategic tool for fat loss. Its ingredients have been carefully selected for their proven effects on appetite and metabolism:

  • Ginger boosts thermogenesis, helping your body burn calories more efficiently.
  • Cinnamon supports blood sugar stability, preventing energy crashes that lead to cravings.
  • Apple cider vinegar slows digestion, which means you feel full longer after meals.
  • Warm water aids hydration, a crucial piece of any weight loss journey.

Together, these components mimic the appetite-suppressing effect of GLP-1, the hormone linked to fullness. Unlike prescription versions of Zepbound, this natural drink relies only on foods you trust. People who’ve tried it alongside simple lifestyle tweaks—like adding more greens or following the how to lose belly fat guide—often report fewer cravings and steady energy throughout the day.

Possible Side Effects and Safety Tips

Because it uses whole foods, side effects are minimal. Still, everyone’s body reacts differently. A few things to keep in mind:

  • Apple cider vinegar may cause mild stomach upset if consumed on an empty stomach.
  • Ginger and cinnamon can feel spicy for some, so start with smaller amounts and adjust.
  • Honey adds natural sugar—great for taste, but those watching carbs may prefer a lighter sweetener.

Most people tolerate this recipe well and find it becomes a comforting daily habit. If you’re sensitive to vinegar, try diluting it further or pairing this recipe with balanced meals like green juice benefits to ease digestion.

When used 2–3 times a week, this recipe fits seamlessly into a weight loss plan. It supports your body naturally—without the side effects linked to medications.

Meal Prep and Variations

How to Meal Prep Natural Zepbound

One of the best parts about the natural zepbound recipe is how easy it is to fit into your weekly rhythm. Since it takes just minutes to make, you can prepare a few servings ahead of time and store them in the fridge.

  • Batch Preparation: Mix a larger quantity—say, four cups—by scaling the ingredients. Keep it in a glass jar with a lid.
  • Storage Tips: Refrigerate for up to 3–4 days. Before drinking, stir well or warm it slightly to re-activate the flavors.
  • Best Times to Drink: Mid-morning or late afternoon, when cravings usually strike. This timing makes the most of the recipe’s satiety effects.

Many readers combine this approach with high-protein snacks like the quick & easy cottage cheese pancakes to stay satisfied during the day. It’s a practical way to cut down on mindless snacking while keeping energy steady.

Variations for Taste & Diet Needs

The natural zepbound recipe is flexible, so you can tailor it to your taste and dietary goals:

  • Low-Carb Version: Replace honey with a zero-calorie sweetener if you’re counting carbs.
  • Extra Spice: Add a dash of cayenne or chili for a metabolism boost.
  • Cooling Twist: Swap warm water for chilled water with ice for a refreshing summer drink.
  • Detox Pairing: Serve it alongside fiber-rich dishes like the Mediterranean ground beef skillet for a balanced fat-loss meal plan.

Because the recipe is so adaptable, you’ll never feel stuck. You can sip it warm for comfort, chilled for refreshment, or spiced up for an extra fat-burning kick—all while keeping weight loss front and center.

Serving, Nutrition & Lifestyle Tips

Serving Suggestions & Pairings

The natural zepbound recipe is simple, but when served at the right time, it can maximize your fat loss results. Most people find drinking it:

  • Before Lunch: Helps reduce midday cravings and keeps portion sizes in check.
  • Early Evening: Supports blood sugar balance and curbs late-night snacking.

Pair it with protein-rich or fiber-heavy meals to create a full fat-burning combo. For example, sipping it alongside the healthy banana bread recipe in the morning balances natural sweetness with appetite control. Or, serve it before a light dinner like roasted sweet potato salad for a filling yet slimming plate.

Nutrition Information & Long-Term Use

Nutrition Table

Nutrient Amount
Calories 50 kcal
Carbohydrates 13 g
Fiber 2 g
Sugar 12 g (from honey)
Protein 1 g
Sodium 10 mg

Drinking it 2–3 times a week is enough to notice changes in appetite and energy. Over time, it can become a reliable part of your weight loss toolkit, complementing balanced meals and light exercise.

Benefits, FAQs & Lifestyle Notes

Key Benefits in Daily Life

The natural zepbound recipe isn’t just another health drink—it’s a weight loss ally you can rely on. Its combination of ginger, cinnamon, honey, and apple cider vinegar helps reduce cravings, balance blood sugar, and naturally increase satiety. That means fewer snack attacks, steady energy, and gradual fat loss.

We’ve seen readers combine this with supportive meals like the homemade protein bar for afternoon fuel, or morning hydration habits from the green juice benefits guide. Used consistently, it becomes more than a recipe—it’s part of a lifestyle shift toward sustainable weight management.

FAQs About Natural Zepbound Recipes

What is the natural zepbound recipe?
It’s a natural weight loss drink made with ginger, cinnamon, honey, apple cider vinegar, and warm water. These ingredients help mimic the appetite-suppressing effect of GLP-1 medications—without synthetic drugs.
What is natural zepbound recipe?
The natural zepbound recipe is a simple homemade drink designed to curb hunger, balance blood sugar, and support fat loss using whole foods.
What is the recipe for natural zepbound?
Combine 1 tbsp grated ginger, 1 tsp cinnamon, 1 tbsp apple cider vinegar, 1 tbsp honey, and 2 cups warm water. Mix well, steep for 2–3 minutes, and enjoy.
How to make natural zepbound recipe?
Mix ginger and cinnamon into warm water, stir in vinegar and honey, let steep, and drink warm. It takes less than 10 minutes to prepare.
Are there side effects with natural Zepbound alternatives?
Side effects are rare since only whole foods are used. Some may notice mild digestive adjustments from apple cider vinegar or ginger at first.
How often should I eat this recipe for weight loss?
2–3 times a week is ideal. Consistency supports appetite control without overwhelming your system.
Can I meal prep this recipe?
Yes, make a larger batch and store it in the fridge for up to 4 days. Stir before drinking and enjoy either warm or chilled.
Print
clock clock iconcutlery cutlery iconflag flag iconfolder folder iconinstagram instagram iconpinterest pinterest iconfacebook facebook iconprint print iconsquares squares iconheart heart iconheart solid heart solid icon
natural zepbound recipe weight loss drink in glass mug

Natural Zepbound Recipe for Weight Loss – Simple & Effective


5 Stars 4 Stars 3 Stars 2 Stars 1 Star

No reviews

  • Author: Chef Dodos
  • Total Time: 7 minutes
  • Yield: 2 servings 1x

Description

This natural Zepbound recipe is a weight loss drink made with ginger, cinnamon, apple cider vinegar, honey, and warm water. It helps curb cravings, balance blood sugar, and support fat loss naturally.


Ingredients

Scale

1 tbsp freshly grated ginger

1 tsp cinnamon powder

1 tbsp honey

1 tbsp apple cider vinegar

2 cups warm water


Instructions

1. Gather all ingredients: ginger, cinnamon, honey, apple cider vinegar, and warm water.

2. Mix ginger and cinnamon into warm water and stir well.

3. Add apple cider vinegar and stir again.

4. Sweeten with honey and let the drink steep for 2–3 minutes.

5. Sip warm or allow to cool before drinking.

Notes

This drink can be consumed 2–3 times a week for weight loss.

For stronger flavor, let it steep longer.

Replace honey with a zero-calorie sweetener for a low-carb version.

  • Prep Time: 5 minutes
  • Cook Time: 2 minutes
  • Category: Drink
  • Method: Stir & Steep
  • Cuisine: Weight Loss Recipe

Nutrition

  • Serving Size: 1 cup
  • Calories: 50
  • Sugar: 12g
  • Sodium: 10mg
  • Fat: 0g
  • Saturated Fat: 0g
  • Unsaturated Fat: 0g
  • Trans Fat: 0g
  • Carbohydrates: 13g
  • Fiber: 2g
  • Protein: 1g
  • Cholesterol: 0mg

Conclusion

You don’t need expensive injections or harsh diet pills to take control of your appetite. The natural zepbound recipe proves that simple, everyday ingredients—ginger, cinnamon, honey, apple cider vinegar, and warm water—can help balance cravings, boost satiety, and support steady weight loss. With consistent use, it can become a daily habit that works with your body instead of against it.

If you’re ready to take the next step, start by making this recipe today. Small, natural choices add up—and this one drink could be the shift your weight loss journey has been waiting for.

Let’s StayFit — together.For More follow us on facebook & pinterest

Beef stir fry 20 minutes healthy

Beef stir fry 20 minutes healthy recipe served hot with veggies
Quick and healthy beef stir fry ready in just 20 minutes.

I still remember the first time I made a beef stir fry on a weeknight after work. I was tired, but I wanted something flavorful and healthy without spending hours in the kitchen. That quick meal reminded me how satisfying it can be to put together a dish that tastes amazing, takes only 20 minutes, and feels good for the body. Later, when Kiko and Med started StayFitRecipes, they shared how their own 100-day pact to eat real food and stay accountable changed everything. Med focused on hearty lunches and dinners like this, while Kiko created smart breakfast and snack swaps. You can read their full story here.

This beef stir fry 20 minutes healthy recipe follows the same spirit—fast, simple, and nourishing. The balance of lean beef, colorful veggies, and light sauce makes it a dinner worth repeating. Once you try this beef stir fry recipe, it may become your go-to weeknight fix. If you’ve enjoyed quick dishes like our Turkish pasta recipe, you’ll love how this one delivers flavor in less time. Pair it with a fresh side such as our roasted sweet potato salad for a meal that feels complete, healthy, and deeply satisfying.

Why Stir Fry Works as a Healthy Dinner Choice

Fast Cooking, Fresh Taste, Low Calories

One of the best parts about making a beef stir fry 20 minutes healthy dinner is how fast it comes together. In less than half an hour, you can put a flavorful, balanced plate on the table. Cooking over high heat keeps beef juicy while giving vegetables a crisp bite. Because the process is so quick, vitamins and minerals stay intact. That means every forkful delivers nutrition without extra calories.

This dish also feels lighter than most meat-based meals. You get protein from beef, fiber from broccoli and peppers, and just enough sauce to bring everything together. For many families, this makes it a reliable option during the week. Readers who love quick meals like our grilled chicken bites often turn to stir fry for the same reason—it’s satisfying, fast, and never boring.

What Makes Beef Stir Fry Unique vs Other Dinners

Unlike heavy roasts or slow stews, stir fry adapts to what you have on hand. Swap vegetables depending on the season, change the sauce for variety, or even use different grains for serving. Beef brings a deep, savory flavor that stands out from chicken or seafood. It also adds iron and protein that help with energy and muscle recovery.

This flexibility makes a beef stir fry 20 minutes healthy recipe a true kitchen staple. Just like our rice paper rolls healthy noodle-free recipe, you can adjust it to fit your taste while keeping it balanced. Each time you make it, small changes create a new experience, but the core remains the same—fast, nourishing, and delicious.

Step-by-Step Instructions

Ingredients & Prep in Under 10 Minutes

Ingredients for beef stir fry 20 minutes healthy recipe
Fresh and colorful ingredients prepared for beef stir fry.

When you plan a beef stir fry 20 minutes healthy dinner, the prep is quick. Thinly slice beef across the grain so it stays tender. Cut vegetables into small, even pieces for fast cooking. A light sauce of soy, garlic, and ginger ties everything together with fresh flavor.

Ingredients Quantity
Lean beef strips 1 lb
Broccoli florets 2 cups
Red bell pepper, sliced 1 large
Low-sodium soy sauce 3 tbsp
Fresh garlic, minced 2 cloves
Fresh ginger, grated 1 tsp

Cooking in a Hot Pan for the Perfect Finish

Heat your wok until very hot, then add a splash of oil. Sear beef strips until browned, then set aside. Toss vegetables into the same pan and cook until just tender. Return beef, stir in sauce, garlic, and ginger, then cook for two minutes. Everything should stay crisp yet coated in flavor.

Step Action
1 Heat wok until very hot, add oil.
2 Sear beef strips until browned, remove.
3 Cook vegetables until crisp-tender.
4 Add beef back, stir in sauce, garlic, ginger.
5 Stir for 2 minutes, serve hot.

With practice, this method becomes second nature. Just like our zesty lemon chicken orzo protein boost or grilled chicken drumsticks, this stir fry shows that weeknight cooking can be both healthy and quick. A beef stir fry 20 minutes healthy meal is the perfect fix when you want dinner fast.

Nutrition Information & Serving Suggestions

Calories, Protein, and Fat Breakdown per Serving

When you prepare a beef stir fry 20 minutes healthy recipe, you get more than speed—you get balance. One serving usually falls around 350–400 calories, depending on the cut of beef and sauce. With lean beef, you’ll enjoy about 30 grams of protein that keeps you strong and full. Add broccoli and peppers, and you get fiber, vitamins, and antioxidants in every bite.

Because stir frying happens over high heat in just minutes, most nutrients remain. Vitamin C from bell peppers and compounds in broccoli don’t break down the way they might in slow-cooked meals. This means the plate not only looks fresh but also supports your body with clean fuel. That’s why this dish is one of the smartest dinner choices for busy families. If you enjoy protein-rich meals like our homemade perfect protein bar, this stir fry offers the same strength-building edge—only savory.

Smart Serving Sizes and Best Sides

The right serving size helps you enjoy flavor without going overboard. A good balance is one cup of beef with two cups of vegetables per plate. For carbs, add a scoop of brown rice or quinoa. For a lighter option, serve it over cauliflower rice. Each approach keeps the beef stir fry 20 minutes healthy balance of lean protein and fresh vegetables.

This meal also works well for meal prep. Store leftovers in airtight containers and reheat in a skillet to keep texture. Switching sides also prevents boredom. Try pairing it with the orange muffins no eggs no dairy for a sweet finish or add a light salad on the side for extra crunch.

In the end, the beef stir fry 20 minutes healthy recipe proves that you don’t have to sacrifice taste for nutrition. It’s filling, balanced, and flexible enough to fit into any plan—whether that’s fueling workouts or feeding the family fast.

Pro Tips and Common Mistakes to Avoid

The Secret to a Successful Stir Fry

The secret to a beef stir fry 20 minutes healthy dinner is simple: heat and timing. Always start with a hot wok or skillet. The high temperature sears beef quickly, keeping it juicy and tender. Cut beef against the grain in thin strips, so it cooks evenly without turning tough. Keep vegetables dry before adding them to the pan. Too much moisture lowers heat and causes steaming instead of searing.

Balance your flavors with a light sauce. Soy sauce, garlic, and ginger give depth without covering the fresh crunch of vegetables. If you like a touch of sweetness, add a teaspoon of honey. That balance makes this stir fry as rewarding as lighter meals such as our chocolate strawberry yogurt clusters. Both recipes show that healthy can also mean flavorful.

Disadvantages of Stir Frying and How to Fix Them

Even with practice, stir fry has challenges. Overcrowding the pan makes beef chewy and vegetables soggy. Solve this by cooking in small batches. Using too much oil is another mistake—it can turn a lean dish into a heavy one. Stick to a tablespoon spread across the hot surface for the best results.

Some worry that stir frying adds calories, but with lean beef and smart cooking, it remains a beef stir fry 20 minutes healthy option. If you want to trim fat further, use a nonstick skillet and reduce oil slightly. Pair this dish with light sides like the berry cheesecake overnight oats for dessert, and you’ll have a balanced meal that doesn’t feel heavy.

In the end, the rhythm of stir frying makes it fun. Keep the pan hot, move fast, and stir constantly. That’s the real path to mastering a beef stir fry 20 minutes healthy recipe. Once you know these tricks, you’ll cook with confidence every time.

Beef stir fry 20 minutes healthy FAQs

Is stir fry healthy for you?
Yes. A beef stir fry 20 minutes healthy meal uses lean protein and fresh vegetables cooked quickly, so nutrients remain intact while calories stay controlled.
Is beef stir fry high in calories?
No, not when made with lean beef and light sauce. A single serving of beef stir fry averages 350–400 calories, making it a smart dinner option.
What are the three rules of stir-frying?
Use a very hot pan, cut ingredients into small even pieces, and cook fast while stirring. These rules keep beef tender and veggies crisp.
Can you overcook stir fry beef?
Yes. Overcooked beef turns chewy. Slice thinly against the grain, cook quickly on high heat, and remove from the pan once browned to avoid toughness.
What is the best oil for stir-frying?
Choose oils with a high smoke point like avocado, canola, or peanut oil. They handle high heat without breaking down, perfect for a fast stir fry.
Does stir frying increase calories?
Not much. Calories mostly come from beef and sauce. With just a tablespoon of oil and lots of vegetables, a stir fry stays light and healthy.

Conclusion

A beef stir fry 20 minutes healthy recipe proves that fast food doesn’t have to mean unhealthy food. With lean beef, fresh vegetables, and simple seasoning, you can enjoy a balanced meal in less time than it takes to order takeout. Try it once, and you’ll see how easy it is to make this your weeknight go-to.

Ready to make dinner simple and nourishing? Fire up your skillet tonight and enjoy this beef stir fry recipe with your favorite sides.

Let’s StayFit — together.For More follow us on facebook & pinterest

Print
clock clock iconcutlery cutlery iconflag flag iconfolder folder iconinstagram instagram iconpinterest pinterest iconfacebook facebook iconprint print iconsquares squares iconheart heart iconheart solid heart solid icon
Beef stir fry 20 minutes healthy recipe served hot with veggies

Beef stir fry 20 minutes healthy


5 Stars 4 Stars 3 Stars 2 Stars 1 Star

No reviews

  • Author: Chef Dodos
  • Total Time: 20 minutes
  • Yield: 4 servings 1x

Description

Quick, healthy, and packed with flavor — this beef stir fry 20 minutes healthy recipe is perfect for busy weeknights. Tender beef, crisp vegetables, and a light sauce make it balanced and delicious.


Ingredients

Scale

12 oz lean beef (flank or sirloin), thinly sliced

2 cups broccoli florets

1 red bell pepper, sliced

2 cloves garlic, minced

1 tsp fresh ginger, grated

2 tbsp low-sodium soy sauce

1 tbsp cornstarch + 2 tbsp water (slurry)

2 tbsp avocado oil

1 tsp sesame oil (optional, for finish)


Instructions

1. Slice beef thinly against the grain; chop all vegetables into even pieces.

2. Whisk soy sauce, garlic, ginger, and cornstarch slurry together to form the sauce.

3. Heat avocado oil in a wok until very hot; sear beef for 2–3 minutes, then remove.

4. Add vegetables to the wok and stir fry 3–4 minutes until crisp-tender.

5. Return beef to the pan, add sauce, and stir fry for 1–2 minutes until coated.

6. Finish with sesame oil drizzle and serve immediately.

Notes

Serve over brown rice, quinoa, or cauliflower rice for balance.

For meal prep, store in airtight containers up to 3 days.

Double the vegetables to reduce calories per serving.

  • Prep Time: 10 minutes
  • Cook Time: 10 minutes
  • Category: Dinner
  • Method: Stir Fry
  • Cuisine: Asian

Nutrition

  • Serving Size: 1 cup
  • Calories: 380
  • Sugar: 6g
  • Sodium: 520mg
  • Fat: 14g
  • Saturated Fat: 3g
  • Unsaturated Fat: 10g
  • Trans Fat: 0g
  • Carbohydrates: 18g
  • Fiber: 4g
  • Protein: 32g
  • Cholesterol: 65mg

Protein Bread Recipe: Healthy, Easy, and Delicious

Protein bread recipe fresh loaf on kitchen table
Freshly baked protein bread ready to slice.

I still remember the first time I baked a loaf of protein bread at home. The warm smell of eggs and tuna filled the kitchen, and I couldn’t wait to slice into it. Back then, I was searching for simple meals that fueled my workouts without leaving me sluggish. That need sparked our DODOs journey: we felt out of balance, made a 100-day pact, and stuck to real workouts, real meals, and full accountability. Kiko handled the breakfast and snacks, while Med took over lunch and dinner, and the changes were life-changing. You can read the full story here: our transformation story.

This protein bread recipe is quick, filling, and perfect for anyone chasing health goals. It pairs well with toppings like avocado or can be enjoyed with a tuna salad for extra protein. If you’ve been looking for a healthy twist on bread, this is it.

Why Protein Bread Matters

Everyday Benefits of Protein Bread

Protein bread is more than just a fitness trend. It helps you stay full longer, fuels muscles, and supports steady energy throughout the day. Many people find that swapping standard bread for a protein bread recipe helps reduce snacking and keeps cravings in check. That’s because protein slows digestion and keeps blood sugar steady.

When I started making protein bread at home, it became my go-to for busy mornings. A slice with cottage cheese or nut butter kept me fueled for workouts and meetings. Unlike store-bought options filled with additives, this recipe relies on whole ingredients. Pair it with grilled chicken bites for a post-workout plate, or enjoy it plain with your morning coffee. Either way, it fits naturally into a healthy lifestyle.

Protein Bread vs. Regular Bread

Traditional bread is mostly carbohydrates. While it gives quick energy, it often leaves you hungry soon after. Protein bread, on the other hand, balances macros with fewer carbs and a higher protein count. This balance makes it a smart choice for weight management and muscle repair.

A homemade protein bread recipe also lets you control flavors and textures. Unlike packaged options, you know every ingredient you add. For example, eggs and tuna give this bread a solid protein punch while keeping it light and moist. Compared to a sweet loaf like healthy banana bread, this one leans savory, making it versatile for sandwiches and sides.

Protein bread doesn’t just replace traditional bread. It improves the way you fuel your day, bite by bite.

Choosing Ingredients for Protein Bread

Eggs, Tuna, and Baking Powder Explained

Protein bread recipe ingredients eggs tuna baking powder
Simple ingredients for protein bread.

At first glance, the ingredients for this protein bread recipe look unusual, but each one has a purpose. Eggs form the base and provide structure, moisture, and a high-quality protein source. Tuna may surprise some, yet it blends smoothly into the batter and gives the bread extra protein with very little fat. Baking powder is the leavening agent that helps the bread rise and stay fluffy instead of dense.

Together, these simple items create a balanced loaf that feels satisfying but not heavy. When I tested this recipe, I noticed how well it paired with spreads or toppings. The mild flavor makes it versatile, so you can dress it up or keep it plain. For a quick snack, I like to pair a slice with a scoop of cottage cheese ranch dip or layer it with avocado slices for a creamy bite.

Best Flour Options for High Protein Bread

If you want to experiment beyond eggs and tuna, flour choices matter. Traditional white flour adds bulk but not much protein. Instead, almond flour, oat flour, or whole wheat are smarter options. They contribute fiber and nutrients while complementing the protein in eggs and tuna. Some bakers even stir in a scoop of whey or plant protein powder for an extra boost.

The key is balance. Too much flour can make the bread dense, while too little may leave it fragile. Start with small adjustments and taste as you go. If you enjoy savory flavors, oat flour adds heartiness without overpowering the tuna. On the sweeter side, almond flour blends beautifully, especially if you want to try a variation similar to quick & easy cottage cheese pancakes.

With the right mix of ingredients, your protein bread recipe becomes both nourishing and delicious.

Step-by-Step Protein Bread Recipe

Preparation and Mixing

Protein bread recipe ingredients eggs tuna baking powder
Simple ingredients for protein bread.

Making a protein bread recipe at home is simpler than it looks. The ingredients blend quickly, and you’ll have warm bread ready in less than an hour. Start with eggs, tuna, and baking powder as your base. Mix them until smooth. This creates a fluffy batter that holds together while baking.

When I first baked this bread, I loved how easy cleanup was. No long kneading, no waiting for yeast to rise. Just whisk, pour, and bake. For extra flavor, add a pinch of herbs or spices. You can even fold in chopped vegetables for texture. For inspiration, check out how we added zesty flavors to our lemon chicken orzo protein boost. It’s proof that simple ingredients can deliver big results.

Baking and Serving

Pour the batter into a lined loaf pan. Bake at 350°F (175°C) for about 20 minutes or 15 minutes in The Airfryer, or until a toothpick comes out clean. Let the bread cool slightly before slicing. This step prevents crumbling and locks in the moist texture.

Serve it fresh or store it in the fridge for later. I like to toast a slice and top it with hummus for a quick lunch. It also pairs beautifully with hearty meals like the Mediterranean ground beef skillet.

Recipe Table

Here’s the formatted table for your Protein Bread Recipe:

Ingredients Steps
3 Eggs Whisk eggs until fluffy.
1 can Tuna (drained) Mix in tuna until smooth.
1 tsp Baking Powder Add baking powder and stir gently.
Optional: Herbs/Spices Season with herbs or spices for taste.
Loaf Pan Pour batter into pan and bake at 350°F for 30 min.

Flavor Variations & Creative Twists

Savory Add-ins

One of the best things about a protein bread recipe is how easy it is to customize. The base of eggs and tuna is neutral, which makes it a great canvas for savory flavors. Add chopped spinach, onions, or peppers for color and crunch. Fresh herbs like parsley or basil also brighten the flavor without adding extra calories. For cheese lovers, a sprinkle of shredded cheddar or mozzarella in the batter makes every slice richer.

Another trick is to top the loaf with seeds before baking. Sesame, sunflower, or flax add texture and healthy fats. A slice topped with cottage cheese pairs perfectly with a side of roasted sweet potato salad, creating a balanced meal. If you prefer something lighter, this bread also makes a great side to homemade protein bars for quick post-gym fuel.

Sweet Options

Not every protein bread has to lean savory. With a few swaps, you can turn this recipe into a lightly sweet loaf. Stir in mashed banana, a touch of honey, or vanilla protein powder for flavor. Almond flour works well in this variation, giving a mild nutty taste. For a more indulgent twist, dark chocolate chips or dried berries make the bread taste like dessert while keeping protein high.

The beauty of experimenting is that you control the balance of flavor and nutrition. Try smaller batches first to find your favorite mix. Whether you like savory or sweet, a protein bread recipe adapts easily to your cravings. That flexibility makes it one of the most versatile recipes you can bake.

Nutrition & Health Benefits

Nutrition Breakdown of This Recipe

The best part about baking your own protein bread recipe is knowing exactly what goes into every slice. Eggs and tuna provide lean, high-quality protein. Baking powder helps the loaf rise without adding extra calories. Because this recipe skips refined flour, it stays light in carbs yet still filling.

Here’s a simple nutrition breakdown for one slice (based on 6 slices per loaf):

Nutrient Per Slice
Calories 110
Protein 14 g
Carbohydrates 2 g
Fat 5 g

Is Protein Bread Healthy?

Many people wonder if protein bread is a healthy choice. The answer depends on how you make it. A homemade protein bread recipe keeps things simple with whole ingredients. It’s naturally gluten-free if you skip wheat flour, and it avoids the preservatives found in store-bought loaves.

Protein bread fits easily into different diets. Athletes enjoy it for muscle recovery, while anyone aiming for weight control benefits from the satiety. It’s also versatile—toast it for breakfast, use it as a sandwich base, or enjoy it with a dip like cottage cheese ranch dip. Pairing it with protein bagels in meal prep gives you variety without losing the protein punch.

When made with eggs, tuna, and minimal add-ins, protein bread is a tasty, nutritious swap for traditional bread.

Serving Ideas & Practical Tips

Best Ways to Enjoy Protein Bread

One of the joys of this protein bread recipe is how versatile it is. You can enjoy it plain, warm out of the oven, or dress it up for a meal. Toast a slice and top it with mashed avocado for a quick breakfast. Add a fried egg on top for extra protein. For lunch, use it as the base for an open-faced tuna melt. The soft texture holds toppings well while staying light.

Protein bread also works great as a side. Serve it with healthy banana bread when hosting brunch for a mix of savory and sweet. If you’re prepping snacks, pair slices with homemade protein bars to keep energy steady through the day.

Storage and Practical Tips

Homemade bread has no preservatives, so storage matters. Let the loaf cool fully before slicing to avoid crumbling. Keep it in an airtight container in the fridge for up to four days. If you want it to last longer, slice and freeze it. That way, you can pull out a slice and toast it when needed.

Another tip: experiment with toppings. From hummus and salsa to Greek yogurt and herbs, small additions transform this protein bread recipe into something new each time. For meal prep, bake two loaves—one savory with herbs and one sweeter with banana or vanilla protein powder. This gives you variety throughout the week without extra effort.

With just a few tricks, your protein bread can become a reliable staple. Whether you enjoy it fresh, toasted, or frozen, it’s a practical and delicious way to add more protein to your day

Protein Bread FAQ

How to make protein bread at home?
Mix eggs, tuna, and baking powder in a bowl. Pour into a loaf pan and bake at 350°F for about 30 minutes. Let it cool before slicing.
What type of bread is highest in protein?
Protein bread made with eggs, tuna, or protein powder is highest. Store-bought options often add protein powders, but homemade versions are fresher and cleaner.
What is the best flour for high protein bread?
Almond flour, oat flour, and whole wheat flour are good choices. They add protein, fiber, and keep the bread light but filling.
Is protein bread healthy for you?
Yes, when made at home with clean ingredients. It is low in carbs, high in protein, and keeps you full longer than regular bread.

Conclusion

This protein bread recipe is quick, healthy, and flexible enough for any meal. Try baking it today and enjoy a simple way to add more protein to your diet.

Let’s StayFit — together.For More follow us on facebook & pinterest

Print
clock clock iconcutlery cutlery iconflag flag iconfolder folder iconinstagram instagram iconpinterest pinterest iconfacebook facebook iconprint print iconsquares squares iconheart heart iconheart solid heart solid icon
Protein bread recipe fresh loaf on kitchen table

Protein Bread Recipe: Healthy, Easy, and Delicious


5 Stars 4 Stars 3 Stars 2 Stars 1 Star

No reviews

  • Author: Chef Dodos
  • Total Time: 35 mins
  • Yield: 1 loaf (6 slices) 1x

Description

This protein bread recipe is quick, healthy, and made with eggs, tuna, and baking powder. A high-protein loaf perfect for snacks, breakfast, or post-workout meals.


Ingredients

Scale

3 Eggs

1 can Tuna (drained)

1 tsp Baking Powder

Optional: Herbs or spices for flavor


Instructions

1. Whisk the eggs until fluffy.

2. Mix in the tuna until smooth.

3. Add baking powder and stir gently.

4. Pour the batter into a lined loaf pan.

5. Bake at 350°F (175°C) for about 30 minutes.

6. Let it cool before slicing.

Notes

Store in an airtight container in the fridge for up to 4 days.

For longer storage, slice and freeze, then toast when needed.

  • Prep Time: 5 mins
  • Cook Time: 30 mins
  • Category: Bread
  • Method: Baking
  • Cuisine: American

Nutrition

  • Serving Size: 1 slice
  • Calories: 110
  • Sugar: 0g
  • Sodium: 190mg
  • Fat: 5g
  • Saturated Fat: 1g
  • Unsaturated Fat: 3.5g
  • Trans Fat: 0g
  • Carbohydrates: 2g
  • Fiber: 0g
  • Protein: 14g
  • Cholesterol: 90mg

Back to School Healthy Snacks Kids Will Actually Love

Smiling boy holding a muffin snack in classroom.
Healthy snack box filled with muffins, nuts, and fruit.
Balanced snack options for back-to-school lunches.

Smart Snack Planning for Busy School Mornings

Why Preparation Matters

Every parent knows the chaos of a school morning. Between packing lunches, finding lost shoes, and making sure homework is signed, snacks often get overlooked. Yet the right snack can fuel focus, calm moods, and keep kids satisfied until lunch. When you prepare snacks the night before, mornings feel less stressful. You can simply grab and go, knowing your child has something nourishing tucked in their bag. That’s why planning is the first step toward making back to school healthy snacks a regular habit. A few extra minutes in the evening can transform rushed mornings into smooth starts.

Must-Have Pantry Staples

The key to successful snack prep is keeping staple ingredients on hand. Whole-grain crackers, nut butters, fresh fruit, and yogurt cups make versatile options that can be paired in countless ways. Adding high-protein choices like hard-boiled eggs or homemade bars ensures your child stays energized. For variety, bake items ahead of time. A batch of Healthy Banana Bread Recipe makes an excellent slice-and-pack option, while Protein Bagels are perfect with cream cheese or turkey slices. Stocking these basics means you can build balanced snacks quickly, without reaching for processed treats.

When mornings are busy, thoughtful preparation saves time and helps kids stay nourished. With a well-stocked pantry and a little planning, back to school healthy snacks become effortless, reliable, and enjoyable for both parents and children.

Table of Contents

Kid-Friendly Sweet Snacks

Naturally Sweet Choices

Kids love sweets, but parents know the struggle of keeping sugar in check. The good news? Sweet doesn’t have to mean unhealthy. Fresh fruit is nature’s candy, and when paired with protein, it becomes a satisfying school snack. Apple slices with peanut butter or strawberries with cottage cheese keep energy steady without the sugar crash. Yogurt parfaits layered with berries and a sprinkle of granola feel like a treat yet deliver fiber, protein, and probiotics. These options prove that back to school healthy snacks can be just as fun as store-bought treats, while giving kids real nutrition.

Bake Ahead Options

Homemade baked goods are another way to satisfy cravings without resorting to packaged snacks. Weekend baking sessions can set you up for the week ahead. A tray of Mandarin Muffins adds a burst of citrus flavor that kids adore. Another hit for lunchboxes is Chocolate Baked Oat Cups, which taste like dessert but are made with wholesome oats and minimal sweeteners. Both can be stored in the fridge or freezer for quick grab-and-go snacks. Pair these baked options with a glass of milk or a small fruit cup, and you’ve got a balanced snack ready in minutes.

By choosing naturally sweet options and baking healthier treats at home, parents can feel confident about what’s going into their kids’ lunchboxes. Back to school healthy snacks don’t need to be complicated—just a mix of fresh produce, smart pairings, and a few make-ahead recipes to keep mornings stress-free and children happy.

Savory & Crunchy Snack Ideas

Assortment of snack containers with nuts and granola.
Prepped snack boxes ready for back-to-school.

Protein-Packed Dips

Not every child craves something sweet at snack time. Many prefer a savory crunch, and that’s where dips shine. A simple veggie tray with baby carrots, cucumber slices, and bell pepper strips can turn into a colorful snack when paired with protein-rich dips. A favorite is Cottage Cheese Ranch Dip. Creamy, tangy, and loaded with protein, it balances fresh vegetables perfectly. Add whole-grain pita chips or pretzel thins, and you have a snack that feels indulgent but is still packed with nutrition. For parents seeking back to school healthy snacks that encourage kids to eat more veggies, dips are a winning strategy.

Portable Savory Snacks

Handheld savory snacks are also great for lunchboxes. They travel well, fill up hungry bellies, and keep kids satisfied between meals. Rice Paper Rolls – Healthy Noodle-Free Recipe are a light yet filling option, stuffed with colorful veggies and lean protein. They pack easily and look fun, which makes children more likely to try them. Homemade popcorn, lightly seasoned with herbs instead of butter, is another crunchy choice that kids love. For older children, slices of cheese with whole-grain crackers provide a balanced combo of carbs and protein that powers them through after-school activities.

Savory snacks add variety to the lunchbox and keep kids from getting bored with the same foods day after day. With just a little creativity, parents can make back to school healthy snacks both tasty and practical, ensuring that children have the energy to focus and thrive during the school day

After-School Refuel

Energy Boosting Combos

When kids burst through the door after school, they’re usually hungry and tired. The right snack can turn crankiness into calm and give them the fuel they need for homework or sports. Energy-boosting combos like apple slices with almond butter or grapes with cheese sticks provide a quick balance of carbs and protein. Yogurt layered with fruit and a drizzle of honey is another reliable option. For a sweet and crunchy twist, Chocolate Strawberry Yogurt Clusters are a hit. They taste like candy but deliver protein, fiber, and antioxidants. These smart pairings make after-school time smoother while keeping nutrition in check.

High-Protein Options for Teens

Older kids and teens often need bigger snacks, especially if they head to sports practice or long study sessions. That’s where protein-rich choices shine. A homemade Perfect Protein Bar can be packed with nuts, oats, and natural sweeteners, offering a satisfying bite that supports muscle recovery and focus. Smoothies with Greek yogurt and berries also provide quick nutrition in a sippable form. For something savory, try turkey roll-ups with a slice of cheese wrapped in whole-grain tortillas. These high-protein snacks not only satisfy hunger but also set the stage for better concentration and performance.

By combining lighter options for younger kids with protein-dense snacks for teens, parents can cover everyone’s needs. Back to school healthy snacks after class are about more than filling tummies—they help children and teens recharge, focus, and feel their best through the rest of the day.

Step-by-Step Snack Prep Guide

Step-by-Step Instructions

Getting into a rhythm with snack prep makes school weeks easier. By dedicating a little time on Sunday or the night before, you can set up quick, stress-free mornings. Here’s a simple routine to follow for back to school healthy snacks:

Step Action
1 Wash and cut fruits and veggies ahead of time.
2 Bake muffins, breads, or oat cups on the weekend.
3 Prepare dips like cottage cheese ranch for veggie packs.
4 Assemble grab-and-go containers with balanced pairings.

Nutrition & Serving Suggestions

The best snacks balance protein, fiber, and healthy fats. This ensures steady energy for kids throughout the school day. A serving of Berry Cheesecake Overnight Oats makes a great breakfast-to-snack crossover, while Protein Bagels double as a lunchbox win. Here’s a quick nutritional guide:

Snack Nutritional Highlight
Overnight Oats High fiber + steady energy
Protein Bagels High protein + satisfying
Yogurt Clusters Protein + antioxidants

By combining prep steps with nutritional balance, back to school healthy snacks become simple, tasty, and reliable.

Creative Snack Variations Kids Won’t Get Bored Of

Fun Twists on Classics

Even the healthiest snacks lose their charm if they look the same every day. Kids enjoy variety, so finding small ways to reinvent favorites keeps them excited about eating well. For instance, banana slices topped with nut butter can be turned into mini “sandwiches.” A simple smoothie can transform into a frozen treat by pouring it into popsicle molds. When you need a baked good that feels fresh, try swapping flavors—like making Chocolate Baked Oat Cups one week and fruity Mandarin Muffins the next. These playful tweaks make snack time feel special while still keeping nutrition in focus.

Seasonal & Themed Snacks

Another way to keep back to school healthy snacks exciting is to tie them to the season or even to classroom themes. In fall, apple slices with cinnamon Greek yogurt dip celebrate the harvest. During spring, fresh berries layered with cottage cheese make a colorful parfait that mirrors blooming gardens. For holidays, shape sandwiches with cookie cutters or add a sprinkle of festive toppings to oats. Recipes like Healthy Banana Bread are also easy to customize—add nuts, chocolate chips, or dried fruit to match the mood.

When snacks evolve with the season or adopt a fun theme, kids are less likely to ask for packaged treats. These small adjustments keep lunchboxes interesting and enjoyable. With a rotation of creative choices, parents can confidently pack back to school healthy snacks that kids look forward to every single day.

Smiling boy holding a muffin snack in classroom.
A kid enjoying his back-to-school muffin snack.

Back to school healthy snacks FAQs

What is the healthiest snack for school?
The healthiest school snacks are simple and balanced. Fresh fruit with nut butter, veggie sticks with a protein dip, or yogurt with berries all make great back to school healthy snacks. They provide steady energy without excess sugar.
What are 5 healthy snacks for a child?
Five easy ideas include: apple slices with peanut butter, cottage cheese with fruit, overnight oats, a slice of healthy banana bread, and a homemade protein bar. Each is quick to pack and supports kids’ growth during the school day.
What are healthy post school snacks?
After school, children need snacks that refuel energy and curb hunger. Options like yogurt clusters, rice paper rolls, or smoothies with Greek yogurt are excellent back to school healthy snacks for afternoons at home.
What are high-protein snacks for teens?
Teens benefit from snacks higher in protein, especially if they play sports. Homemade protein bars, turkey roll-ups, protein bagels, or smoothies with whey and fruit are all great choices to keep them full and focused.

Conclusion

Back to school healthy snacks don’t need to be stressful or complicated. With a mix of sweet, savory, and high-protein options, you can keep kids energized and happy all day long. Start small, prep ahead, and enjoy the difference nourishing snacks make. Ready to try more? Explore our recipes and build your best snack routine today.

Let’s StayFit — together.For More follow us on facebook & pinterest

How to Make Rice Paper Rolls That Taste Amazing

Fresh rice paper rolls filled with shrimp, lettuce, herbs, and vegetables, served with a tangy dipping sauce on a rustic plate.
Fresh rice paper rolls with dipping sauce
Fresh, healthy rice paper rolls served with peanut-hoisin dip.

There’s something about rice paper rolls that just feels like summer on a plate. Light, fresh, and packed with vibrant colors, they’re the kind of meal that makes you feel good the moment you see them. Imagine crisp lettuce, sweet carrots, cool cucumber, and tender shrimp all wrapped in a delicate sheet of rice paper — no frying, no heaviness, just clean, satisfying flavors in every bite.

They’re a perfect balance of textures: the soft, slightly chewy wrapper; the crunch of fresh vegetables; the savory pop of protein. And because you can mix and match fillings, they’re endlessly versatile — equally at home as a quick lunch, a healthy snack, or a crowd-pleasing appetizer. Whether you’re keeping it classic with shrimp and herbs or getting creative with fruits, tofu, or quinoa, rice paper rolls are proof that healthy food can be just as exciting as it is nourishing.

Table of Contents

Why Rice Paper Rolls Are the Perfect Healthy Bite

Rice paper rolls aren’t just a treat for the eyes — they’re a win for your health, too. The rice paper itself is naturally gluten-free and low in calories, acting as a light wrapper for nutrient-rich fillings. This means you can pack them with lean protein, fresh vegetables, and healthy fats without adding unnecessary heaviness.

A typical roll might include shrimp or chicken for protein, lettuce and cucumber for crunch, carrots for natural sweetness, and herbs for a fresh kick. Add in avocado, nuts, or a drizzle of olive oil, and you’ve got a balanced meal that covers all your macronutrients.

Compared to fried spring rolls or flour tortillas, rice paper rolls are lighter on the digestive system and far less processed. Since the fillings are fresh and often raw, you also get maximum vitamins and minerals without nutrient loss from cooking. This makes them perfect for meal prep, post-workout fuel, or simply a wholesome snack that satisfies without the crash.

Ingredients

Protein

  • 150g shrimp, peeled and deveined
  • 150g grilled chicken breast, thinly sliced
Close-up of fresh shrimp seasoned with black pepper , sizzling in a pan as a protein source for rice paper rolls.
Pan-seared shrimp seasoned with black pepper — the perfect protein choice for fresh rice paper rolls.

Vegetables & Fruit

  • 1 medium carrot, cut into thin sticks
  • 1 medium cucumber, cut into thin sticks
  • 4–5 leaves of lettuce, roughly chopped
  • 1 ripe avocado, sliced
  • 4 pineapple rings, cut into small chunks
Chopped cucumber, shredded carrots, crisp lettuce, and pineapple chunks neatly arranged on a wooden cutting board for rice paper rolls.
Colorful and fresh — cucumbers, carrots, lettuce, and pineapple prepped for delicious rice paper rolls.

Others

  • 8–10 rice paper wrappers
  • Peanut-hoisin dipping sauce (or homemade)
  • Crushed peanuts for garnish

Instructions

Step-by-step process for making healthy noodle-free rice paper rolls with shrimp, chicken, fresh vegetables, and dipping sauce.
Step-by-step guide to making fresh, healthy rice paper rolls — from prepping veggies to rolling and serving with dipping sauce.

1. Cook the shrimp
Heat a non-stick pan over medium heat. Add the shrimp with a pinch of salt and pepper. Cook for 1–2 minutes on each side until pink and opaque. Remove and set aside.

2. Prepare the chicken
Grill or pan-sear the chicken breast until cooked through (internal temperature 75°C / 165°F). Slice into thin strips for rolling.

3. Chop your veggies and fruit
Slice the carrot, cucumber, avocado, and pineapple into thin, uniform pieces. Tear or chop the lettuce into bite-sized pieces.

4. Soften the rice paper
Fill a shallow plate or bowl with warm water. Dip one rice paper sheet into the water for 5–7 seconds until just soft (it will continue to soften as you work). Lay it flat on a clean surface.

5. Assemble the rolls
Near the lower third of the rice paper, layer a few lettuce pieces, carrot sticks, cucumber sticks, avocado slices, pineapple chunks, shrimp, and chicken strips.

6. Roll them up
Fold the bottom of the rice paper over the filling, then fold in the sides, and roll tightly to seal. Repeat until all ingredients are used.

7. Serve
Arrange on a plate with peanut-hoisin dipping sauce on the side, sprinkle with crushed peanuts, and enjoy fresh.

Endless Filling Possibilities

One of the best things about rice paper rolls is that they’re a blank canvas. The wrapper itself is light and neutral in flavor, so what you put inside determines both the taste and the nutritional value. When you skip the noodles, you make room for more vegetables, lean proteins, and healthy fats — keeping each roll nutrient-dense and satisfying without unnecessary carbs.

Classic Fresh Fillings Everyone Loves

If you want to keep things authentic but still healthy, here’s a noodle-free spin on the traditional Vietnamese roll:

  • Protein: Poached shrimp, grilled chicken breast, or tender poached fish
  • Vegetables: Crisp lettuce leaves, cucumber sticks, carrot matchsticks, and crunchy bell pepper strips
  • Herbs: Fresh mint, basil, or coriander for fragrance and flavor

These fillings deliver protein, fiber, vitamins, and antioxidants — all wrapped in a light rice paper for a fresh, balanced bite. Pair with a clean dipping sauce like nuoc cham (lime juice, fish sauce, garlic, and a touch of honey) for maximum flavor without excess sugar or oil.

Whether you’re trying to cut or lose fat, visit our Nutrition & Tips section — you might discover a lot of things that have been hiding from you.

Creative & Healthy Twist Fillings (No Noodles)

With rice paper rolls, you can play with textures and flavors while still keeping it light and nutritious:

  • Vegetarian Power Roll: Slices of avocado, marinated tofu, shredded purple cabbage, carrot, and cucumber
  • Lean & Zesty: Grilled chicken breast, pineapple chunks, cucumber, and fresh mint
  • Omega-3 Boost: Smoked salmon, avocado, cucumber, and microgreens
  • Sweet-Savory Snack Roll: Mango slices, cucumber, basil, and grilled chicken for a tropical twist

By avoiding noodles, you keep each roll naturally low in refined carbs and high in fiber, protein, and healthy fats — perfect for weight management, post-workout recovery, or a light, energizing meal.

From Kitchen to Table – Serving & Storing Rice Paper Rolls

Once your rice paper rolls are wrapped and ready, the fun part begins — serving them beautifully and keeping them fresh until you’re ready to eat. With the right dips, plating, and storage tricks, they’ll stay just as vibrant and delicious as when you first rolled them.

Best Ways to Serve Rice Paper Rolls

A great dipping sauce can take rice paper rolls from tasty to unforgettable. Here are some healthy, flavor-packed ideas:

  • Peanut-Hoisin Sauce — Blend natural peanut butter, low-sodium hoisin, lime juice, and water until smooth.
  • Nuoc Cham — A light Vietnamese sauce made with lime juice, fish sauce, garlic, chili, and a touch of honey.
  • Soy-Ginger Dip — Combine low-sodium soy sauce, fresh ginger, lime juice, and sesame oil for a zesty kick.

For presentation, place rolls on a wooden board or platter, garnish with fresh herbs, and serve the sauces in small bowls for dipping.

Storage & Make-Ahead Tips

Rice paper rolls are best enjoyed fresh, but you can store them for short periods with the right method:

  1. Wrap each roll individually in cling wrap to prevent sticking.
  2. Store in an airtight container in the fridge for up to 24 hours.
  3. If prepping ahead, store the fillings and wrappers separately — assemble right before eating to keep the texture perfect.

This way, your rolls will keep their fresh crunch without becoming soggy.

For more low-carb recipes, visit our Tuna Salad Recipe.

Let’s StayFit—together.For More follow us on facebook & pinterest

Frequently Asked Questions

Are rice paper rolls healthy?

Yes, rice paper rolls are naturally low in calories and fat, especially when filled with lean protein, fresh vegetables, and healthy fats. Skipping noodles keeps them lower in carbs and higher in nutrient density.

What filling to put in rice paper rolls?

You can fill rice paper rolls with a variety of healthy ingredients like grilled chicken breast, shrimp, avocado, cucumber, carrot, bell peppers, fresh herbs, and even tropical fruits like mango or pineapple.

What is the trick to rice paper rolls?

The secret is to soak the rice paper in lukewarm water for just 4–6 seconds, use leafy greens as a base to prevent tearing, and roll tightly without overstuffing.

How to make rice paper rolls?

Dip rice paper in lukewarm water until flexible, layer leafy greens, protein, vegetables, and herbs, fold the sides in, and roll tightly from the bottom up. Serve with your favorite healthy dipping sauce.

How long do you soak rice paper rolls?

Only 4–6 seconds in lukewarm water is enough. The rice paper will continue to soften as you assemble and roll. Over-soaking can make it sticky and prone to tearing.

Print
clock clock iconcutlery cutlery iconflag flag iconfolder folder iconinstagram instagram iconpinterest pinterest iconfacebook facebook iconprint print iconsquares squares iconheart heart iconheart solid heart solid icon
Fresh rice paper rolls filled with shrimp, lettuce, herbs, and vegetables, served with a tangy dipping sauce on a rustic plate.

How to Make Rice Paper Rolls That Taste Amazing


5 Stars 4 Stars 3 Stars 2 Stars 1 Star

No reviews

  • Author: Chef Dodos
  • Total Time: 25 minutes
  • Yield: 12 rolls 1x

Description

Fresh, light, and low-carb shrimp & veggie rice paper rolls made without noodles. Perfect for a quick lunch, snack, or healthy dinner option.


Ingredients

Scale

12 rice paper wrappers

200g cooked shrimp (peeled and deveined)

1 cup shredded lettuce

1 cup cucumber sticks

1 cup carrot sticks

1/2 cup pineapple chunks

Peanut or dipping sauce of choice


Instructions

1. Cook shrimp with salt, pepper, and garlic until pink and set aside.

2. Wash and slice cucumber and carrots into thin sticks, shred lettuce, and cut pineapple into small chunks.

3. Fill a shallow dish with warm water and dip rice paper wrapper briefly until soft.

4. Layer shrimp, cucumber, carrot, lettuce, and pineapple in the center of the wrapper.

5. Fold in the sides, then roll tightly from the bottom up.

6. Serve immediately with your favorite dipping sauce.

Notes

Best served fresh. If making ahead, wrap tightly in plastic wrap and refrigerate for up to 4 hours.

  • Prep Time: 20 minutes
  • Cook Time: 5 minutes
  • Category: Appetizer
  • Method: No-Cook, Assembly
  • Cuisine: Asian

Nutrition

  • Serving Size: 1 roll
  • Calories: 90
  • Sugar: 2g
  • Sodium: 180mg
  • Fat: 2g
  • Saturated Fat: 0.5g
  • Unsaturated Fat: 1.5g
  • Trans Fat: 0g
  • Carbohydrates: 9g
  • Fiber: 1g
  • Protein: 7g
  • Cholesterol: 30mg

Conclusion:


Fresh rice paper rolls make a light, wholesome meal that’s perfect for lunch or dinner, giving you a burst of flavor and nutrients without weighing you down. For an even healthier lifestyle, start your day with our energizing Green Juice Recipe. It’s the perfect morning boost to hydrate your body, fuel your metabolism, and set a healthy tone for the rest of the day.