Hey there! We’re The DODOs — a real couple with a real story.
I’m Kiko, and I’m Med, and together we created StayFit Recipes — not just because we love good food, but because we were both stuck in bodies and habits we didn’t love.
How Grilled Chicken Drumsticks Fit Into Our 100-Day Transformation
Hey! We’re The DODOs — Kiko & Med. We didn’t always look or feel this way. Kiko was hitting the gym but stuck with stubborn fat and low energy. Med was underweight, unhealthy, and constantly crashing. We both felt off — and we knew it was time for a change. So, we made a deal: 100 days of no excuses. Just real workouts, real meals, and real accountability. Kiko took on breakfast and snacks. Med mastered lunch and dinner. Together, we transformed our bodies, our habits, and our lives — and we’re here to help you do the same.
When we needed a reliable protein source that was flavorful, satisfying, and easy to make, grilled chicken drumsticks became a go-to. They’re juicy, rich in nutrients, and perfect for meal prep. Whether you’re cooking for a weekend barbecue or a quick midweek dinner, drumsticks bring that smoky, savory magic without much fuss.
The beauty of this recipe is its flexibility. You can marinate them overnight for deep flavor or season them just before grilling for speed. With the right heat control and a few pro tips, your chicken will have crisp skin, tender meat, and a taste that rivals any restaurant. And once you try them alongside a fresh salad or a hearty quinoa dish, you’ll see why they’re a staple in our meal plans.
Choosing and Preparing Drumsticks
Selecting the Best Cuts
Good grilled chicken drumsticks start with fresh meat. Look for drumsticks that are firm, pink, and have smooth skin. Skip any that look dull or have a bad smell. Bone-in drumsticks stay juicier and taste better on the grill. If you can, choose air-chilled chicken. It holds less water, so grilled chicken drumsticks cook with a better color and flavor.
Prepping for the Grill
Before cooking, dry the grilled chicken drumsticks with paper towels. This helps the skin get crisp instead of soggy. You can trim extra skin or fat, but keep some for flavor. For faster, even cooking, make small cuts in the thick part of the meat. Now your grilled chicken drumsticks are ready for seasoning or marinade. Serve them with fresh sides like roasted sweet potato salad for a healthy, filling meal.
Marinades and Seasonings
Classic and Creative Marinades
Marinades make grilled chicken drumsticks tender and full of flavor. A basic mix of oil, lemon juice, salt, and pepper works well. You can also add garlic, herbs, or spices like paprika for extra taste. For a sweet touch, try honey or a little brown sugar. Marinate for at least 30 minutes, but a few hours will give your grilled chicken drumsticks even more flavor.
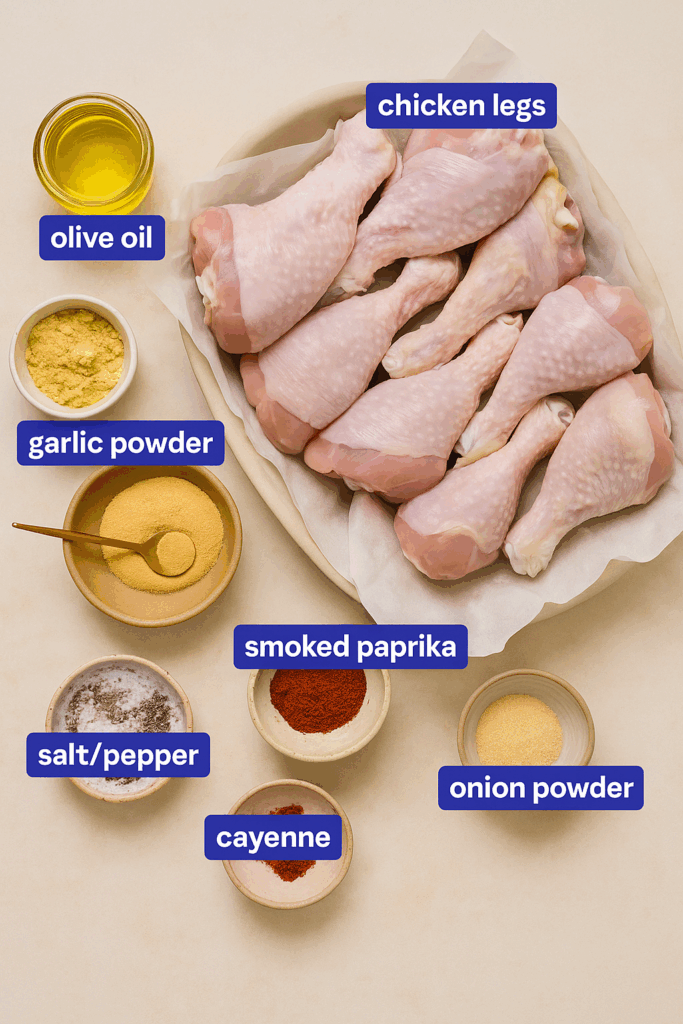
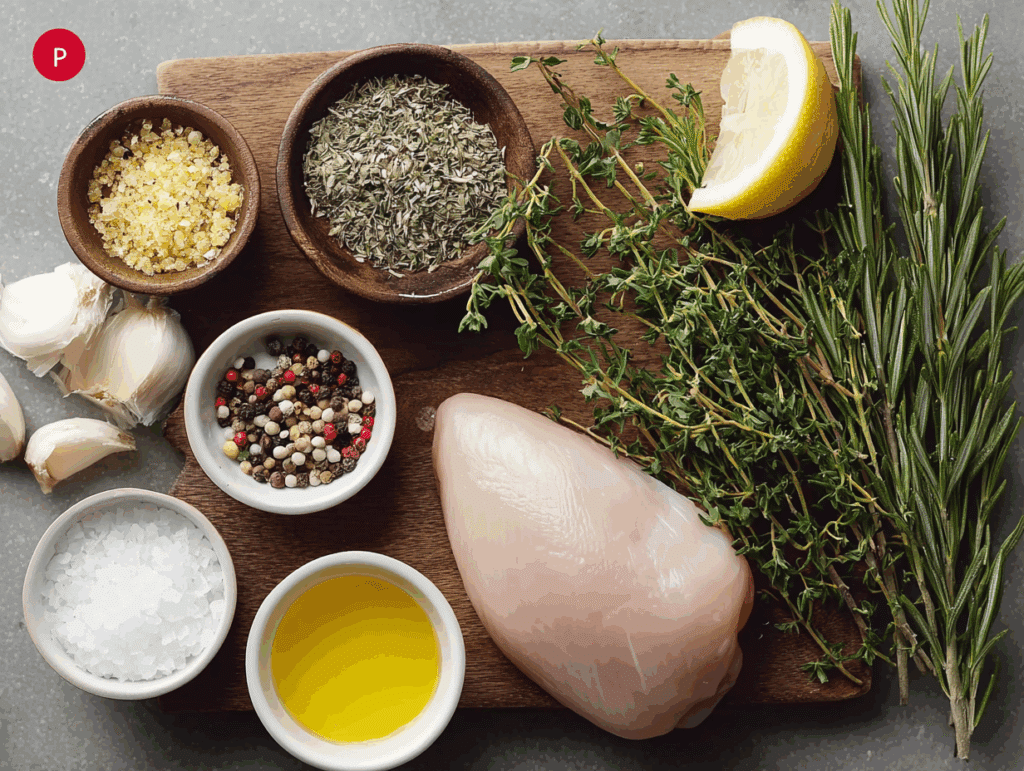
Grilled chicken drumsticks ingredients including olive oil, ground mustard, garlic powder, smoked paprika, cayenne, onion powder, salt, and pepper.
Dry Rubs and Quick Seasoning
If you don’t have time to marinate, use a dry rub. Mix salt, pepper, garlic powder, and paprika. Coat the grilled chicken drumsticks evenly before grilling. For a spicy kick, add cayenne pepper. Dry rubs work well because they keep the skin crisp while adding bold taste. Serve your seasoned drumsticks with dips like muhammara for a fresh flavor twist.
Grilling Techniques for Drumsticks
Direct vs. Indirect Heat
The way you place grilled chicken drumsticks on the grill matters. For crispy skin, start over direct heat for a few minutes on each side. Then move them to indirect heat to finish cooking without burning. This method keeps the outside golden while the inside cooks through.
Temperature and Timing
Grilled chicken drumsticks are ready when they reach an internal temperature of 165°F (74°C). Use a meat thermometer for accuracy. On a medium-hot grill, drumsticks usually take 25–30 minutes. Turn them often so they cook evenly. If the skin browns too fast, move the drumsticks to a cooler part of the grill. Pair them with a side like Mediterranean ground beef skillet for a full, protein-packed meal.
Grilled chicken drumsticks sizzling over charcoal with perfect grill marks.
Serving Ideas and Pairings
Healthy Side Dishes
Grilled chicken drumsticks go well with light and fresh sides. Try a crisp salad with greens, tomatoes, and cucumbers. Grilled vegetables like zucchini or bell peppers also add color and flavor. For extra protein, serve with quinoa salad or lentils. These sides balance the meal and keep it filling without being heavy.
Sauces and Finishing Touches
A good sauce can make grilled chicken drumsticks even better. Try a yogurt-based dip with garlic and herbs for something cool and creamy. For a fresh kick, blend parsley, olive oil, and lemon juice into a quick herb sauce. If you like heat, brush on a chili glaze during the last minutes of grilling. Serve with cottage cheese ranch dip for a tangy twist.
FAQs – Expert Answers for Perfect Drumsticks
How long do you grill chicken drumsticks for?
On medium heat, grilled chicken drumsticks take about 25–30 minutes. Turn them often so they cook evenly.
Should I marinate drumsticks before grilling?
Yes. Marinating adds flavor and helps keep grilled chicken drumsticks tender. Even 30 minutes makes a difference.
Should I boil chicken drumsticks before grilling?
It’s not needed. Grilling from raw gives better flavor and texture.
Should you grill drumsticks with the lid open or closed?
Start with the lid open for searing, then close it to finish cooking the grilled chicken drumsticks evenly.
What should I put on chicken before grilling?
Oil, salt, and spices work well. This keeps grilled chicken drumsticks juicy and flavorful.
Grilled chicken drumsticks are one of the easiest and most rewarding meals you can make. With the right cut, simple prep, and balanced heat, you get juicy meat and crispy skin every time. A good marinade or dry rub adds flavor, and smart grilling keeps the meat tender. Serve them with fresh sides and a tasty sauce, and you have a healthy, filling dish that works for weeknights or special gatherings. Once you master this, grilled chicken drumsticks will be a recipe you return to again and again.
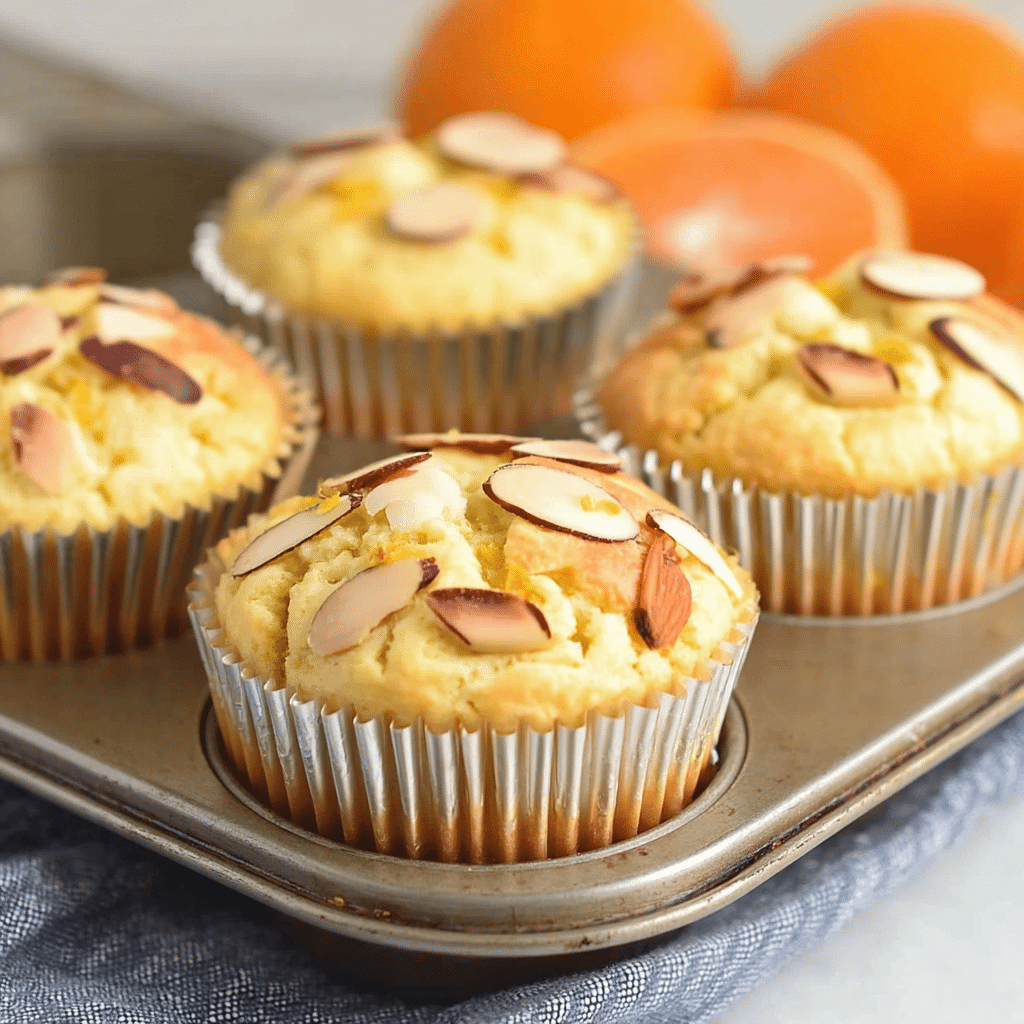
Fluffy orange muffins made without eggs or dairyTable Of Contents
Table of Contents
Introduction
These soft, fluffy orange muffins are 100% egg-free and dairy-free — but you’d never know it from the taste. They’re bright, moist, and packed with real orange flavor. Whether you’re vegan, have allergies, or just ran out of eggs and milk, this recipe is here to help. We’ve made them for brunch, snacks, and even bake sales, and they always disappear fast. In this article, we’ll show you exactly how to make these muffins from scratch with simple ingredients you already have at home. You’ll also get tips on mixing, baking, and storing — plus the answers to the most asked questions about baking orange muffins (no eggs, no dairy). Let’s bake something amazing — without the stuff your body doesn’t need.
Our Muffin Story
Why we made these orange muffins Back when Kiko was cutting dairy and I (Med) was skipping eggs, we had one problem: we missed muffins. We tried a few recipes, but they always turned out flat or dry. We wanted the kind of muffin that was soft, moist, and full of flavor — just like the ones from our childhood bakeries.
So, we grabbed two fresh oranges, a tub of almond yogurt, and a lot of hope. After a few tries, we got it right. The orange juice and zest gave a bold citrus flavor. The olive oil made them tender. And the yogurt added richness without the dairy.
Since then, we’ve made these orange muffins (no eggs, no dairy) dozens of times. They’ve become a go-to for Sunday mornings, post-gym snacks, and even gifts. You’ll also love our mandarin muffins if you’re craving more citrus flavor, or check out the chocolate baked oat cups for another egg-free favorite.
The problem with most eggless muffins Most egg-free muffins turn out heavy or gummy. But here’s what we learned: it’s not just about what you leave out. It’s about what you put in. You need moisture, structure, and something to help the muffins rise. In this recipe, we use a mix of orange juice, olive oil, and self-rising flour to get that soft, bakery-style crumb — without any eggs or milk.
Key Ingredients That Make It Work
Why self-rising flour is your best friend If you’re baking orange muffins with no eggs and no dairy, self-rising flour makes everything easier. It’s already mixed with baking powder and a touch of salt, so you don’t have to measure those out. This is important because, without eggs, your batter needs all the help it can get to rise properly.
No self-rising flour? Just use 1 cup of all-purpose flour with 2 teaspoons of baking powder and ¼ teaspoon salt. We’ve used this method in our gluten-free cinnamon rolls, and the result is always light and fluffy.
This flour gives the muffins structure. It helps them rise in the oven, creating a soft center and gently golden top — the kind you’d expect from a bakery, not a vegan recipe.
Simple swaps for eggs and dairy To keep these orange muffins both egg-free and dairy-free, we use a mix of three smart swaps. First, plant-based yogurt — almond or coconut — gives the muffins a creamy texture and helps bind the batter. Next, light olive oil adds richness and keeps them moist. And finally, the fresh orange juice works with the baking powder to give a gentle lift.
But it’s not just about texture. These ingredients also boost flavor. The orange juice and zest bring brightness, the yogurt adds depth, and the oil ties it all together. These swaps don’t just replace eggs and dairy — they improve the whole bite.
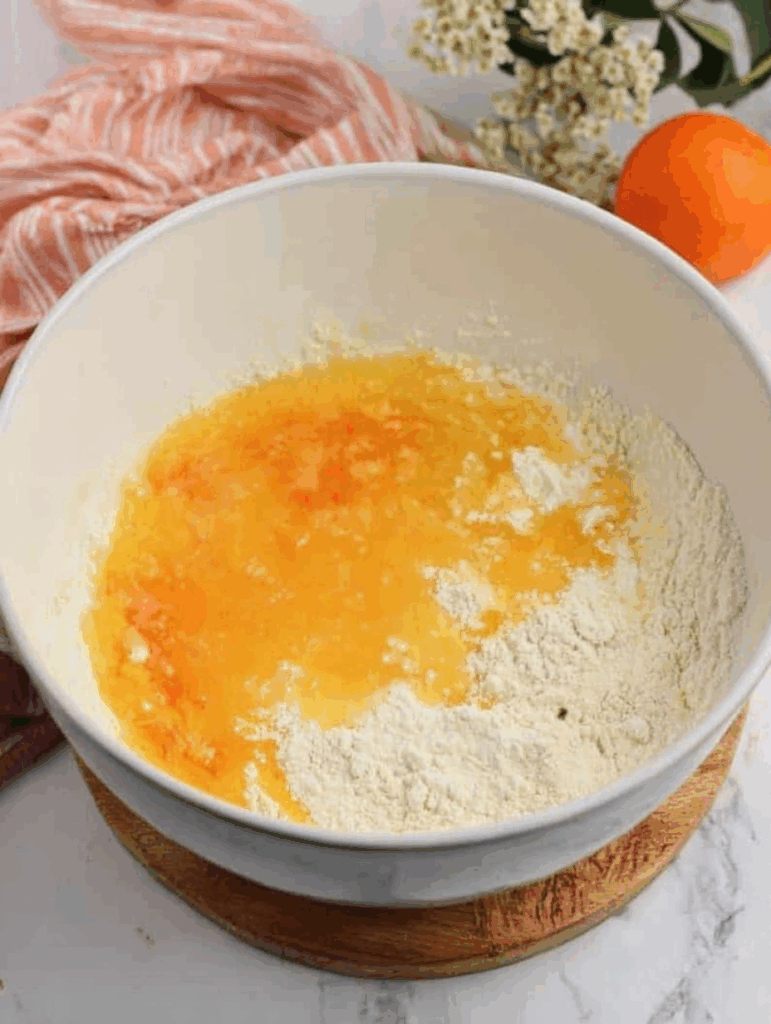
Juice the oranges and measure how much you need. Add the orange juice, other liquids, and sugar to a large bowl.Add the self-rising flour to the bowl with the wet ingredients.
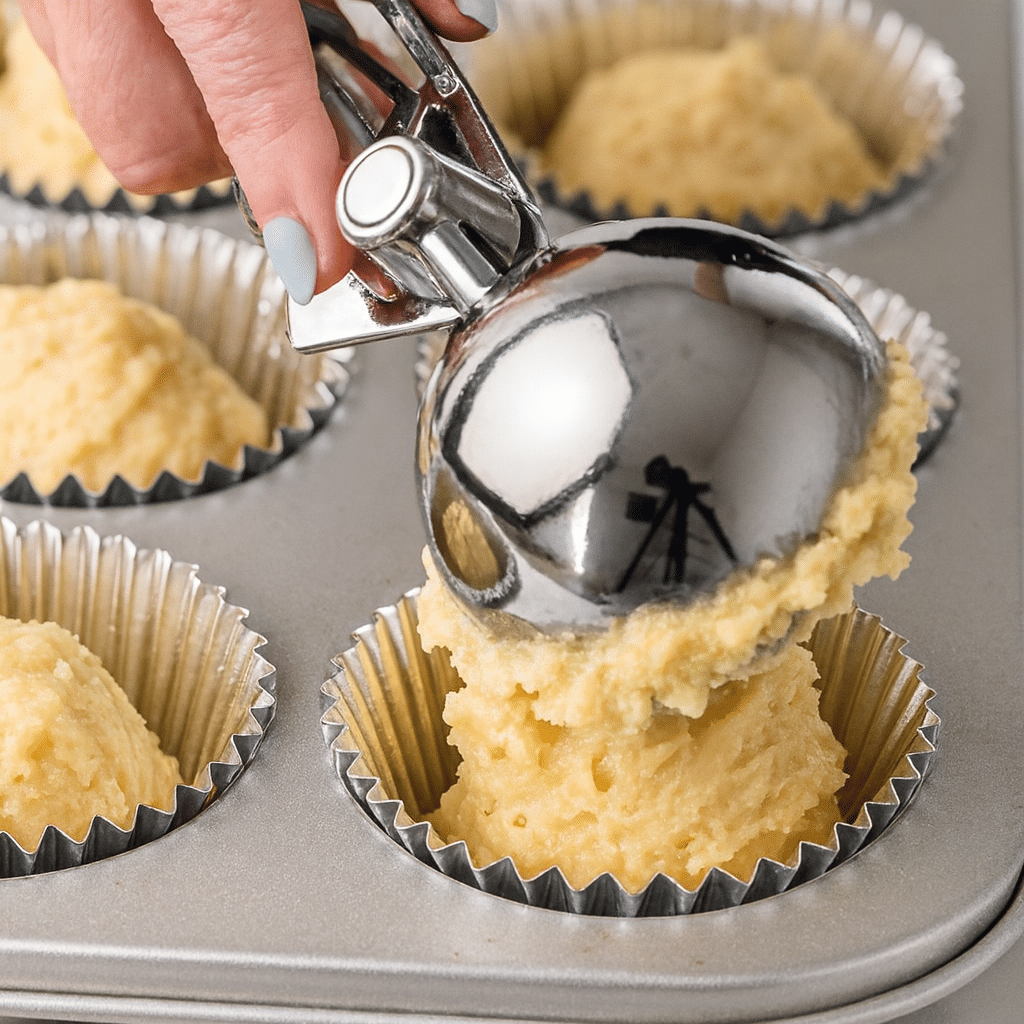
Mixing orange juice, yogurt, and zest for muffin batterFilling muffin cups with eggless orange batter
How to mix for soft, fluffy muffins Making these orange muffins without eggs or dairy is super simple. Start by preheating your oven to 350°F (175°C). Line a muffin tin with paper liners or lightly grease it. Now grab two bowls: one for the dry ingredients, and one for the wet.
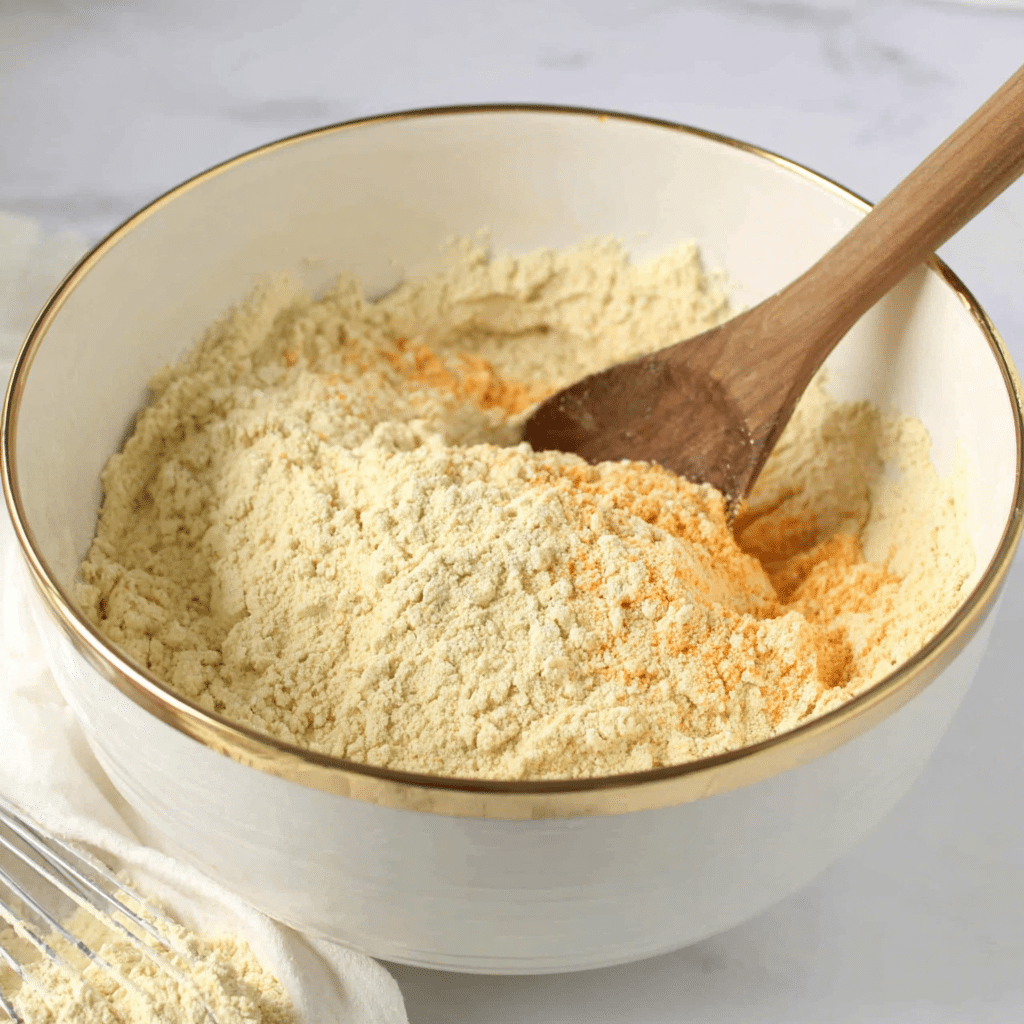
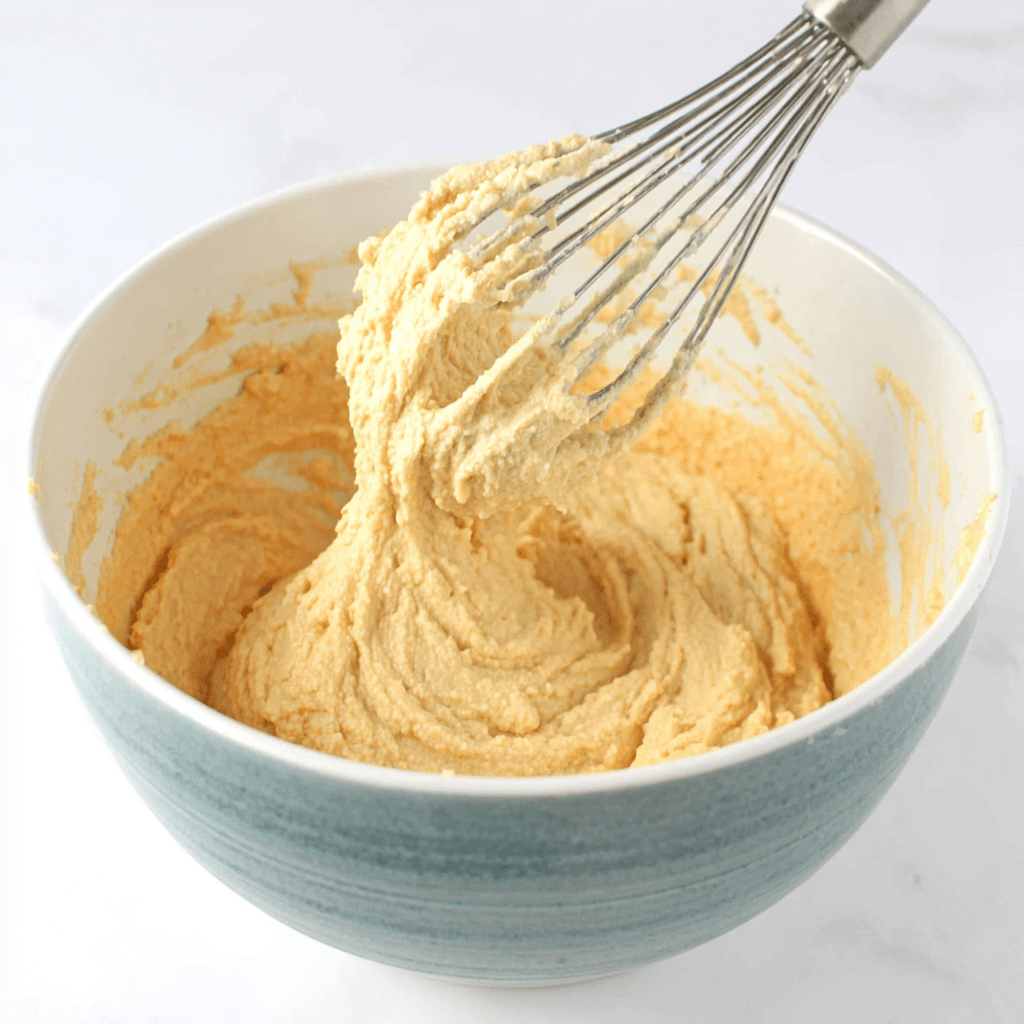
In the first bowl, add the self-rising flour. Give it a quick stir to break up any clumps. In the second bowl, mix the orange juice, plant-based yogurt, olive oil, sugar, orange zest, and vanilla. Whisk until smooth.
Now pour the wet mixture into the dry bowl. Gently fold with a spatula — don’t overmix. A few lumps are totally fine. If you stir too much, the muffins can turn dense. For added texture, you can mix in nuts, dried cranberries, or even chopped chocolate. We sometimes toss in a handful of fruit like we do with our chocolate strawberry yogurt clusters for a little twist.
Baking tips that make all the difference Scoop the batter into your muffin tin, filling each cup about ¾ full. Bake for 20–22 minutes. The muffins should rise with golden tops, and a toothpick poked in the center should come out clean.
Once out of the oven, let the muffins sit in the pan for 5 minutes before moving them to a wire rack. This resting time helps them set up without drying out. We like enjoying these orange muffins (no eggs, no dairy) while they’re still warm, paired with a smoothie like our green juice recipe.
That’s it — no stress, no complicated steps. Just real ingredients and real flavor.
Flavor & Texture Upgrades
Easy add-ins to make them your own Once you master the base recipe for these orange muffins without eggs or dairy, you can start having fun with flavors. We love folding in dairy-free chocolate chips for a dessert-like muffin. You can also add dried cranberries, chopped dates, or sunflower seeds for a more wholesome snack.
Want extra crunch? Try topping the muffins with slivered almonds or a sprinkle of rolled oats before baking. For kids or picky eaters, mini muffin tins work great too — same flavor, smaller bites. It’s a trick we also use in our chocolate baked oat cups, and it always works.
No matter how you switch it up, stick to ½ to ¾ cup of add-ins total. That keeps the texture light and avoids overloading the batter.
How to control sweetness or tang These orange muffins strike a nice balance — sweet, but not too sweet. Still, you can adjust it to your taste. If you like things less sugary, reduce the unrefined sugar to ¾ cup. Prefer more tang? Add an extra teaspoon of orange zest or use slightly less sugar.
If you’re using store-bought orange juice instead of fresh, check the label. Some versions are sweeter than others and could make the muffins taste overly sugary. We prefer squeezing our own, like we do in our mandarin muffin recipe — more flavor, more control.
Even small changes make a big difference in these orange muffins (no eggs, no dairy). You’ll find your favorite version in no time.
Storage & Make-Ahead Tips
How to store orange muffins the right way After baking a batch of orange muffins (no eggs, no dairy), you’ll want to keep them fresh as long as possible. Once they’ve cooled completely, place them in an airtight container. Keep them at room temperature for up to two days. If your kitchen runs warm, store them in the fridge instead to prevent spoilage.
In the fridge, they’ll stay good for about 4 days. Just warm them for 10–15 seconds in the microwave before serving. This softens them up and brings back that fresh-baked texture. We do the same when prepping snacks like our homemade protein bars — quick, simple, and ready when you are.
Don’t store muffins while they’re still warm. That traps steam, makes them soggy, and causes mold fast.
Freezing and reheating tips Want to make a big batch ahead of time? Freeze them. These eggless, dairy-free orange muffins freeze beautifully. Wrap each muffin in parchment or foil, then place them in a zip-top freezer bag. Label the bag with the date and pop it in the freezer — they’ll last up to 1 month.
When you’re ready to enjoy one, unwrap and let it sit at room temperature for 30–60 minutes, or reheat in the microwave for about 30 seconds. The result? Still soft, still citrusy, still amazing. We follow the same freezing method for other baked recipes like our healthy banana bread, and it works every time.
Planning ahead means you always have a tasty, allergen-friendly snack ready — no stress. Follow us for more in facebook
Frequently Asked Questions
Can I make orange muffins without eggs and dairy?
Yes! You can make orange muffins with no eggs and no dairy by using plant-based yogurt, orange juice, and light olive oil. They turn out fluffy and flavorful without any animal products.
What can I use instead of self-rising flour?
You can mix 1 cup of all-purpose flour with 2 teaspoons of baking powder and ¼ teaspoon salt to make your own self-rising flour — perfect for these eggless orange muffins.
Do eggless orange muffins turn out fluffy?
Yes. The acidity in orange juice reacts with baking powder, helping these orange muffins (no eggs, no dairy) rise naturally for a light, airy texture.
How should I store dairy-free orange muffins?
Keep muffins in an airtight container for 2 days at room temp, or refrigerate for up to 4 days. You can freeze them for 1 month and reheat as needed.
Conclusion
These orange muffins (no eggs, no dairy) prove that you don’t need eggs or milk to bake something delicious. With the right swaps and simple techniques, you’ll get soft, golden muffins bursting with orange flavor — every time. Whether you’re avoiding allergens or just looking for a clean, plant-based treat, this recipe delivers.
A woman reflects on her body and belly fat journey in soft natural light
We’ve been there—cutting down to two meals a day, eating cleaner than ever… yet that stubborn belly fat just won’t budge. Sound familiar? You’re not alone, and more importantly, you’re not broken. The truth is, eating less doesn’t always mean losing fat—especially around your midsection.
Let’s break it down.
Table of Contents
Table of Contents
Eating Less Doesn’t Mean Burning Fat
When you drastically reduce your meals, your body doesn’t cheer and start burning fat—it panics. It thinks food is scarce, and it responds by slowing your metabolism and holding onto fat, especially around the belly. It’s called adaptive thermogenesis, and it’s your body’s survival mode kicking in.
Even if you’re only eating twice a day, if those meals are heavy in carbs, low in protein, or lack fiber, your blood sugar could still spike, triggering insulin—your fat-storing hormone. So instead of burning fat, your body gets the signal to store it.
In fact, many people unknowingly eat in a way that tells their body, “Let’s keep the belly fat—just in case.”
And that’s just one piece of the puzzle.
Stress, Sleep & Hormones: The Hidden Triggers
Let’s talk about stress. If you’re constantly wired, overwhelmed, or underslept, your cortisol levels are likely sky-high. Cortisol is a major reason fat clings to your waistline—it tells your body to store energy for “fight or flight.” And it’s relentless.
Poor sleep? That’s another fat-loss blocker. Lack of rest lowers leptin (your appetite-suppressing hormone) and raises ghrelin (your hunger hormone), making cravings harder to control and belly fat harder to shed.
And if you’re over 35? Hormonal shifts (like insulin resistance or low thyroid function) can make it even tougher. That’s why no single meal plan works for everyone.
The good news? Once you understand what’s actually causing the belly fat to stick, you can turn things around—without eating less or starving yourself.
You’ve swapped soda for smoothies, cookies for granola, and drive-thru meals for homemade quinoa bowls—and yet, your belly fat won’t budge. What gives?
Visible belly fat loss through real food, workouts, and consistency
Let’s get real: “healthy” doesn’t always mean “fat-loss friendly.” In fact, some of the most praised health foods could be quietly keeping that belly fat right where it is.
Healthy ≠ Fat-Burning
Here’s the catch: a food can be nutritious and still cause fat storage—especially when eaten in excess or without balance.
Take oats, for example. They’re high in fiber, sure—but load them with bananas, honey, and almond butter, and you’ve got a blood sugar spike that tells your body to store fat, not burn it. Even “good carbs” can lead to belly fat if you’re not pairing them with protein and fat to slow the insulin response.
Many of us eat “clean” but lack the macronutrient balance that promotes fat loss. And let’s not even talk about those so-called healthy snacks that are really just glorified desserts.
The key? Focus on blood sugar stability and muscle maintenance, not just calories.
Sneaky Belly Fat Blockers in Your Diet
Let’s dig into what might be silently sabotaging your efforts:
Too Little Protein – Protein preserves lean muscle and keeps you full. Without it, cravings spike—and so does belly fat.
Underhydration – Dehydration raises cortisol and slows metabolism.
Natural Sugars – Dates, dried fruit, honey—while natural, they can be sugar bombs in disguise.
Want a quick win? Reverse your meal order: eat protein and veggies first, carbs last. You’ll stay fuller, longer—and train your body to burn fat, not store it.
How to Actually Lose Belly Fat (Without Starving or Obsessing)
Losing belly fat doesn’t have to mean cutting out everything you love or counting every crumb. In fact, the most effective fat-loss strategies are surprisingly simple—and sustainable.
Let’s flip the script from restriction to results.
Build a Belly-Fat-Burning Plate
Forget fad diets. If your meals don’t keep you full, balanced, and satisfied, your body won’t burn fat efficiently—especially belly fat.
Portion-smart meals that burn fat
Enter the StayFit Plate Formula:
½ plate non-starchy veggies
¼ plate high-quality protein
¼ plate smart carbs or healthy fat
Why does this work? Because it stabilizes blood sugar, supports muscle, and keeps hunger hormones in check. No crashes, no binges—just steady energy and fat-burning all day long.
Want to lose belly fat without feeling deprived? Try eating protein with every meal, aim for 25–30g per sitting, and prioritize whole foods over packaged “diet” items.
Timing matters too. Most people do best with:
Protein-packed breakfast
Lighter dinner
12–14 hour overnight fast (not extreme)
This eating rhythm supports hormonal balance, which is essential for shrinking belly fat.
Move Less, Burn More (Yes, Really)
Here’s the good news: you don’t have to spend hours in the gym. What matters most is consistency, movement quality, and metabolism support.
Start here:
Walk daily – It’s underrated but powerful. 7–10k steps can significantly reduce belly fat.
Lift 2–3x per week – Muscle burns fat, especially around the belly.
Even your posture and breath affect belly fat. Shallow chest breathing keeps your body in stress mode. Deep belly breaths, on the other hand, activate your parasympathetic nervous system and reduce cortisol.
How to Lose Belly Fat Without Giving Up Foods You Love
Yes, you can lose belly fat and still enjoy pizza, chocolate, and even wine. The secret isn’t deprivation—it’s intention. When you learn to indulge strategically, your body doesn’t panic, your hormones stay balanced, and your results actually stick.
Let’s ditch the all-or-nothing mindset and talk balance.
Smart Swaps, Not Sacrifices
Most people gain belly fat from yo-yo dieting, not occasional indulgences. It’s the restrict–binge–repeat cycle that keeps your metabolism confused and your cravings raging.
Here’s our golden rule: 80/20 lifestyle. That means 80% of your meals follow the StayFit formula, and 20% allow room for fun. Whether it’s a Friday-night burger or Sunday pancakes, planned enjoyment keeps you on track.
Try these practical tricks:
Upgrade your treats: Dark chocolate over candy bars, homemade fries over fast food, protein mug cake instead of cake-cake.
Time it right: Have indulgent meals post-workout or at lunch—not late at night.
Pair smart: Eating carbs with protein and fiber reduces their impact on fat storage.
One of our favorite hacks? The Two Treat Rule—enjoy two mindful indulgences each week, guilt-free, no “cheat day” binges required.
Habits Over Hustle
Losing belly fat starts with rewiring your habits, not just your meals.
Ask yourself:
Are you eating because you’re hungry—or stressed?
Are you moving because you want to feel good—or punish yourself?
Are you sleeping 7–8 hours—or running on empty?
When you shift from punishment to empowerment, belly fat starts melting as a side effect of living better—not just eating less.
18 Effective Tips to Lose Belly Fat
Even if you’re doing most things right, belly fat can be incredibly stubborn. That’s why we’re giving you 18 proven tips—split into digestible parts—to help you lose belly fat naturally, efficiently, and without extreme diets.
Here’s the first 6.
1. Eat More Protein (Not Less Food)
Protein isn’t just about muscle—it’s a metabolic power tool. It curbs cravings, supports lean mass, and helps torch belly fat. Aim for 25–30g per meal. Bonus: it stabilizes blood sugar, so you won’t store fat so easily.
2. Prioritize Soluble Fiber
Think: avocados, chia seeds, flaxseed, black beans. Soluble fiber forms a gel in your gut that slows digestion and reduces visceral belly fat. Add 5–10g daily for noticeable results.
3. Skip Sugar, Even the “Healthy” Kind
Coconut sugar, agave, and maple syrup may sound better—but they spike your insulin just like the refined stuff. Belly fat thrives in high-insulin environments. Cut back and watch your waist shrink.
4. Reduce Refined Carbs, Not All Carbs
You don’t need to go keto—but swap white rice for quinoa, white bread for sprouted grain, and sugary cereal for oats. Lower-GI carbs keep insulin down and help your body use fat for fuel.
5. Drink More Water, Especially Before Meals
Hydration impacts metabolism and digestion. Drinking 16 oz (500 ml) of water 30 minutes before meals helps you eat less and burn more. Bonus: it may reduce belly bloat, too.
6. Don’t Skip Meals, Especially Breakfast
Skipping meals stresses your body, raises cortisol, and can lead to fat storage—especially around the belly. Instead, build a protein-rich breakfast that tells your metabolism: “we’re safe, let’s burn fat.”
Let’s keep the momentum going. You’ve got the basics down—now it’s time to build better habits with these next 6 belly-fat-burning tips.
7. Fix Your Metabolism First
A slow metabolism keeps belly fat locked in place. The fix? Build muscle, eat enough protein, sleep more, and stop under-eating. Learn how to reset your metabolism in our full breakdown: How to Fix Your Metabolism
8. Ditch the Insulin Roller Coaster
High insulin = fat storage mode. By reducing sugar and refined carbs, and spacing out meals, you allow your body to burn stored fat—especially visceral belly fat. This post explains it better: Insulin Control for Fat Loss
9. Try the Pink Salt Trick Before Meals
A pinch of pink salt with lemon water can support digestion, reduce bloating, and improve stomach acid—especially if you’ve been under-eating or over-stressing. We swear by it pre-breakfast. Pink Salt Trick for Weight Loss
Ditch the vending machine. A high-protein snack helps curb cravings and lowers cortisol. Make it tasty, too: Chocolate Strawberry Yogurt Clusters
12. Focus on Sustainable Swaps
Fat loss doesn’t need to feel like punishment. Choose options that satisfy and support your goals. Case in point: protein-packed pancakes that crush cravings. Quick & Easy Cottage Cheese Pancakes
13. Use Low-Impact Fat-Burning Workouts
Forget endless cardio. Consistency beats intensity. Try low-impact workouts that reduce stress and burn fat—especially around the midsection. Think walking, strength training, and bodyweight circuits.
14. Start Your Morning With a Metabolic Kick
Before you sip that coffee, try a digestion-friendly morning ritual like a lemon pickle mocktail or gut-friendly greens. It primes your system for the day and reduces bloating—fast.
Skipping breakfast and overeating at night is a belly-fat recipe. Fuel your day early, and go lighter in the evening to align with your body’s natural fat-burning rhythm.
You can’t outwork poor sleep. Aim for 7–9 hours. Deep rest boosts leptin, lowers cortisol, and puts your body into fat-burning recovery mode.
17. Build a Routine, Not a Diet
Belly fat loss sticks when your actions become second nature. That means batch-cooking, movement breaks, daily hydration—and yes, dessert that fits.
18. Make It About More Than Just Fat Loss
Here’s the truth: belly fat is a symptom. Sustainable fat loss is a byproduct of better habits, better fuel, and better self-respect. This isn’t a quick fix—it’s a life shift.
The best part? It works.
Conclusion: Real Habits, Real Fat Loss
Losing belly fat isn’t about punishing workouts or extreme diets—it’s about giving your body what it actually needs: protein-rich meals, balanced blood sugar, daily movement, quality sleep, and consistency.
If you’re eating just two meals a day or making healthy choices but still seeing belly fat hang around, you’re not doing it wrong—you just haven’t been told the whole story.
You don’t have to eat less. You just have to eat smarter. You don’t have to cut everything out. You just need the right habits—and to keep showing up.
Here’s your next step: Pick 2–3 tips from this list. Apply them this week. Don’t wait for perfect. Small shifts, repeated often, will melt stubborn fat faster than any “quick fix” ever could.
And remember: you’re not doing this alone. We’re here to help you StayFit—together.
Why can’t I lose my belly fat even when eating healthier?
Because belly fat is controlled by more than food—hormones, stress, sleep, insulin, and metabolism all play major roles. Even healthy meals can spike blood sugar if not balanced with protein and fiber. Eating clean is great—but fat loss needs the right strategy behind it.
Why is my belly so big even though I eat healthy?
You may be eating “healthy” but too much of the wrong macros (like carbs or fats), too little protein, or not spacing meals properly. Combine that with stress, lack of movement, or poor sleep, and belly fat can remain—despite healthy habits.
How to lose belly fat but still eat what you want?
Follow the 80/20 rule: 80% of your meals should follow our StayFit Plate formula (protein, fiber, healthy fat), and 20% can include foods you love. Smart timing, portion awareness, and planning treats helps you stay on track without feeling restricted.
Why can’t I lose stomach fat?
Most people hit a wall with belly fat due to: Eating too little or too infrequently Chronic stress or high cortisol Poor sleep habits Blood sugar spikes and low protein intake Once you fix these root issues, stubborn fat starts to drop—without starving.
Freshly baked mandarin muffins made without eggsTable of Content
Table of Contents
The Muffin That Started It All – Mandarin Muffins, No Eggs
It started with a bowl of extra mandarins and zero eggs in the fridge. We were in the mood for something sweet but not heavy — something wholesome, zesty, and fuss-free. That’s how these Mandarin Muffins (healthy, no eggs) came to life. They’re light, fluffy, and bursting with citrus flavor — no eggs required, and no one misses them.
We get it: muffins are usually packed with butter, eggs, and sugar. But here’s the deal — with a little creativity, you can make Mandarin Muffins (healthy, no eggs) that still feel like an indulgence. These are moist from fresh mandarin juice and dairy-free yogurt, naturally sweetened with unrefined cane sugar, and topped with a toasty almond crunch. They make a great post-workout bite, school snack, or grab-and-go breakfast.
This recipe was a happy accident that quickly turned into a meal-prep staple. The aroma alone — sweet citrus with warm vanilla — makes it worth baking. And just like our Healthy Banana Bread or Chocolate Baked Oat Cups, these muffins prove that clean ingredients and real flavor go hand in hand.
Why Mandarin Muffins?
Mandarins are often overlooked in baking, but they bring something special — a natural balance of sweetness and acidity that keeps things light. The zest adds brightness, while the juice helps create that tender crumb. And because you’re skipping eggs, the moisture from the mandarins and yogurt pulls double duty.
Whether you’re avoiding eggs or just want to shake up your routine, Mandarin Muffins (healthy, no eggs) are the kind of recipe that makes you wonder why you ever baked any other way.
Egg-Free Baking Tips: What to Use Instead of Eggs in Muffins
Making Mandarin Muffins (healthy, no eggs) might sound like a challenge if you’re used to baking with eggs. But once you understand how to replace them, it becomes second nature — and honestly, kind of fun. Whether you’re vegan, allergic, or just out of eggs, these swaps let you bake confidently without compromising texture or taste.
Best Egg Substitutes for Muffins — Banana, Yogurt & More
Eggs usually act as binders and moisture-boosters. But so do plenty of other wholesome ingredients — like mashed bananas, unsweetened applesauce, flax “eggs,” and dairy-free yogurt. Each has its own strengths depending on the recipe.
Here’s a quick cheat sheet:
Egg Substitute
Best Use In
Mashed Banana
Muffins, pancakes, quick breads
Dairy-Free Yogurt
Cakes, brownies, mandarin muffins
Flax Egg (1 tbsp flax + 3 tbsp water)
Cookies, denser muffins, protein bars
Looking for a good flax-based snack? Try our Homemade Perfect Protein Bar — it’s packed with healthy fats and fiber.
Why Go Egg-Free? It’s More Than Allergies
Sure, some people skip eggs because of allergies. But others do it for lifestyle, digestion, or sustainability. Some just love a good baking experiment. Whatever your reason, baking Mandarin Muffins (healthy, no eggs) can be even more rewarding than the traditional route.
You’re not sacrificing — you’re gaining variety, nutrients, and flexibility. These muffins are also easier to make with kids (no raw egg risk) and travel well in lunchboxes.
Not sold yet? Grab one of our Berry Cheesecake Overnight Oats next time you’re meal prepping — both are proof that smart swaps = big results.
The Mandarin Muffin Recipe – Step-by-Step
Now that you know these Mandarin Muffins (healthy, no eggs) are the real deal, let’s break down how to make them. This is a simple, single-bowl recipe with minimal cleanup and lots of room to personalize.
Ingredient Breakdown & Smart Swaps
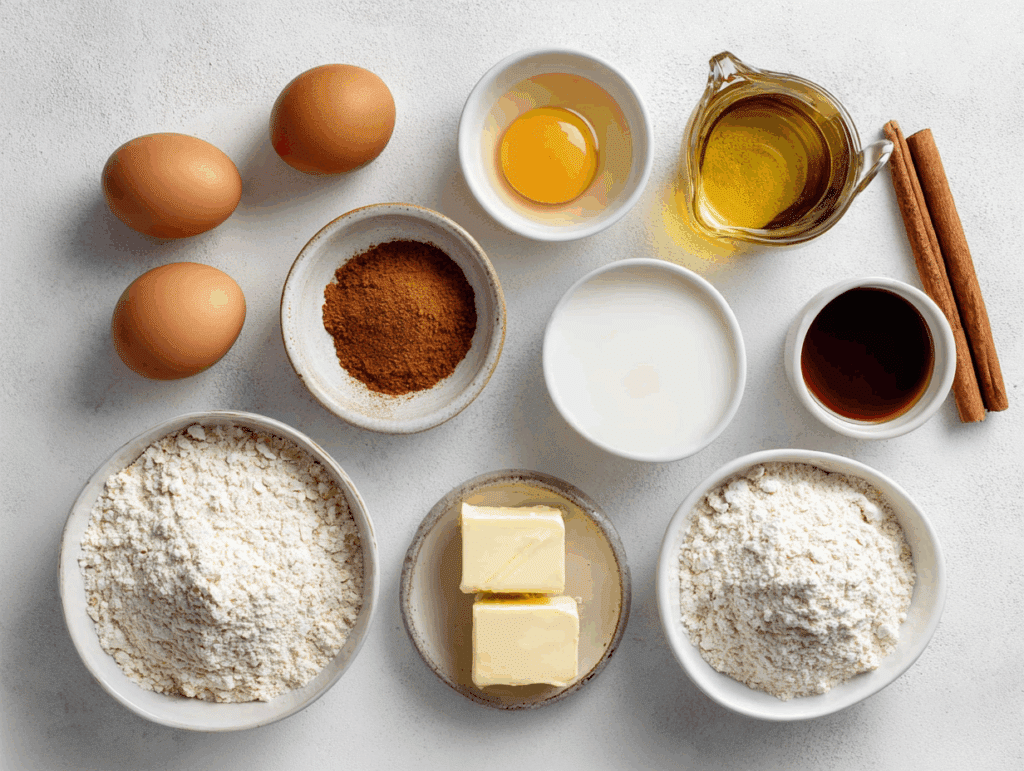
Whole food ingredients ready to make healthy mandarin muffins
Here’s what makes this recipe work — and how you can make it your own:
Self-Rising Flour – Already includes baking powder and salt, so no measuring extras.
Almond Flour – Adds moisture and a hint of nuttiness. For nut-free, sub oat flour.
Mandarin Juice – Fresh-squeezed is best! It keeps the muffins light and citrusy.
Dairy-Free Yogurt – Binds and softens. Coconut or almond-based yogurt works great.
Light Olive Oil – Helps the muffins stay moist. Can be replaced with avocado oil.
Unrefined Cane Sugar – Adds sweetness without the crash. Maple syrup is another option.
Mandarin Zest – Don’t skip this! It’s the flavor booster that brings the whole muffin together.
Vanilla Extract – A must for warm, bakery-style flavor.
Sliced Almonds – For crunch. You can swap in sunflower seeds for nut-free needs.
These ingredients work in harmony — and you don’t need eggs to pull it off. It’s just like how we reimagined pancakes with our Quick Easy Cottage Cheese Pancakes — different, but just as satisfying.
Foolproof Instructions for Moist, Zesty Muffins
Combine the dry ingredients in a large mixing bowl.Incorporate the wet ingredients until smooth.
Transfer the batter to a muffin pan with paper cups.Bake the muffins for 22-25 minutes at 350°F (180°C).
Preheat your oven to 350°F (180°C). Line a 12-hole muffin pan with paper liners and give them a light spray of oil. This helps them release easily.
Juice your mandarins (about 4 large ones) and strain out any seeds. You’ll need around ⅔ cup of juice.
Grate the zest from those same mandarins before juicing. Trust us — you want the zest.
In a large mixing bowl, whisk together the mandarin juice, zest, yogurt, oil, sugar, and vanilla.
Add the flours (self-rising + almond) and fold gently using a rubber spatula. Don’t overmix — a few lumps are fine.
Divide the batter evenly between the 12 muffin cups. Sprinkle sliced almonds on top for crunch.
Bake for 22–25 minutes, or until the tops are golden and a toothpick comes out clean.
Cool completely on a wire rack. This step helps the texture set — and they peel from the wrappers much easier.
Once cooled, store your Mandarin Muffins (healthy, no eggs) in an airtight container for up to 4 days, or freeze for up to 2 months. They’re amazing as a grab-and-go breakfast alongside one of our Chocolate Strawberry Yogurt Clusters.
The texture is moist but not dense, with a bright citrus aroma that’ll have your whole kitchen smelling like summer. And the best part? No eggs. No stress. Just real, whole ingredients that feel as good as they taste.
Variations & Banana Baking Without Eggs
One of the best things about these Mandarin Muffins (healthy, no eggs) is how flexible they are. The base batter is forgiving and adaptable — which means you can mix it up and still get great results. Whether you want to add bananas, swap citrus, or experiment with toppings, there are endless ways to make this recipe your own.
More Egg-Free Muffin Ideas to Try
Once you’ve nailed this base recipe, you can customize it to suit your mood (or pantry). Here are a few fun swaps and add-ins:
Swap mandarins for lemon juice and add poppy seeds for a classic twist.
Fold in blueberries before baking for bursts of fruity sweetness.
Mix in chopped walnuts or dates for texture and natural caramel flavor.
Add a swirl of almond or peanut butter for a protein boost.
Just keep your ratios consistent — around 1 ½ cups of dry ingredients and 1 ¼ cups of wet. And don’t be afraid to experiment. These muffins are designed to work with you, not against you.
Banana Cakes & Mandarin Muffins with No Eggs – Yes, It Works!
Let’s bust a myth: you don’t need eggs to make banana muffins or cake. In fact, bananas are one of the best egg substitutes around. They’re naturally sweet, rich in moisture, and great for binding.
For each egg you’d typically use, just swap in ¼ cup of mashed banana. It’s perfect for dense, flavorful muffins or banana snack cakes. You can even combine banana with yogurt, just like in our Mandarin Muffins (healthy, no eggs), to double up on softness and moisture.
So next time you’ve got overripe bananas and no eggs, don’t stress — you’ve already got everything you need to bake something epic.
Q1: What to use instead of egg in banana muffins?
You can use mashed banana, dairy-free yogurt, unsweetened applesauce, or flaxseed meal mixed with water. Each provides moisture and binding — just like an egg would — without changing flavor too much.
Q2: Should muffins have eggs?
Traditionally, yes. Eggs help with lift, texture, and binding. But they’re not essential. You can make soft, fluffy muffins using whole-food substitutes — just like we did in these Mandarin Muffins (healthy, no eggs).
Q3: Can I skip eggs in muffins?
Absolutely. As long as you replace them with something that offers moisture and structure, skipping eggs is no problem. Yogurt, banana, and flax eggs are all solid go-to options.
Q4: What does adding eggs to muffins do?
Eggs typically help muffins rise and hold together. But in egg-free baking, ingredients like baking powder, acidic juices (like mandarin), and creamy add-ins like yogurt can achieve similar effects.
Q5: What can I replace eggs with in a banana cake?
Mashed bananas, applesauce, or even blended silken tofu. Aim for about ¼ cup of substitute per egg. For extra lift, pair with a little baking soda or vinegar.
Q6: What can I bake with bananas and no eggs?
So many things! Muffins, pancakes, quick breads, cookies, and cakes. Bananas are naturally binding and work wonderfully in egg-free recipes — especially when paired with flour and a good fat source.
This Homemade Perfect Protein Bar is soft, chewy, and packed with wholesome ingredients. An easy no-bake snack you can make in 10 minutes with just 6 pantry staples.
Preheat the oven to 350°F (180°C). Line a 12-hole muffin pan with muffin paper cases. Lightly oil the paper cases with oil spray. Set aside.
Cut the mandarins in half, and squeeze their juice to get the amount needed. Remove any seeds from the juice if some have dropped. Set aside.
Keep the skin to grate on a hand grater and get some zest. Set aside.
In a mixing bowl, add the juice, zest, olive oil, vanilla extract, yogurt, and sugar. Whisk to combine.
Fold in self-rising flour and flour and using a rubber spatula stir to incorporate and form a smooth muffin batter.
Divide the batter evenly into the 12 muffin holes.
Bake the muffins on the center rack of your oven for 22-25 minutes at 350°F (180 °C) until a toothpick inserted in the center comes out clean and golden brown outside.
Let the muffins cool down completely on a cooling rack.
Notes
Note 1: If you don’t have self-rising flour, stir 1 1/2 cups all-purpose flour with 3 teaspoons of baking powder. I haven’t tried all-purpose gluten-free flour for this recipe, so I can’t guarantee it works.
Note 2: Almond flour adds a moist texture, proteins, and lovely flavor to the muffins. For a nut-free option, swap for an extra 1/2 cup of self-rising flour. Or swap almond flour for the same amount of cashew flour. Oat flour doesn’t work here, the muffin will be dry and dense.
Note 3: Or any light-flavor oil you love.
Note 4: Or use freshly squeezed navel orange juice. Do not use lime juice or lemon juice, it would be too acidic.
Note 5: Any plain dairy-free yogurt works; I don’t bake with dairy, but plain Greek yogurt gives a similar texture.
Note 6: Or coconut sugar (the muffins will be darker with this option) or caster sugar.
Note 7: Zest is optional. It adds a tangy flavor. Skip it if you don’t like its flavor.
Storage: Store the muffins in the fridge in an airtight cake box for up to 4 days.
Prep Time:10 minutes
Cook Time:20 minutes
Category:Snacks
Method:No Bake
Cuisine:American
Nutrition
Serving Size:1 bar
Calories:214.2kcal
Sugar:0g
Sodium:90mg
Fat:11.2g
Saturated Fat:3g
Unsaturated Fat:8g
Trans Fat:0g
Carbohydrates:18g
Fiber:2g
Protein:8g
Cholesterol:0mg
Conclusion: Real Ingredients. Real Flavor. No Eggs Needed.
If you’ve ever felt stuck trying to bake without eggs, this recipe proves you don’t need them to enjoy bakery-style results. These Mandarin Muffins (healthy, no eggs) are moist, bright, and packed with flavor — all without anything artificial, over-processed, or complicated.
Whether you’re avoiding eggs for health, allergies, or just because you ran out, this muffin is a keeper. It’s easy to prep, kid-friendly, and freezable. Plus, it tastes just as good with banana or lemon if you’re feeling creative.
We made this recipe to solve a simple problem — no eggs in the fridge. But we ended up with something way better: a go-to treat that’s fast, fresh, and full of real ingredients.
Bake it once and you’ll see what we mean. ✨ Follow us on facebook for more
Pair your pink salt trick drink with protein for best results.
We didn’t stumble onto the pink salt trick because we were looking for a shortcut. We were in the trenches—trying to lose weight, gain energy, and feel like ourselves again. Kiko was grinding at the gym but couldn’t shed that last layer of bloat. Med? Constant energy crashes and sugar cravings were sabotaging every goal. We were doing everything right—or so we thought—until one morning, everything changed.
It was day 36 of our StayFit journey, and Kiko came across a forum post raving about pink Himalayan salt in the morning. At first, it sounded gimmicky. But we’d promised each other: no more ego, no more guessing. Just real experiments, real habits, real change. So we tried it. And within 72 hours, Kiko’s puffiness around the waist went down. Med noticed less brain fog. We were hooked.
The pink salt trick is simple: warm water, pink salt, and lemon. That’s it. But the effects? Surprisingly powerful. This morning drink supports hydration, restores mineral balance, and kickstarts digestion, which can all indirectly support fat loss. It’s not a magic potion—it’s a metabolism primer. And once we saw it working, we refined it, tested it, and turned it into a daily ritual.
Pink Himalayan salt isn’t just pretty—it contains over 80 trace minerals that help regulate fluid balance, nerve signals, and hormone levels. Combine that with lemon (a natural digestive stimulant) and warm water (gentle on your gut), and you’ve got a trifecta that helps your body wake up, flush out, and focus in.
The Science Behind the Pink Salt Trick Weight Loss Recipe
We know what you’re thinking—can a pink salt trick weight loss recipe actually do anything meaningful? Surprisingly, yes—if you understand how it works with your body instead of against it.
Does the Pink Salt Trick Weight Loss Recipe Actually Work?
While no single drink can magically burn fat, the pink salt trick weight loss recipe works by optimizing hydration, balancing electrolytes, and reducing cravings—three major barriers to fat loss. When your body’s dehydrated or mineral-deficient, it misfires hunger cues, stores excess water, and slows metabolism. That’s where this simple pink salt drink shines.
The recipe—a mix of warm water, lemon, and pink Himalayan salt—delivers over 80 trace minerals, helping your body reset after sleep, restore mineral balance, and improve digestive fire. Studies show that electrolyte imbalance can increase insulin resistance, bloating, and weight gain. So even though the pink salt trick isn’t a fat burner, it’s a fat-loss facilitator—and that’s a game-changer.
Within a week of using this pink salt trick weight loss recipe, we noticed less belly puffiness, fewer snack attacks, and more stable energy during workouts. Real wins from real food.
What Happens If You Eat Pink Salt Every Day?
Used correctly, pink salt can support your goals. The key is moderation. One serving of the pink salt trick weight loss recipe uses only ¼ tsp—enough to provide minerals without overloading sodium. If you’re already eating clean, this addition can help you break through plateaus, especially when paired with high-protein meals.
The Pink Salt Trick Weight Loss Recipe + Why We Use Himalayan Salt
You asked for a recipe, and here it is—the pink salt trick weight loss recipe that helped us cut water weight, crush cravings, and feel more energized in the morning.
What Are the Three Ingredients in the Pink Salt Trick Weight Loss Recipe?
It’s beautifully simple and surprisingly powerful. Here’s how to make it:
The original 3-ingredient pink salt trick weight loss drink
The Classic Pink Salt Trick Weight Loss Recipe:
¼ teaspoon pink Himalayan salt
Juice from ½ a lemon
10–12 oz warm filtered water
Optional additions:
1 tsp raw apple cider vinegar (for gut health)
A pinch of cayenne (for metabolism)
Directions: Mix everything in a glass first thing in the morning, and sip slowly. Wait 20–30 minutes before eating breakfast to give your body time to absorb the minerals and activate digestion.
We recommend starting with 7 days straight. Use it as a daily reset to reduce bloating and balance hydration—especially after high-sodium meals, workouts, or poor sleep.
Why We Use Himalayan Salt Instead of Sea Salt
You might wonder: why not just use sea salt?
Here’s the deal. While both are less processed than table salt, pink Himalayan salt offers up to 84 trace minerals—including potassium, magnesium, calcium, and iron. These minerals help regulate insulin, control appetite, and reduce cortisol (the stress hormone that holds onto belly fat).
Most sea salt is processed and lacks those micro-nutrients. Plus, sea salt today can contain microplastics due to ocean pollution. Himalayan salt is mined from ancient seabeds, protected from modern contaminants, making it a cleaner, more mineral-rich choice for your daily detox drink.
Bottom line: when it comes to the pink salt trick weight loss recipe, we want quality. Himalayan salt gives you minerals that matter—not just sodium.
Real Results + Variations of the Pink Salt Trick Weight Loss Recipe
By now, you know the pink salt trick weight loss recipe isn’t just hype—it’s a small change with a surprisingly big ripple effect. But how do you get the most out of it? And what do real people experience when they commit?
How to Maximize the Pink Salt Trick Weight Loss Recipe
Here’s what worked best for us (and our clients):
Use the recipe daily, first thing in the morning—before coffee or food.
Pair it with light movement, like a 10-minute walk or mobility warm-up.
Delay breakfast by 20–30 minutes after drinking. This gives your digestive system time to respond and primes fat metabolism.
This trick works especially well when combined with clean eating, hydration, and sleep. It’s not magic—but it creates momentum. And momentum is the secret weapon in fat loss.
Real People, Real Wins
We’ve seen clients shed 2–4 pounds of water weight in the first week—just from reducing inflammation and fixing hydration. One reader (shout-out to Laura!) started using the pink salt trick weight loss recipe during a stressful work season. It curbed her coffee cravings, eased her afternoon bloating, and helped her drop 11 pounds in 6 weeks by sticking to her plan.
7-day transformation from bloated to sculpted using the pink salt trick weight loss recipe
For us? This drink became our reset button. On days we felt puffy or out of sync, we used it to rebalance and restart. It’s not a replacement for real food—but it is a reminder that the smallest changes often spark the biggest wins.
Real Results + Smart Ways to Use the Pink Salt Trick Weight Loss Recipe Daily
By now, you know the pink salt trick weight loss recipe is more than a morning drink—it’s a smart metabolic ritual. But what if we told you it can become a full-on kitchen swap, too?
Use Pink Salt in All Your Meals — Here’s How
We didn’t stop with just a glass of lemon-salt water. Once we started seeing results, we swapped pink salt for table salt in every meal—and never looked back.
Sure, table salt is iodized, and iodine is important for thyroid function. But guess what? You can easily meet your iodine needs through natural sources like:
Seaweed (nori, kelp, dulse)
Fish (especially cod, tuna, shrimp)
Eggs and dairy (like Greek yogurt)
Iodine-enriched multivitamins (if needed)
That means you can enjoy all the mineral benefits of pink Himalayan salt without compromising thyroid health—as long as you’re eating a balanced diet.
And of course, keep your pink salt trick weight loss recipe as your daily hydration ritual.
Real Results, Real Simplicity
From water weight wins to reduced cravings and clearer focus, this pink salt habit has changed how we start every single day. And it’s not just us. Hundreds of our readers now use the recipe alongside meals like our chocolate protein oat cups and high-fiber bowls to stay fuller, longer.
Final Thoughts: Small Ritual, Big Results
If you’ve ever woken up with a bloated belly or a puffy face, wondering why your body feels off despite your best efforts—you’re not alone. That’s exactly where we started. And the pink salt trick weight loss recipe was one of those small changes that made a huge difference.
It’s not a magic bullet. But when used consistently, it helps your body hydrate better, digest smarter, and shed that stubborn inflammation that makes you feel heavy and foggy. Add it to your morning routine, pair it with real food and movement, and watch what happens.
We’ve seen what this ritual can do firsthand—from sculpting our faces, to flattening our midsections, to simply helping us feel more in control of our health.
You deserve that too. So grab a lemon, a pinch of pink salt, and a glass of warm water. And take the first sip toward a leaner, lighter, more energized you.
The pink salt trick is a simple morning drink made with pink Himalayan salt, lemon juice, and warm water. It’s designed to boost hydration, support digestion, and balance minerals to help reduce bloating, cravings, and water retention. While it’s not a fat-burning miracle, it can kickstart your metabolism when paired with healthy habits.
Does the pink salt trick actually work?
Yes, when used consistently and responsibly, the pink salt trick weight loss recipe can support weight loss by helping your body hydrate better, reduce stress-related water retention, and minimize insulin spikes. Many people notice less facial puffiness and improved energy within a few days.
What are the three ingredients in the pink salt trick?
The classic pink salt trick weight loss recipe uses: ¼ teaspoon pink Himalayan salt Juice from ½ a lemon 10–12 oz of warm filtered water Optional add-ins include apple cider vinegar or cayenne pepper for added metabolism support.
What happens if I eat pink salt every day?
If consumed in small amounts—like in this daily drink or as a table salt replacement—pink salt can help replenish essential minerals. It’s naturally rich in potassium, magnesium, and calcium. Just be sure to get iodine from other sources like seaweed, eggs, or fish, as pink salt is not iodized like regular table salt.
If you’re deciding to get healthy, here’s one powerful piece of advice: you don’t need to give up the foods you love — you just need to get smart. Swap the bad ingredients for wholesome, healthy alternatives and you’ll still enjoy every bite, guilt-free. That’s exactly what we learned when we developed our gluten free cinnamon rolls recipe: it’s possible to eat deliciously and stay on track with your goals.
Freshly baked gluten free cinnamon rolls styled for a modern food blog
At StayFit Recipes, we believe in real food, real results, and real people. We’re The DODOs — Kiko & Med. A couple of years ago, we made a deal to transform our health in 100 days. Back then, cinnamon rolls were off-limits because of all the refined flour, sugar, and unhealthy fats. But we didn’t want to feel deprived. So we took Kiko’s passion for breakfast and baked a better version — gluten free, optionally egg and dairy free, and just as warm, soft, and sweet as the originals.
Our first attempt was messy (spoiler: the dough stuck everywhere), but every try taught us what makes gluten free cinnamon rolls soft, flavorful, and easy to roll. Now it’s one of our go-to healthy breakfast recipes, and readers love that you can find more ideas in our breakfast category and even snacks to pair with your morning coffee.
Whether you’re avoiding gluten for health reasons or just want to bake a healthier treat for your family, these gluten free cinnamon rolls won’t disappoint. Stick with this guide to learn our foolproof method, pro tips, and how to store and freeze them for later.
Now, let’s talk ingredients and the smart swaps that make all the difference.
Ingredients & Alternatives: How to Make Smart Swaps Without Sacrificing Taste
Baking gluten free cinnamon rolls at home is one of the best ways to enjoy a comforting treat while staying true to your health goals. With our easy recipe, you can make soft, fluffy, and flavorful gluten free cinnamon rolls every single time. Below you’ll find the exact ingredients and clear, step-by-step instructions for perfect results.
Ingredients You’ll Need for Gluten Free Cinnamon Rolls
To make these amazing gluten free cinnamon rolls, start with the yeast and milk mixture. Combine 1 ¼ cups (264 grams) of milk — regular or non-dairy works — with 1 tablespoon of fast-acting yeast and 1 tablespoon of organic cane sugar. Let this sit for 5–10 minutes until foamy.
Flat lay of all ingredients for gluten free cinnamon rolls, ready to bake
How to Make Gluten Free Cinnamon Rolls Step by Step
Step-by-Step Instructions for Gluten Free Cinnamon Rolls with Agave
Start by preheating your oven to 200°F and brushing your baking pan with 2 tablespoons melted butter.
Warm the milk just until lukewarm, then stir in the yeast and 2 teaspoons agave syrup. Set this aside for about 5–10 minutes to foam. This step ensures your yeast is active and will help your gluten free cinnamon rolls rise properly.
While the yeast activates, place the flour, potato starch, Expandex, baking powder, xanthan gum, and salt into the bowl of your stand mixer. Add the avocado oil, eggs (or applesauce), and 3 tablespoons of agave syrup to the bowl. Once the yeast mixture is foamy, pour it in as well.
Using the paddle attachment, mix on low to medium speed at first, then increase to high for about 1 minute. You should have a sticky, smooth dough — this is normal for gluten free cinnamon rolls.
On a lightly oiled piece of parchment, turn out the dough. Spray your hands with oil and gently press the dough into a rectangle about 14 by 12 inches.
Spread the softened butter over the dough, leaving about half an inch around the edges. Drizzle the agave syrup evenly across the surface, then sprinkle with the ground cinnamon.
Using the parchment to guide you, roll the dough tightly into a log, seam-side down. If needed, sprinkle a little potato starch on your hands to handle the dough more easily. Use a ruler to mark every 1 ½ inches and cut into 9 even rolls.
Arrange the rolls in your prepared pan, spacing them evenly. Brush the tops with 2 tablespoons of milk or cream. Cover with a towel and place in the warm oven (turned off) to rise for about 35–40 minutes.
Remove the pan, preheat your oven to 375°F, and brush the rolls with the remaining milk or cream. Bake your gluten free cinnamon rolls for 18–19 minutes if you like a gooey center or 20–22 minutes for firmer rolls.
Essential Gluten Free Cinnamon Roll Ingredients You’ll Need
Start by gathering everything you need so the process is smooth. For the yeast mixture, you’ll use warm milk — dairy or non-dairy both work — with instant yeast and a little sugar to feed it. The dough relies on a gluten free flour blend (we prefer King Arthur’s Measure for Measure), potato starch, Expandex for elasticity, organic cane sugar, avocado oil, baking powder, xanthan gum, salt, and two eggs.
If you’ve never baked gluten free before, don’t worry. Combining flours and starches properly is what gives these gluten free cinnamon rolls their signature soft bite. You can also find more inspiration for healthier baked goods in our healthy baking section.
The filling is classic: softened butter, brown sugar, and cinnamon. To finish, we like a drizzle of cream cheese frosting, but you can skip it or use a vegan version.
Here’s the full table of ingredients for easy reference:
Ingredient
Amount
Gluten free flour blend
1 ¾ cups
Potato starch
½ cup
Expandex
½ cup
Avocado oil
⅓ cup
Egg-Free and Dairy-Free Modifications That Actually Work
One of the best things about this recipe is how adaptable it is. If you’re avoiding eggs, simply substitute 3 ounces of applesauce for the two eggs — it keeps the dough moist and soft. For dairy-free, just use unsweetened almond milk and vegan butter wherever milk or butter is called for.
We’ve even tested this recipe side-by-side with these swaps and found that the flavor and texture of these gluten free cinnamon rolls hold up beautifully.
Step-by-Step: How to Make Gluten Free Cinnamon Rolls That Are Soft and Delicious
Now that you’ve got your ingredients ready, it’s time to roll up your sleeves and make the best gluten free cinnamon rolls you’ve ever tasted. Follow these simple steps and you’ll have warm, fluffy rolls ready to serve.
Preparing the Yeast and Mixing the Dough Properly
Start by warming your milk to about 110°F — warm enough to activate the yeast but not too hot. In a small bowl, mix the warm milk, instant yeast, and a tablespoon of sugar. Let it sit for 5–10 minutes until it starts to foam. This ensures your yeast is alive and ready to help your gluten free cinnamon rolls rise.
While the yeast is proofing, combine your dry ingredients: gluten free flour blend, potato starch, Expandex, cane sugar, baking powder, xanthan gum, and salt in a large mixing bowl. Whisk until everything is evenly distributed.
Next, add the eggs (or applesauce for egg-free), avocado oil, and the foamy yeast mixture to the dry ingredients. Using a stand mixer with a paddle attachment, mix on medium speed for about 3–4 minutes until the dough is smooth and slightly sticky. Don’t worry — gluten free dough won’t feel exactly like wheat dough, and it’s supposed to be softer.
Sprinkle a little extra flour on a piece of parchment paper, then turn your dough onto it and gently pat it into a rectangle. Keeping it slightly sticky helps these gluten free cinnamon rolls stay soft when baked.
Rolling, Filling, and Baking to Perfection
Step-by-step collage of gluten free cinnamon rolls recipe: from mixing dough to golden baked rolls
Now spread softened butter evenly over the surface of your dough rectangle. In a small bowl, mix the brown sugar and cinnamon, then sprinkle it generously over the buttered dough.
Using the parchment paper to help, carefully roll the dough into a log. Don’t press too hard — just keep it tight enough to hold its shape. Once rolled, use a sharp knife or dental floss to cut the log into 8–10 even rolls.
Arrange the rolls in a greased baking dish, leaving a little space between each one so they can expand. Cover the pan with a clean kitchen towel and let them rise for 30–40 minutes. Yes, even gluten free cinnamon rolls need time to rise — and this step makes them extra soft.
Preheat your oven to 350°F. Once risen, bake the rolls for about 25–30 minutes, or until they’re golden brown and smell irresistible. If you’d like, brush the tops with melted butter halfway through for even more flavor.
You can top them with cream cheese frosting or leave them as-is for a slightly lighter option. Either way, you’ll have a tray of warm, comforting gluten free cinnamon rolls perfect for breakfast, brunch, or even dessert.
Tips and Tricks for Perfect Gluten Free Cinnamon Rolls Every Time
Making gluten free cinnamon rolls that are soft, fluffy, and full of flavor isn’t hard — but there are a few smart tricks we’ve learned along the way. If you’ve ever baked gluten free and ended up with dense or dry results, these tips will help you fix that for good.
The Secret Techniques for Soft, Fluffy Results
The number one secret to soft gluten free cinnamon rolls is hydration. Gluten free flours are more absorbent than wheat flour, so keeping the dough slightly sticky is key. Don’t be tempted to add too much extra flour when rolling it out — it’s supposed to feel a little tacky.
Another tip: give your dough time to rise. Many people think gluten free dough doesn’t rise, but that’s not true. As long as your yeast is active and your environment is warm enough (around 75–80°F), the rolls will puff up beautifully.
We also recommend brushing the tops with a little melted butter before baking. This keeps them moist and adds a rich, golden color.
Finally, bake just until they’re golden brown. Overbaking is one of the most common mistakes and leads to hard rolls. Use a toothpick to check the center roll — it should come out clean, and the rolls should feel springy.
Common Mistakes to Avoid for Better Texture and Flavor
One common mistake is skipping the proofing step. Even though gluten free dough won’t double in size the same way wheat dough does, it still needs time for the yeast to work its magic and create a light texture. Be patient — it’s worth the wait.
Another pitfall: using the wrong flour blend. Not all gluten free blends are equal. We’ve had the best results with King Arthur’s Measure for Measure or similar high-quality blends. Cheap or unbalanced blends can result in gritty or crumbly rolls.
Finally, don’t skip the xanthan or guar gum. These ingredients help mimic the elasticity that gluten provides. Leaving them out will make your rolls fall apart.
Storing and Freezing Gluten Free Cinnamon Rolls the Right Way
One of the best things about these gluten free cinnamon rolls is that they’re just as good the next day — if you store them properly. Whether you’re making a big batch ahead of time or saving leftovers, these simple tips will keep your rolls soft and satisfying.
Best Ways to Store and Reheat Without Drying Them Out
Gluten free baked goods tend to dry out faster than their wheat-based counterparts. To prevent that, let your cinnamon rolls cool completely after baking, then cover them tightly with plastic wrap or store them in an airtight container. They’ll stay fresh at room temperature for up to two days.
If you need them to last longer, refrigerate them for up to five days. Before serving, warm them gently in the microwave for 10–15 seconds or in a 300°F oven for about 5 minutes. This brings back the soft, fluffy texture and makes the cinnamon filling gooey again.
For more reheating ideas and tips, you can also check our snacks category — many of our healthy treats are freezer-friendly too.
How to Freeze and Enjoy Later
If you want to save a batch for another week, freezing your gluten free cinnamon rolls is a great option. Once baked and cooled, wrap each roll individually in plastic wrap and place them in a freezer-safe bag. They’ll keep well for up to two months.
Warm gluten free cinnamon roll served at a cozy breakfast table
When you’re ready to enjoy them, let them thaw at room temperature for about an hour, then warm them in the oven or microwave as above. Freezing works especially well if you like having healthy breakfast options ready on busy mornings — just like our breakfast recipes that make meal prep a breeze.
Proper storage and gentle reheating keep your gluten free cinnamon rolls tasting just as fresh as the day you made them. Next, let’s answer some of the most common questions we get about making, baking, and enjoying these rolls.
7. Roll up dough using parchment, seam-side down. Cut into 9 even rolls.
8. Place rolls in prepared pan, brush with 2 tbsp milk/cream. Cover and proof in warm oven for 35–40 minutes.
9. Remove pan, preheat oven to 375°F. Brush rolls with remaining milk. Bake 18–22 minutes.
10. Let cool slightly, then serve warm.
Notes
Sticky dough is normal — don’t add more flour.
Use applesauce and plant-based milk/butter for egg- and dairy-free.
Store covered at room temp for 2 days or refrigerate up to 5 days.
Prep Time:25 minutes
Cook Time:20 minutes
Category:Breakfast
Method:Baking
Cuisine:American
Nutrition
Serving Size:1 roll
Calories:210
Sugar:10g
Sodium:150mg
Fat:8g
Saturated Fat:2g
Unsaturated Fat:5g
Trans Fat:0g
Carbohydrates:32g
Fiber:3g
Protein:3g
Cholesterol:30mg
FAQs About Gluten Free Cinnamon Rolls
We get a lot of questions about making and baking gluten free cinnamon rolls. Here are clear answers to the most common ones, so you can feel confident every time you make them.
Do Gluten Free Cinnamon Rolls Still Need to Rise?
Yes! Even though there’s no gluten to develop, the yeast still needs time to create air pockets in the dough, making the rolls soft and fluffy. Don’t skip the rise — usually 30–40 minutes in a warm spot is enough. This step is key to achieving the perfect texture.
How Long Should I Let the Cinnamon Roll Dough Rise?
After you’ve rolled and cut your dough, place the rolls in your greased pan and let them rise until slightly puffy — about 30–40 minutes. They won’t double in size like wheat rolls, but you’ll see some lift. This short rise is what helps make these gluten free cinnamon rolls tender and airy.
How Do I Know When the Homemade Gluten Free Cinnamon Rolls Are Done?
Bake your rolls at 350°F for 25–30 minutes. They’re done when the tops are golden brown, the filling is bubbly, and the center roll feels springy to the touch. If you insert a toothpick, it should come out clean. Overbaking can make them dry, so keep an eye on them toward the end of baking time.
Why Are My Gluten Free Cinnamon Rolls Hard?
If your rolls turn out hard, it’s often because too much flour was added or they were baked too long. Gluten free dough is naturally sticky — resist the urge to over-flour while rolling it out. Also, store them properly and avoid overbaking to keep them soft.
Conclusion: Yes, You Can Have Soft, Delicious Gluten Free Cinnamon Rolls
Getting healthy doesn’t mean giving up comfort foods — it just means making smarter choices. These gluten free cinnamon rolls prove you can enjoy every warm, gooey bite while sticking to your goals. With the right flour mix, a little patience, and our tested method, you’ll bake rolls that are soft, flavorful, and just as satisfying as the originals.
Whether you make them egg-free, dairy-free, or as written, you’ll have a tray of cinnamon rolls that are perfect for breakfast, brunch, or dessert. For more wholesome ideas like this, visit our healthy baking or breakfast sections.
Happy baking — and remember, the best way to stay on track is to make healthy eating enjoyable
When we traveled to Italy last summer, we stopped at a little restaurant tucked away on a quiet street. Scanning the menu, I chose the sous vide chicken breast as a healthy option, expecting something simple. But the first bite left me shocked — tender, juicy, and packed with flavor.
I’d always thought sous vide was just for fancy red meat cuts. Curious, I asked the chef about it, and he happily explained how sous vide chicken breast is one of his favorite tricks for perfect results every time.
Since that trip, it’s become a staple in my kitchen. And because good things shouldn’t be kept secret, I’m sharing my method with you today — so you can experience the same unforgettable flavor, anytime. This sous vide chicken breast recipe is beginner-friendly and easy to adapt for different marinades and serving ideas.
Ingredients and Step-by-Step Instructions for Sous Vide Chicken Breast
Before you get started, here’s everything you need to make this tender, flavorful sous vide chicken breast with a honey-lime-chili marinade.
Ingredients
2 boneless, skinless chicken breasts
1 tablespoon honey
1 tablespoon chili powder
1 tablespoon lime juice
1 tablespoon olive oil
1 teaspoon molasses
1 teaspoon coriander
1 teaspoon salt
½ teaspoon garlic powder
These simple pantry ingredients pack a ton of flavor.
Step-by-Step Instructions
Marinate chicken breasts with honey, lime, chili powder, and spices
Sear and serve. When the chicken is done, remove it from the bag, pat dry with paper towels, and sear in a hot skillet with a little oil for 1–2 minutes per side for a golden crust. Slice and serve hot.
Prepare the marinade. In a small bowl, whisk together the honey, chili powder, lime juice, olive oil, molasses, coriander, salt, and garlic powder to make a smooth marinade.
Coat the chicken.
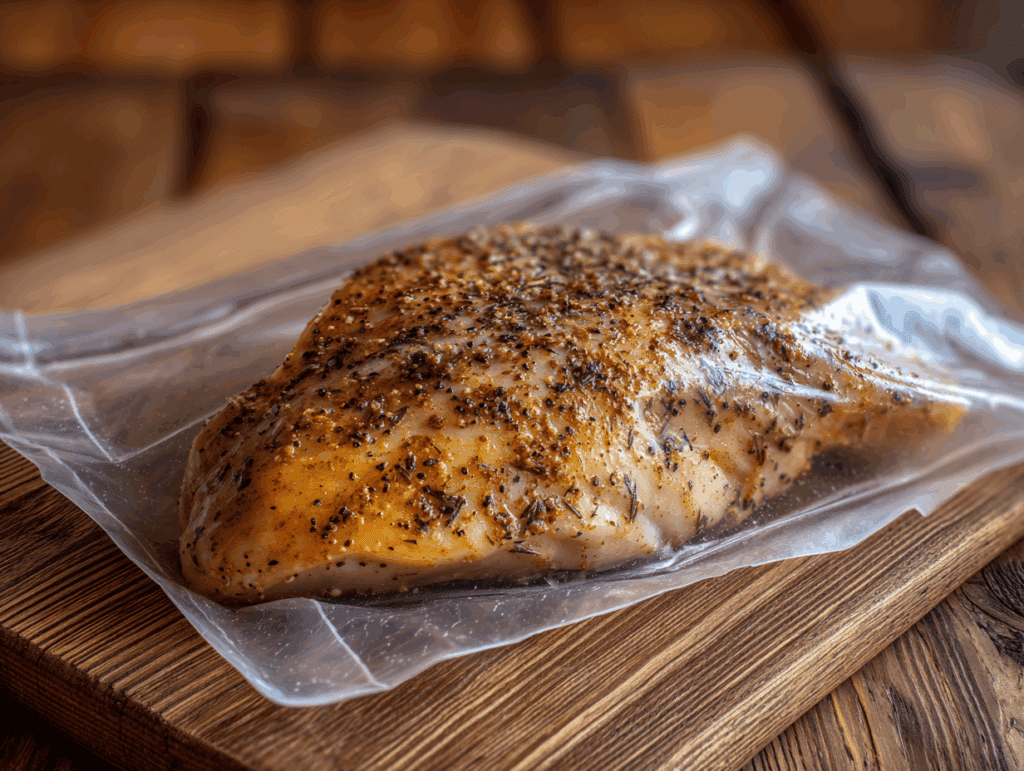
Chicken breasts sealed in a bag and ready for sous vide bath
Place the chicken breasts in a shallow dish or directly into a sous vide bag. Pour the marinade over the chicken and turn to coat evenly. Let sit for 10–15 minutes while you heat the water bath.
Preheat the sous vide. Fill your container or pot with water and set your sous vide machine to 150°F. Let it come to temperature before adding the chicken.
Seal the chicken. If using a vacuum sealer, seal the bag tightly. If using a zip-top freezer bag, remove as much air as possible with the water displacement method.
Cook in sous vide bath. Place the sealed chicken in the water bath and cook for 1½–4 hours. Make sure the bag stays fully submerged.
When it comes to sous vide chicken breast, getting the time and temperature right is key. The beauty of this method is how forgiving it is — you can leave the chicken in longer without worrying about it drying out or overcooking.
What is the recommended sous vide chicken breast temp?
For most home cooks, 150°F is the sweet spot for sous vide chicken breast. At this temperature, the chicken turns out tender, juicy, and fully cooked while maintaining its natural texture. Some chefs prefer going as low as 145°F for even softer meat, though it may appear a little pink. If you like firmer chicken, 155°F works too, though it can lose a bit of juiciness.
Here’s a simple temperature reference:
Temperature
Texture & Notes
145°F
Extra tender, slightly pink
150°F
Juicy, tender, fully cooked
155°F
Firmer, less juicy
No matter which temperature you pick, sous vide keeps the chicken consistent from edge to center. Unlike roasting or grilling, you don’t get dry spots or uneven doneness.
How long should you cook chicken breast in a sous vide?
Can You Sous Vide Frozen Chicken Breast?
Absolutely! One of the great benefits of a sous vide chicken breast recipe is how forgiving it is — even if you start with frozen chicken breast, the results are still juicy and tender. Simply add about 30 extra minutes to your cook time to ensure the chicken reaches the proper internal temperature all the way through. This makes it perfect for busy weeknights or meal prep when you forgot to thaw your chicken in advance.
One of the biggest advantages of sous vide chicken breast is how flexible the cooking time can be. For chicken breasts about 1 inch thick, 1½ hours in the water bath is just right. That gives the meat enough time to reach the target temperature and break down slightly for tenderness.
However, you can leave the chicken in the bath for up to 4 hours if needed — perfect for busy schedules. The steady water temperature ensures it won’t overcook, so you have some freedom.
For thicker breasts (closer to 1½ inches), you may want to add an extra 15–30 minutes just to be sure it cooks through evenly.
Cooking Multiple Chicken Breasts at Once
One of the best things about sous vide chicken breast is how easy it is to scale up. Whether you’re cooking for one or meal prepping for the week, this method delivers the same tender, juicy results every time — even when cooking a big batch. This also applies if you’re starting with frozen chicken breast — just remember to extend the cooking time slightly so every piece reaches a safe temperature.
How many chicken breasts can you sous vide at once?
You can cook as many chicken breasts as will comfortably fit in your water bath, as long as you don’t overcrowd the bag or block water circulation. Most standard sous vide setups can handle at least 4–6 boneless breasts at a time. Arrange them in a single layer inside your bag to ensure even cooking. If you’re cooking a larger batch, use multiple bags and make sure they aren’t stacked on top of each other.
The key here is water flow — the sous vide circulator needs room to move water around each piece of chicken. If you cram too many in, some parts may not cook properly. If you’re using a large container like the 12-quart Rubbermaid bucket, you can fit even more, making it perfect for family dinners or meal prep.
For more batch cooking tips and recipes, check out our meal prep ideas, where we share ways to make your week healthier and easier.
Batch cooking for meal prep
Sous vide chicken breast is ideal for meal prepping. Cook a big batch on Sunday, then store it in the fridge for up to 4 days or freeze for longer. Each piece stays juicy and ready to eat all week, making it perfect for salads, wraps, or quick dinners.
Pro tip: after sous vide, chill extra chicken in an ice bath before storing. This stops cooking instantly and keeps the texture perfect when you reheat. Pair it with sides from our healthy lunch recipes for balanced meals all week long.
Knowing When Sous Vide Chicken is Done
One of the reasons people love sous vide chicken breast is how foolproof it feels. But if you’re new to the method, you might wonder how to tell when it’s actually ready. Here’s what to look for.
How do you know when sous vide chicken is done?
Because sous vide cooks chicken at a low, steady temperature, the inside may still have a faint pink hue when it’s fully cooked — and that’s perfectly safe if you followed the right time and temperature. After at least 1½ hours in the sous vide bath at 150°F, your chicken breast is cooked through.
When you remove it from the bag, it should feel tender to the touch and pull apart easily with a fork. You can also double-check with an instant-read thermometer if you like — it should read at least 150°F. The beauty of sous vide is that the chicken can’t get hotter than the water temperature, which makes overcooking impossible.
If you’re looking for more guidance on safe cooking, you might also enjoy our tips in healthy cooking basics.
Tips for perfect results every time
For the best flavor and presentation, don’t skip the finishing step. Once your sous vide chicken breast is cooked, pat it dry and sear it quickly in a hot skillet with a little olive oil. This gives you a beautiful golden crust and locks in flavor.
Another tip: season generously before cooking. The honey, lime, and chili powder rub in this recipe is a perfect example of how sous vide locks in bold, bright flavors.
Essential Sous Vide Equipment
One reason sous vide chicken breast is such a great addition to your cooking routine is that it doesn’t require a lot of fancy gear. You only need a few key tools — and you probably already have most of them in your kitchen.
What sous vide equipment do you really need?
At its core, sous vide cooking only requires three things:
A sous vide immersion circulator: This is the small device that heats and circulates the water. We love the Anova Sous Vide for its reliability and compact size.
A container or pot: Any large pot you already own will work fine for sous vide. If you plan to cook larger batches often, a dedicated 12-quart plastic container makes it easier to fit more food.
Cooking bags: You can use standard freezer-safe zip-top bags and remove the air with the water displacement method. Or, if you prefer reusable options, silicone bags like Stasher work beautifully.
That’s it — no huge investments required. With these basics, you’re ready to start making sous vide chicken breast at home.
Recommended tools and upgrades
If you cook sous vide regularly, there are a few upgrades worth considering:
A vacuum sealer and pre-cut vacuum bags for quick, secure sealing with no leaks.
Bag clips to attach bags to the side of your container and keep them fully submerged.
A lid or plastic wrap for your container to prevent evaporation during longer cooks.
These extras aren’t necessary to get started, but they can make the process even more convenient and efficient.
Serving and Storing Sous Vide Chicken Breast
Once your sous vide chicken breast is perfectly cooked, you’ll want to make the most of it. The great thing about this method is how versatile and easy it is to store for later.
Best ways to serve sous vide chicken breast
Sous vide chicken breast shines in just about any dish. Slice it thin and serve it over a big green salad with your favorite vinaigrette. Or tuck it into whole-grain wraps with crisp veggies and a smear of hummus for a quick lunch. You can also pair it with roasted vegetables and quinoa for a balanced, satisfying dinner.
Because the chicken stays so moist, it’s also a hit in hot dishes like stir-fries or grain bowls — just add it at the very end so it doesn’t dry out. If you want to try more serving ideas, check our healthy dinner recipes for plenty of inspiration.
How to store and reheat
Sous vide chicken breast stores beautifully. If you’re eating it within 4 days, keep it sealed in an airtight container in the fridge. For longer storage, freeze individual portions for up to 2 months.
When reheating, skip the microwave if you can. Instead, gently warm the chicken in a hot water bath (below 150°F) or in a covered skillet with a splash of broth. This keeps the meat juicy and flavorful, just like when it was freshly cooked.
FAQ
What is the recommended sous vide chicken breast temp?
We recommend cooking sous vide chicken breast at 150°F. This gives you juicy, tender, fully cooked chicken that’s safe to eat while maintaining great texture.
How long should you cook chicken breast in a sous vide?
Cook your chicken breast for 1½ hours for perfect results, though you can safely leave it in the bath for up to 4 hours without overcooking thanks to the steady water temperature.
How many chicken breasts can you sous vide at once?
You can sous vide as many chicken breasts as will fit in your container in a single layer, as long as water can circulate freely around each piece.
How do you know when sous vide chicken is done?
If your chicken has been in the bath for at least 1½ hours and reaches 150°F internally, it’s fully cooked even if slightly pink. It should be tender and easy to shred with a fork.
Can I sous vide frozen chicken breast?
Yes! Cooking a frozen chicken breast sous vide works beautifully — just add 30 minutes to the cooking time. The even temperature control ensures the chicken stays juicy and tender every time.
Juicy, tender sous vide chicken breast with a honey-lime-chili marinade. Foolproof, flavorful, and perfect every time.
Ingredients
Scale
2 boneless, skinless chicken breasts
1 tablespoon honey
1 tablespoon chili powder
1 tablespoon lime juice
1 tablespoon olive oil
1 teaspoon molasses
1 teaspoon coriander
1 teaspoon salt
½ teaspoon garlic powder
Instructions
1. Prepare the marinade: In a small bowl, whisk together honey, chili powder, lime juice, olive oil, molasses, coriander, salt, and garlic powder.
2. Coat the chicken: Place chicken breasts in a dish or sous vide bag and coat evenly with marinade.
3. Preheat sous vide: Fill your container with water and set sous vide to 150°F.
4. Seal chicken: Vacuum seal or remove air with water displacement method.
5. Cook in sous vide bath: Submerge chicken and cook for 1½–4 hours.
6. Sear and serve: Pat dry and sear in a hot skillet for 1–2 minutes per side. Slice and enjoy.
Notes
For more flavor, marinate chicken overnight in the refrigerator.
Store cooked chicken in an airtight container in the fridge for up to 4 days or freeze for up to 2 months.
Prep Time:10 minutes
Cook Time:1 hour 30 minutes
Category:Dinner
Method:Sous Vide
Cuisine:American
Nutrition
Serving Size:1 chicken breast
Calories:240
Sugar:6g
Sodium:620mg
Fat:7g
Saturated Fat:1g
Unsaturated Fat:5g
Trans Fat:0g
Carbohydrates:8g
Fiber:1g
Protein:36g
Cholesterol:85mg
Conclusion
Sous vide chicken breast is one of the simplest ways to take your cooking to the next level. With just a few tools, you can make tender, juicy, perfectly seasoned chicken every single time — whether you’re cooking one or a whole week’s worth.
Since that first bite in Italy, sous vide chicken breast has been one of my favorite ways to eat healthy and still enjoy every meal. And now it’s yours too. Follow the steps in this guide and discover why this method is no longer just a restaurant secret — it’s the smart way to cook at home.
If you’ve ever struggled to cook steak perfectly — juicy in the center, evenly cooked from edge to edge — this sous vide steak guide is exactly what you need. With sous vide, you can achieve steakhouse-quality results every single time without stress or guesswork.
We’re Kiko and Med from StayFit Recipes, and we know how hard it is to stick to clean eating when your favorite meals feel out of reach. That’s why we put together this sous vide steak guide — to help you enjoy steak that’s healthy, tender, and full of flavor. During our 100-day fitness challenge, we discovered sous vide cooking and instantly fell in love. It gave us lean, perfectly cooked steak without extra oil or overcooking.
This step-by-step sous vide steak guide will walk you through everything: choosing the right cut, setting the perfect temperature, and finishing with a flawless sear. Whether you’re cooking for one or hosting a dinner party, this guide will help you master steak the StayFit way — delicious, healthy, and stress-free.If you’re ready to change the way you cook steak forever, keep reading — and check out our other sous vide recipes to see what’s possible.
Why Sous Vide Your Steak?
Cooking steak can be tricky. Pan-searing often leads to overcooked edges and an underdone center. Grilling can dry out a beautiful cut in minutes. That’s why this sous vide steak guide is such a game changer — it shows you how to cook steak perfectly every time.
Consistency and precision
This sous vide steak guide helps you lock in precise doneness, so your steak comes out just the way you like it, from edge to edge. By cooking steak in a temperature-controlled water bath, you avoid undercooking, overcooking, and uneven results.
Following our Sous Vide Ribeye Steak example, you’ll see why so many rely on a sous vide steak guide to take the guesswork out of steak night.
Juicier, healthier steak
By sealing steak in its juices and cooking gently, this sous vide steak guide ensures maximum tenderness and flavor. Even leaner cuts stay moist, and you only need a little oil to sear at the end. That means fewer calories but all the satisfaction.
Just like our Salt Beef Sous Vide recipe, the same principles apply — cooking low and slow for unbeatable results.
With this sous vide steak guide, you’ll feel confident cooking steak anytime, knowing it’ll be juicy, healthy, and consistently delicious.
How to Select the Right Steak for Sous Vide
Choosing the right cut is the first step toward success, and this sous vide steak guide will help you pick the perfect one. The beauty of sous vide is that it works with nearly any steak, but some cuts perform better depending on your goal.
Ingredients for sous vide steak prep
Best cuts to use
This sous vide steak guide recommends tender, flavorful cuts for short cooks of 1–3 hours:
Ribeye: rich and marbled for amazing flavor
New York Strip: leaner, firmer, yet still tender
Filet Mignon: buttery soft and ideal for special occasions
For longer cooks (6–8 hours or more), tougher cuts like flank, hanger, or skirt steak benefit from the extended time. They’ll become tender without losing their meaty flavor.
Thickness and fat content
A good sous vide steak guide also suggests aiming for steaks about 1–1.5 inches thick. Thicker steaks take longer to cook evenly, while very thin cuts can overcook during searing. Fatty cuts like ribeye render beautifully and stay juicy, while leaner cuts benefit from adding a pat of butter or herbs in the bag.
Prep matters
Before cooking, trim any excess fat and pat the steak dry. Season with salt, pepper, and herbs like thyme or rosemary. This sous vide steak guide also recommends using a vacuum sealer for the best results, but a heavy-duty zipper bag with the water displacement method works too.
By selecting and prepping your steak properly, this sous vide steak guide sets you up for success in the next step: choosing the perfect temperature.
How to Select the Right Temperature for Sous Vide Steak
Temperature is the most important decision you’ll make when cooking sous vide, and this sous vide steak guide will help you get it right. The beauty of sous vide is that you can choose your exact level of doneness and know your steak will be cooked evenly from edge to edge.
Why temperature matters
This sous vide steak guide is all about precision. Every degree makes a difference in texture and flavor. For example, a ribeye cooked at 129°F is beautifully medium-rare, with a tender and juicy bite. Cook that same steak at 140°F, and it’ll come out closer to medium, with a firmer texture.
A proper sous vide steak guide teaches you to avoid going too high. Temperatures above 145°F can dry out even the best cuts, defeating the purpose of sous vide cooking. Instead, stay within the recommended ranges below for perfect results.
Recommended temperature ranges
This sous vide steak guide suggests the following target temperatures for steak:
Rare: 125°F — deep red, very tender
Medium-rare: 129°F — pink and juicy
Medium: 135°F — slightly firmer, light pink
Medium-well: 145°F — less pink, firmer texture
Well-done: 155°F+ — fully cooked through, but can be dry
For most cuts, medium-rare (129°F) is the sweet spot, balancing flavor, moisture, and tenderness. That’s why our Sous Vide Ribeye Steak and Salt Beef Sous Vide recipes both use similar gentle heat to protect the meat’s natural juices.
By using this sous vide steak guide, you can confidently set your water bath knowing the result will be exactly what you expect — every time.
Does Timing Matter for Sous Vide Steak?
Many people believe that sous vide cooking is “set it and forget it,” but this sous vide steak guide explains why timing still matters. While sous vide gives you a bigger window of perfection than traditional cooking, leaving your steak in the water bath too long can still affect the texture.
Minimum and maximum times
This sous vide steak guide recommends letting your steak cook at least long enough to heat through evenly. For most steaks, that’s about 1 hour per inch of thickness. Thinner steaks can be ready in just under an hour, while thicker cuts may need closer to 2–3 hours.
But don’t assume you can leave it forever. After about 4 hours, even tender cuts can start to turn mushy as the muscle fibers break down too much. This sous vide steak guide helps you strike the right balance so your steak stays juicy and tender without becoming soft or grainy.
Holding time for flexibility
One advantage of this sous vide steak guide is that it teaches you how to use the technique’s flexibility. If your guests are running late, or you’re not quite ready to eat, you can hold your steak in the water bath at the target temperature for up to 30–60 minutes past its optimal time without much noticeable change.
This makes meal prep and entertaining stress-free. Whether you’re following our sous videchicken breast or experimenting with something new, this sous vide steak guide ensures you know exactly when your steak is ready — and when it’s time to take it out.
Timing might be more forgiving with sous vide, but as this sous vide steak guide shows, it’s still an essential part of getting steak just right.
Temperature and Timing Charts for Sous Vide Steak Cuts
One of the biggest advantages of using this sous vide steak guide is having clear, reliable reference points for any cut of steak. With sous vide, precision is everything — and knowing the right temperature and time for your steak guarantees perfect results every time.
Why charts are essential
Even though sous vide cooking is forgiving, following a chart like the one in this sous vide steak guide helps you avoid guesswork. Different cuts and thicknesses require slightly different times and temperatures to reach their full potential. A thick ribeye won’t behave the same as a thin sirloin, and lean cuts like filet mignon need a little more care to keep them juicy.
Recommended sous vide steak temperatures and times
This sous vide steak guide recommends the following settings for common cuts and doneness levels:
Cut
Doneness
Temp
Time
Ribeye
Medium-rare
129°F
1–3 hours
Filet Mignon
Medium
135°F
1–2 hours
Sirloin
Medium-well
145°F
1–2 hours
When using this sous vide steak guide, keep in mind that you can hold the steak at the desired temperature a little longer if needed, but avoid going beyond 4 hours for tender cuts to maintain texture.
This sous vide steak guide isn’t just about cooking — it’s about giving you the confidence and clarity you need to serve steak exactly the way you like it.
How to Cook a Steak Sous Vide, Step by Step
This sous vide steak guide breaks down the process into easy steps so you can cook steak perfectly every time. Follow along, and you’ll feel like a pro in no time.
Step 1: Preheat the Water Bath
Set your sous vide precision cooker to the desired final temperature (use the chart earlier in this sous vide steak guide). Wait for the water bath to reach temperature before adding the steak. This ensures even cooking from the start.
Step 2: Season Generously
Season your steak all over with salt and pepper. Don’t forget the edges — this sous vide steak guide recommends full coverage for better flavor. You can add a sprinkle of garlic powder or other spices if you like.
Step 3: Add Aromatics
Place your seasoned steak in a sous vide bag. Add a few sprigs of rosemary, thyme, or even sliced shallots to the bag for extra aroma and flavor.
Step 4: Seal the Bag
Use a vacuum sealer if you have one. If not, follow the water displacement method described earlier in this sous vide steak guide: slowly lower the bag into water to push out the air, then seal just above the water line.
Step 5: Cook in the Water Bath
Gently submerge the sealed steak into the water bath. Make sure it’s not blocking the circulator and is fully underwater. Cook for the time recommended in this sous vide steak guide, depending on thickness and doneness.
Step 6: Remove and Dry
When done, remove the steak from the bag and place it on a paper towel–lined plate. Pat it dry very well — this sous vide steak guide emphasizes this step because moisture can prevent a good sear.
Step 7: Finish on the Stovetop
Step 4 of sous vide steak cooking
Heat a heavy skillet over high heat until smoking. Add a tablespoon of neutral oil, then lay the steak down gently. Sear for 15–30 seconds per side, flipping as needed until a crust forms. For added richness, toss in a knob of butter and fresh herbs during the last flip.
Step 8: Sear the Edges
Hold the steak with tongs and roll it along the edges in the pan to brown the sides. This takes about 45 seconds and makes your steak look (and taste) professional.
Step 9: Rest and Serve
Place the steak on a cutting board. You can serve immediately — sous vide steak doesn’t need a long rest. Slice against the grain and serve hot, with a little flaky sea salt on top.
This sous vide steak guide shows you just how easy it is to master steak at home, from prep to perfect sear. Now you’re ready to impress every time.
Finishing a Sous Vide Steak on the Stovetop
Searing is where your steak truly comes alive — adding a golden crust, deeper flavor, and irresistible aroma. This sous vide steak guide explains how to finish your steak on the stovetop like a pro.
Why sear after sous vide?
Sous vide cooks steak perfectly on the inside but leaves the outside pale and soft. This sous vide steak guide shows you how a quick, high-heat sear creates that classic steakhouse look and taste without overcooking the center.
Preheat your skillet
Turn on your kitchen vent and open a window — it’s about to get smoky. Place a heavy cast-iron or stainless-steel skillet on your hottest burner. Add a tablespoon of high-smoke-point oil (like canola or vegetable). Wait until the skillet is shimmering and just starting to smoke.
Sear quickly for maximum crust
Lay your steak in the skillet with tongs, pressing it down gently. Sear for 15–30 seconds on the first side, then flip and repeat on the other side. Flip every 15–30 seconds until a deep brown crust forms, usually 1–2 minutes total.
This sous vide steak guide recommends adding a knob of butter and a sprig of rosemary during the final flip for added richness and aroma. Tilt the pan and spoon the hot butter over the steak for extra flavor.
Don’t forget the edges
Use your tongs to hold the steak upright on its edges, rolling it along the skillet until all sides are seared. This adds even more texture and makes your steak presentation-worthy.
This sous vide steak guide proves you don’t need a fancy setup to create steakhouse magic — just a hot skillet and the right technique. Searing is the final step in transforming your perfectly cooked steak into a masterpiece.
Finishing a Sous Vide Steak on the Grill
If you love a smoky flavor and gorgeous grill marks, this sous vide steak guide has you covered. Finishing your sous vide steak on the grill combines precision cooking with the irresistible taste of open flames.
Why finish on the grill?
While the stovetop is convenient, the grill adds a unique, charred flavor and an outdoor cooking vibe. This sous vide steak guide suggests the grill for cookouts, summer meals, or anytime you want that authentic barbecue feel.
Set up for high heat
Your goal is intense, direct heat to sear the outside without overcooking the center. This sous vide steak guide recommends lighting a full chimney of charcoal and spreading the coals over one half of the grill. Let the grill preheat for 5–10 minutes until the grates are hot and clean. On a gas grill, set one side to the highest heat and allow it to preheat fully. Oil the grates with tongs and a paper towel for a non-stick surface.
Sear and rotate
Place your steak directly over the hottest part of the grill. Sear each side for about 30 seconds, flipping and rotating every 15–30 seconds to build even grill marks and prevent flare-ups. If the flames rise too high, move the steak briefly to the cooler side until they die down.
Serve immediately
Once you’ve achieved a deep brown crust with nice grill marks, remove the steak from the grill and serve immediately. This sous vide steak guide reminds you there’s no need to rest — sous vide locks in the juices already.
By finishing your steak on the grill, you get the best of both worlds: the precision of sous vide with the flavor of fire. This sous vide steak guide ensures your steak always turns out beautifully, no matter where you cook it.
Frequently Asked Questions
These are the most common questions readers ask about cooking steak with sous vide. This sous vide steak guide answers them all so you can feel confident every step of the way.
How long do I have to sous vide a steak?
Technically, you only need to cook long enough for the steak to heat through evenly — usually 1–2 hours. But this sous vide steak guide explains that holding it a little longer (up to 3–4 hours) won’t hurt and can even improve tenderness on some cuts.
What is the downside of sous vide?
The biggest downside this sous vide steak guide notes is that sous vide takes longer than traditional methods. You also need to sear afterward to get a crust, and if you cook too long, the texture can become mushy. It also requires some equipment, like a sous vide machine and bags.
Why is my steak tough after sous vide?
If your steak turns out tough, this sous vide steak guide suggests checking your temperature — cooking above 140°F can dry it out. You might also be using a very lean or tough cut without adjusting time properly. Always finish with a sear for the best texture.
Is sous vide safe?
Absolutely. Cooking steak with sous vide at temperatures above 130°F is safe and kills harmful bacteria. This sous vide steak guide follows all food safety guidelines so you can cook worry-free.
Can you sous vide frozen steak?
Yes! One of the perks of this sous vide steak guide is that you can cook steak straight from frozen. Just add 30–60 minutes to the recommended cook time to account for thawing.
Do you have to sear after sous vide?
Technically no, but this sous vide steak guide strongly encourages it. Searing creates the caramelized crust and rich flavor that make steak irresistible. Without it, the outside of your steak will look pale and feel soft.
Conclusion
With this sous vide steak guide, you now have everything you need to make steak night stress-free and delicious. From picking the perfect cut to setting the right temperature and finishing with a gorgeous crust, every step is covered to help you feel confident in the kitchen. Whether you prefer stovetop searing or smoky grill marks, this guide ensures your steak is juicy, tender, and perfectly cooked every time.
We all have that one snack we keep coming back to — for us, it’s Perfect Bars. Soft, creamy, just the right balance of sweet and salty, and packed with protein to keep you going. But at $3–4 a bar? Not exactly sustainable.
That’s why we decided to take matters into our own hands. After a little kitchen experimenting, we created our own Homemade Perfect Protein Bar — and we couldn’t be happier with the results. This easy, no-bake recipe gives you everything you love about the original: amazing taste, satisfying texture, and a solid nutritional boost. And it’s made with just six everyday ingredients you probably already have.
In this guide, we’ll walk you through exactly how to make these bars step-by-step. You’ll learn what goes into a Perfect Bar, how to store them, how to customize for dietary needs, and what makes them so irresistible. By the end, you’ll have the perfect snack for busy days, workouts, or just keeping your energy steady — without the hefty price tag.
Our Story & Why We Made the Homemade Perfect Protein Bar
How This Homemade Perfect Protein Bar Changed Everything
We’re Kiko & Med — and not too long ago, we were stuck. Kiko was putting in the hours at the gym but still felt drained. Med was underweight, running out of steam by mid-afternoon, and frustrated. We knew we needed better fuel to feel better and get results.
That’s when we discovered Perfect Bars. They were a quick win: creamy, satisfying, and easy to grab when we were busy. But after a few weeks, the cost started to add up — and we weren’t willing to keep paying so much just for a snack.
One weekend we decided to experiment and came up with this Homemade Perfect Protein Bar recipe. With just a handful of ingredients and no baking, our Homemade Perfect Protein Bar turned out soft, chewy, and even more affordable than we expected. We’ve been making this Homemade Perfect Protein Bar every week since — and now we’re sharing it here so you can, too.
Making your own Homemade Perfect Protein Bar means you’re in control. You can adjust the sweetness, skip preservatives, and even make it nut-free or gluten-free if you need to.
We also love knowing we’ve got a batch of Homemade Perfect Protein Bars in the fridge — one less thing to think about on busy days. Just like our Grilled Chicken Bites or our Mediterranean Ground Beef Skillet, these bars help keep us on track without feeling like extra work.
Ingredients Explained – What’s in a Perfect Bar?
What You’ll Find in the Original Perfect Bar
If you’ve ever read the label on a store-bought Perfect Bar, you know it’s packed with a long list of ingredients. Peanut butter, honey, dried milk powder, egg powder, and a proprietary “superfood” blend of greens and seeds. Those extras sound impressive, but the real magic of a Perfect Bar comes down to just a few essentials: nut butter, a sweetener, and something to hold it all together.
That’s why our Homemade Perfect Protein Bar keeps it simple. With only six pantry staples, you still get the same creamy, chewy, satisfying texture — but without unnecessary additives. And the flavor? Just as good, if not better.
Here’s what goes into our recipe:
Peanut butter — creamy, rich, and full of healthy fats.
Honey — natural sweetness and a sticky binder.
Coconut oil — adds moisture and helps everything hold.
Oat flour — hearty and satisfying without being heavy.
Protein powder — optional, but it gives each Homemade Perfect Protein Bar an extra boost.
A pinch of salt — to balance all that sweetness.
Ingredients for making a Homemade Perfect Protein Bar laid out neatly
Why These Ingredients Work So Well
Each ingredient in this Homemade Perfect Protein Bar plays a role. The nut butter and coconut oil keep the bars soft. Honey holds everything together. Oat flour adds bulk and a chewy texture. And protein powder, if you choose to use it, makes the bars more filling and ideal for post-workout recovery.
We love customizing our bars depending on the week. Sometimes we mix in mini chocolate chips or sprinkle sea salt on top. Other times we go for a more dessert-inspired vibe, like our Healthy Banana Bread or these Chocolate Baked Oat Cups — proof that healthy doesn’t have to mean boring.
You can also experiment with different nut butters, swap in maple syrup for honey, or use almond flour if you’re avoiding oats. That’s the beauty of making your own Homemade Perfect Protein Bar — you can adjust it to fit your needs.
How to Make the Perfect Bar – Step-by-Step
Step-by-Step Guide to the Homemade Perfect Protein Bar
The beauty of the Homemade Perfect Protein Bar is how easy it is to make. No baking, no fancy equipment — just one bowl, a spatula, and a little fridge time. Here’s how to make a batch in about 10 minutes.
Step 1: Mix the Wet Ingredients In a large mixing bowl, combine peanut butter, melted coconut oil, and honey. Stir until the mixture is completely smooth. The coconut oil helps loosen the peanut butter and makes it easier to combine.
Step 2: Add the Dry Ingredients Next, fold in oat flour, protein powder, and a pinch of salt. Use a sturdy spatula and mix until everything comes together into a thick, cookie-dough-like batter. If it feels too sticky, add a teaspoon or two more oat flour.
Step 3: Shape & Chill Line a small baking dish or pan with parchment paper. Press the mixture firmly into an even layer, making sure it reaches all the edges. Refrigerate for at least an hour to let it firm up. Then slice into bars or squares, and enjoy!
That’s it — you’ve just made your first batch of Homemade Perfect Protein Bars.
Tips & Fun Variations
Once you’ve mastered the basic recipe, have fun with add-ins. Fold in mini chocolate chips, chopped nuts, or even crushed graham crackers for a s’mores vibe. A sprinkle of flaky sea salt on top also makes each bite pop.
By making your own Homemade Perfect Protein Bar, you save time, money, and gain a snack you actually look forward to.
Healthy or Not? Are Perfect Bars Actually Good for You?
The Nutritional Benefits of a Homemade Perfect Protein Bar
One of the biggest questions we get about the Homemade Perfect Protein Bar is whether it’s actually healthy. The answer? Absolutely — when you make it yourself, you’re using whole, nutritious ingredients you can feel good about.
Each bar gives you a balance of healthy fats, natural sugars, complex carbs, and protein. That mix helps keep your energy stable, your cravings in check, and your stomach full between meals. Plus, by making your own bars, you can control the amount of sweetener, adjust the protein level, and skip unnecessary fillers.
They’re especially great as a pre-workout snack, a quick breakfast, or a mid-afternoon pick-me-up. If you pair your Homemade Perfect Protein Bar with a piece of fruit or some yogurt, you’ve got a perfectly balanced mini meal — much like our Pistachio Ice Cream recipe which proves healthy eating can still feel like a treat.
When to Enjoy and When to Watch Portions
While the Homemade Perfect Protein Bar is packed with nutrients, it’s also calorie-dense — which is why we recommend eating it mindfully if weight loss is your goal. Each bar is designed to fill you up, not to replace a meal or snack you’d eat mindlessly.
That said, it’s miles better than grabbing processed candy or skipping meals altogether. And because it’s homemade, you can always adjust the size of each bar or cut them into smaller bites to suit your needs — similar to how you can portion out Muhammara Dip for a lighter snack option.
So, are Perfect Bars healthy? Yes — as long as you keep portions in mind and use high-quality ingredients, the Homemade Perfect Protein Bar is a smart, satisfying choice you can feel good about.
Storing and Shelf Life of No Bake Protein Bars
How Long Does a Homemade Perfect Protein Bar Last?
One of the best parts about making a Homemade Perfect Protein Bar is how well it keeps. You can make a batch on Sunday and have a healthy snack ready to grab all week long. Properly stored in an airtight container in the fridge, your bars will stay fresh for about 7–10 days.
For even longer storage, wrap each bar individually in parchment paper or plastic wrap and freeze them. Frozen, a Homemade Perfect Protein Bar can last up to three months. Just pull one out and let it thaw for a few minutes before enjoying.
Tips to Keep Your Bars Fresh and Tasty
Here are a few simple tips to get the most out of your Homemade Perfect Protein Bar:
Use a tightly sealed container to prevent them from drying out.
Place parchment between layers if stacking to keep them from sticking.
Keep them in the coldest part of the fridge to maintain texture.
We also recommend cutting the bars into your preferred size before chilling. That way, you can grab just what you need, when you need it, without having to cut frozen or cold dough.
Making a Homemade Perfect Protein Bar not only saves money, it also gives you the freedom to prep ahead — so you’re always ready with something healthy and satisfying.
Why Do Perfect Bars Taste So Good? The Secret
The Flavor Magic of a Homemade Perfect Protein Bar
If you’ve ever wondered why Perfect Bars — and by extension, the Homemade Perfect Protein Bar — taste so good, it’s all about balance. Every bite delivers the perfect harmony of creamy, sweet, salty, and satisfying.
Nut butter gives a rich, slightly roasted flavor that feels indulgent without being over the top. Honey brings just the right amount of sweetness while acting as a binder. A pinch of salt makes the sweetness pop and keeps the flavor from feeling flat. Combine that with the chewy texture from oat flour and a soft finish from coconut oil, and you’ve got something that tastes more like dessert than a protein bar.
We find it’s that soft, cookie-dough-like texture that makes a Homemade Perfect Protein Bar irresistible compared to dry, chalky store-bought options. For more proof that healthy can still feel indulgent, try our Cottage Cheese Ranch Dip or even this Pickle Lemonade Mocktail — both unexpected and full of flavor.
How You Can Make Them Even Better
The beauty of the Homemade Perfect Protein Bar is that you can adjust it to your taste. Want more chew? Add a drizzle more honey. Prefer a firmer bar? Mix in a little extra oat flour. Love chocolate? Stir in dark chocolate chips or drizzle melted chocolate on top after chilling.
We like to think of these bars as a blank canvas — easy to customize, but always delicious. And because you’re making them at home, you can tweak the flavor and texture until they’re perfect for you.
That’s why we keep coming back to the Homemade Perfect Protein Bar — it’s the snack that tastes as good as it makes you feel.
FAQs About the Homemade Perfect Protein Bar
What are the ingredients in a Perfect Bar?
The original Perfect Bar includes nut butter, honey, dry milk powder, egg powder, and a proprietary superfood blend. Our Homemade Perfect Protein Bar uses just six ingredients: peanut butter, honey, coconut oil, oat flour, protein powder, and a pinch of salt.
What is a good substitute for protein powder in bars?
If you don’t want to use protein powder, you can replace it with more oat flour or almond flour for texture. Keep in mind it will lower the protein content of your Homemade Perfect Protein Bar slightly.
Are Perfect Bars healthy?
Yes — when made with whole, simple ingredients, they’re a nutrient-dense snack with healthy fats, protein, and carbs. Just watch portion sizes, as they are calorie-rich.
How long do no bake protein bars last?
Your Homemade Perfect Protein Bar will keep in the fridge for 7–10 days in an airtight container, or up to 3 months in the freezer.
Why do Perfect Bars taste so good?
it’s the perfect mix of creamy nut butter, sweet honey, a hint of salt, and a soft, chewy texture — just like a cookie dough bite
How to create the Perfect Bar?
Follow our simple recipe: mix wet ingredients, fold in dry, press into a pan, chill, and cut into bars.
This Homemade Perfect Protein Bar is soft, chewy, and packed with wholesome ingredients. An easy no-bake snack you can make in 10 minutes with just 6 pantry staples.
Ingredients
Scale
1 cup creamy peanut butter
1/3 cup honey
2 tbsp melted coconut oil
1 1/2 cups oat flour
1/2 cup vanilla protein powder
1/4 tsp sea salt
Instructions
1. In a mixing bowl, stir together peanut butter, honey, and melted coconut oil until smooth.
2. Fold in oat flour, protein powder, and salt until a thick dough forms.
3. Line a baking dish with parchment and press the dough evenly into the pan.
4. Refrigerate for at least 1 hour to firm up.
5. Cut into bars or squares and enjoy.
Notes
Store bars in an airtight container in the fridge for up to 7–10 days or freeze for up to 3 months.
Customize with chocolate chips, nuts, or dried fruit as desired.
Prep Time:10 minutes
Cook Time:0 minutes
Category:Snacks
Method:No Bake
Cuisine:American
Nutrition
Serving Size:1 bar
Calories:210
Sugar:6g
Sodium:90mg
Fat:12g
Saturated Fat:3g
Unsaturated Fat:8g
Trans Fat:0g
Carbohydrates:18g
Fiber:2g
Protein:8g
Cholesterol:0mg
Conclusion
The Homemade Perfect Protein Bar proves that you don’t have to overpay to enjoy a snack that’s delicious, healthy, and satisfying. With just a few pantry staples and a little time, you can whip up a batch that fuels your workouts, keeps you full between meals, and tastes better than anything off the shelf.
Whether you’re customizing your own flavors or sticking with the classic recipe, you’ll feel good knowing exactly what’s in your snack. Real food. Real results. Real people — that’s what StayFit Recipes is all about.
Now it’s your turn: grab a bowl, mix up a batch, and enjoy your own Homemade Perfect Protein Bar all week long. Follow us for more on Facebook
Testosterone booster supplements styled for modern kitchen
If you’ve ever felt sluggish at the gym, noticed stubborn belly fat creeping in, or just felt “off,” you’re not alone. Many people turn to a testosterone booster hoping it will bring back their energy, strength, and confidence. But do these supplements really deliver on their bold claims?
We know firsthand from our own health journey — at StayFit Recipes, we’ve learned the hard way that real results come from real choices, not shortcuts. In this article, you’ll learn the truth about testosterone boosters, how to tell if you’re low, natural ways to improve your levels, and what to know before choosing any supplement. From drinks that might help to lifestyle changes that actually work, we’ll cover it all with practical tips you can start today. Let’s cut through the hype and focus on what really helps you feel your best.
Testosterone Booster Basics — Do They Really Work?
The Science Behind Testosterone Boosters
A testosterone booster is typically a dietary supplement designed to raise your body’s natural production of testosterone. Most products contain a mix of vitamins, minerals, and herbs — with common ingredients like zinc, magnesium, vitamin D, fenugreek, and D-aspartic acid. These nutrients play roles in hormone production, and deficiencies can contribute to low testosterone. Some boosters also include exotic herbs such as ashwagandha or tongkat ali, marketed as natural testosterone enhancers. But it’s important to understand that these supplements aren’t the same as prescription hormone therapy. They don’t actually contain testosterone — they aim to support your body’s own ability to make it. When used properly, some can help slightly if your low testosterone is due to minor nutritional gaps or stress.
Evidence and Efficacy: What Studies Show
So, do testosterone boosters really work? The evidence is mixed. Research suggests that some ingredients, like zinc or vitamin D, can modestly raise testosterone levels in people who are deficient. Herbs such as fenugreek and ashwagandha have shown small improvements in studies. However, the overall effects are usually mild and temporary, especially compared to lifestyle changes like weight loss or exercise.
Many supplements on the market make exaggerated claims without solid proof. Worse, some products may even contain hidden steroids or contaminants, which can be dangerous. If you’re considering a booster, it’s crucial to choose wisely, just like you would when picking clean eating recipes on our Healthy Lunches page. And just like staying consistent with your meal prep makes all the difference, consistency with healthy habits far outweighs what any pill can offer.
How Can I Raise My Testosterone Level Naturally?
Diet and Lifestyle Changes That Support Testosterone
Foods that naturally raise testosterone levels
If you want to raise your testosterone level without relying solely on a testosterone booster, start with proven lifestyle changes. Strength training is one of the best natural testosterone boosters. Exercises like squats, deadlifts, and push-ups activate large muscle groups and stimulate testosterone production. Pair your workouts with adequate sleep — at least seven to eight hours each night — because sleep deprivation lowers testosterone.
Managing stress also helps; high cortisol interferes with testosterone levels. Practice meditation, take nature walks, or even cook a healthy meal to unwind. A balanced diet supports testosterone, too. Focus on whole foods rich in healthy fats, lean protein, and vegetables. Avocados, salmon, eggs, and spinach contain nutrients that help your body produce testosterone naturally. By eating clean and moving regularly, you’re using the best kind of natural testosterone booster your body already knows how to use.
The Role of Body Weight and Alcohol
Excess weight, especially around your waist, can lower your testosterone levels. That’s because fat cells convert testosterone into estrogen, reducing your free testosterone. Losing even a small amount of body fat can help restore healthy levels and improve how you feel. Instead of depending on a testosterone booster, combine smart eating and regular workouts for lasting results.
Alcohol is another big factor. Heavy drinking suppresses testosterone and may undo all your hard work. If you’re serious about boosting testosterone, cut back on alcohol or skip it entirely for a while. Every small habit counts toward higher testosterone. Together, these changes create a natural testosterone booster effect without the risks of questionable supplements.
How to Tell If You’re Low on Testosterone
Common Symptoms of Low Testosterone
Common symptoms of low testosterone
Knowing whether you need a testosterone booster starts with recognizing the signs of low testosterone. Many people first notice fatigue that doesn’t go away, even with rest. Others experience a noticeable drop in libido or sexual performance. Low testosterone can also make it harder to build or maintain muscle, while increasing body fat — especially around the midsection.
You might feel depressed, moody, or find it harder to focus. In some cases, low testosterone leads to weaker bones and joint pain. If these symptoms sound familiar, you may already be wondering if a testosterone booster could help. But before reaching for supplements, it’s important to confirm whether your levels are truly low.
In our own journey at StayFit Recipes, we found that tracking our symptoms alongside regular workouts and meal prepping helped us notice patterns. If you’ve been sticking with your fitness plan and still feel off, it may be time to test.
When to See a Doctor for Testing
The best way to know if you really need a testosterone booster is through a simple blood test. Your doctor can measure your testosterone levels and help you understand what’s normal for your age and health. Morning is the best time for testing, as levels are highest then. If your results show low or borderline levels, your doctor can discuss whether lifestyle changes, a natural testosterone booster, or medical therapy is right for you. Self-diagnosing and taking a testosterone booster without testing can mask deeper health issues or even cause harm. For peace of mind and better results, get tested first and work with a professional to choose the safest approach to boosting testosterone.
Best Drinks and Foods to Boost Testosterone
Drinks That May Help
If you’re looking for a natural testosterone booster, certain drinks can help support healthy hormone levels. One of the best options is pomegranate juice. Research suggests it can improve blood flow and slightly increase testosterone while reducing stress hormones. Green tea is another good choice; it’s rich in antioxidants that may support healthy testosterone production when consumed in moderation. Milk, especially whole milk with vitamin D, provides calcium and healthy fats your body uses to make hormones. Drinking enough water is also essential, as dehydration can interfere with metabolism and lower your energy levels.
While these drinks aren’t magic, they’re healthier choices compared to sugary sodas or alcohol. Adding them to your routine alongside balanced meals and a workout plan is a smarter way to boost testosterone naturally. For more healthy drink ideas, check out our smoothie recipes for options that pair well with a testosterone-friendly diet.
Foods That Naturally Support Testosterone
A testosterone booster doesn’t always need to come in a bottle — it can come from your plate. Eating whole eggs is a great way to get cholesterol, which your body needs to produce testosterone. Fatty fish like salmon and tuna deliver omega-3 fatty acids and vitamin D, two nutrients linked to hormone health.
Avocados and olive oil provide monounsaturated fats that support testosterone production, while leafy greens like spinach supply magnesium, a mineral known to help maintain healthy levels. Nuts, seeds, and lean red meat also offer key nutrients like zinc and protein. Incorporating these foods into your daily meals not only helps you feel fuller and more satisfied but also works as a natural testosterone booster. Combine these foods with regular strength training and sleep, and you’ll be on the right track — no risky supplements required.
Risks and Side Effects of Testosterone Boosters
Potential Health Risks of Supplements
While a testosterone booster sounds appealing, many over-the-counter supplements carry hidden risks. Some products are contaminated with unlisted ingredients, including steroids, which can lead to dangerous side effects like liver damage, high blood pressure, and hormonal imbalances. Even natural ingredients in high doses can cause problems — too much zinc, for example, can harm your immune system. Taking a testosterone booster without knowing your actual hormone levels can mask serious health conditions or worsen symptoms. It’s always better to check with a doctor before using any testosterone booster, no matter how “natural” it claims to be. Reading labels carefully and buying from reputable brands is crucial. Just as you choose clean, healthy ingredients in our meal prep recipes or follow our snack tips to fuel your body right, the same care should go into selecting supplements.
Safer Alternatives and Professional Advice
If you suspect low testosterone, working with a healthcare provider is the safest way to improve your levels. They can determine whether lifestyle changes, a natural testosterone booster, or medically supervised hormone therapy is best for you. Many people see impressive improvements just by improving sleep, reducing stress, and exercising regularly — without ever taking a supplement. I
f you do choose to use a testosterone booster, your doctor can recommend a product with clinically tested ingredients and proper dosages. Avoid chasing quick fixes, and instead focus on building sustainable habits that improve your overall health. Real results come from consistent effort and smart choices.
How to Choose the Right Testosterone Booster if You Decide to Use One
Ingredients to Look For
If you decide a testosterone booster is worth trying, choose wisely. Look for products with ingredients backed by science, such as zinc, magnesium, vitamin D, fenugreek, or ashwagandha. These nutrients are known to support natural hormone production in people with deficiencies or high stress levels. Be cautious of boosters that claim overnight results or contain “proprietary blends” without specifying exact amounts. Transparency is key — just as you’d carefully pick the right ingredients from our healthy dinner recipes or plan balanced meals with our lunch ideas, you should know exactly what you’re putting into your body. Avoid supplements with synthetic hormones or untested herbal mixes, which can do more harm than good.
Quality, Dosage, and Brand Reputation
Not all testosterone boosters are created equal. Only buy from brands that use third-party testing to ensure purity and potency. Check for certifications like GMP (Good Manufacturing Practice) and look up reviews from verified customers. Correct dosage is also important — more is not always better. Some ingredients are only effective within specific ranges, and overdosing can cause side effects. When in doubt, consult your doctor or a qualified nutritionist who can help you select a safe product that aligns with your goals. A smart approach to choosing a testosterone booster can help you avoid health risks and focus on what really works — sustainable habits and informed decisions.
FAQ: Testosterone Boosters
Do the testosterone boosters really work?
A testosterone booster can help raise levels slightly if your body is deficient in certain nutrients like vitamin D or zinc. However, most boosters have only modest effects. Lifestyle changes, like strength training and healthy eating, are usually more effective.
How can I raise my testosterone level?
You can raise your testosterone naturally through regular exercise, especially resistance training, getting 7–8 hours of sleep, managing stress, and eating a diet rich in healthy fats, lean protein, and vegetables. A testosterone booster may complement these habits if needed.
How to tell if you’re low on testosterone?
Symptoms of low testosterone include fatigue, low sex drive, depression, increased body fat, and difficulty building muscle. If you suspect low levels, see your doctor for a blood test before trying a testosterone booster.
What drink boosts testosterone?
Drinks like pomegranate juice, green tea, and milk with vitamin D can help support testosterone naturally. Hydrating well and avoiding excessive alcohol are also important for maintaining healthy hormone levels.
Conclusion
A testosterone booster might seem like a quick fix, but real, lasting results come from consistent healthy habits. Strength training, good sleep, stress management, and a clean diet remain the most effective ways to raise testosterone and improve overall well-being. If you suspect low testosterone, work with a healthcare provider to determine the safest, most effective plan for you — whether that includes a testosterone booster or not. At StayFit Recipes, we believe in real food, real workouts, and real results. Stick with choices you can sustain, and you’ll feel and perform at your best.