How to Make Pistachio Ice Cream: Simple, Creamy, Healthy Recipe

how to make pistachio ice cream – creamy homemade dessert
Table of Contents

Our StayFit Story and Why It’s Worth It

 how to make pistachio ice cream – creamy homemade dessert
How to make Healthy pistachio ice cream – creamy homemade dessert

How to make pistachio ice cream was a question we never thought we’d ask — until our StayFit journey made us look at dessert differently.

How to make pistachio ice cream wasn’t something we planned to learn. But once our StayFit challenge started, we began looking at dessert in a new way. When Kiko and I made our deal — 100 days of no excuses, just real meals — we thought desserts had to go. Like most people trying to get in shape, we believed anything sweet or creamy didn’t fit into a healthy life.

Then came one hot morning. After our workout, we were wiped. Kiko opened the freezer and stared at a half-empty tub of ice cream. “Why does everything good feel so fake?” he said. He was right. The label was full of fake flavors, preservatives, and more sugar than we’d usually eat in a week.That’s when I remembered the bag of pistachios we had in the pantry. I wondered if we could make something better. I searched how to make pistachio ice cream at home — and what I found shocked me. It was easy. All we needed were real pistachios, milk, cream, eggs, and a little sugar.

That night, we gave it a shot. We peeled the pistachios, blended them into a paste, and stirred it into a warm custard. After cooling and churning, the result blew us away. It was creamy, nutty, and just sweet enough. We were hooked. This ice cream fit our goals and tasted better than anything store-bought. Knowing how to make pistachio ice cream gave us more than a dessert. It gave us control — and another reason to stick to real food.

Let’s StayFit — together.

Why Making Pistachio Ice Cream at Home Beats Store-Bought Every Time

Back when Kiko stood in front of that freezer, holding a half-melted tub of store-bought ice cream, something clicked. We realized it wasn’t just the sugar or the additives that bothered us — it was how disconnected we felt from the food we used to love. That’s when we started wondering how to make pistachio ice cream from scratch.

Turns out, it wasn’t just doable — it was better in every way. Here’s why we’ve never looked back.

Control the Ingredients for a Healthier Treat

One of the biggest reasons we started making our own was to ditch the fake flavors. Most store brands rely on artificial pistachio extract, food coloring, and way too much sugar. But when you make it yourself, you’re in charge.

We use real pistachios, creamy coconut milk, and a touch of honey or maple butter. A pinch of sea salt adds balance. You can even make it fully dairy-free without losing that smooth, rich taste. That flexibility fits perfectly with our StayFit mindset — just like our chocolate strawberry yogurt clusters and homemade protein bars, it’s all about clean comfort.

Customize the Texture and Flavor to Fit You

That first batch we made was simple — just a pistachio paste blended into a banana-coconut base. But over time, we started playing with it. More cream for a smoother finish. Dark chocolate chunks for crunch. Fresh berries for brightness. It’s like building your perfect bowl, just like we do with our baked oat cups or gluten-free cinnamon rolls.

Once you know how to make pistachio ice cream your way, you stop settling. It becomes a dessert you feel good about — because you built it, and you kept it real.

SteStep-by-Step Guide: How to Make Pistachio Ice Cream at Home

Learning how to make pistachio ice cream at home is easier than you think. This version is dairy-free, egg-free, and uses just five clean ingredients. It’s creamy, lightly sweet, and needs no fancy custard or machine.
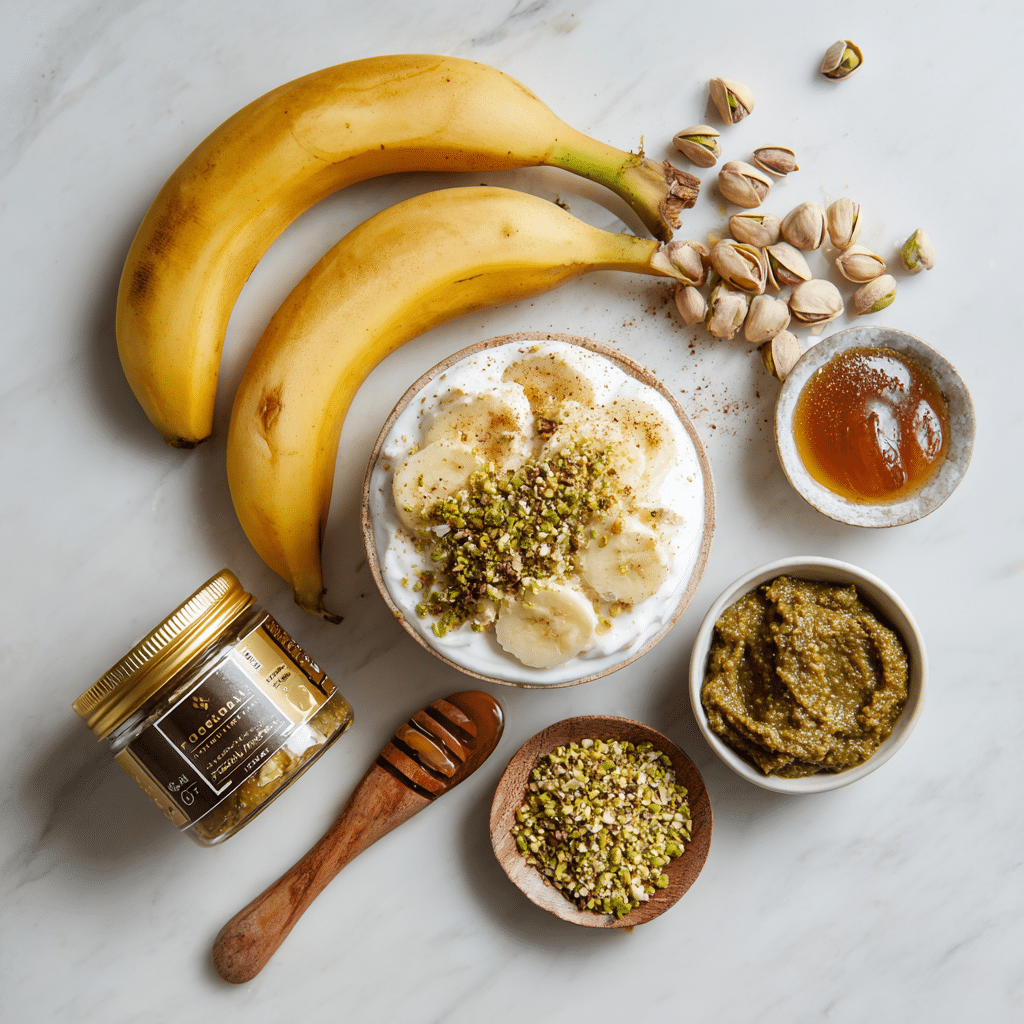
 ingredients for homemade pistachio ice cream recipe
Ingredients for homemade pistachio ice cream

Ingredients You’ll Need

  • 2 bananas (frozen for 12 hours, peeled)
  • 1 can full-fat coconut milk (refrigerated for 12 hours)
  • 6 Tbsp pistachio paste
  • 4 Tbsp maple butter or honey
  • 1 handful pistachios (chopped, for garnish)

A high-speed blender or food processor works best. Regular blenders won’t give you that smooth, creamy finish. If you’re still building your StayFit kitchen, check out our kitchen gear guide for tips.

Quick Method

  1. Open the chilled coconut milk and scoop out the cream. Save the liquid for smoothies.
  2. Add frozen bananas, coconut cream, pistachio paste, and maple butter or honey to a high-speed blender.
  3. Blend until smooth and creamy.
  4. Transfer to a freezer-safe container and freeze for about 4 hours.
  5. Let it soften for 10–15 minutes before scooping. Top with chopped pistachios.

Bonus: Quick Answers to Common Pistachio Ice Cream Questions

What makes pistachio ice cream green?
Real pistachios give the ice cream a soft green tint. For a brighter color, you can add a handful of spinach or a touch of matcha.

How can I make it without eggs?
No eggs are needed here. The bananas and coconut cream create the perfect creamy base.

Can I make it without cream?
Yes. Just use the bananas and pistachio paste for a lighter, soft-serve version.

What if I don’t have an ice cream maker?
No problem — this recipe is made to freeze and scoop without one.

How can I use a Vitamix for this?
Just follow the same steps using your Vitamix. It blends everything perfectly.

How to Serve and Store Pistachio Ice Cream the Right Way
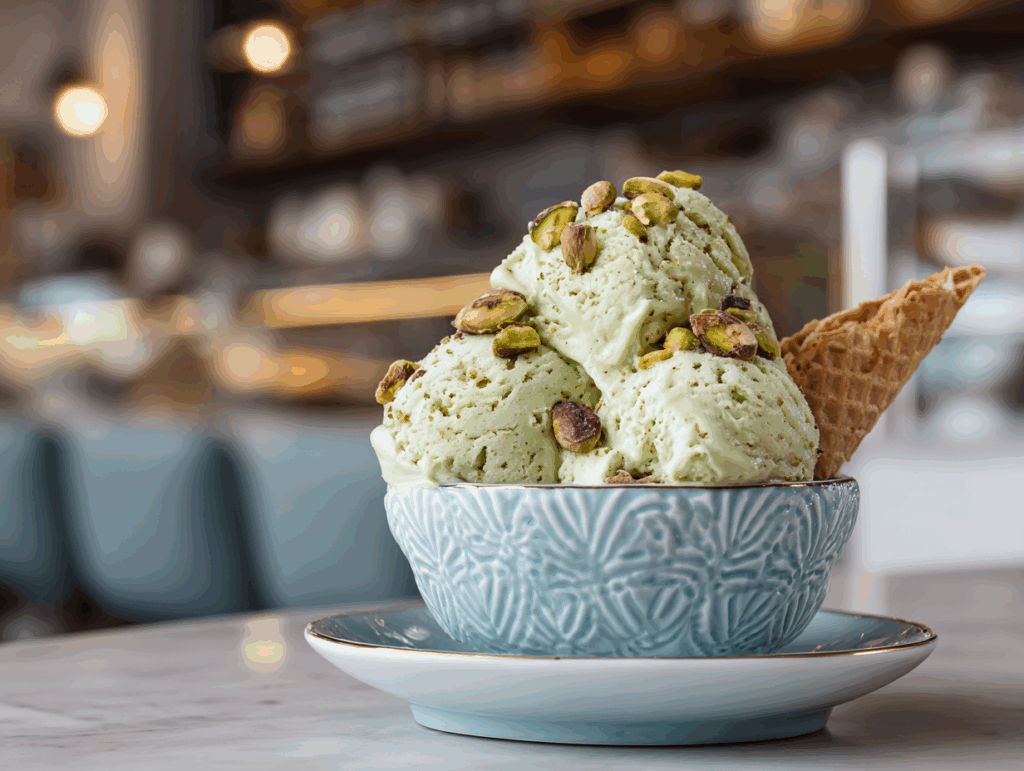
served pistachio ice cream with chopped pistachios
Served pistachio ice cream with chopped pistachios

Now that you’ve learned how to make pistachio ice cream at home, it’s time to enjoy it the right way. From fun toppings to smart storage, here’s how to get the most out of your homemade treat.

Creative Ways to Serve Pistachio Ice Cream

Sure, it’s great right from the container — but why stop there? Add some crunch with chopped pistachios or cacao nibs. For something bright and fresh, toss on a few raspberries. Want to go all in? Serve a scoop between two of our high-protein cookies for a StayFit-style ice cream sandwich.

For a fancier twist, drizzle a bit of dark chocolate on top or garnish with mint. It’s a great way to dress it up without overdoing it.

Want more topping and dessert ideas? Our chocolate strawberry yogurt clusters are full of flavor and easy to pair with frozen treats.

Remember — this ice cream is rich and filling. A small scoop goes a long way.

Proper Storage for Freshness

Since this recipe is made from real ingredients, it’s best within 1–2 weeks. Here’s how to keep it tasting great:

  • Store in a sealed, freezer-safe container.
  • Press parchment or wax paper against the top before sealing.
  • Keep it in the coldest part of your freezer.

Before scooping, let it sit at room temp for 10–15 minutes. Want to keep your meals fresh too? Don’t miss our storage tips and tricks for healthy food that lasts.

When you store it right, your homemade pistachio ice cream stays creamy, smooth, and ready any time.

Can Pets Have Pistachio Ice Cream? What You Need to Know

If you’ve ever sat down with a bowl of your favorite frozen treat and noticed your dog or cat giving you those big eyes, you’re not alone. But here’s the honest answer: this isn’t something to share with them.

Why Dogs Shouldn’t Have It

Pistachios aren’t toxic in small amounts, but the sugar, fat, and creamy base in this dessert can mess with your dog’s digestion. Many dogs struggle with dairy, which can lead to gas, bloating, or worse — like pancreatitis.

Instead of taking the risk, give your pup a simple homemade snack made just for dogs — no dairy, no sugar, and no ingredients that could upset their stomach. They’ll still get something tasty, and you’ll feel good knowing it’s safe.

Even though it might be tempting to let them have a taste, it’s safest to keep this treat just for you.

Why Cats Should Skip It Too

Cats have an even tougher time with dairy, and the sugar and fat content offer no benefit. Even a small bite can cause vomiting or diarrhea — or lead to longer-term issues.

Stick to safe rewards like plain, cooked meats or something from our list of healthy snacks that won’t cause problems.

We get it — sharing food feels like love. But this one’s better left untouched by your furry friends. It’s rich, cool, and made just for you.

FAQs and Final Thoughts on Making Pistachio Ice Cream

How to make pistachio ice cream at home?

Start by freezing bananas and chilling coconut milk overnight. Blend the coconut cream, frozen bananas, pistachio paste, and maple butter or honey in a high-speed blender. Freeze for 4 hours, then serve sprinkled with chopped pistachios.

What makes pistachio ice cream green?

The green color comes naturally from pistachios, though some recipes add food coloring. For a brighter hue without artificial dyes, try blending in a little spinach or matcha powder.

How do you make pistachio ice cream without eggs?

Our recipe is already egg-free, relying on bananas and coconut cream for smooth texture.
How do you make pistachio ice cream without cream?
You can skip coconut cream and just use bananas and pistachio paste for a softer, lighter ice cream.

Can dogs or cats eat pistachio ice cream?

No — pistachio ice cream contains sugar, dairy, and fat that can harm pets. Stick with safer treats from our FAQs about StayFit desserts for more ideas.

Final Thoughts: Why Homemade Pistachio Ice Cream Is Worth It

Making this recipe taught us something more than just how to enjoy dessert — it showed us that sweet treats don’t have to set you back. When you use real ingredients and skip the fake stuff, you get flavor that feels good.

So grab your blender, prep your pantry, and give it a go. This isn’t just ice cream — it’s proof that when you choose better, everything changes. Including you.

Let’s StayFit — together.For More follow us on facebook & pinterest

Print

clock clock iconcutlery cutlery iconflag flag iconfolder folder iconinstagram instagram iconpinterest pinterest iconfacebook facebook iconprint print iconsquares squares iconheart heart iconheart solid heart solid icon
served pistachio ice cream with chopped pistachios

How to Make Pistachio Ice Cream: Simple, Creamy, Healthy Recipe


5 Stars 4 Stars 3 Stars 2 Stars 1 Star

No reviews

  • Author: Chef Dodos
  • Total Time: ~4 hr 10 min (including freeze)
  • Yield: 46 servings 1x

Description

Creamy, nutty, and healthier pistachio ice cream made with bananas, coconut milk, and real pistachio paste.


Ingredients

Scale

2 bananas (frozen for 12 hours)

1 can full-fat coconut milk (refrigerated for 12 hours)

6 Tbsp pistachio paste

4 Tbsp maple butter or honey

1 handful pistachios (for garnish)


Instructions

1. Scoop chilled coconut cream into blender.

2. Add frozen bananas, pistachio paste, and maple butter or honey.

3. Blend until smooth and creamy.

4. Transfer to freezer-safe container and freeze for about 4 hours.

5. Let soften for 10–15 minutes before serving and garnish with chopped pistachios.

Notes

Best enjoyed within 1–2 weeks. Store airtight. Let thaw slightly before scooping.

  • Prep Time: ~10 min
  • Cook Time: 0 min
  • Category: Dairy-Free
  • Method: Blend & Freeze
  • Cuisine: American, Italian

Nutrition

  • Calories: 167 kcal
  • Fat: 9g
  • Carbohydrates: 20 g
  • Protein: 3 g

Quinoa Salad Recipe – A Fresh & Flavorful Way to Stay Fit Daily

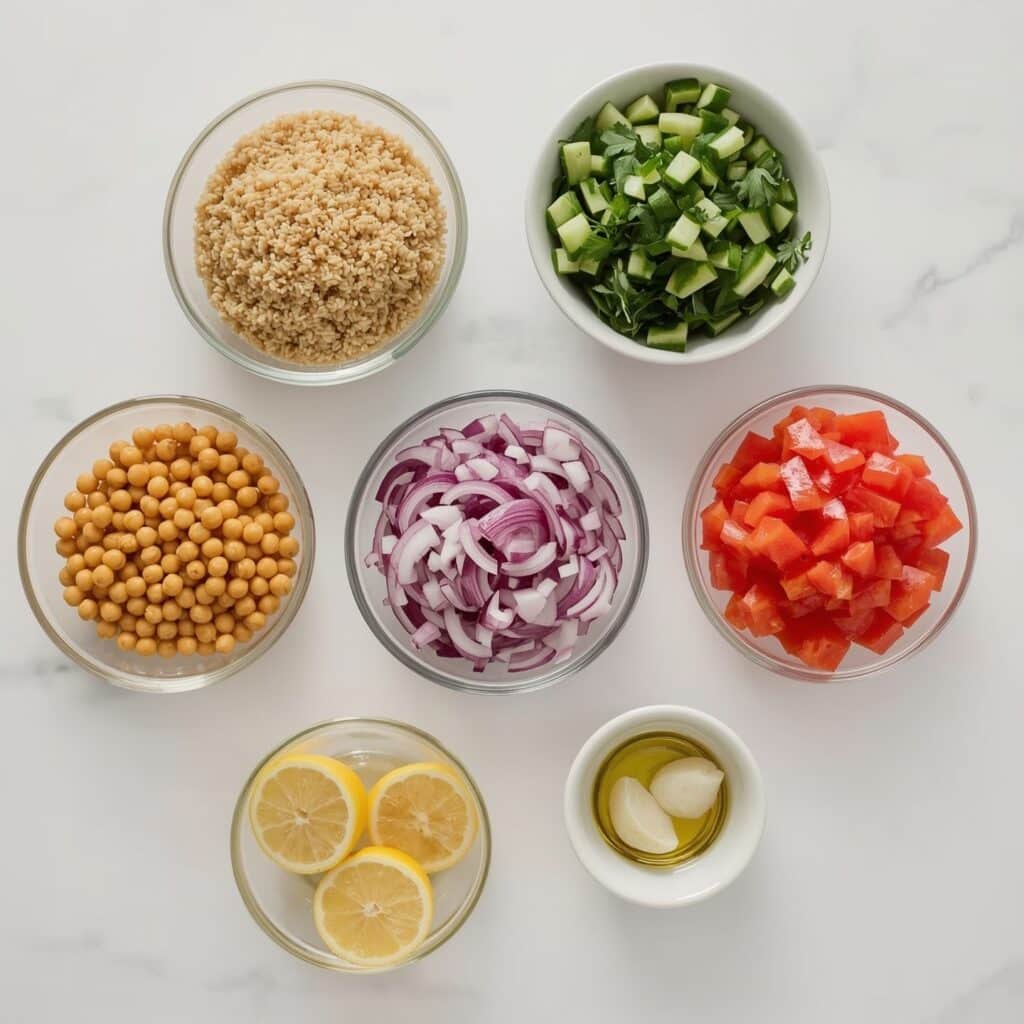
Quinoa salad ingredients including chickpeas, cucumber, red onion, parsley, and lemon
Table of Contents

Quinoa salad changed everything for us.

Hey! We’re The DODOs — Kiko & Med. Back when we kicked off our 100-day no-excuses journey, we needed meals that were clean, quick, and actually satisfying. Kiko was in charge of breakfast and snacks, but lunch was all on Med. That’s when the quinoa salad came into our lives — not just as a recipe, but as a reset.

Quinoa salad ingredients including chickpeas, cucumber, red onion, parsley, and lemon
Fresh, whole ingredients used to make our StayFit quinoa salad

We had tried a bunch of salads before, but they left us hungry an hour later. Then Med threw together some quinoa, chickpeas, fresh veggies, and a lemony garlic dressing. We didn’t expect much. But that first bite? Game changer. It was vibrant, filling, and full of texture — the kind of meal that keeps you energized without weighing you down.

This wasn’t just another salad. It became our go-to for post-workout lunches, weeknight dinners, and even next-day leftovers. Today, we’re sharing the exact quinoa salad recipe that helped fuel our transformation — real ingredients, real flavor, real results.

Let’s dive in.

Print
clock clock iconcutlery cutlery iconflag flag iconfolder folder iconinstagram instagram iconpinterest pinterest iconfacebook facebook iconprint print iconsquares squares iconheart heart iconheart solid heart solid icon
Quinoa salad ingredients including chickpeas, cucumber, red onion, parsley, and lemon

Quinoa Salad Recipe – A Fresh & Flavorful Way to Stay Fit Daily


5 Stars 4 Stars 3 Stars 2 Stars 1 Star

No reviews

  • Author: Chef Dodos

Description

A zesty, protein-packed quinoa salad recipe with chickpeas, crisp veggies, and a lemon garlic dressing. Perfect for clean eating and weekly meal prep.


Ingredients

Scale

1 cup uncooked quinoa, rinsed

2 cups water

1 can (15 oz) chickpeas, rinsed and drained

1 medium cucumber, seeded and chopped

1 red bell pepper, chopped

¾ cup red onion, chopped

1 cup parsley, finely chopped

¼ cup olive oil

¼ cup lemon juice (23 lemons)

1 tbsp  vinegar

2 cloves garlic, minced

½ tsp sea salt

Black pepper, to taste


Instructions

1. Rinse quinoa in cold water using a fine-mesh strainer.

2. Combine quinoa and water in saucepan; bring to a boil.

3. Reduce heat to low, simmer uncovered until water is absorbed (about 15 min).

4. Remove from heat, cover, and let rest for 5 min. Fluff with a fork.

5. In a large bowl, mix chickpeas, cucumber, bell pepper, onion, and parsley.

6. Whisk olive oil, lemon juice, vinegar, garlic, and salt in a small bowl.

7. Add quinoa to the large bowl, pour dressing over, and toss to coat.

8. Season with black pepper and more salt if needed.

9. Let salad sit 5–10 minutes before serving.

10. Serve chilled or at room temperature.

Notes

Salad keeps well for up to 4 days in an airtight container.

Add avocado, feta, or grilled chicken for variation.

Perfect for meal prep, picnics, or a post-workout meal.

The Story Behind This Quinoa Salad

How We Discovered Our Go-To Quinoa Salad

Before this quinoa salad became a regular on our meal plan, salads weren’t really our thing. Sure, we ate greens here and there, but they always felt like a side dish — never the main event. That changed one afternoon during week two of our StayFit challenge. Med was experimenting in the kitchen, trying to make something with quinoa that wasn’t, well… boring.

He opened the fridge, pulled out a few basics: a can of chickpeas, some leftover red bell pepper, a cucumber, a handful of parsley, and a red onion. We didn’t have any feta or trendy toppings — just simple, whole ingredients. Then came the homemade dressing: olive oil, lemon juice, red wine vinegar, garlic, salt, and pepper. Light, punchy, and balanced.

When we tossed everything together, something just clicked. The quinoa soaked up the bright lemony flavors. The chickpeas added creamy texture. The crisp veggies brought crunch and freshness. We didn’t even need a second try — it was perfect from the start.

Why Quinoa Salad Became Our Weeknight Lifesaver

Since that first bowl, this quinoa salad has become a staple. It’s easy to make in big batches, keeps in the fridge for days, and tastes even better after the flavors meld. Whenever we’re low on time or energy, we whip up a fresh batch — and just like that, lunch or dinner is done.

It’s also endlessly customizable. Some days we toss in feta and olives, other times it’s avocado and pumpkin seeds. But no matter what version we make, the base stays the same — protein-packed quinoa, colorful veggies, and that zesty lemon dressing.

Key Ingredients in the Perfect Quinoa Salad

What’s in Our Favorite Quinoa Salad

The ingredients for this quinoa salad are refreshingly simple — and each one plays a role in texture, flavor, or nutrition. Here’s the breakdown:

Quinoa salad ingredients including chickpeas, cucumber, red onion, parsley, and lemon
Fresh, whole ingredients used to make our StayFit quinoa salad
  • Quinoa (1 cup, uncooked): It’s the protein-rich base that keeps you full and energized. Make sure to rinse it well to remove any bitterness.
  • Chickpeas (1 can or 1½ cups cooked): They bring fiber, plant protein, and a creamy bite that balances out the crunchy veggies.
  • Cucumber and red bell pepper: These two add color, crunch, and hydration.
  • Red onion: A small amount goes a long way to give your salad that sharp, zesty edge.
  • Fresh parsley: Don’t skip this. It brightens the entire bowl and pairs beautifully with lemon.
  • Lemon-garlic dressing: Made with olive oil, lemon juice, red wine vinegar, garlic, sea salt, and black pepper — it’s light but flavorful enough to tie everything together.

You could pair this salad with high-protein mains like our grilled chicken bites or keep it vegetarian with a scoop of cottage cheese ranch dip on the side.

Why These Ingredients Work So Well Together

Every element of this quinoa salad recipe is designed to balance each other out. The quinoa offers substance without heaviness. Chickpeas bring richness. Crisp veggies keep it refreshing. The lemony garlic dressing brings everything together in a way that feels clean but never bland.

What’s even better? These ingredients are easy to find, easy to prep, and easy to swap. Out of parsley? Try cilantro or fresh mint. Want more crunch? Add chopped celery. Craving more fat? Throw in diced avocado.

The whole point is that this salad doesn’t require perfection — it just requires real food. And when paired with something like our zesty lemon chicken orzo, it rounds out your plate with flavor and nutrients.

Next, let’s walk you through how to cook quinoa just right and toss it all together like a pro.

How to Make Quinoa Salad Step-by-Step

Cooking Fluffy Quinoa the Right Way

The foundation of this quinoa salad is perfectly cooked quinoa — fluffy, not soggy, with a slight bite. It starts with rinsing the quinoa under cold water using a fine-mesh sieve. Don’t skip this step — it removes the natural coating called saponin that can make quinoa taste bitter.

In a medium saucepan, combine 1 cup of rinsed quinoa with 2 cups of water. Bring it to a boil over medium-high heat, then reduce the heat and let it simmer, uncovered, until all the water is absorbed — about 15 minutes. Once the water’s gone, remove it from the heat, cover, and let it sit for 5 minutes. This resting time steams the quinoa gently, making it fluffier. After that, use a fork to fluff it up.

Quinoa stores well too. You can cook it in advance and keep it chilled for 3–4 days. We often make a double batch so we have extra for meal prep — paired with dishes like our Mediterranean ground beef skillet or a side of muhammara spread.

Tossing Everything Together for Best Flavor

Once your quinoa is cool or at least room temp, it’s time to bring everything together. In a large mixing bowl, combine:

  • Cooked quinoa
  • Rinsed chickpeas
  • Chopped cucumber
  • Chopped red bell pepper
  • Chopped red onion
  • Fresh chopped parsley

In a smaller bowl or jar, whisk together ¼ cup olive oil, ¼ cup fresh lemon juice, 1 tablespoon red wine vinegar, 2 cloves minced garlic, ½ teaspoon sea salt, and a few cracks of black pepper. Drizzle it all over the salad and toss until evenly coated.

Let the salad sit for 10 minutes before serving to let the flavors meld — it makes a huge difference. You can serve this with a refreshing drink like our pickle lemonade mocktail for a satisfying, complete light meal.

Next up: creative variations you can try — because quinoa salad never has to be boring.

How to Make Quinoa Salad Step-by-Step

Cooking Fluffy Quinoa the Right Way

The foundation of this quinoa salad is perfectly cooked quinoa — fluffy, not soggy, with a slight bite. It starts with rinsing the quinoa under cold water using a fine-mesh sieve. Don’t skip this step — it removes the natural coating called saponin that can make quinoa taste bitter.

In a medium saucepan, combine 1 cup of rinsed quinoa with 2 cups of water. Bring it to a boil over medium-high heat, then reduce the heat and let it simmer, uncovered, until all the water is absorbed — about 15 minutes. Once the water’s gone, remove it from the heat, cover, and let it sit for 5 minutes. This resting time steams the quinoa gently, making it fluffier. After that, use a fork to fluff it up.

Quinoa stores well too. You can cook it in advance and keep it chilled for 3–4 days. We often make a double batch so we have extra for meal prep — paired with dishes like our Mediterranean ground beef skillet or a side of muhammara spread.

Tossing Everything Together for Best Flavor

Once your quinoa is cool or at least room temp, it’s time to bring everything together. In a large mixing bowl, combine:

  • Cooked quinoa
  • Rinsed chickpeas
  • Chopped cucumber
  • Chopped red bell pepper
  • Chopped red onion
  • Fresh chopped parsley

In a smaller bowl or jar, whisk together ¼ cup olive oil, ¼ cup fresh lemon juice, 1 tablespoon red wine vinegar, 2 cloves minced garlic, ½ teaspoon sea salt, and a few cracks of black pepper. Drizzle it all over the salad and toss until evenly coated.

Let the salad sit for 10 minutes before serving to let the flavors meld — it makes a huge difference. You can serve this with a refreshing drink like our pickle lemonade mocktail for a satisfying, complete light meal.

Next up: creative variations you can try — because quinoa salad never has to be boring.

Quinoa Salad FAQs Answered

Is Quinoa Salad Healthy?

Yes — quinoa salad is one of the healthiest meal options you can make, especially when it’s built on whole, plant-based ingredients like the one we’ve shared here. Quinoa itself is a complete protein, meaning it contains all nine essential amino acids — rare for plant foods. It’s also naturally gluten-free and packed with fiber, magnesium, iron, and antioxidants.

Add in fiber-rich chickpeas, hydrating cucumbers, and antioxidant-loaded parsley, and you’ve got a salad that supports digestion, muscle recovery, and steady energy. And the olive oil-lemon dressing? Full of heart-healthy fats and vitamin C. That combo makes this salad ideal for anyone following a clean eating, Mediterranean, or plant-forward plan.

We often eat this after strength workouts or as a quick dinner when we want something nutrient-dense but easy. It fits right into our 100-day StayFit routine, just like our go-to protein-packed chicken bites and balanced orzo bowls.

What Goes Well with Quinoa in a Salad?

The great thing about quinoa salad is that it plays well with so many ingredients. If you want more creaminess, try adding diced avocado or a spoon of Greek yogurt dressing. For crunch, toss in toasted seeds or chopped almonds. Craving a little sweetness? Add chopped dried apricots or pomegranate seeds.

Other tasty mix-ins include:

  • Roasted vegetables (like sweet potatoes or zucchini)
  • Fresh herbs (mint, basil, cilantro)
  • Crumbled cheeses (goat cheese, feta)
  • Beans or legumes (lentils, black beans)
  • Pickled onions or artichoke hearts

Dressing-wise, vinaigrettes with a citrus or vinegar base work best. That’s why our lemon-garlic dressing hits the sweet spot — tangy enough to brighten the dish without overpowering it.

Looking for other salad-friendly recipes? Our insulin-friendly fat loss guide breaks down why combining protein, fiber, and healthy fats (just like in this salad) leads to sustainable results.

Serving, Storing & Meal Prep Tips

Make-Ahead Magic: How to Store for Days

One of the biggest wins with this quinoa salad recipe? It tastes even better the next day. That’s because the lemony garlic dressing continues to soak into the quinoa and veggies, boosting the flavor with time. It’s ideal for meal prep — make a big batch, store it in an airtight container, and you’ve got lunch or dinner ready for up to 4 days.

We recommend storing the salad undressed if you plan to keep it for more than 2 days. Just keep the dressing in a small jar and mix it in right before serving for maximum freshness and crunch. It’s also great in individual glass containers, so you can grab-and-go for work, gym days, or long car rides.

Pro tip: Pack a side like our turkish muhammara dip or cottage cheese ranch dip for added protein and flavor variety through the week.

How We Meal Prep with This Protein-Packed Bowl

Quinoa salad works hard — it’s more than just a side dish. In our 100-day challenge, this salad played a big role in Med’s lunch prep strategy. Some days he’d toss in grilled chicken, other times it was plant-based with chickpeas and roasted veggies. Once, we even added a dollop of hummus and a soft-boiled egg for a Mediterranean-style power bowl.

It travels well, doesn’t get soggy, and keeps you full without the post-meal crash. That’s why it’s one of our most repeated recipes — and one we always recommend to readers who are just starting out with real food cooking. Whether you’re building a week of meals or just need something clean and satisfying for dinner, quinoa salad has your back.

Want more ideas for prep-ahead meals? Try our grilled chicken bites or lemon orzo bowl — they pair beautifully and bring extra protein to the table.

Let’s StayFit—together. For More follow us on facebook & pinterest

Frequently Asked Questions

Is quinoa salad healthy?

Absolutely. Quinoa is a complete protein packed with fiber, magnesium, and iron, making it an excellent base for a balanced meal. Paired with chickpeas, vegetables, and olive oil, this salad offers slow-digesting carbs, healthy fats, and plant protein. It supports energy, digestion, and even weight management.

What is in the Jennifer Aniston salad?

The Jennifer Aniston salad became popular thanks to a viral TikTok trend. It typically includes cooked quinoa or bulgur, chickpeas, cucumbers, red onion, parsley, mint, pistachios, and a simple lemon-olive oil dressing. It’s similar to our quinoa salad, just with a few added textures and Middle Eastern flair.

What do you put in a quinoa salad?

Start with cooked quinoa, then layer in protein (like chickpeas or grilled chicken), fresh veggies (cucumber, bell pepper, onion), fresh herbs (parsley, mint), and a bright dressing. From there, you can add avocado, feta, seeds, olives, or even fruit like pomegranate or dried apricots.

What salad dressing goes well with quinoa?

Light, citrus-based vinaigrettes are ideal. Our go-to: olive oil, lemon juice, vinegar, garlic, sea salt, and pepper. You could also use tahini dressing, a creamy yogurt-based mix, or even something spicy with chili flakes or sriracha for kick.

Conclusion: Real Food, Real Results

This quinoa salad recipe isn’t just another bowl of greens — it’s a StayFit essential. It’s fast, flexible, and built on real food that keeps you full and feeling good. Whether you’re meal prepping for the week or looking for a quick reset meal after a weekend of takeout, this salad delivers.

We created this during our own transformation — and it helped fuel Med’s midday meals without slowing him down. Add it to your rotation, and see how easy it is to eat clean without getting bored.

StayFit Tip: For a full balanced meal, pair it with grilled chicken bites or a dollop of muhammara dip. Real food, real results — always.

Let’s StayFit—together.For More follow us on facebook & pinterest

How to Make Berry Cheesecake Overnight Oats (Fast & Healthy!)

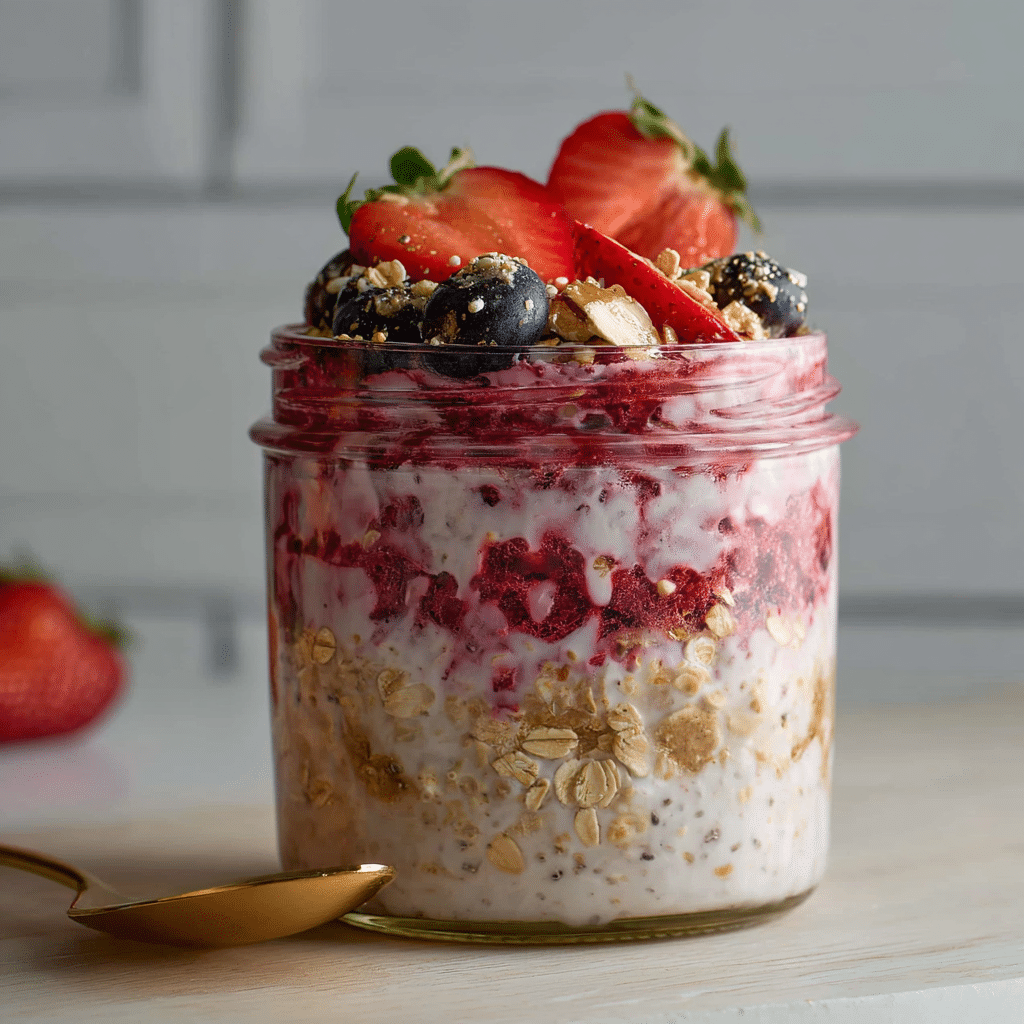
berry cheesecake overnight oats ready to eat with spoon and toppings
berry cheesecake overnight oats in jar with spoon and berries
Berry cheesecake overnight oats served in a jar with crushed graham topping and fresh berries

Berry cheesecake overnight oats are one of the easiest ways to stay on track at night. When we started our 100-day fitness challenge, the evenings were the hardest. We were tired, hungry, and always looking for something sweet. These oats changed that. They’re creamy, tasty, and keep you full — without making you feel guilty.

We used to grab chips or sugary snacks before bed. Now we reach for a jar of berry cheesecake overnight oats. Each one is filled with oats, Greek yogurt, a drizzle of honey, and crushed graham crackers. It tastes like dessert, but it’s packed with protein and fiber. The oats and chia seeds help keep you full, and the berries give a nice sweet touch without any added sugar.

Some nights, we pair it with Chocolate Baked Oat Cups if we need something a little extra. Or we enjoy it with Healthy Banana Bread after a long workout. It’s a snack that feels good and works with your goals.

What Makes the Cheesecake Layer So Good
The best part of berry cheesecake overnight oats is the top layer. It’s made with Greek yogurt, protein powder, and honey. Spread it over the oats like frosting, and it tastes just like cheesecake. It’s rich and creamy without being too heavy. Plus, it adds a big boost of protein.

We use strawberries, blueberries, or raspberries depending on what we have. Frozen berries work great too. They melt overnight and mix right into the oats for extra flavor.

Now we prep these oats every week. They’re simple, tasty, and a smart way to beat late-night cravings. If you want real food that fits your plan, berry cheesecake overnight oats are it.

Benefits of Berry Cheesecake Overnight Oats

Are Overnight Oats Actually Healthy?
Yes — especially when you make them the StayFit way. Berry cheesecake overnight oats give you the perfect mix of protein, fiber, and slow-digesting carbs. Oats are full of heart-healthy fiber that helps with digestion and keeps blood sugar stable. When you add chia seeds and Greek yogurt, you also get healthy fats and protein to stay full longer.

This snack supports your goals, whether you’re trying to lose fat, build muscle, or just avoid junk food at night. Compared to sugary desserts, it’s a smart swap that actually satisfies your cravings. It’s also made with whole ingredients — no mystery stuff, no crash later.

Many of our readers say it helped them stop mindless snacking. We’ve heard similar feedback on Protein Bagels, which work great earlier in the day. But when it comes to late-night hunger, these oats are hard to beat.

The Power of Protein, Berries & Whole Grains
Let’s break it down. Each serving of berry cheesecake overnight oats gives you:

  • Oats: slow carbs to keep you full and steady
  • Chia seeds: a little crunch, plus omega-3s
  • Greek yogurt: thick, creamy, and high in protein
  • Protein powder: extra fuel to help you recover and stay satisfied
  • Berries: loaded with antioxidants and natural sweetness

All of this in one small jar you can eat straight from the fridge.

You can even adjust the recipe depending on your needs. Want more calories? Add a spoonful of peanut butter. Trying to lower sugar? Use plain yogurt and skip the honey. This snack is flexible, and it works with your plan — just like our Zesty Lemon Chicken Orzo works for high-protein dinners.

In short, berry cheesecake overnight oats are more than tasty. They’re good for your body, easy to prep, and perfect when you want something that feels like a treat but fuels your progress.

Key Ingredients & Smart Substitutions

The Best Ingredients for Flavor and Function
What makes berry cheesecake overnight oats so good is the way each layer adds something important — flavor, texture, and nutrition. You only need a few ingredients, but they each serve a purpose.

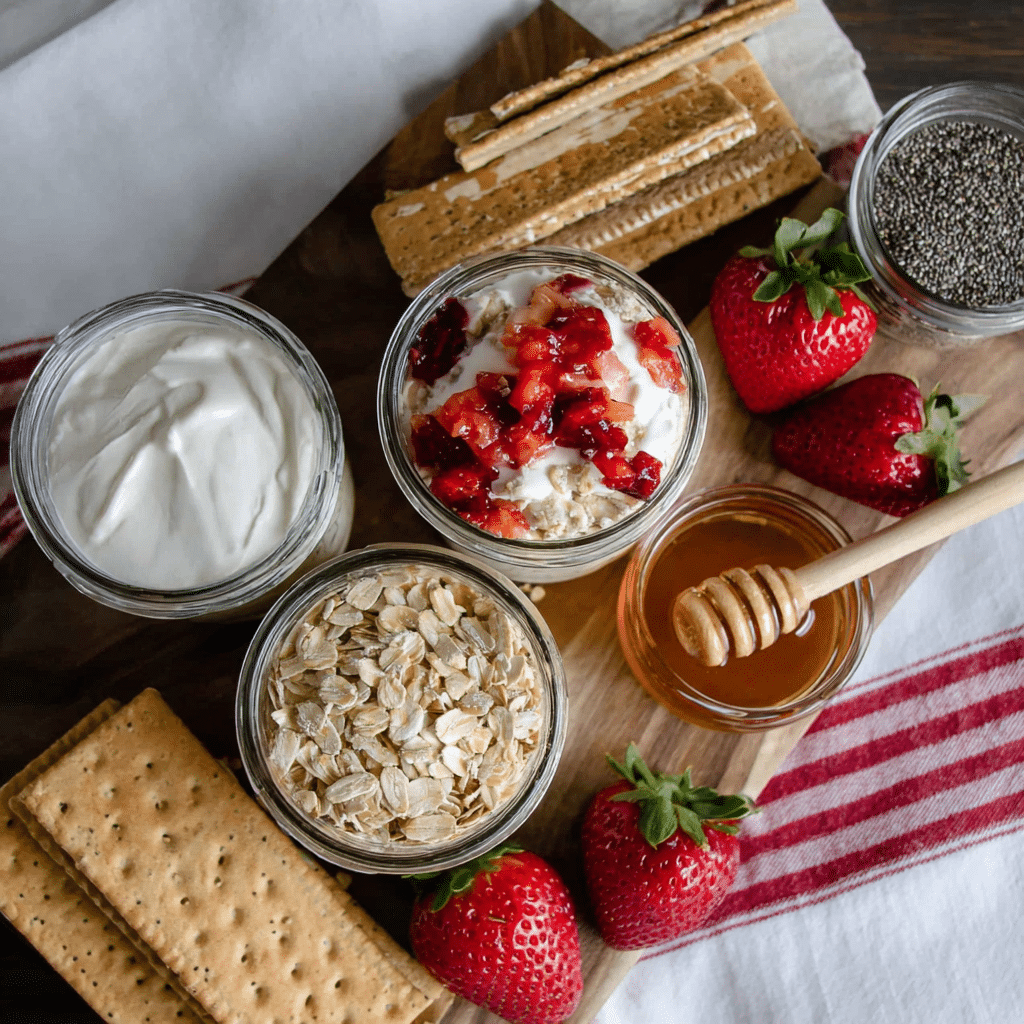
ingredients for berry cheesecake overnight oats laid out on table
Simple ingredients for berry cheesecake overnight oats – oats, Greek yogurt, berries, honey, and chia seeds

Here’s what goes into every jar:

  • Oats – Rolled or quick oats both work. They soak up the liquid overnight and give you that creamy base.
  • Greek yogurt – Thick and tangy, this makes the cheesecake-style topping and adds a solid amount of protein.
  • Chia seeds – These little seeds help hold everything together and give you healthy fats and fiber.
  • Protein powder – Just one scoop adds extra protein and gives the topping a sweet vanilla flavor.
  • Honey – A little honey adds natural sweetness. You can also use maple syrup.
  • Berries – Use fresh or frozen. Berries add color, natural sugar, and antioxidants.
  • Graham crackers – Crushed on top, they bring that true cheesecake feel with a little crunch.

Each ingredient plays its part. The result? A cold, creamy, ready-to-eat snack that feels like dessert but fuels your goals. We love pairing it with Chocolate Strawberry Yogurt Clusters for a sweet and satisfying combo.

Smart Substitutions to Fit Your Goals
One of the best things about berry cheesecake overnight oats is how easy they are to tweak. Whether you’re dairy-free, vegan, gluten-free, or just short on something, you can still make it work.

Here are some easy swaps:

  • No protein powder? Skip it and use vanilla yogurt instead for flavor.
  • No honey? Use maple syrup, agave, or even date syrup.
  • No Greek yogurt? Try plant-based yogurt or Skyr.
  • No chia seeds? Ground flaxseed will do the job.
  • Want it gluten-free? Just use certified gluten-free oats and graham crackers.

You can also change up the fruit. Try peaches in the summer or cherries when they’re in season. Even a mix of frozen berries adds great flavor.

We get asked a lot if these oats still work without dairy or grains. The answer is yes — we’ve seen readers replace ingredients and still love the results. Just like how our Cottage Cheese Ranch Dip can be dairy-free, this snack is just as flexible.

Bottom line: You don’t need to follow the recipe exactly. You just need the basics — oats, something creamy, a sweetener, and berries. Make it your own. That’s what keeps it fun and sustainable.

Mistakes to Avoid with Overnight Oats

What Not to Add in Overnight Oats
Not every ingredient works in overnight oats — especially when you’re making something as creamy and balanced as berry cheesecake overnight oats. Some things can mess with the texture, taste, or even your digestion.

Here’s what we learned to avoid:

  • Too much liquid – Adding too much milk or yogurt will leave your oats runny and hard to enjoy. Stick with just enough to cover the oats and let the chia seeds thicken things up.
  • Crunchy add-ins (too early) – Nuts, seeds, or graham crackers should be added right before eating. Otherwise, they get soggy overnight.
  • Artificial sweeteners – These can leave a weird aftertaste and may cause stomach discomfort. A little honey or maple syrup is a better option.
  • Citrus fruits – Fresh oranges or pineapple can break down the oats too much and make them bitter. Save those for other recipes like our Roasted Sweet Potato Salad.

Making berry cheesecake overnight oats is simple — but keeping it balanced matters. Too many extras can turn your snack into a sugar bomb or make it tough on your stomach.

Why Some Ingredients (Like Berries) Need Timing
Berries are a key part of this recipe, but you have to know when to add them. Frozen berries are perfect to mix in before chilling. They thaw slowly overnight and release a little juice into the oats, giving a natural, sweet flavor.

Fresh berries, though, are better added the next day. Why? Because they hold their shape and texture better that way. If you add fresh strawberries or blueberries too early, they can get mushy or watery.

Another mistake? Skipping the layer order. You want oats and chia seeds at the bottom, yogurt and protein mixed on top, and berries last. That layering keeps the texture perfect and makes every spoonful feel like a real treat.

We’ve had readers ask, “Can you mess up overnight oats?” The truth is: yes, a few small things can throw them off. But once you know what to avoid, it’s easy. Just like How to Fix Your Metabolism starts with simple steps, so does building a better snack.

Berry cheesecake overnight oats should feel indulgent, not disappointing. Get the timing and texture right, and you’ll have a snack that hits every time.

How to Prep Like a Pro

Can You Add Cream Cheese to Overnight Oats?
Yes, you can — but with a few notes. Classic berry cheesecake overnight oats use Greek yogurt for that creamy, tangy layer. It mimics cheesecake without adding a lot of fat or sugar. But if you really want that classic cheesecake taste, adding a little cream cheese is totally fine.

Stick to a small amount — about 1 tablespoon per serving. Make sure it’s softened and blended with the yogurt and honey so it spreads smoothly. It gives that richer flavor, especially if you skip the protein powder. We recommend pairing it with stronger berries like raspberries or blackberries, which balance out the richness.

Still, most people find that Greek yogurt alone gives just the right texture. It’s lighter, high in protein, and makes the prep super easy. That’s why we use it in most of our go-to recipes — like the topping in our Cottage Cheese Ranch Dip, which also gets its creaminess without needing extra cheese.

Meal Prep Tips for Creamy, Fresh Results
When making berry cheesecake overnight oats, the key is layering and portioning. Use jars or containers with lids — anything you can seal and store in the fridge for 3–4 days.

Here’s our go-to prep process:

  1. Start with oats, chia seeds, and just enough milk to cover.
  2. Mix in a scoop of protein powder.
  3. Add a layer of Greek yogurt mixed with honey (and cream cheese if using).
  4. Finish with berries and close the lid.
  5. Add crushed graham crackers right before eating so they stay crunchy.

Want a smoother mix? Blend your oats with milk before layering for a pudding-like texture. Want it sweeter? Add mashed banana instead of honey. This is your snack — build it how you like.

We prep 3–4 jars at once and keep them chilled. They’re perfect for busy nights when cooking feels like too much. If you’re already making Insulin-Control Meals or doing Sunday prep, these oats slide right into your plan.

By prepping ahead, you always have something ready that feels like a treat — but fuels your body right. Berry cheesecake overnight oats aren’t just easy to make. They’re easy to stick with.

FAQs + Pro Tips

Why You Might Feel Bloated After Overnight Oats

Some people feel bloated after eating overnight oats. It’s often because of too much fiber too fast, or because the oats weren’t soaked long enough. In berry cheesecake overnight oats, chia seeds and oats expand overnight, which helps your body digest them better. If you’re still feeling off, try cutting the portion or switching to gluten-free oats.
Also, watch your mix-ins. Adding lots of raw fruit, dairy, and sweeteners all at once can be tough on the stomach. Keep it simple, and adjust based on what your body handles best. Just like with High-Protein Orzo Meals, balance matters.

What Not to Add in Overnight Oats?

Avoid ingredients that mess with the texture or shelf life. Don’t add fresh bananas, crunchy granola, or raw apples overnight — they turn mushy or brown. Don’t add nuts or crushed crackers ahead of time. Save them for right before eating. With berry cheesecake overnight oats, keeping the base clean is the key to a good snack.

Are Overnight Oats Actually Healthy?

Yes, especially when made with real ingredients like oats, Greek yogurt, chia seeds, and berries. This combo gives you fiber, protein, and antioxidants. Unlike sugary snacks, berry cheesecake overnight oats keep you full and steady without a crash. They’re a much smarter choice than store-bought treats or late-night processed foods.

Can You Add Cream Cheese to Overnight Oats?

You can, and it tastes great if you’re aiming for a true cheesecake flavor. Blend a tablespoon of cream cheese into your yogurt layer. It makes the topping extra rich and smooth. Just be careful with the portion — a little goes a long way. We still prefer Greek yogurt alone for ease and balance.

Why Not Add Berries to Overnight Oats?

You can add frozen berries right away — they thaw overnight and release flavor into the oats. But avoid adding fresh ones too early. They get mushy or soggy. For the best texture, add fresh berries right before serving. That keeps berry cheesecake overnight oats tasting fresh and sweet.

What Is the Healthiest Thing to Add to Overnight Oats?

It depends on your goals. Chia seeds are great for healthy fats and fiber. Greek yogurt boosts protein. Berries add antioxidants and natural sweetness. If you want more staying power, try a spoonful of nut butter. The best part about berry cheesecake overnight oats is that you can build them to match your needs — whether it’s fat loss, muscle gain, or just clean fuel.

Print
clock clock iconcutlery cutlery iconflag flag iconfolder folder iconinstagram instagram iconpinterest pinterest iconfacebook facebook iconprint print iconsquares squares iconheart heart iconheart solid heart solid icon
berry cheesecake overnight oats ready to eat with spoon and toppings

Berry cheesecake overnight oats


5 Stars 4 Stars 3 Stars 2 Stars 1 Star

No reviews

  • Author: Chef Dodos
  • Total Time: 6 hours
  • Yield: 1 serving 1x

Description

Berry cheesecake overnight oats are the ultimate high-protein late-night snack. Sweet, creamy, and easy to prep!


Ingredients

Scale

1/2 cup rolled oats

1/2 cup unsweetened almond milk

1 tbsp chia seeds

1/2 scoop vanilla protein powder

1/2 cup Greek yogurt

1 tbsp honey

1/3 cup mixed berries (fresh or frozen)

1 crushed graham cracker (optional)


Instructions

1. In a jar or container, mix oats, chia seeds, almond milk, and protein powder.

2. Let sit for 5 minutes to slightly thicken.

3. In a bowl, mix Greek yogurt and honey until smooth. (Add 1 tbsp cream cheese if desired.)

4. Layer the yogurt mixture over the oat base.

5. Top with berries and cover.

6. Refrigerate overnight (at least 4–6 hours).

7. Before eating, add crushed graham crackers if desired.

Notes

Use frozen berries for juicy flavor overnight.

Swap Greek yogurt for plant-based yogurt for a dairy-free version.

Use gluten-free oats and crackers to make it gluten-free.

  • Prep Time: 5 minutes
  • Cook Time: 0 minutes
  • Category: Snack
  • Method: No-Cook
  • Cuisine: American

Nutrition

  • Serving Size: 1 jar
  • Calories: 320
  • Sugar: 10g
  • Sodium: 150mg
  • Fat: 8g
  • Saturated Fat: 2g
  • Unsaturated Fat: 5g
  • Trans Fat: 0g
  • Carbohydrates: 35g
  • Fiber: 7g
  • Protein: 22g
  • Cholesterol: 10mg

Conclusion

Berry cheesecake overnight oats are more than just a healthy snack — they’re a smart, crave-worthy way to satisfy those late-night cravings while still supporting your goals. With simple ingredients like oats, Greek yogurt, chia seeds, and berries, you get real food that fuels your body without added junk.

This snack became a game-changer during our 100-day fitness challenge. It gave us a way to enjoy something sweet without breaking progress. And the best part? It’s easy to prep, super flexible, and always ready when you need it.

Whether you’re looking to fuel recovery, cut out sugar, or stay consistent with your eating, berry cheesecake overnight oats deliver. Try them tonight — and let them work for you tomorrow.

Let’s StayFit — together. Follow us on facebbok for more

Why Green Juice Is the Ultimate Morning Game Changer

Green juice in glass bottles with celery, lemon, and ginger on white table
Table of Contents

How Green Juice Changed Our Mornings

Green juice with cucumber, celery, apple, ginger, and lemon
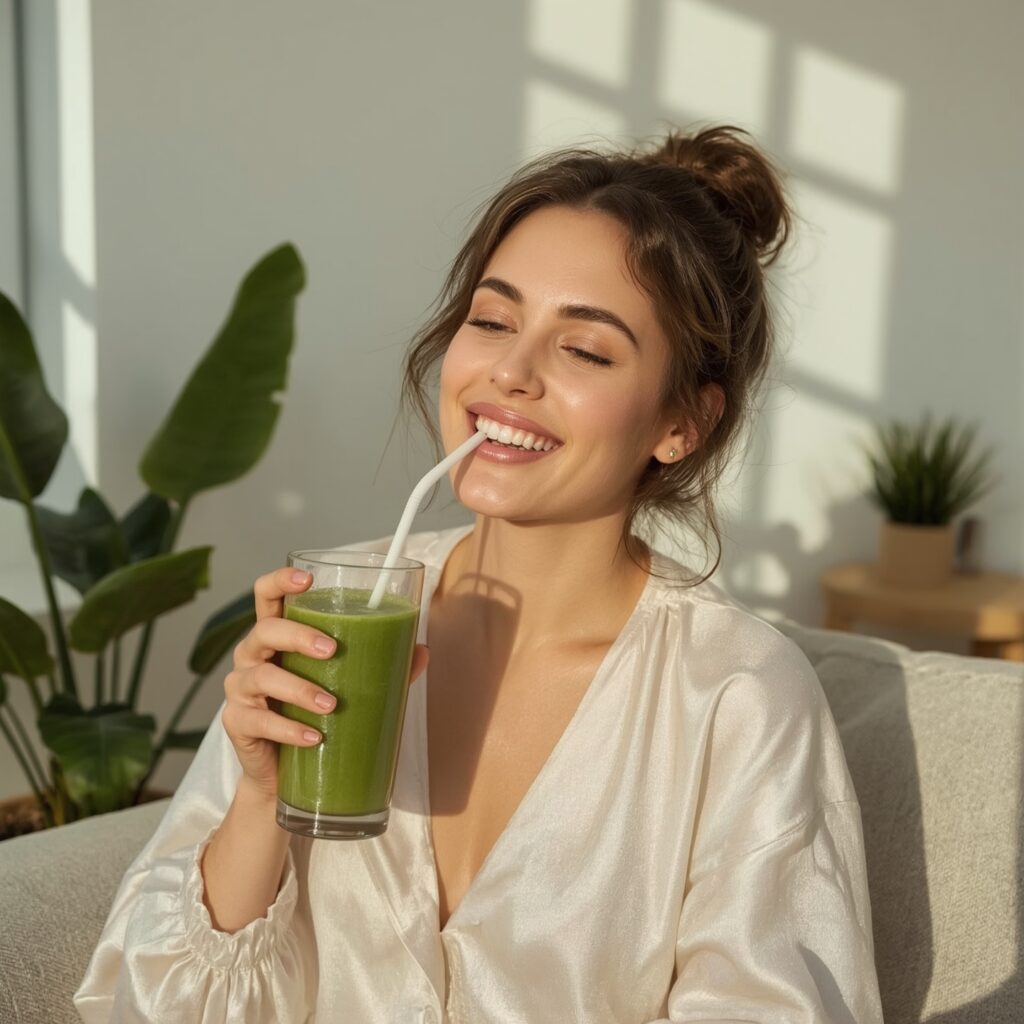
Enjoying the benefits of green juice first thing in the morning.

I still remember the day Med’s face swelled so badly, we rushed to urgent care. It wasn’t an infection or injury—it was internal inflammation. At the same time, I was dealing with uncomfortable, daily constipation that nothing seemed to relieve. We felt stuck.

That’s when we kicked off our 100-day challenge. Real food, real workouts, and zero excuses. As part of our new morning routine, we started drinking green juice—just five ingredients: cucumber, celery, apple, lemon, and ginger.

To our surprise, this fresh blend worked fast. Med’s swelling went down. My digestion got back on track. And we both felt lighter and more energized within days. What began as a simple habit turned into a foundational part of our transformation. If you’ve ever wondered what one glass can do, here’s what we learned from drinking it daily—and why green juice still starts our mornings.

What It Does for Your Body

Helps cleanse and wake up your system

Green juice is more than just trendy. When made with fresh, hydrating produce, it acts like a reset button for your body. Cucumber and celery are loaded with water and natural minerals, which support kidney function and help flush out excess fluid. The result? Less bloating, more balance.

Lemon supports digestion by stimulating bile flow, helping your system process food more efficiently. Ginger soothes the stomach and reduces gut inflammation, which is exactly what Med needed when he was battling swelling and discomfort. And a crisp apple adds subtle fiber and sweetness, keeping blood sugar steady and your energy stable.

For me, the real win was smoother digestion. My gut had been sluggish, but within days of adding this drink to my mornings, things finally started to move.

Gets nutrients into your system—fast

One key benefit of juicing is speed. Because most fiber is removed, the body absorbs nutrients almost instantly. That’s why within 10–15 minutes of drinking, many people feel sharper, lighter, or more awake.

Cucumber hydrates deeply. Celery provides vitamin K and sodium. Apple adds vitamin C. Ginger boosts circulation. Lemon helps alkalize. This green juice delivers nutrients your body can actually use—right when you need them.

And because it’s made from real produce with no added sugars or powders, your body thanks you for the clean start every time.

Green Juice Recipe (Simple & Effective)

You don’t need a ton of fancy superfoods to make a powerful green juice. This 5-ingredient combo is the exact blend we used throughout our 100-day challenge—and we still drink it today. It’s hydrating, anti-inflammatory, and naturally energizing.

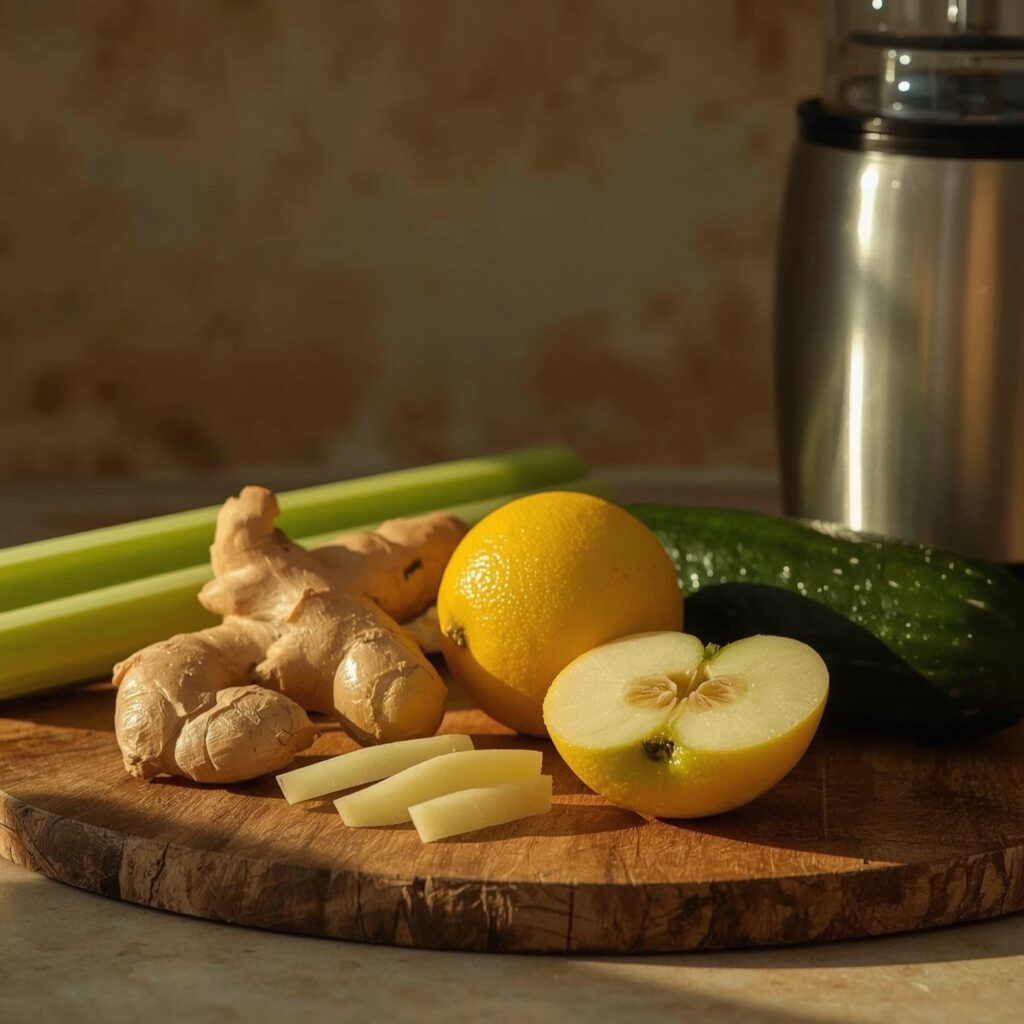
reen juice ingredients including celery, apple, lemon, ginger, and cucumber
Whole ingredients make the difference in every glass of green juice.

Ingredients:

  • 1 large cucumber
  • 3 celery stalks
  • 1 green apple (medium)
  • 1-inch piece of fresh ginger
  • ½ lemon, peeled

Use organic ingredients if possible for the cleanest flavor and best nutrient profile. Wash everything thoroughly before juicing.

Instructions:

  1. Wash all produce with cold water.
  2. Slice the cucumber, celery, and apple into smaller chunks.
  3. Peel the ginger and lemon.
  4. Run all ingredients through a juicer slowly.
  5. Stir and serve immediately.

You’ll get roughly 1–2 cups of green juice, depending on the size of your produce. Drink it first thing in the morning, before any food, for best results. If you’re batch prepping, store it in an airtight glass bottle in the fridge for up to 24 hours—but fresh is always better.

This recipe is light, energizing, and easy to make even on busy mornings. It’s the same green juice that helped us reset our health from day one—and it’s still the one we keep coming back to.

What’s Inside Your Green Juice

Each ingredient, one purpose

What makes this drink powerful is its simplicity. Every ingredient earns its spot in the glass. Cucumber, for starters, is more than water. It contains silica and antioxidants that support skin and hydration from the inside out. Celery, often overlooked, is rich in potassium and natural sodium—great for your nervous system and muscle function.

Apple adds a touch of sweetness, but it’s more than flavor. It offers vitamin C, antioxidants, and a little fiber to support your gut. Ginger is the real hero for inflammation. It’s known to calm the digestive tract, soothe nausea, and increase circulation. Lemon ties it all together, providing vitamin C and citric acid that can gently stimulate your liver and support detox.

We never added powders, sweeteners, or bottled juices. Just whole, raw produce. The first sip may taste earthy, but your body feels the results before you even finish the glass.

Why this blend actually works

The magic of this green juice isn’t in just one ingredient—it’s the combination. On their own, celery or cucumber can taste bland or harsh. But when combined with the tart brightness of lemon, the warmth of ginger, and the crisp sweetness of apple, something clicks.

That balance of flavor is why we never got bored, even after weeks of drinking it. And nutritionally, this mix hits hydration, digestion, and immunity all at once. The synergy helps your system respond better—whether you’re flushing out toxins, calming inflammation, or just starting your day clean.

You don’t need 10 ingredients. This one blend does more than enough when you’re consistent. That’s why we’ve kept it in our lives—long after the 100-day challenge ended.

The Best Greens for Juicing

Top greens that actually help

Not all leafy vegetables belong in a glass. But the right greens make your green juice more powerful—without making it taste like a compost pile. Kale is packed with vitamin K and calcium, offering major benefits for bones and blood clotting. It’s also one of the most antioxidant-rich greens you can juice.

Spinach adds iron and folate to the mix, both of which help support energy and circulation. Romaine is great for volume—it’s light in flavor and high in water, making it a smooth base. Then there’s parsley, which brings a bold flavor and plenty of chlorophyll, known for detox support.

Celery, often the foundation of many green juice recipes, acts as both a green and a base. It hydrates, cleanses, and calms—all in one stalk. Each of these ingredients can strengthen your juice without overpowering it.

Getting the balance right

Here’s where most people go wrong: too many intense greens, not enough balance. If your green juice tastes too bitter or earthy, chances are it’s missing hydration or citrus. Strong greens like kale or parsley should be paired with something softer—like cucumber or romaine.

Lemon and apple not only cut the sharpness, but they make the juice easier to drink every day. And that’s the point: to make green juice a habit, not a chore.

We learned to rotate greens weekly—sometimes spinach, sometimes kale. It kept the flavor fresh and the benefits steady. Stick with 2–3 greens at a time. That keeps your juice simple, effective, and something you actually look forward to.

When and How to Drink Green Juice

Why mornings matter most

One of the best times to drink green juice is first thing in the morning, on an empty stomach. That’s when your body is most ready to absorb nutrients without interference from other foods. Think of it like giving your cells a clean, quick shot of hydration and vitamins before the day gets moving.

We found that making this the first thing we consumed helped with bloating, energy, and focus. Instead of reaching for coffee, we got a lift that felt smoother and didn’t crash later. Med even said it felt like a “reset” button—his face looked less puffy and his eyes brighter within the first week.

It doesn’t take long. Just drink slowly, let your body respond, and follow it up with a balanced breakfast. Within minutes, you’ll likely notice you feel clearer, more awake, and ready to go.

f you’re pairing your morning juice with something light, our collection of healthy snacks has quick options that won’t undo your clean start.

Daily use vs. occasional detox

You don’t need to drink green juice every day—but if your goal is better digestion, clearer skin, or natural energy, consistency helps. For us, daily use during the 100-day challenge made the difference. We saw real results in inflammation, gut health, and even cravings.

Batch prep your green juice to save time and stay consistent.

Still, it’s good to be mindful. Juicing removes fiber, so you’re not getting the same fullness as eating whole veggies. And if you add too much fruit, sugar can creep up. Keep your mix simple, balanced, and low-fruit for daily use. If you’re only using it a few times a week, that’s still beneficial.

Whether daily or just a few mornings a week, green juice is most effective when it becomes a habit—not a quick fix. Start small, stay consistent, and adjust based on how your body responds.

Green Juice vs. Green Smoothies

Which one fits your goals better?

Green juice and green smoothies often get lumped together, but they serve different purposes. Juice removes the fiber and gives your body fast access to vitamins and minerals. Smoothies, on the other hand, keep the fiber intact—slowing digestion and keeping you fuller longer.

If your goal is a quick nutrient boost, green juice works best. It’s especially useful in the morning or when you need a light reset. That’s why we used it during our 100-day challenge—it helped us start the day feeling light, not weighed down.

Smoothies shine when you need something more substantial, like a meal replacement. They blend fruits, greens, nuts, and even protein, which keeps hunger at bay. But they take longer to digest, and not everyone feels good starting the day that heavy.

or more on how real ingredients support real change, check out our full section on nutrition tips and simple habits that actually stick.

Knowing what your body needs—and when—makes it easier to choose between them.

When to reach for one over the other

There were days Med needed something quick and energizing. That’s when green juice made the most sense. It gave him the hydration, minerals, and clarity he needed without slowing him down. On heavier training days, we switched to smoothies for longer-lasting fuel.

If you’re dealing with inflammation, sluggish digestion, or just feel off, juice may be your better bet. But if you’re looking to stay full through a busy morning, a green smoothie is more appropriate.

Both are healthy. But timing and ingredients matter. We still use both, depending on how we feel. Just remember: green juice is like a clean slate for your system. Smoothies are more like a full plate—just blended.

The DODOs’ Green Juice Transformation

How one glass changed our 100-day journey

When we started the StayFit 100-day challenge, we didn’t expect green juice to have such an impact. But the difference was real. Med’s facial swelling—once so severe it distorted his features—began to fade by week two. His skin looked calmer, and his energy felt steadier. For me, after struggling with constipation for months, I finally felt my digestion working the way it should.

Every morning, before coffee or breakfast, we each drank one glass. Just cucumber, celery, apple, ginger, and lemon. No powders, no magic pills. And yet, that small habit shifted everything. It made us feel good right away—and when you feel good, it’s easier to stay consistent.

It wasn’t always easy. There were days we didn’t feel like prepping produce. But after feeling the difference, we pushed through. That’s what made this routine stick—and what helped us stay on track.

Why it’s still part of our lives

Even after the challenge ended, we kept drinking green juice. Not every single day, but most. It’s become part of how we reset after travel, holidays, or just a few off days. When things feel heavy, this drink brings us back to balance.

It’s simple, fast, and packed with benefits we can feel—especially in our skin, digestion, and mental clarity. And because the recipe is affordable and quick to prep, there’s really no excuse.

If you’re just getting started, don’t overthink it. Start with one small glass. Drink it first thing. Let your body tell you how it feels. That’s how we began—and that’s how green juice became one of the most powerful tools in our daily life.

In the end, green juice became more than just a drink for us—it became a daily reset. From calming inflammation to supporting digestion, that simple glass each morning gave us clarity, energy, and real results. No gimmicks, no trends—just real food working with our bodies, not against them.

If you’re stuck, sluggish, or just curious where to begin, this is a habit worth trying. Start with one small glass. Use ingredients you trust. Drink it first thing in the morning. And most importantly, stay consistent. That’s where the real magic lives.

We changed our health in 100 days. You can, too. And if green juice helps you feel just 10% better tomorrow than you did today—it’s already worth it.

Let’s StayFit—together. For More follow us on facebook & pinterest

FAQs

What does green juice do to your body?

Green juice gives your body quick access to vitamins, minerals, and antioxidants. It supports digestion, reduces inflammation, hydrates your system, and can improve energy levels. When consumed in the morning, it helps flush out toxins and wake up your metabolism. Many people also notice clearer skin and fewer cravings when it becomes part of their routine.

What is the healthiest green to juice?

Kale is one of the most nutrient-rich greens you can add. It’s packed with vitamin K, calcium, and antioxidants. Spinach is a great alternative if you want something milder in flavor. Celery is also a popular option—it hydrates, supports digestion, and blends well with other ingredients. Rotating your greens gives your body a wider range of nutrients.

What is green juice made of?

Green juice is typically made from leafy greens and hydrating vegetables, often combined with a bit of fruit and citrus. Our favorite mix includes cucumber, celery, apple, ginger, and lemon. This combination provides hydration, anti-inflammatory support, natural sweetness, and digestive benefits without added sugars or preservatives.

Is it okay to drink green juice every morning?

Yes, for most people, drinking green juice daily is safe and beneficial—especially when made from whole, fresh ingredients. Just keep portions moderate and avoid high-sugar fruits. It’s best enjoyed on an empty stomach, as this helps your body absorb nutrients faster. If you’re new to juicing, start with a few days per week and listen to your body.

Print
clock clock iconcutlery cutlery iconflag flag iconfolder folder iconinstagram instagram iconpinterest pinterest iconfacebook facebook iconprint print iconsquares squares iconheart heart iconheart solid heart solid icon
Green juice in glass bottles with celery, lemon, and ginger on white table

Green Juice Benefits: Why This Detox Drink Deserves a Spot in Your Daily Routine


5 Stars 4 Stars 3 Stars 2 Stars 1 Star

No reviews

  • Author: Chef Dodos
  • Total Time: 5 minutes
  • Yield: 12 servings 1x

Description

This 5-ingredient green juice is hydrating, anti-inflammatory, and energizing—perfect for morning resets or gentle detox support.


Ingredients

Scale

1 large cucumber

3 celery stalks

1 green apple (medium)

1-inch piece of fresh ginger

½ lemon, peeled


Instructions

1. Wash all produce with cold water.

2. Slice the cucumber, celery, and apple into chunks.

3. Peel the ginger and lemon.

4. Juice all ingredients slowly.

5. Stir and serve immediately.

Notes

Drink it on an empty stomach for best nutrient absorption.

Use organic produce if available.

Store in an airtight glass jar for up to 24 hours.

Avoid adding sweeteners or powders.

  • Prep Time: 5 minutes
  • Category: Healthy Snacks
  • Method: Juicing
  • Cuisine: Clean Eating

Nutrition

  • Serving Size: 1 glass (8 oz)
  • Calories: 60
  • Sugar: 10g
  • Sodium: 60mg
  • Fat: 0g
  • Saturated Fat: 0g
  • Unsaturated Fat: 0g
  • Trans Fat: 0g
  • Carbohydrates: 14g
  • Fiber: 1g
  • Protein: 1g
  • Cholesterol: 0mg

Protein Bagels in the Air Fryer: Quick, Healthy & High-Protein Breakfast

protein bagels fresh from air fryer on table
Table of Contents

Our Story + Why These Air Fryer Protein Bagels Work

Protein bagels weren’t something we grew up eating — but now, we can’t imagine our week without them. When we kicked off our 100-Day StayFit Challenge, we knew we had to find meals that actually fueled our goals. Kiko was stuck with stubborn belly fat despite lifting daily. Med? He lived on takeout and burgers and felt drained by noon.

So, we made a deal: Kiko would handle breakfast, and Med would take over dinner. That’s when we started playing around with bagel recipes. We needed something easy, high in protein, and satisfying enough to replace a drive-thru breakfast. These air fryer bagels turned out to be the perfect fix.

 protein bagels fresh from air fryer on table
reshly cooked protein bagels

With just a handful of ingredients and a quick air fryer session, we had golden, chewy bagels that didn’t taste “healthy” — they tasted legit good. Even better, Med started using them as burger buns, calling them the “ultimate post-workout sandwich base.”

They’re crisp on the outside, fluffy inside, and packed with protein thanks to Greek yogurt. One batch keeps us set for the week. Whether we’re topping them with eggs and spinach or peanut butter and banana, these bagels fit right into our routine.

Benefits of Air Fryer Protein Bagels

Protein bagels aren’t just a trend — they’re a smart choice for anyone trying to eat clean and stay full longer. Unlike the processed, carb-heavy bagels from the store, these are made with real ingredients that fuel your body, not spike your blood sugar.

What makes them even better is the air fryer. Instead of waiting for the oven to preheat, you get warm, golden bagels in under 15 minutes. The texture is perfect — crisp outside, soft and chewy inside. No oil, no mess, no guesswork.

The real magic, though, is in the macros. Thanks to Greek yogurt and self-rising flour, these protein bagels offer a balanced mix of protein and carbs. That means better energy, improved recovery, and fewer cravings between meals. For us, they became a go-to swap when we ditched sugary cereals and dry toast.

Med likes his protein bagels stacked with grilled chicken and egg for a power-packed start. I usually keep it simple — just some nut butter or a soft-boiled egg. Either way, they’re satisfying and easy to customize. If you want more meal inspiration, check out our grilled chicken bites or chocolate strawberry yogurt clusters — two staples we rotate with these bagels.

They also store well, so you can prep a batch for the week. Just reheat and go. It’s the kind of simple, real food that helped us stay on track — and it can do the same for you.

Ingredients & Prep Tips

Making protein bagels at home is surprisingly simple. You don’t need yeast, long rise times, or complicated flours. Just a few basic ingredients you likely already have — and an air fryer.

ingredients for homemade protein bagels
Greek yogurt, flour, egg, and seasoning prepped for protein bagels

The base of these bagels is a combo of self-rising flour and non-fat Greek yogurt. The flour gives structure, and the yogurt adds protein while keeping the dough soft. If you want to boost the protein even more, you can mix in a scoop of unflavored whey or collagen powder. Just be sure to adjust the flour slightly to keep the texture right.

You can also change up the flours. We’ve tested these with whole wheat and oat flour — both work well. For gluten-free options, use a 1:1 gluten-free baking blend. It holds together better than almond flour alone.

As for flavor, that’s where you get to play. Try garlic powder and cheddar for a savory twist, or cinnamon and a dash of maple for a sweeter version. Topping them with Everything Bagel seasoning before air frying gives them that classic crunch and aroma.

The dough is quick to pull together. Mix until it’s tacky but not sticky. Lightly flour your hands, shape into four even rings, and don’t worry about perfection. Once cooked, they’ll look golden and feel springy to the touch.

Want more clean breakfast recipes that keep you full? Try our quick cottage cheese pancakes or chocolate baked oat cups — both pair great with these protein bagels for a full StayFit start.

Make a double batch. Once you taste them warm from the air fryer, you’ll want extras ready for the week.

Step-by-Step Cooking Instructions

You don’t need to be a baker to make these air fryer protein bagels. They come together in minutes, and the cooking process is nearly foolproof. Once you’ve made them once, you’ll know the drill by heart.

Start by mixing your dough. Combine self-rising flour and Greek yogurt in a bowl. Use a spoon or your hands to mix until it forms a tacky ball. If it’s too dry, add a spoonful of yogurt. If too sticky, sprinkle a bit more flour.

Divide the dough into four equal parts. Roll each into a log, then connect the ends to form a ring. Don’t stress about perfect shapes — a rustic look adds charm. For a golden crust, brush each with a whisked egg, then sprinkle your favorite toppings.

dividing protein bagel dough into portions
Protein bagel dough divided into four equal parts, ready to be shaped

Preheat your air fryer to 300°F if your model recommends it. Place two bagels in the basket, giving them room to expand. Air fry for 10–12 minutes, flipping once at the halfway mark. They should be golden brown and firm when done. Let them rest for 5 minutes before slicing.

Want a full StayFit-style breakfast? Slice one open and add some zesty lemon chicken orzo or a few spoonfuls of our roasted sweet potato salad. It’s a great way to add variety without losing the focus on whole, protein-rich foods.

These protein bagels store well in the fridge for up to 4 days. To reheat, pop one back in the air fryer at 325°F for 2–3 minutes. It comes out crispy and warm — just like freshly made.

Once you get the feel, you’ll never go back to store-bought. Real food, real fast, and always satisfying.

Common Questions About Protein Bagels

We get asked about protein bagels a lot — especially once people realize they can make them with just a few ingredients and an air fryer. Let’s break down the most common questions we hear from our StayFit community.

Can bagels be cooked in an air fryer?
Absolutely. In fact, the air fryer is one of the best ways to cook bagels at home. You get a golden, crisp crust without drying out the inside. It’s faster than baking in the oven, and there’s no preheat time. Plus, the air fryer makes batch-cooking easy for meal prep.

Are protein bagels healthy?
Yes — especially when you make them yourself. These aren’t the sugary, white-flour bagels from a coffee shop. They’re built from Greek yogurt and flour, giving you a good balance of protein and carbs. They help keep blood sugar stable and support muscle recovery. Add a topping like eggs or our Mediterranean ground beef for an even more balanced plate.

Can you heat up a bagel in an air fryer?
Yes, and it’s one of the best ways to do it. Just set your air fryer to 325°F and heat the bagel for 2–3 minutes. It’ll come out warm, slightly crispy, and way better than a microwave version. Try it with a slice of cheese or our cottage cheese ranch dip on top.

Can you air fry bagels instead of toasting them?
Definitely. You can slice them and toss them into the air fryer for a quick toast. It works especially well with leftovers. Just a few minutes gives you a crunchy finish with zero fuss.

Whether you’re reheating or baking from scratch, protein bagels and air fryers are a match made for real-life eating.

Serving, Storing & Customizing

Now that your protein bagels are golden and ready, let’s talk about how to enjoy them — and keep them fresh. These aren’t just for breakfast. They’re a versatile base for meals throughout your day.

How to Serve Them
Go savory with turkey, avocado, and a soft-boiled egg. For a classic breakfast vibe, stuff your bagel with scrambled eggs and a slice of lean sausage. If you’re craving sweet, try peanut butter and banana, or our chocolate strawberry yogurt clusters spread on top.

For Med, the ultimate is turning these into a burger — chicken, spicy sauce, and lettuce stacked between two warm bagel halves. They’re firm enough to hold up and soft enough to bite through easily.

Storing & Freezing Tips
Let your bagels cool completely before storing. Keep them in an airtight container in the fridge for up to 4 days. To reheat, air fry at 325°F for 2–3 minutes, and they’re good as new.

Want to freeze a batch? No problem. Wrap each one in parchment or foil, then store in a freezer-safe bag. When you’re ready, toss it straight into the air fryer — no thawing needed.

Customizing Your Flavor
These protein bagels are a blank canvas. Add chopped herbs or grated cheese to the dough. Swap in cinnamon and vanilla for a sweeter version. Or top with Everything Bagel seasoning for that classic crunch.

Pair them with meals that keep you on track — like our zesty lemon chicken orzo or even sliced with a side of cottage cheese and fruit for a fast lunch.

Once you find your favorite combo, you’ll wonder how you ever did mornings without these.

FAQs

Can bagels be cooked in an air fryer?

Yes, bagels cook perfectly in an air fryer. Whether you’re making fresh dough or reheating leftovers, the air fryer gives you a crisp exterior and soft inside in just 10–12 minutes — no oven needed.

Are protein bagels healthy?

Homemade protein bagels are a healthy choice, especially when made with Greek yogurt and minimal ingredients. They’re high in protein, lower in sugar, and more filling than traditional white flour bagels.

Can you heat up a bagel in an air fryer?

Definitely. To reheat, place your bagel in the air fryer at 325°F for 2–3 minutes. It warms through evenly and keeps its texture better than microwaving.

Can you air fry bagels instead of toasting them?

Yes. Slice your protein bagel in half and pop it into the air fryer. Toast at 350°F for 2–4 minutes for a warm, crispy result without a traditional toaster.

Conclusion

You don’t need fancy ingredients or a full kitchen to eat better — just real food, a plan, and a little commitment. These protein bagels have become one of our most dependable recipes. They’re simple to make, easy to customize, and fit perfectly into a busy, balanced life.

Whether you’re looking for a quick breakfast, a burger swap, or a grab-and-go snack, this one recipe can do it all. And because they’re cooked in the air fryer, they’re as efficient as they are delicious.

We’ve used these bagels to power our mornings, fuel workouts, and even replace fast food cravings. They helped us StayFit — now it’s your turn.

let’s stayfit together ! Follow us for more on facebook

Print
clock clock iconcutlery cutlery iconflag flag iconfolder folder iconinstagram instagram iconpinterest pinterest iconfacebook facebook iconprint print iconsquares squares iconheart heart iconheart solid heart solid icon
protein bagels fresh from air fryer on table

Protein Bagels in the Air Fryer: Quick, Healthy & High-Protein Breakfast


5 Stars 4 Stars 3 Stars 2 Stars 1 Star

No reviews

  • Author: Chef Dodos
  • Total Time: 17 min
  • Yield: 4 bagels 1x

Description

These easy air fryer protein bagels are made with just 3 ingredients, no yeast, and pack over 12g of protein each. Perfect for healthy breakfasts or meal prep.


Ingredients

Scale

1 cup self-rising flour

1 cup non-fat Greek yogurt

1 egg (for egg wash, optional)

1 tbsp Everything Bagel seasoning (optional)


Instructions

1. Mix the flour and Greek yogurt in a bowl until it forms a dough.

2. Transfer to a floured surface and knead gently until smooth.

3. Divide into 4 equal parts, roll into logs, and shape into rings.

4. Brush with egg wash and sprinkle seasoning if using.

5. Preheat air fryer to 300°F. Place 2 bagels in the basket with space.

6. Air fry 10–12 minutes, flipping at halfway for even browning.

7. Cool for 5 minutes before slicing and serving.

Notes

Use whole wheat or oat flour for extra fiber.

Freeze extras and reheat in the air fryer straight from frozen.

Add cinnamon or garlic powder to customize the flavor.

  • Prep Time: 5 min
  • Cook Time: 12 min
  • Category: Breakfast, Snack
  • Method: Air Fryer
  • Cuisine: American

Nutrition

  • Serving Size: 1 bagel
  • Calories: 145
  • Sugar: 1g
  • Sodium: 170mg
  • Fat: 2g
  • Saturated Fat: 0.5g
  • Unsaturated Fat: 1.5g
  • Trans Fat: 0g
  • Carbohydrates: 21g
  • Fiber: 2g
  • Protein: 12g
  • Cholesterol: 40mg

How to Fix Your Metabolism: Simple Habits That Actually Work

woman resetting metabolism with a healthy breakfast

Real Talk: Fixing Your Metabolism Starts Here

We get it. You’re working out, cutting calories, skipping dessert—but the scale won’t budge. Maybe you feel tired no matter how many hours you sleep. Or you’ve hit that dreaded plateau where your body seems stuck in survival mode. That’s exactly where Kiko was. Despite crushing workouts, he still had stubborn belly fat and zero energy to show for it. Med? He couldn’t gain weight, had brain fog all the time, and was running on caffeine and snacks. Sound familiar?

Table of Contents

That’s when we made a pact: 100 days of no shortcuts, no gimmicks, just showing up with real food and real movement. That’s how we fixed our metabolism—and our lives. And we’re here to show you how to fix your metabolism too. Because it’s not about punishment—it’s about understanding what your body actually needs.

Hey! We’re The DODOs — Kiko & Med. We didn’t always look or feel this way. Kiko was hitting the gym but stuck with stubborn fat and low energy. Med was underweight, unhealthy, and constantly crashing. We both felt off — and we knew it was time for a change. So, we made a deal: 100 days of no excuses. Just real workouts, real meals, and real accountability. Kiko took on breakfast and snacks. Med mastered lunch and dinner. Together, we transformed our bodies, our habits, and our lives — and we’re here to help you do the same. More on our story.

So, what does a broken or sluggish metabolism even feel like? It’s more than weight gain. It’s waking up groggy. Craving sugar non-stop. Having zero motivation to move. These signs often show your body’s energy system is off-balance—and it’s not your fault. Years of crash diets, stress, and inconsistent eating habits can mess things up. But the good news? You can reverse that.

Let’s break this down. Metabolism is how your body turns food into energy. When it’s firing right, you feel strong, focused, and energized. But when it slows down? Everything feels like a grind. That’s why learning how to fix your metabolism isn’t just for fitness junkies—it’s for anyone who wants to feel alive again.

The first step? Fueling your body better. That’s where breakfast comes in hot. If you’re avoiding sugar spikes, reach for a savory option. Or if you’re meal prepping for busy mornings, these Savory Cottage Cheese Pancakes are protein-packed and easy to digest. These small wins add up—because fixing your metabolism isn’t about one huge change, it’s about what you do consistently.

Next, we’ll show you the signs your metabolism is waving red flags—and what to do when it happens.

Signs Your Metabolism Needs Fixing

Ever feel like your body’s just not cooperating anymore? You’re doing all the right things—at least on paper—but nothing’s changing. That’s usually your body sending signals that your metabolism needs some attention. Before you can fix a damaged metabolism, you have to know what you’re dealing with.

One of the first red flags? Chronic fatigue. We’re not talking about the “I stayed up too late” kind. This is the “even coffee isn’t working” kind of tired. Pair that with constant cravings, especially for sugar or simple carbs, and you’re likely dealing with a stressed-out, sluggish system. Other clues? Cold hands or feet, hair thinning, poor workout recovery, or even irregular periods in women. It’s not just about gaining weight—your whole body can feel off.

Sometimes, people confuse these symptoms with aging or stress alone. But your metabolism doesn’t just “slow down” with age—it adapts to how you treat it. If you’ve been skipping meals, doing endless cardio, or following ultra-low calorie diets, you may have accidentally trained your body to conserve energy instead of burn it.

What’s happening inside your body during all this? Your basal metabolic rate (BMR)—the energy your body needs just to function—can drop. Hormones like cortisol (your stress hormone) rise, while your thyroid activity may dip. Over time, your body holds onto fat, loses muscle, and gets really good at conserving energy. Unfortunately, that means fat loss slows down, even if you’re trying harder than ever.

Muscle is also a major player here. It’s metabolically active, which means the more lean muscle you have, the more calories you burn at rest. But if you’re not eating enough protein or strength training consistently, your body may start breaking down muscle for fuel. That makes things worse.

The good news? You can take action—and you don’t have to guess your way through it. One of the smartest strategies we used was prepping meals ahead. Not only did it help us eat consistently, but it made sure we were hitting our protein goals. If you’re ready to rebuild from the inside out, check out our High Protein Meal Prep ideas that are both simple and satisfying.

And let’s not forget dinner. The last meal of your day sets the tone for your body’s overnight recovery. Instead of skipping it or grabbing takeout, try one of our easy Healthy Dinner Recipes to support stable energy and better sleep.

Understanding these warning signs is your first win. Next, we’ll show you how to reset your metabolism naturally—without extremes.

How to Reset Your Metabolism Naturally

So, now that you know the signs, the next step is figuring out how to reset your metabolism in a way that actually sticks. Here’s the truth: your metabolism isn’t broken—it’s just been adapting to survival mode. The fix? Teach your body it’s safe to burn again. That starts with habits, not hacks.

Real food fuels real metabolic repair.

First things first: eat more, not less—especially if you’ve been dieting hard. Undereating trains your body to conserve. But when you start fueling it properly with real food and enough protein, it shifts gears. It’s like giving your system permission to stop hoarding calories and start burning them again.

Next up: lift something heavy. Strength training three times a week builds muscle, which raises your resting metabolic rate over time. It’s not just about how many calories you burn during the workout—it’s what happens afterward. Your body keeps working for hours to repair and rebuild. That means more energy burned, even on your rest days.

But food and fitness aren’t everything. Sleep is one of the most underrated metabolism-reset tools out there. Aim for 7–9 hours. Anything less, and your hunger hormones go haywire. You’ll feel hungrier, crave sugar, and struggle to recover.

And don’t underestimate walking. We’re not talking about steps for the sake of steps. Walking (aka NEAT—Non-Exercise Activity Thermogenesis) can make a huge difference in your daily calorie burn without spiking cortisol. It’s easy on your joints, great for digestion, and helps regulate blood sugar.

Lastly, manage your stress. High cortisol levels = stalled fat loss, increased cravings, poor sleep, and hormone imbalance. If your life feels like a non-stop sprint, your metabolism is likely responding by slamming the brakes.

What NOT to Do: Common Metabolism Myths

Let’s bust some myths that might be holding you back:

  • Myth #1: Starving yourself speeds up weight loss.
    Nope. It slows your metabolism and increases fat storage over time.
  • Myth #2: Cardio is king.
    Excessive cardio can actually lead to muscle loss. Strength training gives you way more bang for your buck metabolically.
  • Myth #3: Intermittent fasting fixes everything.
    It can work for some—but if you’re already stressed, under-eating, or hormonally imbalanced, it might make things worse.

Here’s a quick comparison table for clarity:

                                                                                       
MythTruth
Starving helps burn fatLeads to muscle loss and slowed metabolism
More cardio is betterToo much can lower muscle mass
Fasting resets everythingNot ideal for everyone, especially under stress

Resetting your metabolism doesn’t happen overnight—but with the right fuel, the right movement, and the right recovery, it absolutely happens.

Up next: how to boost your metabolism for good, so you can keep progress rolling.

Boosting Your Metabolism for Good

Now that you’ve started building better habits, let’s talk about how to boost your metabolism long-term. Because while short fixes feel exciting, the real goal is a body that stays strong, energized, and efficient—without burnout.

First off, lift weights regularly. Muscle is your metabolism’s best friend. It’s active tissue, meaning the more you have, the more calories you burn at rest. Aim for resistance training at least 3 times a week. You don’t need fancy equipment—just consistency and progression.

strength training to boost metabolism
Resistance training builds muscle and supports fat-burning.

Next, keep fueling with protein. Every meal. It helps your body repair, rebuild, and stay satiated. A smart place to start? Try our Sous Vide Chicken Breast. It satisfies cravings without spiking your blood sugar—and supports muscle recovery after workouts.

Hydration and micronutrients also matter more than you might think. Minerals like magnesium, zinc, and selenium help your thyroid, hormones, and metabolism run efficiently. Most people don’t need expensive supplements—just whole, nutrient-dense meals and plenty of water throughout the day.

Of course, stress is a sneaky metabolism killer. High cortisol levels increase fat storage and muscle breakdown. The fix? Make recovery a non-negotiable. Get outside, get enough sleep, and set boundaries that support a calmer daily rhythm.

And when it comes to satisfying dinners that won’t drag your metabolism down, go for meals that check all the boxes: balanced, high in protein, and full of flavor. That’s exactly what our High Protein Pasta Recipes deliver—comfort food with real benefits.

How Long Does It Actually Take?

Let’s be real—there’s no one-size-fits-all timeline for fixing your metabolism. Some people start feeling better in a few weeks. For others, especially those recovering from years of low-calorie diets or chronic stress, it can take 3–6 months to fully bounce back.

What matters most? That your body starts trusting you again.

You’ll notice signs along the way: better sleep, steady energy, normal hunger cues, improved digestion. Maybe you feel warmer throughout the day. Maybe you’re not crashing at 3pm anymore. These are green lights—your metabolism coming back online.

So if you’re wondering how long it takes to fix your metabolism, remember: it’s not about speed. It’s about direction. If you’re showing up consistently, giving your body what it needs, and listening instead of forcing—it’s working.

And once your metabolism starts firing again, you’ll wonder how you ever functioned without it.

What Food Speeds Up Metabolism?

Food isn’t just fuel—it’s information for your body. And some foods send the message: burn more, store less. So if you’re wondering what food speeds up metabolism, start with this rule of thumb: whole foods with high thermic effect give your system a natural lift.

Protein tops the list. It takes more energy to digest than fats or carbs—about 20–30% of the calories are burned just by digesting it. That’s why meals centered around chicken, eggs, turkey, cottage cheese, and Greek yogurt are so effective. Our Healthy High Protein Snacks are full of examples that support this metabolic response.

Next up: spices and herbs. Ingredients like cayenne, ginger, turmeric, and black pepper can slightly raise your body temperature and support thermogenesis (calorie burn through heat production). You don’t need to overdo it—just season your meals with intention.

Green leafy veggies like spinach, arugula, and kale help support liver function and thyroid health, which are both crucial for metabolic balance. Combine these with protein in meals like those found in our High Protein Pasta Recipes to keep your body firing on all cylinders.

Don’t forget fiber-rich carbs like oats, sweet potatoes, and lentils. They digest slowly, reduce blood sugar spikes, and support the gut microbiome—which, in turn, affects fat storage and energy output.

Finally, caffeine from black coffee or green tea can give a short-term boost by increasing adrenaline and mobilizing fat stores. Just don’t rely on it—food is the foundation. Coffee is just a gentle nudge.

How to Trigger the Fat Burning Process

If you’re trying to trigger fat burning, you need to do more than just create a calorie deficit. Your body has to feel safe, fed, and strong enough to access stored fat. Let’s break that down.

First, focus on blood sugar balance. Big insulin spikes from processed carbs shut off fat burning. But when you eat protein- and fiber-rich meals, your body keeps insulin lower and steadier—creating the right environment for fat to be burned. Meals that support this with nutrient-dense ingredients and balanced macros.

Second, increase your NEAT (non-exercise activity thermogenesis). This includes walking, standing, cleaning, fidgeting—any movement outside of the gym. It often contributes more to daily fat burn than your actual workout.

Third, fuel your workouts. Contrary to old myths, exercising on empty isn’t more effective for fat loss. You need fuel to train hard, build muscle, and raise your resting metabolic rate. Post-workout recovery meals help signal your body that it can burn, not store.

Finally, sleep and stress control are key. Poor sleep increases cortisol and cravings—shutting down fat burning and encouraging fat storage, especially around the midsection. Even if your workouts and diet are perfect, chronic stress can undo the results.

The best part? Once your metabolism is back online and your habits align with your goals, fat burning becomes automatic—not forced.

FAQs About Metabolism (Before You Go)

How do you fix a damaged metabolism?

Start by eating more real, nutrient-dense meals—especially ones high in protein. Strength training helps rebuild lost muscle, and managing stress and sleep signals your body it’s safe to burn fuel again. Over time, your metabolism can bounce back with consistency and care.

How do I reset my metabolism to lose weight?

To reset your metabolism, you need to stop under-eating and start focusing on quality food, resistance training, and recovery. When your body gets enough fuel and muscle stimulation, it starts using energy more efficiently—leading to fat loss without extreme dieting.

How can I boost my metabolism?

Build muscle. Eat protein. Walk more. Sleep better. And reduce stress where you can. Those five habits work together to naturally boost your metabolism—and they’re way more sustainable than any quick-fix supplement or detox.

How long does it take to fix metabolism?

Most people feel better in 2–4 weeks, but deeper recovery (especially after chronic dieting or burnout) can take 3–6 months or more. The good news? Every habit you build now moves you closer to long-term energy and fat-burning freedom.

Conclusion

If you’ve felt stuck, sluggish, or frustrated, know this: your metabolism isn’t the enemy. It’s just reacting to how you’ve been treating your body. And the best news? You can teach it to work with you again.

Not through restriction—but through smart meals, strength-building, rest, and consistency. Start with small changes. Maybe that means a protein-packed dinner tonight or a morning walk instead of hitting snooze. Those moments add up.

You’re not chasing perfection. You’re building momentum.

And if you need real-food meals to support your journey, you’re already in the right place. We’ve got your back—with every recipe, every article, and every rep.

let’s stayfit together ! Follow us for more on facebook

How to Make Chocolate Strawberry Yogurt Clusters (Quick & Healthy!)

Chocolate Strawberry Yogurt Clusters frozen on parchment with fresh strawberries
Chocolate Strawberry Yogurt Clusters with creamy centers and a crisp chocolate shell

Chocolate Strawberry Yogurt Clusters – A Simple Snack You’ll Love

Chocolate Strawberry Yogurt Clusters all started on a Thursday night after leg day. Kiko was in the kitchen looking for something sweet but not too heavy—something that wouldn’t undo the work at the gym. The pantry was full of old temptations: cookies, sugary bars, processed “protein” snacks. None of them felt right

So, he opened the fridge. Greek yogurt. A bowl of chopped strawberries Med had left from lunch prep. Inspiration struck. He scooped yogurt into a bowl, tossed in the berries, and gave it a good mix. A minute later, Med walked in, dipped a spoon, and grinned. “This needs chocolate.”

And that’s how Chocolate Strawberry Yogurt Clusters were born. They were the perfect post-workout sweet fix—cool, creamy, fruity, and covered in a snap of dark chocolate that made them taste like a treat from a fancy dessert bar. We froze a batch overnight, and by the next afternoon, it was clear: these little clusters were going to be a regular in our kitchen.

What makes Chocolate Strawberry Yogurt Clusters so good isn’t just how they taste—it’s how they feel. The cold bite, the creamy inside, the brightness of strawberry, and that chocolate shell—it’s comfort and fuel in one. Unlike processed desserts that spike your energy then crash it, these clusters keep things steady. They became Kiko’s go-to snack when cravings hit and Med’s late-night sweet tooth fix.

We realized it wasn’t just a recipe. It was a swap—trading in junk for something homemade, honest, and still delicious. And the best part? Anyone can make them in under 10 minutes. They’re like Chocolate Baked Oat Cups: minimal effort, maximum reward.

So whether you’re post-gym, on the couch, or prepping for the week, Chocolate Strawberry Yogurt Clusters are a snack worth keeping around.

What Are Chocolate Strawberry Yogurt Clusters?

At their core, Chocolate Strawberry Yogurt Clusters are exactly what they sound like—small spoonfuls of strawberries mixed into creamy yogurt, frozen until solid, and dipped in a thin shell of melted chocolate. But don’t let the simplicity fool you. These little clusters pack a satisfying crunch and a creamy center that makes them feel like a mini dessert—without the guilt.

Here’s what you’re really getting with each bite:

  • Strawberries, rich in antioxidants like vitamin C and known to support skin health, immune defense, and even post-workout recovery.
  • Greek yogurt, a protein-dense base that supports muscle repair and gut health thanks to probiotics.
  • Dark chocolate, loaded with flavonoids, helps reduce inflammation and adds a bold contrast to the tangy-sweet core.
Ingredients for Chocolate Strawberry Yogurt Clusters including strawberries, yogurt, chocolate, and coconut oil
Simple and clean ingredients used to make Chocolate Strawberry Yogurt Clusters

It’s not just a snack—it’s a smart choice. These clusters are a cousin to our Healthy Banana Bread, which also hits that sweet-meets-nutritious balance. You’re not just satisfying cravings, you’re nourishing your body.

What makes Chocolate Strawberry Yogurt Clusters special is how adaptable they are. Want something low-sugar? Use plain yogurt and berries alone. Prefer more richness? Choose 85% cacao chocolate. Need it dairy-free? Use coconut yogurt—it still works beautifully.

Think of them as frozen bites of balance—protein, fiber, healthy fats, and just enough natural sugar to keep your energy steady. You could even toss in a sprinkle of chia seeds or flax if you’re feeling fancy. The result is a freezer snack that feels indulgent but fits right in with real-food goals.

And like our Roasted Sweet Potato Salad, it’s a dish that looks good, feels right, and actually fuels your day.

How to Make Chocolate Strawberry Yogurt Clusters

Making Chocolate Strawberry Yogurt Clusters is easier than you think—no fancy tools, no complicated steps. Just a mixing bowl, a spoon, a freezer, and a little patience.

Here’s how we do it at StayFitRecipes:

  1. Chop your strawberries. Dice them small enough so they blend into the yogurt evenly, but not so fine that they disappear. About 1 cup of fresh strawberries is perfect.
  2. Mix with Greek yogurt. Use thick, full-fat Greek yogurt (we love plain for lower sugar). Mix until all the fruit is coated. You want just enough yogurt to hold everything together—about ¾ cup works great.
  3. Scoop onto a tray. Line a baking sheet with parchment paper. Use a spoon to drop small clusters of the mixture onto the sheet. Think bite-sized.
  4. Freeze until solid. Pop the tray in the freezer for 60–90 minutes. This step matters—don’t rush it. You want the clusters firm before adding chocolate.
  5. Dip in melted chocolate. Melt ½ cup dark chocolate chips with 1 teaspoon coconut oil. Dip each cluster halfway, or drizzle if you prefer.
  6. Freeze again. Let them set for another 20 minutes so the chocolate hardens.
Strawberry yogurt mixture fully combined with visible fruit chunks in a white bowl
Strawberry yogurt filling mixed and ready to be scooped into clusters

That’s it. Six simple steps to snack satisfaction.

Avoid These Common Mistakes
– Using runny yogurt. This turns the mix into a puddle. Go thick, like Greek or Skyr.
– Not freezing long enough. If the clusters aren’t fully solid, the chocolate won’t stick.
– Overloading ingredients. Less is more for shape and structure.

We’ve learned from trial and error—just like with our Quick Easy Cottage Cheese Pancakes, texture makes or breaks the recipe. Stick to the ratios, and you’ll get those perfect creamy centers and snappy chocolate shells every time.

Why They’re a Healthy Snack

There are plenty of snacks out there that seem healthy—until you check the label. Sugar, preservatives, low protein, mystery oils. Chocolate Strawberry Yogurt Clusters? None of that. They’re the real deal: minimal ingredients, maximum benefit.

Low Sugar, High Impact
These clusters keep it clean. Fresh strawberries bring natural sweetness without overload. Choose plain Greek yogurt and dark chocolate (70% or higher) to keep added sugars low while still getting that rich flavor. Each cluster is a bite-sized balance of protein, fiber, and antioxidants.

Greek yogurt delivers around 10 grams of protein per 100g serving—enough to support muscle recovery and keep you full. Strawberries add fiber, vitamin C, and hydration. Dark chocolate brings flavonoids, which support heart health and reduce inflammation. That’s powerful nutrition packed into a sweet, frozen snack.

If you’re already hooked on snacks like our Healthy Banana Bread, then Chocolate Strawberry Yogurt Clusters fit right into your routine—whole ingredients, smart fuel, no filler.

Better Than Store-Bought Treats
Compare these clusters to commercial yogurt-covered snacks and fruit bars. Most of those are loaded with sugar, artificial flavors, and oils that you don’t need in your system. Plus, they often leave you hungry again in 20 minutes.

Homemade clusters? You’re in control. You can make them high-protein, dairy-free, or even low-carb depending on your needs. Want something crunchy and savory on the side? Pair them with Grilled Chicken Bites for a full meal approach.

And since they’re stored in the freezer, you’re not tempted to eat the whole batch at once. Portion control happens naturally.

Bottom line: these aren’t just “better-for-you”—they are good for you. Real food. Real benefits. No junk.

Creative Variations You Can Try

Once you master the basic Chocolate Strawberry Yogurt Clusters, you’ll probably start thinking, “What else can I toss in?” Good news: this recipe is super flexible. With just a few tweaks, you can keep things interesting—and still stay healthy.

Switch It Up with Flavors
Don’t limit yourself to strawberries. Blueberries and raspberries work just as well and freeze beautifully. Want a tropical vibe? Try chopped mango with coconut yogurt. Love peanut butter? Stir a spoonful into the yogurt before freezing.

You can also play with the chocolate: white chocolate for a dessert-like twist, or extra dark for a more intense finish. The key is to keep the base creamy and the add-ins fresh.

This is where the creativity gets fun—kind of like our Pickle Lemonade Mocktail, which surprised even us by becoming a fan favorite. Unexpected combos can work when you get the texture and chill factor right.

Add-Ons for More Nutrition
Want to boost the protein or fiber even more? Add 1 tablespoon of chia seeds, hemp hearts, or crushed walnuts into your yogurt-fruit mix before scooping. This gives your clusters an extra punch of nutrients without changing the flavor much.

Looking for a gut-friendly option? Mix in a little high-protein cottage cheese—seriously. It blends right in and adds richness, just like we do in our Cottage Cheese Ranch Dip. You’ll barely notice the change, but your macros will thank you.

If you’re prepping for a busy week or want to create different versions for the family, divide your base mix and experiment with flavors. Kids love them with a drizzle of almond butter, while we prefer ours simple and dark-chocolate-dipped.

These clusters are endlessly customizable—and every version still supports your goals.

Serving, Storage & When to Eat Them

One of the best things about Chocolate Strawberry Yogurt Clusters? They’re as practical as they are tasty. Whether you’re meal-prepping or just need something to grab between Zoom calls, these clusters fit right in.

Meal Prep Friendly
You can make a big batch in under 15 minutes. Once they’re frozen solid, transfer them to an airtight container or a freezer-safe bag. They’ll keep well for up to two weeks—though honestly, ours never last that long.

We recommend placing parchment paper between layers if you’re stacking them. That way, they won’t stick together, and you can pull out a few at a time without making a mess.

Think of them like frozen protein pops—except they’re not loaded with weird gums or sweeteners. Just like our Zesty Lemon Chicken Orzo Protein Boost, these clusters are a prep-ahead favorite because they save time and keep you satisfied.

Serving Ideas
These clusters aren’t just a snack—they’re a solution. Eat them post-workout for a quick protein boost. Use them as a late-night dessert swap. Bring them out when friends come over—they look like fancy chocolate truffles but feel way more nourishing.

Need a full plate idea? Pair a few clusters with Grilled Chicken Bites and a green smoothie for a satisfying post-workout meal that hits protein, carbs, and healthy fats.

And here’s a pro tip: serve them with coffee. The chill from the cluster and warmth from the mug make a ridiculously satisfying combo. Trust us on this one.

In the end, Chocolate Strawberry Yogurt Clusters aren’t just another Pinterest snack—they’re a go-to fuel option that actually tastes good and works with your life. And when you’re eating real food that makes you feel this good, it’s a lot easier to stay on track.

FAQs About Chocolate Strawberry Yogurt Clusters

How do you make chocolate strawberry yogurt clusters?

You simply mix chopped strawberries with thick Greek yogurt, scoop small clusters onto parchment paper, freeze until solid, then dip or drizzle with melted chocolate. Freeze again to set, and they’re ready to enjoy.

Is strawberry yogurt a healthy snack?

It can be, especially when made at home. Plain Greek yogurt with fresh strawberries is high in protein, calcium, and vitamin C without added sugars or preservatives. Always check store-bought options for added ingredients.

How to make yogurt clusters?

Start with a creamy, thick yogurt. Mix in your favorite fruit or add-ins like chia seeds, then spoon into small clusters on a tray. Freeze them, then dip in chocolate or nut butter for flavor. Simple, quick, and perfect for batch prep.

Are chocolate-covered berries healthy?

Yes, in moderation. Dark chocolate offers antioxidants and heart health benefits, while berries bring fiber and vitamins. When you control the ingredients—like with these clusters—they’re a smart, satisfying treat.

Print
clock clock iconcutlery cutlery iconflag flag iconfolder folder iconinstagram instagram iconpinterest pinterest iconfacebook facebook iconprint print iconsquares squares iconheart heart iconheart solid heart solid icon
Chocolate Strawberry Yogurt Clusters frozen on parchment with fresh strawberries

How to Make Chocolate Strawberry Yogurt Clusters (Quick & Healthy!)


5 Stars 4 Stars 3 Stars 2 Stars 1 Star

No reviews

  • Author: Chef Dodos
  • Total Time: 1 hour 30 minutes
  • Yield: 12 clusters 1x

Description

These Chocolate Strawberry Yogurt Clusters are creamy, fruity, and dipped in rich dark chocolate. The perfect healthy freezer snack that satisfies sweet cravings without the guilt.


Ingredients

Scale

1 cup chopped strawberries

3/4 cup thick Greek yogurt

1/2 cup dark chocolate chips

1 tsp coconut oil


Instructions

1. Mix chopped strawberries and yogurt.

2. Scoop small clusters onto parchment-lined tray.

3. Freeze 60–90 minutes until solid.

4. Melt chocolate with coconut oil.

5. Dip or drizzle over clusters.

6. Freeze again 20 minutes. Serve cold.

Notes

Use dairy-free yogurt for a vegan version.

Store in airtight container up to 2 weeks.

Try with blueberries or raspberries for variety.

  • Prep Time: 10 minutes
  • Cook Time: 0 minutes
  • Category: smart-sweets-baking
  • Method: Freezer
  • Cuisine: American

Nutrition

  • Serving Size: 3 clusters
  • Calories: 105
  • Sugar: 7g
  • Sodium: 15mg
  • Fat: 5g
  • Saturated Fat: 3g
  • Unsaturated Fat: 2g
  • Trans Fat: 0g
  • Carbohydrates: 10g
  • Fiber: 1g
  • Protein: 6g
  • Cholesterol: 2mg

Conclusion

We created Chocolate Strawberry Yogurt Clusters out of pure necessity—a healthy, sweet snack that didn’t ruin our progress or leave us crashing. And they’ve stuck with us through the StayFit journey.

These clusters are more than just a recipe. They’re a reminder that real food can be quick, tasty, and fit your goals. No more guessing what to eat when cravings hit—you’ve got a freezer full of answers.

So whether you’re just starting your journey or deep in it, recipes like these make healthy eating feel doable. Just like we did, you can swap the junk for something better.

Let’s StayFit—together. For More follow us on facebook

How to Make Healthy Banana Bread That Actually Tastes Good

Healthy banana bread loaf on white kitchen counter
Table of Contents

Why We Swapped Our Banana Bread (and Never Looked Back)

Banana bread used to be our guilty pleasure — like, really guilty. Back when Kiko and I (Med) made our “100 days, no excuses” pact, traditional banana bread was one of the first things to go. But guess what? It came back — stronger, better, and healthy. We just had to flip how we thought about ingredients. Now, our healthy banana bread recipe is on repeat in our kitchen. Moist, sweet, satisfying, and totally in line with our goals.

Let’s be real — most banana bread recipes sneak in loads of refined sugar, white flour, and butter. That stuff might taste good, but it left us feeling bloated and foggy. So, we started experimenting. What if we could get that same comforting flavor and texture… without the crash?

Healthy banana bread loaf on white kitchen counter
reshly baked healthy banana bread — golden and guilt-free.

Turns out, we could. The secret was keeping the essence — those overripe bananas with their natural sweetness — and rebuilding everything else. We swapped white flour for fiber-rich whole wheat. Ditched refined sugar in favor of real stuff like honey and mashed banana. And oils? Only the kind that fuels, not fogs.

We also leaned into the idea that food should work for us, not against us. That’s why we added a dash of protein-rich Greek yogurt and a sprinkle of flax for extra fiber. No compromises, just better balance.

If you’ve ever made a batch of banana bread and felt that sugar hangover an hour later — we’ve been there. But trust me, this recipe is different. It’s indulgent and energizing. And honestly, you’ll never miss the old version once you’ve tried this one.

Looking for other smart breakfast swaps? Our Chocolate Baked Oat Cups hit the same warm, satisfying notes. Pair them with our Cottage Cheese Ranch Dip for a savory snack that’ll keep your goals on track.

Choosing the Right Ingredients for Healthy Banana Bread

When we first started cleaning up our meals, baking was one of the toughest categories to crack — especially banana bread. We wanted that classic flavor and cozy texture, but without the blood sugar rollercoaster. Enter our two go-to flours: oat flour and almond flour. Together, they make this loaf moist, fluffy, and packed with nutrients — no white flour, no gluten, no regrets.

Why Oat and Almond Flour Are a Power Combo

Oat flour gives you that comforting, cake-like structure while adding a boost of soluble fiber — perfect for steady energy and better digestion. Almond flour brings healthy fats, vitamin E, and a hint of natural sweetness. The result? A rich, moist banana bread that doesn’t need oil or butter to stay soft.

We like to use:

  • 1 cup oat flour
  • ½ cup almond flour

This ratio balances structure and tenderness. Too much almond flour can make it crumbly, and too much oat flour can make it gummy — but together, they nail the texture.

Plus, both are naturally gluten-free (just double-check your oats if you’re celiac-sensitive).

Want even more protein? Add a scoop of vanilla protein powder and subtract a bit of flour to keep the ratio balanced.

Here’s a quick guide:

                                                                                       
Flour TypeHealth Benefit
Whole Wheat Pastry FlourHigh in fiber, light texture, nutrient-rich
Oat FlourGluten-free, rich in beta-glucan, great flavor
Almond FlourLow-carb, high in healthy fats and vitamin E

The Best Natural Substitutes for Sugar

The beauty of overripe bananas? They’re naturally sweet. So you’re already halfway there. But if you want to enhance that sweetness without using processed sugar, here’s what we recommend:

  • Mashed medjool dates: High in fiber and potassium.
  • Honey or maple syrup: Natural, flavorful, and easy to mix.
  • Unsweetened applesauce: Great for moisture and subtle sweetness.

One of our favorite tricks? Combine mashed bananas with just a tablespoon of honey. It’s all you need. No spike, no crash — just pure, steady energy.

For another great example of using high-protein, real-food ingredients in baking, check out our Cottage Cheese Pancakes. They’re fluffy, flavorful, and full of fuel — just like this banana bread.

Mastering the Method: Mistakes to Avoid & Tips That Work

You’ve got the right ingredients — now let’s make sure you don’t mess them up. We’ve baked dozens (okay, maybe hundreds) of loaves during our transformation, and one thing became clear: technique matters. One wrong move can turn your dreamy banana bread into a dry brick. But don’t worry — we’ve got your back.

What’s the Number One Mistake When Making Banana Bread?

Hands down: overmixing the batter. It’s easy to do — you’re excited, you want that smooth texture — but here’s the thing: overmixing activates gluten (even in oat flour). That means your banana bread goes from light and tender to dense and gummy. Not what you want.

So here’s our simple rule:
Mix your dry ingredients in one bowl, your wet ingredients in another. Then combine them gently. Fold until just mixed — no electric mixer needed.

You’re not trying to whip air into a soufflé. You’re just marrying banana with flour. Keep it chill.

Another pitfall? Using bananas that aren’t ripe enough. They should be brown-spotted and super soft — borderline “mash-with-a-fork” ripe. That’s where all the natural sugar and moisture comes from.

Pro Tips for Texture, Moisture & Flavor

Let’s level up your loaf. These small adjustments make a huge difference:

  • Use room-temperature eggs: Cold eggs don’t mix evenly and can cause curdling in your batter.
  • Don’t skip the salt: Just 1/4 teaspoon boosts every other flavor.
  • Add Greek yogurt or cottage cheese: For moisture + protein (a tip we also use in our Grilled Chicken Bites — juicy every time).
  • Line your loaf pan with parchment paper for easy removal. No more stuck corners.
  • Don’t guess doneness: Use the toothpick test! Insert into the center — it should come out clean or with just a few moist crumbs.

You can even get playful with mix-ins — walnuts for crunch, dark chocolate chips for flair, or chia seeds for extra fiber. Just don’t overload the batter.

The Full Healthy Banana Bread Recipe (Gluten-Free, No Refined Sugar)

Ready to bake? Here’s the complete recipe for our go-to healthy banana bread using oat flour and almond flour. It’s moist, naturally sweetened, gluten-free, and absolutely perfect for breakfast, snacks, or even dessert.


Ingredients:

Real, clean ingredients that make this loaf a smart swap.
  • 3 very ripe bananas, mashed (about 1 ¼ cups)
  • 2 large eggs (room temperature)
  • ¼ cup maple syrup or 2 mashed medjool dates
  • ⅓ cup plain Greek yogurt (or coconut yogurt for dairy-free)
  • 1 tsp vanilla extract
  • 1 cup oat flour
  • ½ cup almond flour
  • 1 tsp baking soda
  • ½ tsp baking powder
  • ½ tsp cinnamon
  • ¼ tsp salt
  • Optional:
      • ¼ cup dark chocolate chips
      • ¼ cup chopped walnuts

Instructions:

  1. Preheat your oven to 350°F (175°C). Line a 9×5-inch loaf pan with parchment paper or lightly grease it.
  2. In a large bowl, mash the bananas until smooth.
  3. Add in the eggs, maple syrup, Greek yogurt, and vanilla. Whisk together until well combined.
  4. In another bowl, whisk together the oat flour, almond flour, baking soda, baking powder, cinnamon, and salt.
  5. Gently fold the dry ingredients into the wet banana mixture. Do not overmix — stir just until no flour streaks remain.
  6. Fold in optional mix-ins like chocolate chips or walnuts, if using.
  7. Pour the batter into the loaf pan and smooth the top with a spatula.
  8. Bake for 45 to 50 minutes, or until a toothpick inserted into the center comes out clean or with just a few moist crumbs.
  9. Cool in the pan for 10 minutes, then transfer to a wire rack to cool fully before slicing.

Storage:

  • Room Temperature: Store in an airtight container for 2–3 days.
  • Fridge: Stays fresh for up to 5 days.
  • Freezer: Slice, wrap, and freeze for up to 2 months. Reheat or thaw as needed.

How to Make It Your Own (While Staying Fit)

Here’s the fun part — once you’ve nailed the base recipe, you can totally customize it. Whether you’re switching up flavors or batch prepping for the week, this healthy banana bread is flexible enough to match your lifestyle without sacrificing your goals.

Fun Variations & Swaps Without Losing Health Benefits

Just because we made it healthier doesn’t mean it has to be boring. We love playing with flavor profiles and boosting nutrition with creative twists:

healthy-banana-bread-slice.jpg
  • Blueberry Burst: Fold in ½ cup fresh or frozen blueberries.
  • Walnut Crunch: Add ¼ cup chopped walnuts for texture and heart-healthy fats.
  • Chocolate Chip Glow-Up: Use dark chocolate chips (70%+) to keep it antioxidant-rich.
  • Cinnamon Swirl: Mix 1 tsp cinnamon into the batter or swirl with a spoon of almond butter and maple syrup for a marbled effect.

Need it gluten-free? Oat or almond flour work great. Going dairy-free? Use coconut oil and a flax egg (1 tbsp ground flax + 3 tbsp water, let sit 5 min). Want extra protein? Toss in a scoop of your favorite vanilla protein powder — just reduce flour slightly.

The goal is simple: keep the integrity of the ingredients while letting your preferences shine.

We do this same thing with savory meals too — our Mediterranean Ground Beef Skillet shows how swapping spices or greens can completely change the vibe of a dish while keeping the macros strong.

Serving, Storing, and Meal-Prepping for the Week

Banana bread makes an awesome breakfast, snack, or even a pre-workout bite. Here’s how to keep it fresh and functional:

  • Short-term storage: Wrap tightly and store at room temp for 2–3 days.
  • Fridge: Lasts up to 5 days in an airtight container.
  • Freezer: Slice first, then wrap each piece individually. Freeze up to 2 months. Reheat in a toaster or microwave — or just let it thaw naturally.

Pro tip: Make two loaves on Sunday. Eat one this week, freeze the other for later. It’s one of our favorite “no stress” moves — like prepping a batch of our Muhammara Dip to have flavor-packed snacks ready all week.

You can even pack a slice with almond butter and a boiled egg for an on-the-go mini meal that feels like a treat, not a sacrifice.

We’ve got your back.

Let’s StayFit—together.For More follow us on facebook & pinterest

Healthy Banana Bread FAQs

Is there a healthy version of banana bread?

Yes — and this is it! Our version skips refined sugar and white flour in favor of oat flour, almond flour, and natural sweeteners like bananas and maple syrup. It’s nutrient-rich, gluten-free, and still delivers all the flavor and texture you crave.

What is the healthiest flour for banana bread?

Oat flour and almond flour are two of the best. Oat flour is high in fiber and helps stabilize blood sugar, while almond flour is rich in healthy fats and vitamin E. Together, they create a moist, satisfying loaf with a soft crumb

What is a healthy substitute for sugar in banana bread?

We use mashed bananas as the primary sweetener, plus a touch of maple syrup or medjool dates. These natural options offer sweetness with nutrients — no crash, no processed junk.

What is the number one mistake when making banana bread?

Overmixing the batter. It’s tempting to stir until smooth, but that leads to dense, gummy bread. Mix your dry and wet ingredients separately, then fold together gently until just combined.

Print
clock clock iconcutlery cutlery iconflag flag iconfolder folder iconinstagram instagram iconpinterest pinterest iconfacebook facebook iconprint print iconsquares squares iconheart heart iconheart solid heart solid icon
Healthy banana bread loaf on white kitchen counter

Healthy Banana Bread Recipe: Easy, Delicious, and Guilt-Free


5 Stars 4 Stars 3 Stars 2 Stars 1 Star

No reviews

  • Author: Chef Dodos
  • Total Time: 1 hour
  • Yield: 1 loaf (10 slices) 1x

Description

This healthy banana bread is made with oat flour and almond flour, naturally sweetened with bananas and maple syrup. It’s moist, gluten-free, and perfect for breakfast or snacks.


Ingredients

Scale

3 ripe bananas, mashed

2 large eggs (room temperature)

1/4 cup maple syrup or 2 mashed medjool dates

1/3 cup plain Greek yogurt (or coconut yogurt)

1 tsp vanilla extract

1 cup oat flour

1/2 cup almond flour

1 tsp baking soda

1/2 tsp baking powder

1/2 tsp cinnamon

1/4 tsp salt

Optional: 1/4 cup dark chocolate chips or chopped walnuts


Instructions

1. Preheat oven to 350°F (175°C). Line or grease a 9×5-inch loaf pan.

2. Mash bananas in a large bowl. Whisk in eggs, maple syrup, yogurt, and vanilla.

3. In another bowl, combine oat flour, almond flour, baking soda, baking powder, cinnamon, and salt.

4. Gently fold dry ingredients into the wet mixture until just combined.

5. Stir in optional mix-ins if using.

6. Pour batter into the loaf pan and smooth the top.

7. Bake for 45–50 minutes, or until a toothpick comes out clean.

8. Cool in the pan for 10 minutes, then transfer to a wire rack to cool completely.

Notes

Wrap slices individually to freeze up to 2 months.

Use flax eggs and coconut yogurt for a dairy-free, vegan version.

Great for breakfast, snacks, or as a pre-workout meal.

  • Prep Time: 10 minutes
  • Cook Time: 50 minutes
  • Category: Breakfast
  • Method: Baking
  • Cuisine: American

Nutrition

  • Serving Size: 1 slice
  • Calories: 145
  • Sugar: 8g
  • Sodium: 190mg
  • Fat: 5g
  • Saturated Fat: 1g
  • Unsaturated Fat: 3.5g
  • Trans Fat: 0g
  • Carbohydrates: 21g
  • Fiber: 3g
  • Protein: 4g
  • Cholesterol: 35mg

Conclusion

Healthy doesn’t have to mean bland — and this banana bread proves it. With the perfect combo of oat and almond flour, zero refined sugar, and just the right texture, this recipe is one you’ll keep in your regular rotation.

We’ve used it as a pre-workout snack, a grab-and-go breakfast, and a cozy weekend treat — and it fits every phase of our StayFit journey.

Give it a try, tag us when you bake it, and check out more feel-good recipes over on our Chocolate Baked Oat Cups or Muhammara Dip. You don’t have to give up flavor to show up for yourself.

How To Make Chocolate Baked Oat Cups That Taste Like Dessert

Chocolate baked oat cup served with strawberries
Freshly baked chocolate oat cups in a red silicone muffin tray
Chocolate baked oat cups cooling in a silicone muffin tray—easy, mess-free, and ready to serve.
Table of content

Ever had one of those mornings where you wanted something sweet and chocolatey—but didn’t want to sabotage your goals? We get it. That was us during our first 100-day challenge. Med was craving dessert for breakfast (again), and Kiko had just finished a workout, tired of egg whites. So, we grabbed oats, mashed a banana, added cocoa powder and a little maple syrup—and boom: the chocolate baked oat cup was born.

Soft, rich, and just sweet enough to satisfy, these little cups quickly became a game-changer in our meal prep. Think brownie meets breakfast—with real ingredients and zero regrets. You bake once and have portable snacks for days. No more reaching for processed bars or skipping meals.

And the best part? They’re easy to mix, easy to bake, and even easier to customize. Whether you’re chasing fat loss, need more protein, or just want to enjoy food that fuels your energy—you’re going to love these.

We actually like to pair them with a protein-rich side like these Quick & Easy Cottage Cheese Pancakes or sip on a refreshing Pickle Lemonade Mocktail post-gym for that electrolyte boost.

What You’ll Need for the Base

No complicated blends or expensive powders—just real food. Here’s your basic lineup:

ngredients for chocolate baked oat cups including oats, cocoa, banana, eggs, and chocolate chips
All you need to make healthy chocolate baked oat cups—simple, clean ingredients.
                                                                                                                                                                       
IngredientPurpose
Rolled OatsComplex carbs, fiber
BananaNatural sweetness & moisture
Cocoa PowderRich chocolate flavor
EggBinder & protein
Maple SyrupOptional sweetener
Almond MilkSmooth texture
Baking Powder & VanillaLift and flavor

Feel free to get creative. Toss in chopped walnuts, unsweetened shredded coconut, or even a handful of dark chocolate chips if you’re feelin’ fancy.

To support your goals, check out how these tie into our Insulin Control & Fat Loss tips and try pairing them with dips like our Cottage Cheese Ranch Dip for a satisfying snack combo.

Why Chocolate Baked Oat Cups Are Great for Weight Loss

Real Ingredients That Help You Stay Full

Chocolate baked oat cups aren’t just tasty—they’re smart for weight loss too. Each one is made with real food like oats, banana, cocoa powder, and eggs. They give you energy, help you feel full, and don’t spike your blood sugar. That’s key when you’re trying to eat better and stay on track.

We started eating chocolate baked oat cups during our first 100-day challenge. They became a go-to snack and breakfast fast. Why? Because they taste like a brownie but give your body what it actually needs. And since they’re already portioned, there’s no guessing or overeating.

Want to change them up for your goals? Try one of these easy swaps:

                                                                                       
Your GoalSwap Idea
Cut SugarSkip the syrup and use a ripe banana
Add ProteinMix in a scoop of protein powder
Lower FatUse egg whites instead of whole eggs

Easy Portion Control

Chocolate baked oat cups are already sized just right. No scale. No math. Just grab one when you need a clean, healthy snack.

We like pairing them with Grilled Chicken Bites or Zesty Lemon Chicken Orzo for balanced, protein-rich meals.

How to Customize Chocolate Baked Oat Cups

Easy Banana Substitutes That Still Taste Great

Don’t like bananas? No problem. You can still make chocolate baked oat cups without them. Bananas help with sweetness and texture, but they’re not the only option.

You can use unsweetened applesauce, pumpkin puree, or even mashed sweet potato. Each of these swaps keeps the oat cups moist and adds natural flavor. If you go this route, just taste your batter and add a little maple syrup if it needs more sweetness.

For every banana you skip, use about ½ cup of your chosen swap. We’ve made chocolate baked oat cups with applesauce before a tough leg day, and honestly—they were still delicious.

→ Want to try other flexible recipes? Check out our Turkish Pasta Recipe and Teriyaki Chicken—both super easy to adjust with pantry staples.

Rolled Oats vs. Steel-Cut: What Works Best?

When making chocolate baked oat cups, the kind of oats you use matters. Rolled oats (also called old-fashioned oats) are best. They hold their shape and get soft while baking, giving you that perfect chewy texture.

Steel-cut oats don’t work well in this recipe. They take too long to cook and stay hard. If that’s all you have, cook them first or skip them for now. Quick oats are okay in a pinch, but the texture will be softer and less hearty.

We like sticking with rolled oats for that classic feel—like a muffin and a brownie had a healthy baby.

→ Want more texture-based meals? Try our Cottage Cheese Pancakes and Mediterranean Ground Beef Skillet—both packed with feel-good crunch.

How to Store and Prep Chocolate Baked Oat Cups

How Long Do Chocolate Baked Oat Cups Last?

Chocolate baked oat cup served with strawberries
Enjoy your chocolate oat cup with Greek yogurt and berries for a balanced breakfast.

One of the best parts about chocolate baked oat cups is how well they hold up during the week. Once baked, let them cool completely. Then store them in an airtight container in the fridge. They’ll stay fresh for up to 5 days—perfect for quick breakfasts or post-workout snacks.

Need them to last longer? Freeze them! These cups freeze great. Just wrap them individually or place them in a freezer-safe container. When you’re ready to eat, microwave for 30 to 45 seconds. They come out warm, soft, and ready to go.

Chocolate baked oat cups make busy mornings simple. No mess. No excuses.

→ Planning freezer meals? You’ll love our [Healthy Freezer-Friendly Snacks – Coming Soon] and [StayFit Meal Prep System – Coming Soon].

How to Meal Prep a Week’s Worth Fast

You don’t need hours in the kitchen to meal prep. Making a full batch of chocolate baked oat cups takes about 30 minutes total.

Start by mixing your dry ingredients (oats, cocoa powder, baking powder). In another bowl, mash your bananas (or swap) and stir in eggs, milk, vanilla, and syrup. Combine wet and dry, then spoon the mix into muffin cups.

Bake at 350°F for 22–25 minutes. Done.

Want extra protein? Add a scoop of protein powder. Want more fiber? Toss in chia seeds. Want variety? Use mini chocolate chips in half the batch and blueberries in the other. You’re the chef.

→ Need more batch-friendly recipes? Don’t miss our [StayFit Budget Meals – Coming Soon] and [High-Protein Prep List – Coming Soon].

Chocolate baked oat cups make it easy to stay on track—even when life gets busy. Just grab,heat, and go.

FAQs About Chocolate Baked Oat Cups

Can I make chocolate baked oat cups without bananas?

Yes, you can! If you’re not into bananas or don’t have any on hand, no worries. You can use unsweetened applesauce, pumpkin puree, or mashed sweet potato instead. Use about ½ cup for each banana you’re replacing. Just make sure to taste your batter—you may want to add a little maple syrup or honey to balance the sweetness.

Are chocolate baked oat cups good for weight loss?

They sure are. Chocolate baked oat cups are made with real ingredients, no refined sugar, and they’re already portioned. That means no overeating and no guessing. They’re high in fiber, which helps you stay full longer, and easy to fit into a balanced meal plan. Just stick with healthy mix-ins like dark chocolate or chopped nuts.

How long do chocolate baked oat cups last in the fridge?

When stored in an airtight container, chocolate baked oat cups stay fresh in the fridge for up to 5 days. You can also freeze them for up to 3 months. Just microwave for about 30–45 seconds straight from the freezer. They’re perfect for busy mornings, meal prep, or an after-dinner treat.

4. Can I use steel-cut oats instead of rolled oats?

We don’t recommend it. Steel-cut oats take longer to cook and won’t soften the same way. Your oat cups will come out undercooked and too chewy. For best results, stick to rolled oats (also called old-fashioned oats). Quick oats are okay if that’s what you have, but the texture will be softer.

Wrap-Up: Your Go-To Chocolate Baked Oat Cups

Chocolate baked oat cups are that rare combo of healthy, easy, and crave-worthy. They’re made with simple ingredients, they store well, and they check all the boxes—meal prep, portion control, and real flavor.

Whether you’re eating them for breakfast, snacking post-workout, or curbing a late-night sweet tooth, these cups just work. No fancy tools, no long prep. Just mix, bake, and go.

And remember: real change comes from small habits done consistently. Keeping better food on hand is one of those habits. These cups helped us stay on track, and we’re pretty sure they’ll help you too.

Try the banana-free version. Freeze a batch. Make them your own.

We’ve got your back.

— Let’s StayFit—together.For More follow us on facebook & pinterest

Print
clock clock iconcutlery cutlery iconflag flag iconfolder folder iconinstagram instagram iconpinterest pinterest iconfacebook facebook iconprint print iconsquares squares iconheart heart iconheart solid heart solid icon
Chocolate baked oat cup served with strawberries

How To Make Chocolate Baked Oat Cups That Taste Like Dessert


5 Stars 4 Stars 3 Stars 2 Stars 1 Star

No reviews

  • Author: Chef Dodos
  • Total Time: 35 minutes
  • Yield: 12 oat cups 1x
  • Diet: Gluten Free

Description

These chocolate baked oat cups are soft, healthy, and perfect for meal prep. They’re naturally sweetened, freezer-friendly, and made with real ingredients like oats, banana, cocoa powder, and eggs.


Ingredients

Scale

2 cups rolled oats

2 ripe bananas, mashed

1/3 cup unsweetened cocoa powder

2 large eggs

1/2 cup almond milk

1/4 cup maple syrup (optional)

1 tsp vanilla extract

1 tsp baking powder

1/4 tsp salt

1/4 cup dark chocolate chips (optional)


Instructions

1. Preheat oven to 350°F (175°C) and grease or line a 12-cup muffin tin.

2. In a bowl, mash the bananas and mix in eggs, almond milk, maple syrup, and vanilla extract.

3. In another bowl, combine rolled oats, cocoa powder, baking powder, and salt.

4. Stir dry ingredients into wet mixture until well combined. Fold in chocolate chips if using.

5. Spoon batter evenly into muffin cups, filling each about 3/4 full.

6. Bake for 22–25 minutes or until set and slightly firm on top.

7. Cool for 5 minutes, then remove and let cool completely on a wire rack.

Notes

Swap banana with 1/2 cup unsweetened applesauce or pumpkin puree.

Store in an airtight container in the fridge for up to 5 days or freeze for 3 months.

Microwave frozen oat cups for 30–45 seconds before serving.

  • Prep Time: 10 minutes
  • Cook Time: 25 minutes
  • Category: Breakfast, Snack, Meal Prep
  • Method: Baking
  • Cuisine: American

Nutrition

  • Serving Size: 1 oat cup
  • Calories: 130
  • Sugar: 5g
  • Sodium: 90mg
  • Fat: 4g
  • Saturated Fat: 1g
  • Unsaturated Fat: 2g
  • Trans Fat: 0g
  • Carbohydrates: 20g
  • Fiber: 3g
  • Protein: 4g
  • Cholesterol: 35mg

Pickle Lemonade Mocktail: The Odd Drink That’s Going Viral Today

Pickle Lemonade Mocktail
Table Of Content

We know what you’re thinking… pickle juice? in lemonade? Sounds like a prank, right? But hear us out—this pickle lemonade mocktail isn’t just a quirky TikTok trend. It’s a crisp, refreshing, and surprisingly addictive drink that balances salty and sweet in the most unexpected way. And the best part? It’s hydrating, packed with electrolytes, and absolutely zero alcohol.

Let us take you back to day 47 of our 100-day transformation. It was hot, we were sore, and we needed something cold—but not sugary. Kiko opened the fridge and spotted two things: a jar of naturally fermented pickles and a bottle of homemade lemonade. We were curious (and maybe a little delirious). Med grabbed a shaker. In less than five minutes, we had our first ever pickle lemonade mocktail. And we’ve been hooked ever since.

This isn’t just a quirky drink—it’s a functional one. Pickle juice adds natural electrolytes and gut-healthy brine. Lemon juice brings vitamin C and tartness. Combined, they make the ultimate recovery mocktail that keeps you cool, balanced, and satisfied. It’s our go-to during hot days, post-lifting, or after a sweaty hike.

Even if you’ve never tried fermented pickle juice in a drink before, we encourage you to give it a go. You might love it as much as we do. Especially if you’re already into clean eating meals like our Zesty Lemon Chicken Orzo or post-workout staples like the Sweet Potato Power Salad, this drink fits right in.

It’s salty, sweet, weird—in the best way. And best of all? You’re just five minutes away from sipping your new favorite mocktail.

What Makes Pickle Lemonade Mocktail So Unique?

At first glance, a pickle lemonade mocktail might sound like a dare, not a drink. But once you understand how the ingredients work together, the brilliance clicks. This is more than a quirky combo—it’s a bold fusion of flavor and function.

The Power Combo: Lemonade + Pickle Juice

Lemonade brings brightness and vitamin C, but it’s not all about sweet summer vibes. If you use a fresh homemade version or a low-sugar option like Milo’s, you avoid hidden sugars and empty calories.

Pickle juice—specifically from naturally fermented pickles—adds something special. You get sodium for hydration, a hit of vinegar for tang, and live cultures that support gut health. No added preservatives or sugars needed. It’s the kind of raw ingredient that actually works with your body.

If you’ve tried our Teriyaki Chicken Meal Prep or Mediterranean Ground Beef Skillet and felt great after, it’s because real ingredients make a real difference. That’s what this mocktail is about, too—fueling up without the filler.

A Functional Drink That Actually Tastes Good

Most store-bought sports drinks are packed with artificial flavors, colors, and way too much sugar. This mocktail? None of that. You get a crisp, hydrating drink that naturally balances electrolytes and boosts recovery—without spiking your insulin.

It’s a smart pick after workouts, during heatwaves, or even as a way to beat late-night snack cravings. And yeah—it also makes a pretty great conversation starter.

So while it might sound strange at first, once you try it, you’ll understand why we keep it on regular rotation in our fridge.

How to Make a Pickle Lemonade Mocktail at Home

You don’t need a bartender’s setup or exotic ingredients to enjoy this bold drink. In fact, making a pickle lemonade mocktail at home is as easy as it gets—and the payoff is huge. All you need are a few simple components, five minutes, and an open mind.

Pickle Lemonade Ingredients
Ingredients for Pickle Lemonade Mocktail

Step-by-Step: Pickle Meets Lemon

Let’s break it down:

  1. Chill your glass. Pop a tall glass in the freezer for a few minutes while you gather ingredients. Cold glass = crisp experience.
  2. Mix the base. In a shaker or large glass, combine 1 cup of fresh lemonade and ¼ cup of pickle juice. Stir to blend the sour and salty flavors.
  3. Add ice. Grab your chilled glass and fill it to the top with ice cubes.
  4. Pour and garnish. Pour the mixture over ice and add your favorite garnishes—think pickle chips, a lemon wheel, a dill sprig, or even a full pickle spear if you’re feeling wild.

Looking for something to pair it with? Try our savory Muhammara Dip or crisp Cottage Cheese Ranch Dip to elevate snack hour without wrecking your macros.

lavor Swaps & Custom Variations

Want to customize your mocktail? Here are a few ideas:

  • Use sparkling water instead of still lemonade for fizz.
  • Swap pickle juice for cucumber brine for a milder flavor.
  • Add sliced jalapeño for heat, mint for coolness, or ginger for zing.

This drink is all about experimenting with real ingredients and clean hydration. No sugar bombs, no artificial additives—just bold, balanced flavor that helps you feel your best.

Pickle Lemonade Benefits + When to Drink It

Sure, it’s weird. But this pickle lemonade mocktail isn’t just fun—it’s surprisingly smart. From hydration to gut support, here’s why this bold beverage belongs in your regular rotation.

Is Pickle Lemonade Actually Good for You?

Yes—and here’s why. Pickle juice, when made from naturally fermented cucumbers (not the neon green stuff), is rich in electrolytes like sodium and potassium. These minerals help your body retain hydration, especially after intense workouts or long sweaty days.

Lemon juice adds vitamin C, which supports your immune system, reduces inflammation, and boosts natural detox. Plus, the vinegar in pickle brine may help stabilize blood sugar and aid digestion.

Together, this drink hydrates faster and cleaner than your average sports drink—without added sugar, colors, or preservatives. If you’re already into insulin-stabilizing meals, this mocktail fits right into that lifestyle.

When Should You Drink a Pickle Lemonade Mocktail?

Here are our favorite moments to sip this salty-sour refresher:

  • Post-workout: It’s an incredible electrolyte replenisher after a gym session or cardio blast.
  • During hot weather: Keeps you hydrated when water just isn’t cutting it.
  • When craving snacks: It’s tangy enough to satisfy and often curbs salty cravings fast.
  • Pre-run or hike: The sodium helps with fluid retention and performance.

It also works great as a social drink when you’re skipping alcohol but still want something interesting and functional in your glass. Pair it with bold meals like Grilled Chicken Bites for a flavor bomb your body will thank you for.

Pickle Lemonade Frequently Asked Questions

What is pickle lemonade?

Pickle lemonade is a unique beverage made by combining lemonade with pickle juice—usually from naturally fermented pickles. The result is a tangy, salty, slightly sweet drink that’s refreshing and loaded with electrolytes.

Is Chick Fil A pickle lemonade real?

Yes, Chick Fil A briefly tested a pickle lemonade in select markets as part of a summer menu experiment. While polarizing, it created buzz and inspired people to try DIY versions at home.

What mixes well with pickle juice?

Besides lemonade, pickle juice pairs well with tomato juice (for Bloody Mary-style drinks), sparkling water, ginger, jalapeño, and even herbal infusions like mint or dill.

Is pickle lemonade good for you?

Absolutely—when made with no-sugar pickle brine and fresh lemonade, it’s a great source of electrolytes, supports digestion, aids in hydration, and contains vitamin C and antioxidants.

Print
clock clock iconcutlery cutlery iconflag flag iconfolder folder iconinstagram instagram iconpinterest pinterest iconfacebook facebook iconprint print iconsquares squares iconheart heart iconheart solid heart solid icon
Pickle Lemonade Mocktail

Pickle Lemonade Mocktail: The Odd Drink That’s Going Viral Today


5 Stars 4 Stars 3 Stars 2 Stars 1 Star

No reviews

  • Author: Chef Dodos
  • Total Time: 5 minutes
  • Yield: 1 mocktail 1x

Description

This pickle lemonade mocktail is a zesty, salty-sweet refresher packed with electrolytes and low in sugar. Perfect for hot days, post-workout hydration, or as a bold mocktail alternative.


Ingredients

Scale

1 cup fresh homemade lemonade (or low-sugar store-bought like Milo’s)

1/4 cup pickle juice (naturally fermented, no sugar or preservatives)

Ice cubes

Optional: 2–3 pickle chips

Optional: 1 lemon wheel or slice

Optional: 1 pickle spear

Optional: 1 small sprig of fresh dill


Instructions

1. Chill your glass by placing it in the freezer for a few minutes.

2. In a shaker or large glass, mix lemonade and pickle juice until well combined.

3. Fill your chilled glass with ice cubes.

4. Pour the mixture over ice and stir gently.

5. Add garnishes: lemon, pickle chips, dill, or a full spear.

6. Serve immediately and enjoy cold.

Notes

Use naturally fermented pickle juice for health benefits and flavor depth.

Add sparkling water instead of lemonade for a fizzy version.

Pairs great with clean protein snacks or spicy dips.

  • Prep Time: 5 minutes
  • Cook Time: 0 minutes
  • Category: Drinks
  • Method: No-Cook
  • Cuisine: American

Nutrition

  • Serving Size: 1 glass
  • Calories: 20
  • Sugar: 2g
  • Sodium: 420mg
  • Fat: 0g
  • Saturated Fat: 0g
  • Unsaturated Fat: 0g
  • Trans Fat: 0g
  • Carbohydrates: 3g
  • Fiber: 0g
  • Protein: 0g
  • Cholesterol: 0mg

Conclusion

The pickle lemonade mocktail may sound like a dare, but it’s one of the smartest, most refreshing drinks you’ll try this year. It hits that perfect balance between bold flavor and real functionality. Whether you’re powering through a summer workout, recovering after cardio, or just want a low-sugar, hydrating drink that makes you feel good—this mocktail delivers.

Bold. Briny. Hydrating. Real. That’s how we StayFit. For More Follow us on Facebook