Cottage cheese pancakes were one of the first healthy recipes that helped us turn our lives around. Back then, one of us felt tired and out of shape, and the other carried extra weight and wanted to feel stronger. We knew we had to make a change—and it had to start with better food.
These pancakes gave us energy, kept us full, and actually tasted great. They were easy to make and fit right into our new lifestyle. Now they’re a regular part of our mornings, and we’re excited to share them with you too.
Table of Contents
How This Pancake Became Part of Our Transformation
Cottage cheese pancakes were a total game-changer for us. Back when we first started our fitness journey, our mornings looked very different. I (Kiko) was lifting weights but couldn’t shake off stubborn fat. Med was underweight and had no energy all day. We both felt stuck. That’s when we realized—if we wanted real change, it had to start in the kitchen.
One weekend, we found a basic cottage cheese pancake recipe online. It sounded weird at first, but we were willing to try anything to feel better. We made them using just eggs, oats, and cottage cheese. The result? Light, fluffy pancakes with a creamy texture and a boost of protein that kept us full for hours. No sugar crash. No hunger an hour later.
They were so good, we made them again the next day. And the next. That’s how cottage cheese pancakes became a regular part of our mornings. Over time, we added fun toppings like fresh berries or a spoonful of cottage cheese ranch dip for a savory twist. They gave us fuel to power through workouts and helped us finally see the results we’d been working for.
Why Cottage Cheese Pancakes Work So Well
Cottage cheese might sound like a strange pancake ingredient, but trust us—it works. It melts into the batter, making the pancakes soft inside and golden on the outside. Plus, it adds a solid punch of protein without needing protein powder. That’s why we always recommend this recipe to anyone trying to lose fat, gain muscle, or just eat healthier without giving up real food.
How to Make the Best Cottage Cheese Pancakes (Step-by-Step Tips)
Simple Ingredients That Keep You Full
Making cottage cheese pancakes is easier than you think. You only need a few ingredients — all clean, natural, and packed with protein. Here’s what we use:
1 cup cottage cheese (full-fat or low-fat both work)
2 eggs
½ cup oats (quick oats or rolled oats)
Pinch of salt
Dash of cinnamon or vanilla (optional for flavor)
That’s it. No flour, no sugar, no baking soda. Just real ingredients that mix together fast and cook even faster. These pancakes are perfect for busy mornings or weekend meal prep.
We blend everything in a blender until smooth. Then we let the batter rest for 3–5 minutes while we heat a non-stick pan. Spoon it out into small pancakes, cook each side for about 2–3 minutes, and flip carefully. They should be golden and firm on the edges, with a soft, moist center.
Pro Tips for Fluffy, Golden Pancakes
The key to great cottage cheese pancakes is in the balance: not too runny, not too thick. If your batter feels too thick, add a splash of milk. Too thin? Add a few more oats. A good non-stick pan makes all the difference, too — you want that perfect crisp edge without burning.
Cook pancakes on medium heat until golden
Use medium heat — not high — to avoid burning before the center cooks through. We often batch-cook 6–8 pancakes and store extras in the fridge. They reheat well in a toaster oven or skillet and still taste great the next day.
Looking for topping ideas? Go sweet with banana slices, almond butter, or berries.
Why Cottage Cheese Pancakes Are Better Than Regular Ones
What Cottage Cheese Does in Pancakes
Cottage cheese pancakes aren’t just a healthy twist—they’re an upgrade. So, what does cottage cheese actually do in pancakes? First, it changes the texture. Cottage cheese melts into the batter as it cooks, giving these pancakes a soft, fluffy inside with golden, crispy edges. That rich texture is hard to beat.
Second, cottage cheese pancakes are packed with protein. Just one serving delivers 18 to 20 grams of high-quality protein, which helps keep you full and supports your muscle goals. That’s why these pancakes became one of our go-to meals when we started our fitness journey.
Cottage cheese
Unlike regular pancakes, cottage cheese pancakes won’t leave you crashing mid-morning. The protein keeps your blood sugar steady and hunger low, which we also cover in our insulin control fat loss guide. These pancakes became a secret weapon in our routine—not just tasty, but truly effective.
Why Cottage Cheese Pancakes Win on Nutrition
Let’s look at the numbers. Here’s what you’re getting in a typical serving of cottage cheese pancakes (3 medium pancakes):
Nutrient
Amount
Calories
250–280
Protein
18–20g
Carbs
18–22g
Fat
9–11g
Cottage cheese pancakes give you a perfect mix of macros. They’re high in protein, moderate in carbs, and balanced in healthy fat. And they taste amazing too.
Cottage Cheese Pancake Mistakes (And How to Fix Them)
Why Your Cottage Cheese Pancakes Aren’t Fluffy
If your cottage cheese pancakes are turning out flat, don’t worry—it’s a common issue, and it’s easy to fix. First, the biggest mistake we see is not blending the batter well. If your oats and cottage cheese aren’t fully mixed, the pancakes won’t hold together or rise properly. Use a blender to get a smooth, airy texture.
Second, check your heat. Cooking on high heat might seem faster, but it often leads to burnt outsides and undercooked insides. Use medium heat and give your pancakes time to rise and firm up. Letting the batter rest for 3–5 minutes before cooking also helps air bubbles form, which gives your cottage cheese pancakes more lift.
Also, don’t overcrowd the pan. Give each pancake space so it can cook evenly and stay fluffy.
Can You Swap Cottage Cheese for Milk in Pancakes?
You might be wondering, can I use cottage cheese instead of milk in pancakes? Yes—if you’re following a high-protein or low-carb recipe like this one, cottage cheese works as both the liquid and protein source. But keep in mind: cottage cheese is thicker and richer than milk, so it changes the texture.
If you’re trying to convert a traditional pancake recipe, just swapping milk for cottage cheese won’t work perfectly. You’ll likely need to adjust your oats or flour to match the thicker texture. But in a recipe made for it—like our cottage cheese pancakes—it works perfectly.
And that’s why this recipe became one of our favorites. It’s designed to keep things balanced: fewer ingredients, better texture, and more protein. It fits easily into any clean eating plan, just like our muhammara recipe or protein-packed sweet potato salad.
FAQ About Cottage Cheese Pancakes
What does cottage cheese do to pancakes?
Cottage cheese adds moisture, richness, and protein. It melts into the batter while cooking, giving pancakes a creamy texture and golden, crispy edges. It also boosts the protein content to help you stay full longer.
Why aren’t my cottage cheese pancakes fluffy?
They might not be blended well enough, or your pan might be too hot. Always blend your batter until smooth and cook on medium heat. Letting the batter rest a few minutes before cooking can also help them fluff up.
Can I substitute cottage cheese for milk in pancakes?
Yes, in the right recipe. Cottage cheese works as both a liquid and protein source, but it’s thicker than milk. If you’re not using a recipe built around cottage cheese, you may need to adjust the other ingredients.
What is Queen Elizabeth’s pancake recipe?
Her famous drop scones recipe included eggs, milk, flour, and cream—but not cottage cheese. While hers were more traditional, our cottage cheese pancakes are a modern, high-protein twist for fitness-focused food lovers.
These cottage cheese pancakes are fluffy, protein-packed, and perfect for a quick and healthy breakfast. Great for fat loss or muscle gain.
Ingredients
Scale
1 cup cottage cheese
2 eggs
½ cup oats
Pinch of salt
1 tsp vanilla or cinnamon (optional)
Instructions
1. Blend all ingredients until smooth.
2. Let the batter rest for 3–5 minutes.
3. Heat a non-stick pan on medium.
4. Spoon batter into small pancakes.
5. Cook 2–3 minutes per side until golden.
Notes
Use full-fat or low-fat cottage cheese.
Add berries or almond butter as toppings.
Refrigerates well for 2–3 days.
Prep Time:5 mins
Cook Time:6 mins
Category:Breakfast
Method:Stovetop
Cuisine:American
Nutrition
Serving Size:3 pancakes
Calories:270
Sugar:3g
Sodium:390mg
Fat:10g
Saturated Fat:3g
Unsaturated Fat:6g
Trans Fat:0g
Carbohydrates:20g
Fiber:2g
Protein:19g
Cholesterol:130mg
Conclusion: Real Pancakes, Real Results
Cottage cheese pancakes helped us feel stronger, leaner, and more in control of our health. They’re simple to make, packed with nutrients, and don’t sacrifice flavor. If you’re ready to fuel your mornings the StayFit way, this recipe is a great place to start.
Remember, this isn’t about perfection—it’s about consistency. Cottage cheese pancakes became one of our “no excuse” meals, and we hope they become one of yours too. Whether you’re chasing energy, gains, or just a better way to eat, we’ve got your back—one pancake at a time.
Let’s StayFit — together. Follow us on Facebook for more daily recipes
Back when we kicked off our 100-day transformation, snacks were the hardest part. Kiko was already into crunchy veggies—but without a creamy sidekick, they didn’t stand a chance next to the chip bag. That’s when cottage cheese ranch dip stepped in. We needed something high in protein, super satisfying, and way cleaner than anything in a bottle.
At first, we weren’t exactly hyped. Med joked that cottage cheese was “gym food for people who hate flavor.” But one blender session later—with lemon juice, chopped chives, and our clean ranch seasoning—everything changed. The result? A creamy, tangy, next-level dip that we couldn’t stop eating. And with 6g of protein per serving, cottage cheese ranch dip earned its spot in our fridge.
This dip became a Sunday meal prep essential. We made one big batch every week and used it for everything—veggie plates, lunch bowls, and late-night snack attacks. It wasn’t just healthy. It actually made staying healthy easier. Real ingredients. Real flavor. Real wins.
Now, cottage cheese ranch dip is more than just a dip—it’s a lifestyle hack. We scoop it next to grilled chicken bites for post-workout fuel or drizzle it over our roasted sweet potato salad for that creamy finish.
So if you’ve tried “healthy dips” before and ended up disappointed, this one will flip the script. Let’s dig into why cottage cheese ranch dip checks every box—taste, texture, and what it does for your body.
Why Cottage Cheese Ranch Dip Is a Smart Snacking Choice
What Makes This Dip 100% Healthy?
Let’s break this down clearly: cottage cheese ranch dip isn’t just delicious—it’s built for real results. Cottage cheese brings the protein punch, with over 25g per cup, making every scoop more than just tasty. It keeps you full, supports lean muscle, and cuts through cravings the clean way.
Instead of sour cream or mayo, we use cottage cheese as the creamy base—meaning you still get that smooth ranch texture without the heavy fats. That single swap slashes calories while boosting the nutritional payoff. And when you mix in lemon juice, chopped herbs, and clean ranch seasoning? You’re skipping the fake stuff: no preservatives, no weird oils, no sugar bombs.
Even better, cottage cheese ranch dip supports better balance. Dip in crunchy veggies like cucumbers, celery, or bell peppers and you’ve got fiber + protein in one satisfying bite. That combo helps stabilize blood sugar and energy—so you don’t crash mid-afternoon.
Need proof? Here’s how it compares to a standard ranch dip:
Nutrient (per 1/4 cup)
Cottage Cheese Ranch Dip
Traditional Ranch Dip
Calories
~69 kcal
~140 kcal
Protein
6g
1g
Fat
3g
14g
Sodium
~395mg
~530mg
Fast, Fresh & Full of Flavor: How to Make Cottage Cheese Ranch Dip
Simple Ingredients, Powerful Taste
When you’re building healthy habits that stick, simple recipes win every time. That’s exactly why cottage cheese ranch dip is one of our go-tos. It’s made with just five real ingredients—and takes five minutes from start to finish. No complicated tools. No hidden junk. Just clean, bold flavor.
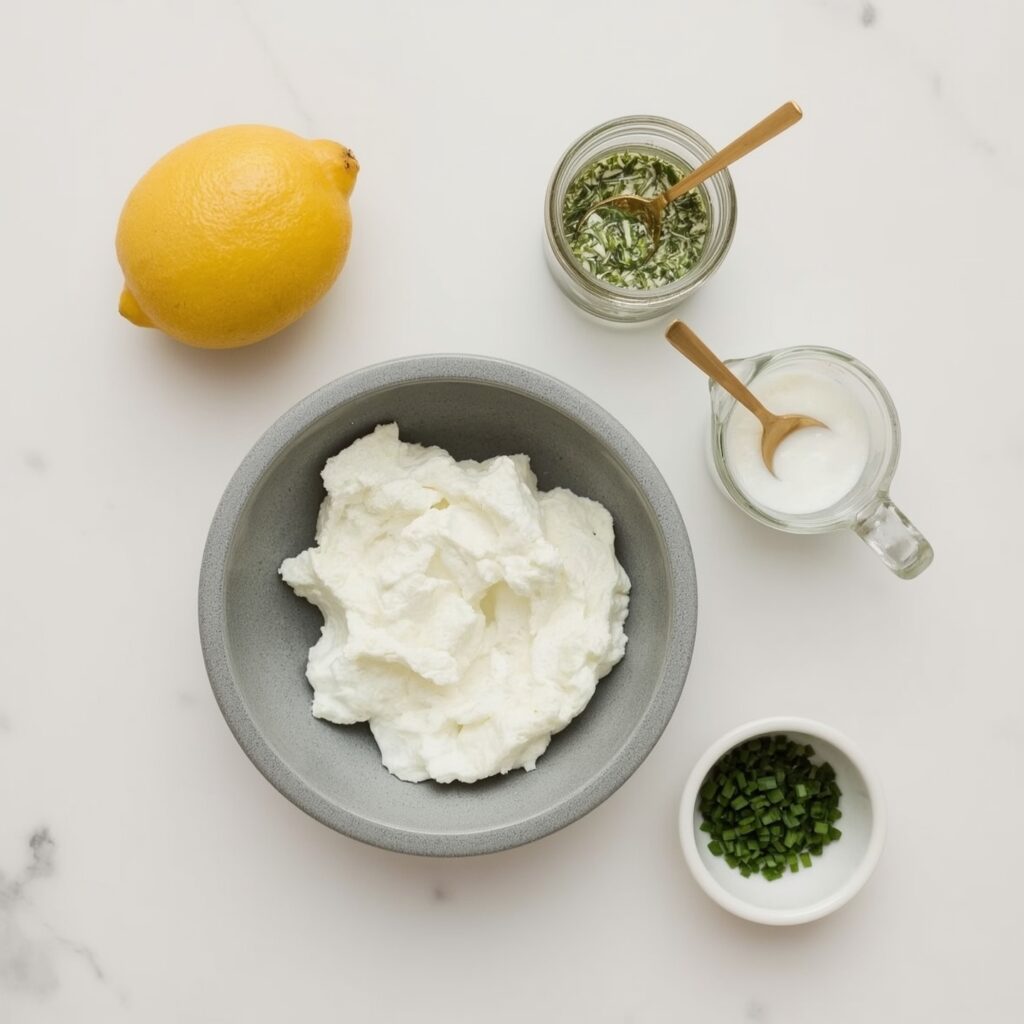
You’ll be surprised how much creamy, tangy goodness you can get out of cottage cheese and a few pantry staples. Here’s everything you need to make your own protein-packed cottage cheese ranch dip at home:
Cottage cheese – Choose 5% for that rich, creamy texture or stick to 1–2% for a leaner version. Both blend beautifully.
Milk of choice – A splash helps thin the dip. Go with regular milk, or try unsweetened almond, oat, or soy if you’re dairy-free.
Fresh lemon juice – Brightens the flavor and balances the natural tang of the cottage cheese.
Ranch seasoning – Use a clean-label store-bought mix or stir together your own homemade version with garlic, dill, parsley, onion powder, and sea salt.
Chives (optional) – For a touch of color and that crisp, garden-fresh finish.
Blend it all until smooth, and you’ve got a creamy, satisfying cottage cheese ranch dip that’s ready to fuel your week.
Simple ingredients to make a healthy creamy dip
You probably have everything you need to make cottage cheese ranch dip already. And if not? Grab a few things next time you’re out—it’s absolutely worth it.
Looking for another high-protein staple? Try our Grilled Chicken Bites. They pair perfectly with this dip and bring a Mediterranean twist that keeps it exciting.
Blend It. Taste It. Dip Everything.
Time to make this your go-to snack dip:
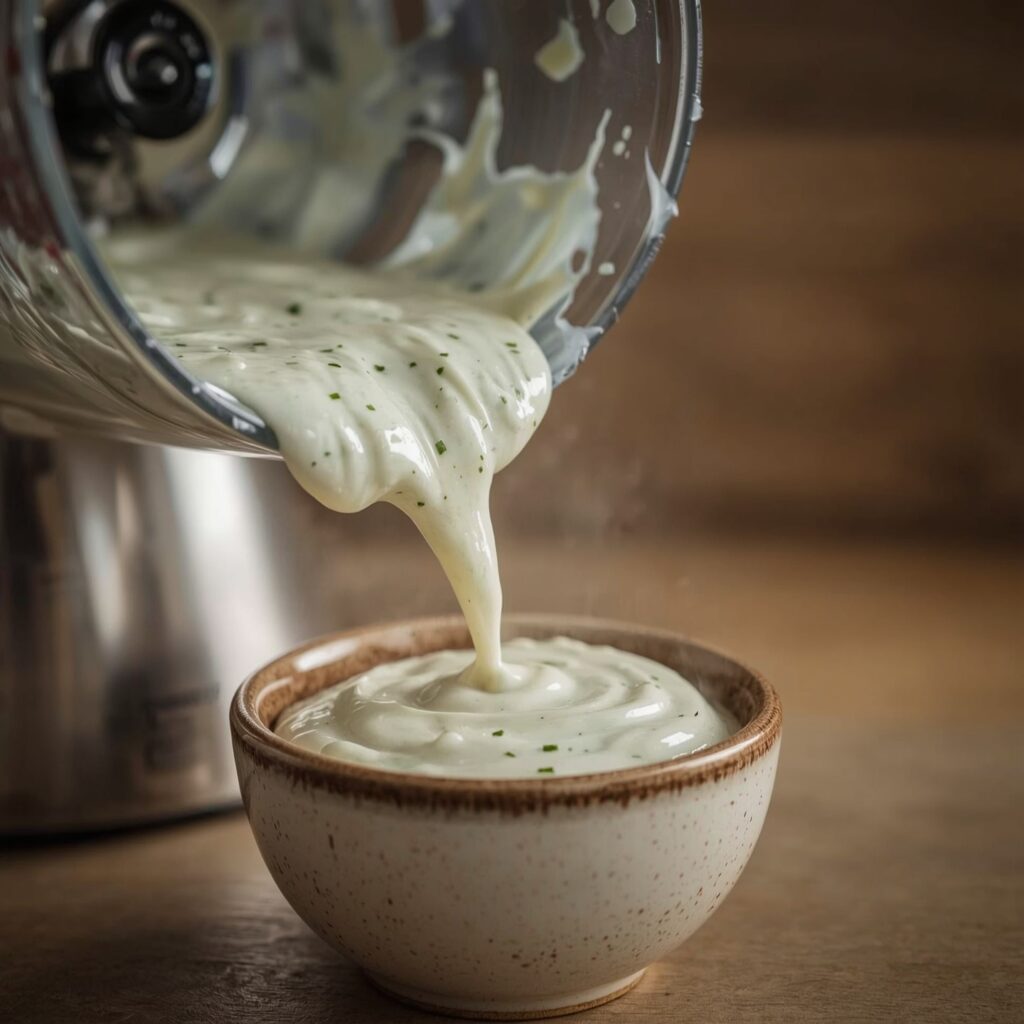
Add everything to a food processor or high-speed blender.
Blend until smooth. Start with 2 tablespoons of milk. Want it thick and spreadable? Use less. Prefer it scoopable? Add more until it’s just right.
Taste and tweak. Need more zing? Squeeze in extra lemon. Want it creamier? Blend another few seconds. Toss in chopped chives for that classic ranch pop.
Serve it now—or chill it. The flavors deepen beautifully in the fridge. Either way, this cottage cheese ranch dip is ready when you are.
Blend ingredients into a smooth, creamy texture
Quick Tips: – Add 1 tablespoon of mayo for extra creaminess if you want a more classic ranch taste. – For heat, mix in red pepper flakes or a dash of Dijon mustard. – Don’t over-blend or it can get runny—aim for a smooth but scoopable consistency.
Want a dairy-free version? Use a thick dairy-free Greek-style yogurt as a base instead. It won’t be exactly the same, but you’ll still get that herby, zesty vibe.
Make It a Meal-Prep Hero
What to Dip and Pair With
You’ve got a creamy, high-protein cottage cheese ranch dip ready to go—now let’s level it up beyond raw carrots and cucumbers. While it’s amazing with bell peppers and snap peas, this dip can do way more.
We keep it in our weekly lineup because it fits into every kind of meal:
Use it as a spread in high-protein egg salad wraps
Add a scoop to buffalo chicken bowls instead of ranch
Dip sweet potato fries or air fryer tofu bites
Swap it for mayo in veggie sandwiches—it’s tangy, satisfying, and way more nutritious
That lemon-herb flavor makes it incredibly versatile. Whether you’re building Mediterranean bowls or prepping lunchboxes for the kids, cottage cheese ranch dip brings it all together. And if you’re trying to actually enjoy raw veggies? This dip’s your secret weapon.
Storing for the Week Ahead
This dip is a meal-prepper’s dream. Store your cottage cheese ranch dip in an airtight container and keep it refrigerated—it stays fresh and creamy for up to 7 days. A little separation might happen (thanks to the lemon juice), but a quick stir brings it right back.
If you’re planning ahead, portion the dip into individual containers. Add veggie sticks, crackers, or even leftover chicken for a grab-and-go snack that’s balanced, flavorful, and 100% clean.
Want more prep-friendly snacks like this? Don’t miss our Roasted Sweet Potato Salad—it makes a perfect sidekick to your dip.en snack cravings hit.
Frequently Asked Questions About Cottage Cheese Ranch Dip
Is cottage cheese ranch good for you?
Yes, cottage cheese ranch dip is an excellent healthy option—especially compared to traditional ranch made with sour cream or mayo. It’s high in protein (about 6g per ¼ cup), lower in saturated fat, and rich in calcium. When made with fresh herbs and lemon juice, it’s a clean and nourishing choice for dipping or spreading.
What tastes good dipped in cottage cheese?
So many things! Fresh veggies like carrots, celery, bell peppers, and cucumbers are classic. But it also pairs well with whole-grain pita chips, roasted sweet potatoes, or even grilled chicken skewers. If you’re building a snack plate, this dip belongs right in the center.
Can you mix ranch packet with cottage cheese?
Absolutely. While we recommend making your own clean ranch seasoning blend to reduce additives and sodium, a store-bought ranch packet works in a pinch. Just blend it with cottage cheese and a bit of milk or lemon juice to taste.
How long does cottage cheese ranch last in the fridge?
Stored properly in an airtight container, it stays fresh for up to 7 days. You might notice slight separation after a few days—totally normal. Just stir it up before serving. If you notice any off smell or change in texture, it’s time to toss and remake.
Is there anything unhealthy about cottage cheese?
The only concern might be the sodium content, especially in some full-fat or flavored varieties. To keep it healthy, choose plain low-fat cottage cheese with minimal sodium. It’s also naturally low in carbs and a great source of casein protein, which digests slowly and keeps you full.
Conclusion
Cottage cheese ranch dip isn’t just another healthy alternative—it’s a game-changing upgrade. It’s packed with protein, low in fat, insanely creamy, and ready in five minutes. Whether you’re meal prepping for the week or just trying to eat more veggies, this dip has your back.
Kiko & Med used recipes like this one to fuel our 100-day transformation—and we still make it every week. It’s real food, with real flavor, that delivers real results.
So go blend, dip, and stay fit—your snack game just leveled up. Let’s StayFit—together.For More follow us on facebook & pinterest
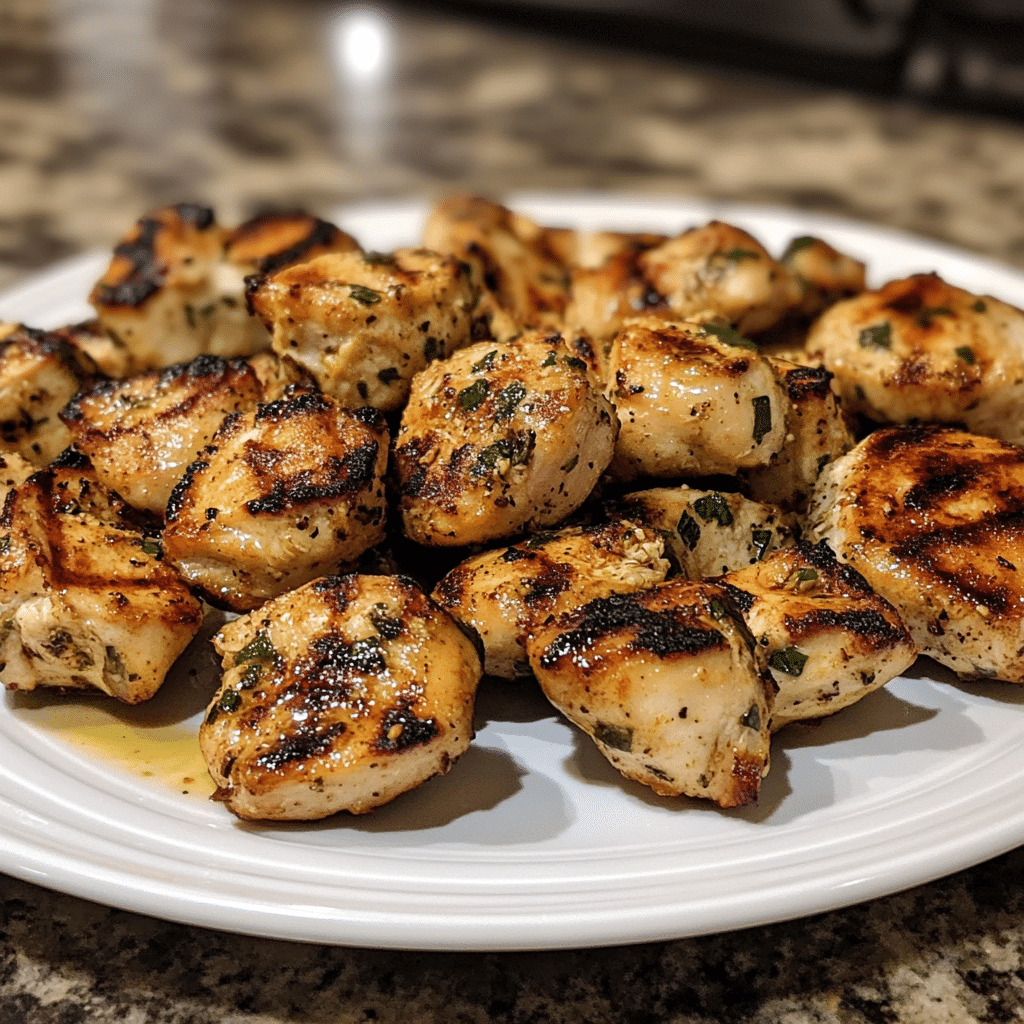
Juicy grilled chicken bites with creamy garlic sauceTable Of content
Table of Contents
Why We’re Obsessed With These Grilled Chicken Bites
Grilled Chicken Bites is one of those recipes that sneak up on you? The ones that don’t seem like much… until you make them, taste them, and suddenly can’t stop thinking about them? That’s exactly what happened with these grilled chicken bites.
We were both in a rut. Med was skipping lunch (again), and Kiko was scarfing down protein bars that left him more bloated than satisfied. So, we challenged each other to come up with one quick, flavorful, high-protein lunch we could both meal prep and love eating. That’s when Kiko hit the grill.
He tossed cubed chicken breast with olive oil, smoked paprika, garlic powder, and a pinch of salt. Super basic. But when those little bites hit the grill pan—sizzling, searing, caramelizing into golden nuggets of juicy flavor—we both froze. They smelled amazing. And once we tasted them? Game over. They were simple, bold, and ridiculously crave-worthy.
But what really takes these grilled chicken bites to the next level? That creamy garlic sauce. It’s light, zesty, and built with Greek yogurt instead of heavy cream or mayo. It’s the kind of dip you’ll want to drizzle on roasted veggies, dunk sweet potato fries in, or eat straight off a spoon.
They’ve officially become our go-to: easy to prep, easy to pack, and perfect whether we’re tossing them into a salad, pairing with rice, or just grabbing a few bites between Zoom calls.
And if you’re into bold flavors without the food coma, you’re going to love these. They even beat out our zesty lemon chicken orzo and teriyaki chicken recipe on our weekly rotation.
Let’s break down how to make the juiciest, most flavorful chicken bites—no grill required.)
The Secret to Juicy, Flavorful Chicken Bites
Dry chicken? No thanks. The whole reason these juicy grilled chicken bites hit so hard is because every step—from how you cut to how you cook—makes a difference. We’re talking crispy edges with a tender, perfectly seasoned center. Here’s how to make it happen every time.
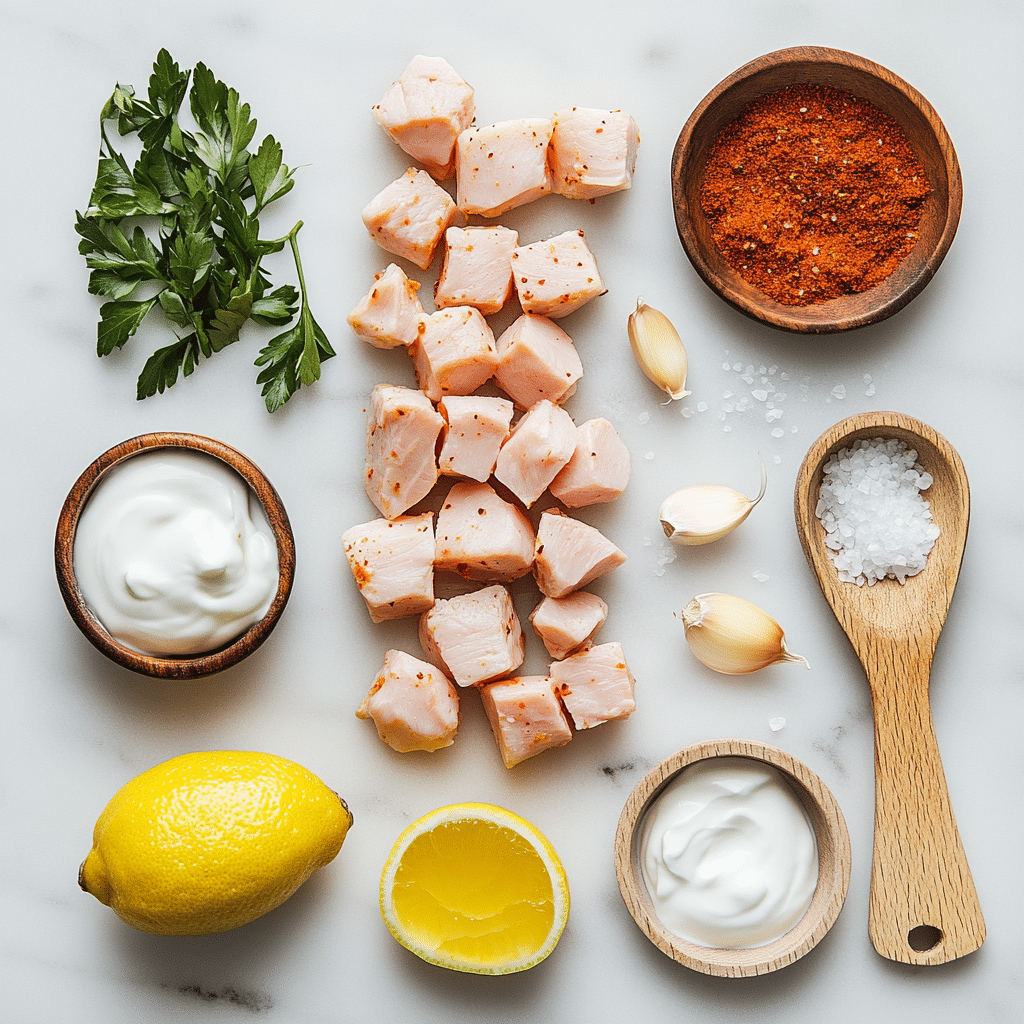
Size matters. You want uniform, 1-inch cubes. Not strips. Not chunks. Bites. That even size ensures they all cook at the same rate—no overdone pieces, no raw surprises. Pro tip: pat the chicken dry before seasoning. Less moisture = better browning.
We keep our seasoning simple but purposeful: olive oil (for moisture and grill marks), smoked paprika (for depth), garlic powder (for punch), and salt (to make it all pop). After tossing, let the chicken rest for 10–15 minutes. This helps the spices penetrate—and gives you time to heat up the pan or grill.
Now, let’s talk grill technique. Whether you’re using an outdoor grill, stovetop grill pan, or cast-iron skillet, preheating is non-negotiable. A hot surface is key to getting that fast, flavorful sear. Cook for about 2–3 minutes per side—don’t crowd the pan and don’t move the pieces too early. Let that crust develop.
When done right, you get that golden-brown exterior and juicy, tender interior. It’s the kind of texture that keeps you coming back, bite after bite.
Want to switch it up? Add a pinch of cayenne or swap the paprika for curry powder. The base method stays the same, but the flavors can go wherever you want.
These tips also work perfectly in recipes like our Zesty Lemon Chicken Orzo and Teriyaki Chicken Recipe. Both are packed with protein and support clean eating, insulin control, and sustainable fat loss—making them a solid part of your StayFit life.
That Garlic Sauce? It’s Everything.
You could serve these grilled chicken bites plain and still get applause. But add this creamy garlic sauce? You’ll have people asking for the recipe before the first bite’s even done.
We built this sauce the same way we built our StayFit lifestyle: real ingredients, real flavor, zero nonsense. No mayo, no sour cream—just clean, creamy goodness that brings the heat and cools it down at the same time.
Here’s what’s in it:
½ cup Greek yogurt (for creaminess and protein)
1–2 garlic cloves, grated or minced
1 tablespoon lemon juice (brightens everything)
1 teaspoon Dijon mustard (hello, tang!)
A pinch of salt and cracked pepper
Everything you need to make these healthy chicken bites
It’s bold, fresh, and surprisingly light. The yogurt gives it that luscious texture without any heaviness, while the garlic and lemon bring sharp, zesty balance. Blend it all together and let it sit for at least 10 minutes—this gives the flavors time to come alive.
What we love most? This sauce is versatile. Drizzle it over your bites. Dip roasted veggies in it. Toss it with shredded chicken or use it as a high-protein salad dressing. Seriously, it goes with everything.
Pro tip: It stores beautifully. Make a batch and keep it in the fridge for up to 4 days. The flavor actually gets better overnight.
And this garlic sauce? It’s our top-tier favorite. Clean, creamy, and built to fuel your goals.
Serving Ideas & Meal Prep Magic
When we first made these grilled chicken bites, we scarfed them straight off the pan. No plates. No sides. Just bites. But the real win? How insanely well they work for meal prep.
We’re not into boring bowls or dry, next-day chicken. These bites hold up like champs—tender, flavorful, and endlessly pairable. If you’re short on time or hate repeating meals, this is your golden ticket.
Build a high-protein bowl Start with a base: brown rice, quinoa, or cauliflower rice. Layer in grilled chicken bites, roasted veggies (we love zucchini or bell peppers), and drizzle on that creamy garlic sauce. Done.
Want a low-carb option? Toss them over chopped romaine or butter lettuce. Add avocado, cherry tomatoes, and cucumber for a protein-packed salad that actually satisfies.
Meal prep like a pro We portion 4–5 ounces of grilled chicken per container with a half-cup of complex carbs and plenty of non-starchy veggies. Sauce goes in a separate container to keep everything fresh and crisp.
The chicken stays juicy for up to 4 days in the fridge, and it reheats beautifully in the microwave or skillet. You can even eat it cold—yes, it’s that good.
Final dish served with garlic sauce
And if you’re really tight on time, pair them with grab-and-go sides like our Tuna Salad Lettuce Wraps or even reheat a portion of our Zesty Lemon Chicken Orzo for a cozy, protein-packed meal that comes together fast.
Bottom line? These grilled chicken bites aren’t just a recipe—they’re a solution. Fast, flavorful, flexible. Whether you’re feeding the fam, meal prepping for the week, or grabbing a quick post-workout refuel, they deliver every single time.
FAQs About Grilled Chicken Bites
1. How long should I grill chicken bites?
Grilled chicken bites cook quickly! Grill over medium-high heat for about 2–3 minutes per side, or until the internal temperature hits 165°F. Be sure to flip only once for a perfect sear without drying them out.
2. Can I make grilled chicken bites without a grill?
Absolutely. You can use a cast-iron skillet or a stovetop grill pan to get the same flavor and char. Even an air fryer or oven broiler works well—just keep the pieces spread out and don’t overcook.
3. What dipping sauces go well with grilled chicken bites?
Our favorite is the creamy garlic sauce in this recipe, but you can also try: Tzatziki for a Greek vibe Spicy hummus Avocado lime crema Low-calorie BBQ or honey mustard for a sweet-savory punch
4. Are grilled chicken bites good for meal prep?
Yes—these are a meal prep dream. They stay juicy in the fridge for up to 4 days, and you can mix and match with veggies, grains, or wraps. The flavor holds up even after reheating, making them ideal for grab-and-go meals.
This roasted sweet potato salad is a warm, hearty, and clean-eating meal loaded with fiber, vitamins, and flavor. Perfect for lunch or dinner
Ingredients
Scale
For the Chicken:
1 lb boneless, skinless chicken breasts, cut into 1-inch cubes
1 tablespoon olive oil
1 teaspoon paprika
1/2 teaspoon garlic powder
1/4 teaspoon salt
For the Garlic Sauce:
1/2 cup plain Greek yogurt
1–2 garlic cloves, grated or minced
1 tablespoon lemon juice
1 teaspoon Dijon mustard
Salt and pepper to taste
Instructions
Toss chicken cubes with olive oil, paprika, garlic powder, and salt. Let sit for 10 minutes. Heat a grill pan or skillet over medium-high heat. Cook chicken for 2–3 minutes per side until golden and cooked through. In a small bowl, combine Greek yogurt, garlic, lemon juice, mustard, salt, and pepper to make the sauce. Serve chicken bites hot with garlic sauce either drizzled or on the side as a dip.
Notes
Store leftovers in the fridge for up to 4 days.
Keep garlic sauce in a separate container for best freshness.
The flavor of the sauce deepens overnight.
Prep Time:10
Cook Time:10
Category:Dinner
Method:Grill / Pan-Sear
Cuisine:American
Nutrition
Serving Size:1 Plats
Calories:280 kcal
Sugar:2g
Sodium:320mg
Fat:10g
Saturated Fat:2g
Unsaturated Fat:7g
Trans Fat:0g
Carbohydrates:85mg
Fiber:0g
Protein:36g
Conclusion
Grilled chicken bites don’t have to be boring — and this recipe proves it. With just a handful of clean ingredients and a quick cook time, you get juicy, bold-flavored bites that are anything but basic. Add that creamy garlic sauce? Total game-changer.
Whether you’re meal prepping for the week, feeding the family, or just need a high-protein bite between meetings, this dish checks every box. It’s fast, satisfying, and endlessly versatile.
So now it’s your turn: fire up that grill pan, whip up the sauce, and make something that actually gets you excited to eat clean. Real food. Real results. Real people.
Zesty Lemon Chicken is more than just a delicious dinner—it’s a symbol of how far we’ve come and how food truly changed our lives.
We weren’t always the “fit couple” you see today on StayFit Recipes. Back then, one of us was “skinny fat”—not technically overweight, but always tired and frustrated by stubborn belly fat. The other? Carrying extra weight and feeling stuck in a body that didn’t reflect the strength we dreamed of. Our transformation didn’t start in the gym. It started with what we were cooking in the kitchen.
We remember the first time we tested a lemon chicken recipe. We were exhausted after a long week, craving something healthy but comforting. We threw together what we had—chicken breasts, fresh lemon, garlic, olive oil, and herbs. That dinner? It wasn’t perfect. But it was bold, juicy, and satisfying. It was the first time healthy food actually felt exciting. That was our turning point.
From then on, cooking became our therapy—and Zesty Lemon Chicken became a staple on our weekly menu. Over time, we fine-tuned it: more zest, just the right balance of tangy and savory, and easy enough to whip up even on your busiest day. It wasn’t just a recipe. It was a reminder that real change starts with small steps—and simple meals that taste amazing.
We created StayFit Recipes for people like you. People who want results, but don’t want to give up flavor. People who are tired of boring chicken and bland diets. This isn’t some trendy “clean eating” gimmick. It’s food that fuels your goals and makes you smile. Pair it with this Cottage Cheese Ranch Dip and raw veggies for a clean snack.
That’s what this guide is about. Whether you’re just starting out or looking to switch things up in the kitchen, our Zesty Lemon Chicken will give you flavor, fuel, and inspiration. It’s more than a recipe—it’s part of our story. And we hope it becomes part of yours, too.
Juicy zesty lemon chicken with golden skin and herbs
Why Zesty Lemon Chicken Is So Popular
Zesty Lemon Chicken is more than just a tasty recipe—it’s one of those dishes that turns a regular night into something you’ll remember. With bold citrus flavor, juicy chicken, and clean, wholesome ingredients, it’s the kind of meal that satisfies without leaving you sluggish or guilty. In fact, it’s a favorite here at StayFit Recipes, and it’s earned that title honestly.
We first created this Zesty Lemon Chicken recipe when we were on our own fitness journey. One of us was tired of bland meal preps, the other was burnt out from trying to eat clean with no real satisfaction. Try our flavor-packed Healthy Teriyaki Chicken for another clean, high-protein favorite. That’s when we threw together fresh lemon juice, garlic, herbs, and good-quality chicken thighs—and everything changed.
Chicken thighs, in particular, shine in this dish. They’re juicier and more flavorful than breasts, especially when cooked with the skin on. Lemon’s bright acidity cuts through the richness of the dark meat and crispy skin, creating that perfect flavor balance.
Prefer breasts over thighs? No problem. You can still enjoy Zesty Lemon Chicken with white meat—just be sure to cook them with the skin on if possible, and check for doneness a few minutes earlier. Breasts tend to dry out faster, so careful timing is key.
Health Benefits of Zesty Lemon Chicken
This isn’t a cheat meal. It’s a smart, clean, protein-rich main course that works with your goals—whether that’s weight loss, muscle gain, or just feeling better after a long day. Unlike typical creamy or fried chicken recipes, Zesty Lemon Chicken is made with real, simple ingredients:
Ingredient
Why It Works for You
Lemon Juice
High in Vitamin C, brightens flavor naturally
Chicken Thighs
Juicy and protein-rich, more satisfying than lean cuts
Olive Oil/Butter
Healthy fats for heart health and satiety
Garlic & Herbs
Add depth without calories or chemicals
Ingredients You’ll Need for a Classic Zesty Lemon Chicken Recipe
Main Ingredients
3 to 4 pounds of chicken thighs or legs (bone-in, skin-on for best results)
2 teaspoons fresh chopped rosemary (or ½ teaspoon dried)
1 teaspoon kosher salt
1 teaspoon black pepper
2 tablespoons melted unsalted butter or extra virgin olive oil
Lemon slices for garnish
Want to use chicken breasts instead? Try our Grilled Chicken Bites for a fast high-protein version.
Want to use chicken breasts instead? You can Try our Grilled Chicken Bites for a fast high-protein version. Just adjust the cook time and try to leave the skin on during baking—it protects the meat and adds richness to your zesty lemon chicken.
Step-by-Step Instructions
Step 1: Marinate the Chicken Whisk together lemon zest, juice, garlic, herbs, salt, and pepper. Score each piece of chicken, coat with marinade, and refrigerate for 1–2 hours.
Step 2: Get Ready to Bake Preheat oven to 425°F. Place chicken in a dish skin side up, brush with olive oil or butter.
Step 3: Bake and Baste Bake for 20 minutes. Baste with leftover marinade. Bake 15–25 more minutes until golden and cooked through.
Step 4: Rest and Serve Let chicken rest for 10 minutes. Skim fat from pan juices and serve as a light sauce.s your zesty lemon chicken to another level of juiciness and flavor.
Great Sides for Zesty Lemon Chicken
Cauliflower mash or roasted veggies
Lemon garlic quinoa
Angel hair pasta
Zucchini noodles
How to Cook Zesty Lemon Chicken Breasts for Maximum Juiciness
While thighs may steal the spotlight in traditional Zesty Lemon Chicken recipes, chicken breasts are still a fantastic choice—especially if you’re aiming for leaner cuts. The key to making them work? Timing, temperature, and technique.
Chicken breasts are naturally lower in fat, so they cook quicker and dry out easier. But that doesn’t mean they can’t be flavorful. In fact, with the right marinade and a bit of kitchen savvy, Zesty Lemon Chicken breasts can be just as juicy and bold as their thigh counterparts.
Here’s how to do it right:
Marinate thoroughly: Let the breasts soak in the lemon zest, juice, garlic, and herb marinade for at least 60 minutes. This infuses flavor deep into the meat and helps tenderize it.
Keep the skin on (if possible): Even if you plan to remove it after cooking, the skin acts like a natural moisture barrier.
Sear before baking (optional): Give the chicken a quick sear in a hot skillet with a little butter or olive oil. This adds color and locks in flavor before roasting.
Watch internal temp: Pull the chicken out as soon as it hits 165°F at the thickest part. Overcooked breasts lose all that lemony juiciness.
Let it rest: Give your cooked chicken breasts at least 5–10 minutes under foil to reabsorb their juices before slicing.
Tip: If you’re making a mix of thighs and breasts in one pan, remember—breasts will likely be done earlier. Take them out and keep them warm while the thighs finish.
Meal Prep Ideas Using Lemon Chicken Breasts
Zesty Lemon Chicken breasts are perfect for healthy meal prepping. They’re easy to portion, store well, and can be used in a variety of meals throughout the week. You’ll also love our Mediterranean Ground Beef Skillet — ready in minutes.
Here are some easy ideas to help you put those leftovers to good use:
Meal Idea
What to Do
Lemon Chicken Salad
Slice and toss with mixed greens, cucumbers, cherry tomatoes, and olive oil
Zesty Chicken Grain Bowl
Layer over brown rice or quinoa with roasted veggies and avocado
Lemon Chicken Wraps
Roll up in a whole grain or low-carb wrap with hummus, spinach, and red onion
High-Protein Pasta Bowl
Chop and mix with chickpea pasta, olive oil, and steamed broccoli
Lemon Chicken Lettuce Cups
Use bibb or romaine leaves, add shredded chicken, sliced almonds, and a splash of lemon juice
Zesty Lemon Chicken also freezes well, so you can cook in bulk and portion out for the month.
Why Chicken Thighs Work So Well with Lemon Marinade
If you ask any seasoned cook—or just someone who loves flavor—they’ll tell you: Zesty Lemon Chicken thighs are where the magic happens.
Why? Because chicken thighs, especially bone-in and skin-on, naturally retain more moisture and have a richer flavor profile than breasts. That little extra fat in the dark meat acts like a built-in flavor enhancer, especially when paired with the bright acidity of lemon juice and zest.
When baked at high heat, the skin crisps up beautifully while the inside stays juicy. The result? Chicken that’s golden, tender, and bursting with clean flavor.
And if you’re someone who doesn’t love chicken skin, no worries. Cook with it on to protect the meat during baking, then peel it off after cooking. You’ll still get all the flavor benefits without leaving the skin on your plate.
Oven, Grill, or Pan: Cooking Methods for Zesty Chicken Thighs
Oven-Baked
Preheat oven to 425°F
Place marinated thighs skin-side up in a baking dish
Brush with olive oil or melted butter
Bake for 35 to 45 minutes
Baste once midway
Rest for 10 minutes before serving
Grilled
Preheat grill to medium-high
Grill skin-side down 5–7 minutes
Flip and grill 10–12 more minutes (until 165°F)
Add a fresh squeeze of lemon before serving
Pan-Seared
Use a cast-iron skillet
Sear skin-side down in olive oil 6–8 minutes
Flip and cook 8–10 minutes while basting with pan juices
When comfort food meets clean eating, you get Zesty Lemon Chicken Pasta—a dish that feels indulgent but still supports your health goals. This isn’t your heavy, creamy pasta drenched in processed sauce. Instead, it’s lean protein, bold lemon flavor, and a light pasta base that ties it all together.
Pick your pasta:
Angel hair or linguine for a classic vibe
Chickpea or brown rice pasta to keep it gluten-free
Zucchini noodles (zoodles) for a low-carb option
Make the sauce: Toss cooked pasta in a lemony olive oil sauce made with:
Reserved chicken drippings or broth
Lemon juice and zest
Garlic sautéed in olive oil
A touch of butter (optional)
Fresh herbs like parsley or thyme
Slice your lemon chicken, lay it over the pasta, and sprinkle with zest. For extra richness, try our High-Protein Alfredo Sauce with a lemon twist.
Best Pasta and Sauce Pairings for Zesty Chicken
Pasta Type
Why It Works
Angel Hair
Quick-cooking and delicate—lets lemon flavor shine
Whole Grain Penne
Adds fiber and holds sauce well
Zucchini Noodles
Low-carb and refreshing
Chickpea Pasta
High-protein, gluten-free, and satisfying
Sauce Ideas:
Lemon Butter Sauce: Lemon juice + zest + butter + pasta water
Garlic Herb Sauce: Garlic sautéed in olive oil with herbs
Zesty Lemon Chicken isn’t just another dinner—it’s a flavorful, feel-good staple that fits into any lifestyle. Whether you go with juicy thighs, lean breasts, pasta combinations, or meal prep bowls, this dish brings brightness and balance to your plate.
It’s easy enough for a busy weeknight but bold enough for company. And best of all? It proves you don’t have to choose between clean eating and delicious meals.
So the next time you’re craving something satisfying, don’t fall back on takeout. Whip up this recipe and taste just how good simple food can be.
A great zesty lemon chicken recipe uses bone-in, skin-on chicken thighs marinated in lemon juice, garlic, fresh herbs, and olive oil or butter. Bake it at high heat for crispy skin and juicy meat, then garnish with lemon slices and pan drippings. It’s simple, clean, and packed with flavor.
How do you make zesty lemon chicken breast juicy?
To keep chicken breasts juicy, marinate them for at least an hour, sear or bake at a high temperature, and let them rest after cooking. Cooking with the skin on (even if you remove it later) helps seal in moisture and soak up that bold lemon flavor.
Can I use chicken thighs for lemon chicken?
Absolutely. Chicken thighs are ideal for zesty lemon chicken thanks to their richness and ability to absorb marinade. They’re also more forgiving when baking or grilling, meaning they’re less likely to dry out.
What’s a good pasta recipe with lemon chicken?
Toss sliced zesty lemon chicken with angel hair pasta, olive oil, garlic, lemon zest, and a touch of butter. Add steamed veggies or fresh spinach and top with herbs for a healthy comfort food combo.
How is Chinese lemon chicken different from zesty lemon chicken?
Chinese lemon chicken is usually battered, deep-fried, and coated in a sweet, sticky sauce. Zesty lemon chicken, in contrast, is roasted or grilled with real herbs, fresh lemon, and clean ingredients—no sugar or deep-frying required.
Is there an easy zesty lemon chicken recipe?
Yes! Mix lemon juice, lemon zest, garlic, and olive oil or butter. Pour it over chicken thighs or breasts, marinate for at least an hour, and bake. It’s an easy, one-dish meal that’s ready in under an hour with just a few ingredients.
Zesty Lemon Chicken is a flavorful and healthy dish made with bone-in chicken thighs or breasts, marinated in fresh lemon juice, garlic, herbs, and olive oil or butter. It’s high in protein, low in carbs, and perfect for a quick dinner or weekly meal prep.
Ingredients
Scale
3 to 4 pounds chicken parts (thighs and legs recommended), skin-on, bone-in, trimmed of excess fat
Teriyaki chicken recipe isn’t just a tasty meal for us — it’s a part of our story. We’re Chef Dodos, the real couple behind StayFit Recipes. Before we got fit and healthy, our lives looked very different. Kiko was working out like crazy, but still felt bloated, tired, and stuck. Med was skinny, but felt weak and had no energy. We both wanted real change — and we knew we had to start with what we ate.
That’s when we made a deal: 100 days of no junk, no skipped workouts, and no excuses. We pushed each other, we learned together, and we built meals that worked for our bodies and goals. Kiko handled the snacks and breakfasts, and Med focused on building delicious, protein-packed lunches and dinners.
One of those dinners? This teriyaki chicken recipe. Simple, flavorful, and so good it became a go-to — especially when Kiko was upset. Med would whip this up, and suddenly things didn’t feel so heavy. It became comfort food, fuel, and a reminder of how far we’d come.
Today, we’re sharing this exact recipe with you — not just because it tastes amazing, but because it’s part of the lifestyle that helped us change for good. It’s clean, high-protein, and still full of the sweet, sticky teriyaki flavor you love. You don’t need to be perfect to enjoy meals like this. You just need to start — and we’re here to help you every step of the way.
Let’s dive into what makes this teriyaki chicken recipe so powerful, and how you can make it part of your journey too.
Table of Contents
Understanding the Basics of a Teriyaki Chicken Recipe
What is Teriyaki Chicken?
At its heart, a teriyaki chicken recipe is all about that bold, sticky-sweet flavor we know and love. The word “teriyaki” comes from Japanese cooking and means “shine and grill.” That shiny glaze? It’s the sweet soy-based sauce that gives this dish its mouthwatering look and taste.
In most homes, teriyaki chicken is a quick and easy dinner choice. But here at StayFit Recipes, we took it a step further. We wanted that same flavor — without all the sugar, sodium, and processed ingredients. So we rebuilt it into a recipe that fits our goals. No bloating, no crash — just clean, high-protein comfort food.
When people think of the teriyaki chicken recipe, they often picture thick sauce, white rice, and maybe a few veggies. And while that’s a classic way to enjoy it, there’s so much more you can do. You can serve it in bowls, wraps, or even meal prep containers. The base idea stays the same — chicken, cooked in a glaze made with soy sauce, sweetener, and spices — but the possibilities are endless.
The History and Origin of Teriyaki
Teriyaki chicken recipes are inspired by Japanese traditions but really took off in American kitchens. In Japan, “teriyaki” was mostly used for fish like yellowtail or mackerel. But when Japanese immigrants brought the technique to Hawaii and the mainland U.S., they started using local ingredients — and that’s when chicken entered the picture.
Soon, teriyaki became one of the most popular sauces in Asian-American cuisine. From restaurants to fast food spots, you’ll find teriyaki chicken almost everywhere. But the homemade version? That’s where the magic happens — especially when you care about what goes into your food.
Today, we’ve got cocuntless ways to enjoy a clean version of the classic teriyaki chicken recipe. With the right swaps, you can keep the taste while cutting down on sugar, oil, and salt — and we’ll show you how.
Why This Dish Remains a Global Favorite
There’s a reason why people all over the world love teriyaki chicken. First, it’s quick. You don’t need hours in the kitchen to make something that feels special. Second, it’s flexible. You can make it in a skillet, bake it in the oven, or toss it in the air fryer. And finally — the flavor hits every time. Sweet, salty, a little tangy, and totally crave-worthy.
For busy couples like us, this dish checks all the boxes. It’s perfect for meal prep, picky eaters, or even a cozy dinner after a long day. And when it’s part of your weekly rotation, it becomes one of those go-to meals you never get tired of.
The best part? You control every ingredient. That means fewer chemicals, less bloating, and more real energy — just how we like it. And that’s exactly why this teriyaki chicken recipe is a favorite we come back to week after week.
Core Ingredients in a Teriyaki Chicken Recipe
Essential Ingredients You Can’t Skip
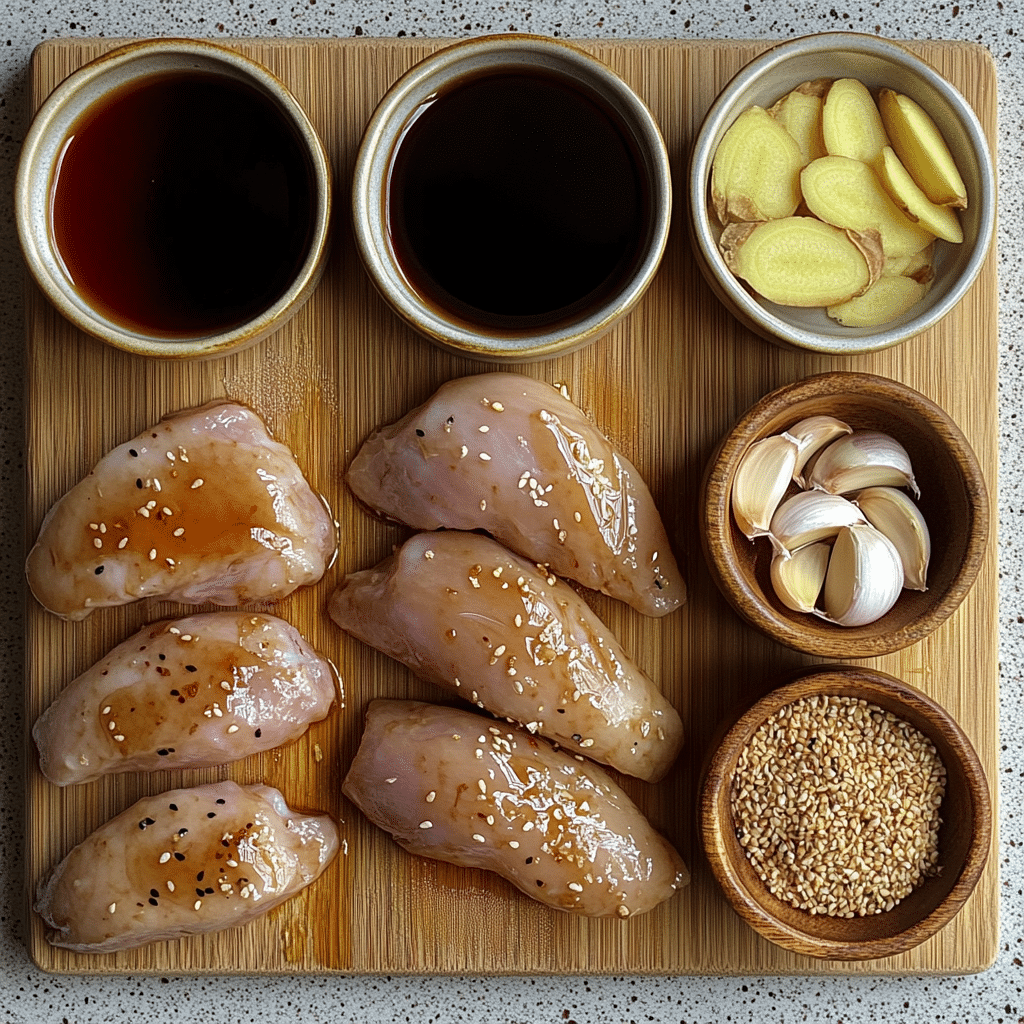
When building a clean and flavorful teriyaki chicken recipe, it starts with simple, whole ingredients. Unlike bottled sauces that often contain corn syrup, preservatives, and loads of sodium, this version sticks to the basics — just how we like it at StayFit Recipes.
Here’s what every solid teriyaki chicken recipe needs:
Ingredient
Purpose
Healthy Tip
Boneless Chicken
Lean protein base
Go for chicken breast or thighs
Soy Sauce or Tamari
Salty depth and umami flavor
Use low-sodium soy or gluten-free tamari
Honey or Maple
Natural sweetness for that sticky glaze
Swap out refined sugar
Garlic & Ginger
Punch of flavor and antioxidants
Fresh is always better than powder
Rice Vinegar
Brightens up the sauce
Adds tang without adding sugar
Cornstarch (optional)
Thickens the sauce slightly
Use only a small amount if needed
By keeping these ingredients fresh and clean, you’re giving your body fuel — not fillers. A real teriyaki chicken recipe should never leave you feeling bloated or sluggish.
What Are the Three Ingredients in Teriyaki Chicken?
A common question we hear is: What are the three ingredients in teriyaki chicken? While recipes can vary, the traditional trio includes:
Chicken – the main protein, grilled or pan-cooked to perfection
Soy Sauce – the base of the sauce
Sugar or Sweetener – adds that iconic sticky-sweet flavor
Of course, at StayFit Recipes, we go beyond those basics to make it healthier. We replace refined sugar with honey or pure maple syrup, and always opt for low-sodium sauces to help reduce bloating and inflammation.
These small swaps may seem simple, but they make a huge difference in how you feel after eating — and how your body responds over time. If you’re going to cook a teriyaki chicken recipe at home, it should leave you feeling light, energized, and full of flavor.
Choosing Between Chicken Breasts vs. Thighs
Which is better for your teriyaki chicken recipe: chicken breast or chicken thighs?
Cut
Texture & Flavor
Health Focus
Chicken Breast
Lean, less juicy
Lower fat, high protein
Chicken Thighs
Juicier, more flavor
Slightly higher fat
Both work great, and it really depends on your goals. For lean muscle gain and fat loss, we often go with chicken breast. But if we’re after something juicier or prepping meals for the week, skinless thighs are a solid pick — especially when grilled or pan-seared.
Bottom line? You can’t go wrong. The real key is how you season and cook the chicken — and when paired with that homemade teriyaki glaze, both cuts taste amazing. It’s one more reason why this teriyaki chicken recipe is a true kitchen favorite.
How to Make a Healthy Teriyaki Chicken Recipe
Low-Sugar Teriyaki Sauce Variations
When you think of a classic teriyaki chicken recipe, you probably imagine a thick, sweet sauce coating tender chicken. The problem? Store-bought teriyaki sauces are usually loaded with added sugar, sodium, and even preservatives. That’s why we decided to build our own version — one that keeps all the flavor and skips the junk.
Here’s what we use in our healthier sauce:
Low-sodium soy sauce or tamari
Honey or pure maple syrup (instead of white sugar)
Fresh garlic and ginger (for kick and depth)
A splash of rice vinegar (for tang)
Optional cornstarch slurry (for thickness, use only a bit)
This clean glaze brings all the flavor of a traditional teriyaki chicken recipe without leaving you bloated or sluggish. It’s light, clean, and still super satisfying — just the way we like it.
How to Make Healthy Teriyaki Sauce for Chicken
So, how do you actually whip up a healthy teriyaki sauce from scratch?
It’s easy:
In a saucepan, combine soy sauce, honey, minced garlic, and grated ginger.
Bring to a light simmer.
Add a splash of rice vinegar and optional sesame oil.
If you want it thicker, mix a little cornstarch with cold water and stir it in.
Cook until the sauce gets glossy. That’s it. You can use it right away or store it for meal prep.
This method keeps your teriyaki chicken recipe clean and quick. No MSG, no added sugars, just real ingredients you recognize.
Cooking Techniques: Grilled, Baked, Stir-Fried
One thing we love about this recipe? It works any way you want to cook it. Whether you’re a grill master or a skillet kind of person, the teriyaki chicken recipe holds up every time.
Here’s how to do it three ways:
Method
Why It Works
Tips
Grilled
Charred edges, smoky flavor
Marinate first, then grill hot
Baked
Hands-off and juicy
Use foil or parchment for easy clean-up
Stir-fried
Quick, crispy edges, and fast
Use a nonstick or cast-iron skillet
If you’re meal prepping, we recommend baking or stir-frying — it’s faster and keeps well in containers. Want something with a grilled vibe? Fire it up outside and enjoy that smoky, sweet finish.
Every style brings out different layers of flavor in the teriyaki chicken recipe, so don’t be afraid to try them all. The key is not overcooking — keep it tender, juicy, and coated in that homemade sauce.
Healthy Substitutes and Smart Ingredient Swaps
What is a Healthy Substitute for Teriyaki Sauce?
A lot of folks love teriyaki chicken but worry about the sauce. And for good reason — most bottled teriyaki sauces are packed with sugar, corn syrup, preservatives, and way too much sodium. If you’re trying to eat clean or lose weight, that can be a deal-breaker. The good news? You’ve got healthy options.
Here are our favorite clean swaps when building a better teriyaki chicken recipe:
Swap This
For This Instead
Why It’s Better
Regular soy sauce
Low-sodium soy or tamari
Cuts down salt and bloating
Brown sugar
Honey or pure maple syrup
Natural sweetness, lower impact
Cornstarch
Arrowroot or none
Lighter thickening or skip it
Store-bought sauce
Homemade glaze (easy to make)
No chemicals, all flavor
Coconut aminos is also a great substitute if you’re avoiding soy altogether. It has a natural sweetness and fewer ingredients. The flavor is still rich and satisfying.
So yes — a teriyaki chicken recipe can still taste amazing without all the junk.
Gluten-Free and Low-Sodium Alternatives
We get this question a lot: Can I make this gluten-free or low-sodium? Absolutely.
To go gluten-free, just use tamari instead of soy sauce. Tamari is brewed without wheat but still has that bold umami flavor you want. If you need even lower sodium, coconut aminos is your go-to — it’s naturally lower in salt and still adds a great depth of flavor.
Don’t forget to check your other ingredients too. Things like vinegar, garlic paste, or store-bought spices can sometimes sneak in gluten or hidden salt. The cleaner your pantry, the better your teriyaki chicken recipe will support your health.
Clean-Eating and Paleo-Friendly Adjustments
If you follow a clean-eating or paleo-style diet, this dish still works. Just make a few smart moves:
Skip cornstarch and stick to arrowroot if thickening
Use raw honey instead of processed sugar
Choose pasture-raised chicken when possible
Pair it with steamed veggies or cauliflower rice
These small choices turn a comfort dish into fuel. We do this all the time when we’re cutting or trying to get lean without giving up flavor. A clean teriyaki chicken recipe like this fits right into any health goal — and it doesn’t feel like a sacrifice.
Pairing and Side Ideas for Teriyaki Chicken
What Veggies Go Best with Teriyaki Chicken?
No teriyaki chicken recipe is complete without a great side of veggies. The sweet and savory flavors of the chicken pair perfectly with crisp, colorful vegetables. Not only do they balance out the dish, but they also add fiber, nutrients, and crunch.
Here are our top veggie picks to pair with this dish:
Veggie
Why It Works
Broccoli
Steams fast and soaks up the sauce
Bell Peppers
Adds sweetness and color
Snap Peas
Crunchy texture and fresh bite
Carrots
Slightly sweet, balances the glaze
Baby Corn
Brings an Asian-style vibe to your plate
Zucchini
Low-cal and great at absorbing flavor
Most of the time, we stir-fry these with garlic and a touch of olive or sesame oil. You can also roast or steam them if you’re watching oil intake. If you’re meal prepping, cook them lightly so they stay crisp when reheated.
Adding veggies not only completes your teriyaki chicken recipe, but it also makes it a well-balanced meal that keeps you full and focused.
Rice, Noodles, or Quinoa: Best Bases
Choosing the right base for your teriyaki chicken depends on your goals. Want something traditional? Go for white rice. Need more fiber or protein? Try quinoa or brown rice. Looking for low-carb? Cauliflower rice or zucchini noodles are great options.
Let’s break it down:
Base
Best For
Bonus Tip
White Rice
Classic and comforting
Rinse before cooking to remove starch
Brown Rice
More fiber and a hearty bite
Use broth for added flavor
Quinoa
High in protein and gluten-free
Rinse well to remove bitterness
Cauliflower Rice
Low-carb and light
Sauté in olive oil with garlic
Rice Noodles
Soft texture, quick to cook
Great for a noodle bowl version
Whatever you choose, just keep portions balanced. Your teriyaki chicken recipe should lead the plate, not drown in carbs. We like to go 50% veggies, 25% protein, and 25% base — that’s our StayFit golden ratio.
Plating for a Balanced Macros Meal
If you’re tracking macros or just want to feel energized after eating, plating your food right is key. Here’s our go-to method for building the perfect teriyaki chicken recipe plate:
Start with 1 palm-size serving of chicken (about 4–5 oz)
Add 1–2 cups of mixed veggies
Finish with ½ cup of rice, quinoa, or other base
Drizzle your homemade teriyaki sauce over everything and sprinkle with sesame seeds or green onions for a little boost. You’ve now got a meal that looks good, tastes great, and works with your fitness goals.
This kind of setup keeps you satisfied without the crash. It’s how we eat almost every day — and why this teriyaki chicken recipe has become a weekly favorite.
Teriyaki Chicken Meal Prep and Storage Tips
Make-Ahead Ideas for Busy Weeks
When life gets hectic, meal prep can be a total game-changer. That’s one reason this teriyaki chicken recipe works so well — it’s quick to make, stores beautifully, and reheats like a dream. Whether you’re prepping for the workweek, gym recovery meals, or just trying to avoid takeout, this dish delivers.
We like to double the recipe and split it into 4–6 portions using glass or BPA-free meal prep containers. Here’s our simple formula:
4–5 oz of cooked teriyaki chicken
1 cup of steamed or sautéed veggies
½ cup of rice, quinoa, or cauliflower rice
Add a little sauce on top, or store extra sauce separately if you want to keep things crisp. This teriyaki chicken recipe stays fresh in the fridge for up to 4 days — perfect for grab-and-go lunches or quick dinners.
Best Containers and Reheating Methods
How you store and reheat food makes a big difference in taste and texture. We recommend using divided glass containers with snap lids. They keep your food fresh and prevent flavors from blending together too much.
For reheating:
Microwave: Add a splash of water to keep chicken moist and cover loosely
Stovetop: Warm in a skillet on low with a drizzle of oil or splash of water
Air fryer: For a crisp edge, heat on 350°F for 3–4 minutes
Avoid overcooking during reheating, or the chicken will get dry. This is especially true if you used chicken breast in your teriyaki chicken recipe — it needs a gentler touch.
Freezer-Friendly Teriyaki Chicken
Need something that lasts longer? This recipe freezes well, too. Just let the cooked chicken and sauce cool fully, then pack them in freezer-safe bags or containers. You can freeze with rice and veggies, or freeze everything separately for more flexibility.
Freezing tips:
Use airtight containers to prevent freezer burn
Label with date and contents
Lay flat if using zip bags to save space
When you’re ready to eat, thaw overnight in the fridge or reheat straight from frozen using the microwave or stovetop. The flavor holds up great, and the texture stays juicy — especially if you froze thighs instead of breast meat.
So if you’re serious about staying on track with your health, meal prepping this teriyaki chicken recipe is one of the easiest ways to stay ready and feel good all week.
Comparing Teriyaki Sauce vs. Soy Sauce
What is the Difference Between Teriyaki Sauce and Soy Sauce?
People often ask: Isn’t teriyaki sauce just soy sauce with sugar? Not quite. While both bring that deep umami flavor, the two are different in how they’re made — and how they’re used. When you’re building a clean teriyaki chicken recipe, knowing the difference can help you make smarter choices in the kitchen.
Let’s break it down:
Sauce Type
What’s In It
Flavor Profile
Soy Sauce
Soybeans, wheat, salt, water
Salty, thin, sharp
Teriyaki Sauce
Soy sauce, sweetener, garlic, ginger
Sweet, thick, balanced
Soy sauce is a fermented seasoning made from soybeans and wheat. It’s salty, sharp, and very strong on its own. You’ll often see it used as a dip, stir-fry base, or added in small amounts for depth.
Teriyaki sauce, on the other hand, is a mix. It starts with soy sauce, but then adds things like honey, garlic, ginger, and vinegar. The result? A sweet and sticky glaze perfect for coating chicken, like in your favorite teriyaki chicken recipe.
Nutrition Breakdown and Sodium Comparison
When you’re focused on clean eating, it’s important to check the label — or better yet, make your own. One of the biggest concerns is sodium.
Sauce
Avg. Sodium (per tbsp)
Notes
Regular Soy Sauce
900–1000 mg
Very salty; avoid if cutting sodium
Low-Sodium Soy
500–600 mg
Better choice, still bold in flavor
Store Teriyaki
600–900 mg
Includes sugar and thickeners
Homemade Teriyaki
200–400 mg
Control the salt with your own mix
If you’re prepping a teriyaki chicken recipe at home, go for homemade. That way, you can adjust how much soy you use, choose a natural sweetener like honey, and skip all the additives.
We love using low-sodium tamari or coconut aminos as our base. It cuts the salt and still gives you that rich, deep flavor.
When to Use Each in Recipes
So, which sauce should you use — and when?
Use soy sauce when:
You’re making a stir-fry with bold seasoning
You want a salty edge without the sweetness
You’re marinating meat before adding other flavors
Use teriyaki sauce when:
You want a sticky glaze or sweet finish
You’re cooking dishes like our teriyaki chicken recipe
You need a balanced flavor that pairs well with rice and veggies
Both sauces can work in different ways, but when you want that signature sweet-savory combo with a glossy finish, nothing beats a good homemade teriyaki.
Popular Teriyaki Chicken Variations
Teriyaki Chicken Bowl
One of the easiest and most popular ways to enjoy a teriyaki chicken recipe is in bowl form. It’s simple, portable, and perfect for meal prep or a quick dinner. All you need is a base, your favorite veggies, and a big spoonful of juicy, glazed chicken.
Here’s a basic setup for a satisfying teriyaki chicken bowl:
Base: Brown rice, jasmine rice, quinoa, or cauliflower rice
Veggies: Steamed broccoli, shredded carrots, edamame, or cucumber slices
Toppings: Green onion, sesame seeds, and a drizzle of extra teriyaki sauce
Bowls are great because you can mix and match based on what you have. They’re also easy to pack for work or school, and they reheat well without losing flavor. When you’re short on time but want something filling, this version of the teriyaki chicken recipe never fails.
Slow Cooker Teriyaki Chicken
Want to set it and forget it? Try making your teriyaki chicken recipe in the slow cooker. It’s a great way to cook in bulk, and the flavors get even better as they simmer over time.
How to do it:
Add chicken (breast or thighs) to your slow cooker
Pour in your homemade teriyaki sauce
Cook on low for 4–5 hours or high for 2–3 hours
Shred the chicken or slice it before serving
This method makes the chicken super tender and packed with flavor. It’s perfect for sandwiches, bowls, wraps, or even lettuce cups. Plus, it makes your kitchen smell amazing!
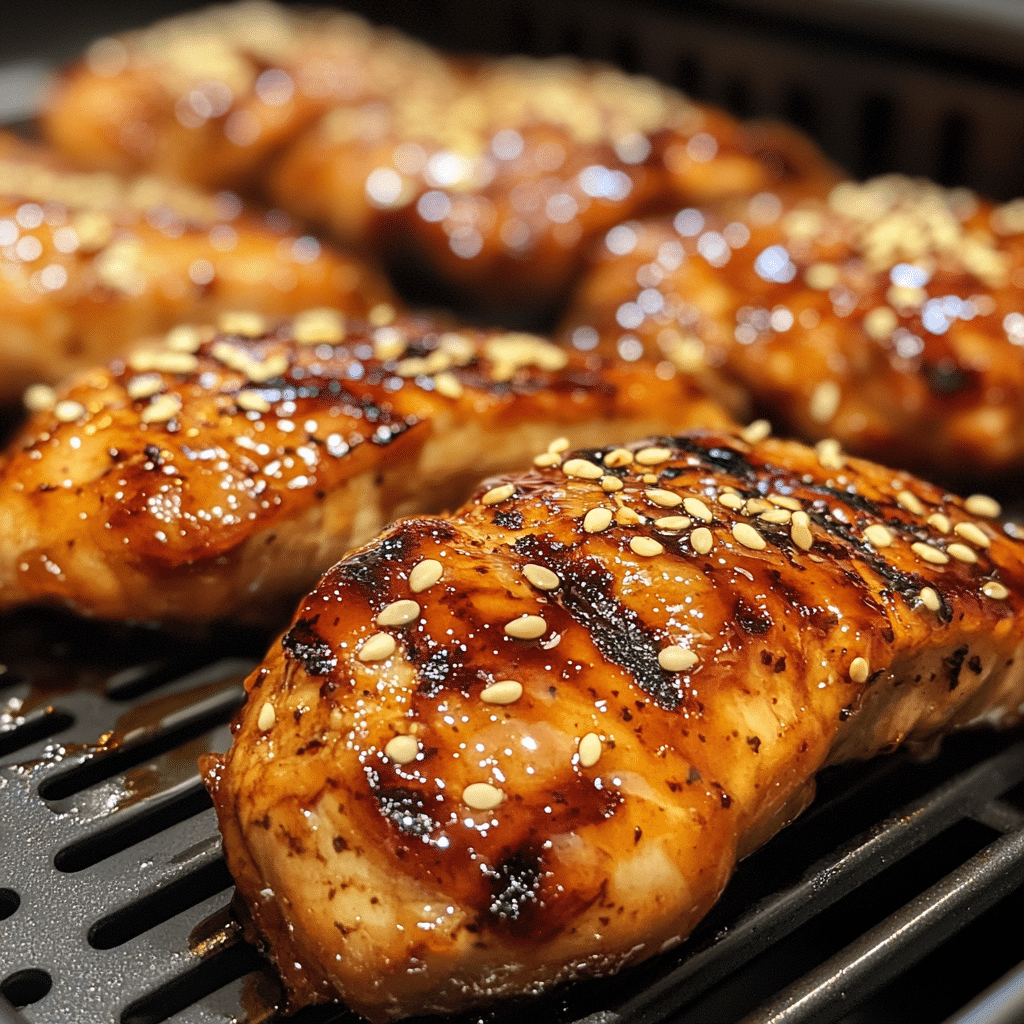
Air Fryer Teriyaki Chicken
If you like crispy edges and fast cooking, the air fryer version is a game-changer. We love this method when we want our teriyaki chicken recipe done fast without turning on the stove or oven.
Here’s how:
Preheat air fryer to 375°F
Lightly oil chicken pieces and air fry for 12–15 minutes
Brush with teriyaki sauce in the last few minutes
The result? Juicy chicken with crispy outsides, coated in that sticky, sweet glaze. It’s like takeout — but way healthier and quicker.
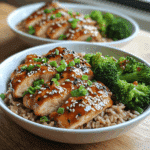
Crispy air fryer teriyaki chicken with glaze
Bonus tip: You can toss in some broccoli or bell peppers for a complete one-basket meal. It’s fast, clean, and super tasty.
These variations are just a few ways to keep your teriyaki chicken recipe interesting. Whether you like it classic, shredded, crispy, or bowl-style, there’s a version that’ll fit your vibe and your goals.
This teriyaki chicken recipe is a healthy twist on a classic favorite. Made with simple, real ingredients like low-sodium soy sauce, honey, and fresh garlic, it’s naturally gluten-free and perfect for clean eating. Ready in under 30 minutes, it’s ideal for weeknight dinners, meal prep, or a comforting protein-packed lunch. No store-bought sauce needed — just bold flavor, quick prep, and real results.
Ingredients
Scale
For the Chicken:
1 lb (450g) boneless, skinless chicken breasts or thighs
1 tbsp olive oil (optional, for pan cooking)
For the Homemade Teriyaki Sauce:
¼ cup low-sodium soy sauce or tamari (gluten-free)
2 tbsp honey or pure maple syrup
1 tbsp rice vinegar
1 tsp sesame oil (optional for added flavor)
1 tsp grated fresh ginger
1 clove garlic, minced
1 tbsp cornstarch (or arrowroot powder) + 2 tbsp cold water (optional, for thickening)
Toppings (optional):
Sesame seeds
Chopped green onions
Instructions
Prepare the Sauce In a small saucepan over medium heat, combine soy sauce, honey, rice vinegar, sesame oil, ginger, and garlic. Stir well and bring to a gentle simmer.
Thicken the Sauce (Optional) In a small bowl, mix cornstarch with cold water. Slowly stir the slurry into the simmering sauce and cook for 1–2 minutes until slightly thickened and glossy. Remove from heat and set aside.
Cook the Chicken Cut chicken into bite-sized pieces or leave whole. Heat olive oil in a large nonstick skillet over medium heat. Add chicken and cook for 6–8 minutes (turning halfway) until golden and cooked through.
Add the Sauce Pour the teriyaki sauce over the cooked chicken. Toss to coat and cook for 1–2 more minutes to let the flavors absorb.
Serve and Garnish Plate with steamed veggies and rice or quinoa. Top with sesame seeds and chopped green onions if desired.
Notes
Chicken Tip: Thighs are juicier, but breasts are leaner. Use what fits your goals.
Sweetener Swap: You can use coconut sugar or monk fruit if avoiding honey or syrup.
No Cornstarch? Use arrowroot or skip thickening for a lighter glaze.Make It Spicy: Add red pepper flakes or a dash of sriracha to the sauce for heat.Meal Prep Friendly: Store in an airtight container for up to 4 days in the fridge. Keeps great for weekday lunches.Freezer Tip: Freeze cooked chicken and sauce together. Thaw overnight and reheat gently for best texture.
Vegetarian Option: Swap chicken for tofu or tempeh and follow the same sauce process.
Prep Time:10 mins
Cook Time:15 mins
Nutrition
Serving Size:4
Calories:280 kcal
Sugar:free
Conclusion: A Teriyaki Chicken Recipe That Fits Your Life
If you’ve made it this far, you’re not just looking for another quick dinner — you’re building a better way to eat. The beauty of a clean teriyaki chicken recipe is that it hits all the marks: flavor, flexibility, and fuel for your goals. Whether you’re meal prepping for the week, cooking for your family, or just making something that feels like a win after a long day, this recipe delivers.
From homemade sauces to smart ingredient swaps, crispy air fryer tricks to freezer-ready tips — you’ve got all the tools. And the best part? It’s a recipe that fits your lifestyle, not the other way around. It’s the kind of meal that helped us change our lives, and now it’s here to help you change yours.
You don’t have to be perfect. You just have to start.
Don’t miss our light and guilt-free treat: fluffy orange muffins — it’s the perfect dessert after a flavorful teriyaki dinner.
And remember: you’re not doing this alone. We’re here to help you StayFit—together.
To make a healthy version of teriyaki sauce, skip the bottled stuff. Start with low-sodium soy sauce or tamari, and mix it with a natural sweetener like honey or pure maple syrup. Add fresh minced garlic and grated ginger for flavor, and a splash of rice vinegar for some tang. If you want it thicker, stir in a tiny bit of arrowroot powder or cornstarch. Let it simmer until it’s glossy. This sauce works great with any clean teriyaki chicken recipe.
What is a healthy substitute for teriyaki sauce?
If you’re avoiding soy, sugar, or gluten, there are several good swaps: Coconut aminos (soy-free and lower in sodium) Balsamic vinegar + honey (sweet, tangy mix) Homemade teriyaki glaze using tamari and maple syrup These options keep your teriyaki chicken recipe tasty while cutting back on the stuff your body doesn’t need.
What are the three ingredients in teriyaki chicken?
At its core, a simple teriyaki chicken recipe uses just three things: Chicken – usually breast or thigh Soy sauce – the salty, savory base Sweetener – like sugar, honey, or syrup to balance the salt Everything else — garlic, ginger, vinegar, and thickeners — just boosts the flavor and makes it better.
What veggies go best with teriyaki chicken?
Some veggies just click with teriyaki flavors. Our top picks: Broccoli – soaks up the sauce perfectly Bell peppers – sweet and colorful Snap peas – add a nice crunch Carrots – bring sweetness and texture Zucchini or baby corn – mild and tender Toss them in a skillet or steam lightly for the perfect side to your teriyaki chicken recipe.
What is the difference between teriyaki sauce and soy sauce?
Soy sauce is salty, dark, and thin — it’s a seasoning, not a full sauce. Teriyaki sauce starts with soy sauce but adds sweetener, garlic, and ginger to create a rich, sticky glaze. One is a basic ingredient; the other is a full-flavored sauce. That’s why you don’t just pour soy sauce on chicken — you build a full teriyaki chicken recipe with layers of flavor
A healthy and refreshing tuna salad recipe loaded with nutrients
This tuna salad recipe is one of our all-time favorites at StayFit Recipes. Not just because it’s low in calories, high in protein, and super quick to make (yep, only takes 7 minutes!) — but because it helped change our lives.
We’re The DODOs — Kiko and Med — a real couple who struggled for years with our bodies and eating habits. Kiko was hitting the gym all the time but still had belly fat and low energy. Med was skinny but felt weak, tired, and ate way too much junk. We were both frustrated and tired of not seeing results.
So we made a promise to each other: 100 days of no skipped workouts, no cheating on meals, and full support. If one of us slipped up, the other got a $100 treat — no excuses.
That challenge changed everything. I (Med) started focusing on cooking lunches and dinners that were tasty and helped us get fit. Kiko took care of breakfast and snacks. One meal that we kept making again and again was this easy tuna salad recipe.
It’s not your average tuna mix. This healthy tuna salad is filling, fresh, full of flavor, and super easy to prep. It became our go-to on busy days — after workouts, for fast lunches, or when we just wanted something light but satisfying.
When you’re trying to lose weight or eat clean, meals can feel boring or confusing. We wanted real food that made us feel good and showed real results. That’s why this tuna salad recipe for weight loss is still a staple in our kitchen.
Now it’s your turn. Let us show you how simple, healthy, and delicious this tuna salad recipe really is.
Table of Contents
Why Tuna Salad Recipe Is a Healthy and Popular Choice
Nutritional Value of Tuna
Tuna is a powerhouse when it comes to lean protein. Just 3 ounces of canned tuna in water packs around 20–25 grams of protein, with minimal fat and almost no carbs. That’s what makes it a favorite for fitness enthusiasts, athletes, and anyone trying to lose weight without feeling starved.
The protein helps build lean muscle and keeps you full longer, which reduces the chances of unnecessary snacking. It’s also rich in omega-3 fatty acids — the healthy fats your body needs to manage inflammation, support brain health, and improve heart function.
Here’s a quick breakdown of what you get in one serving of tuna:
Nutrient
Amount (per 3 oz canned in water)
Calories
90–100
Protein
22g
Fat
1g
Carbs
0g
Omega-3s
~250mg
Tuna salad recipes that use water-packed tuna help you stay in a calorie deficit while fueling your body with essential nutrients.
Why Tuna Salad Recipe Fits Weight Loss Diets
Let’s be honest: most “diet food” either lacks flavor or leaves you hungry 20 minutes later. That’s where a tuna salad recipe for weight loss really shines. It’s quick to make, satisfying, and totally customizable.
You can mix it with crisp greens, fresh veggies, or light dressings. Want it spicy? Add jalapeños. Want it creamy but clean? Use avocado or Greek yogurt instead of mayo. The point is — you’re in control.
It’s also ideal for meal prepping. You can make a big batch and keep it in the fridge for 2–3 days. Whether you’re looking for a clean lunch, a light dinner, or a post-workout meal, this healthy tuna salad recipe is always a solid option.
Plus, it’s budget-friendly. One can of tuna, a few veggies, and a light dressing can cost less than $3 per serving. So if you’re eating clean on a tight schedule or budget, this recipe checks every box.
Choosing the Right Tuna for Your Salad
Canned vs. Fresh Tuna: Which One Works Best?
When it comes to building the perfect tuna salad recipe, your choice of tuna makes a big difference — not just in taste, but also in health benefits and prep time.
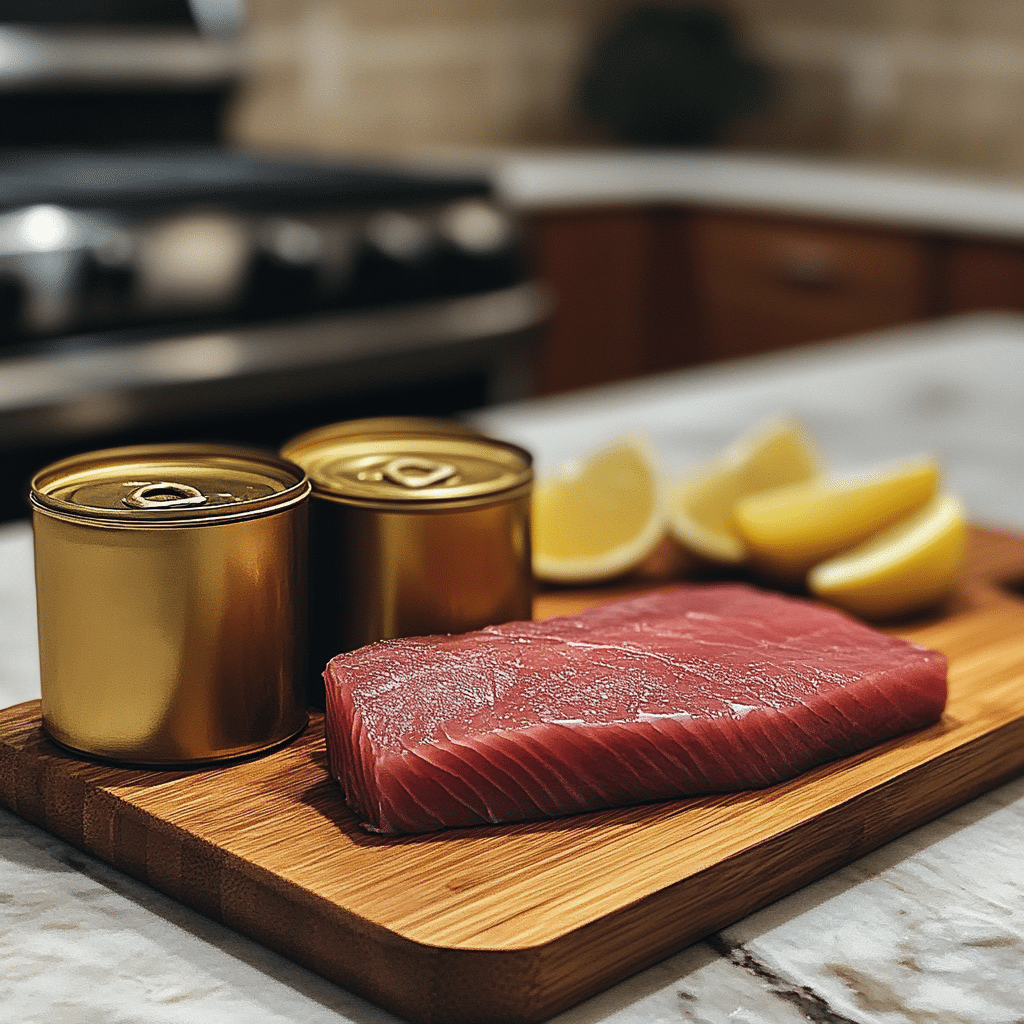
Choosing between fresh and canned tuna for your salad
Canned tuna is the go-to for most people. It’s affordable, shelf-stable, and takes zero effort to prepare. But not all canned tuna is the same. You’ll often see two main types:
Tuna in water – Lower in calories and fat, best for weight loss.
Tuna in oil – Richer taste, but also higher in fat and calories.
For a clean, lean meal, go with canned tuna in water. It keeps your salad light and protein-packed. If you’re after a more indulgent taste, use tuna in olive oil — but drain it well to cut extra calories.
On the other hand, fresh tuna (like ahi or yellowfin) is a premium choice. It’s perfect if you’re after a seared tuna salad or want that restaurant-quality flavor. It’s lean, high in protein, and delicious when grilled or pan-seared with a little seasoning.
Still, fresh tuna is more expensive and requires cooking, which may not be ideal if you’re short on time. That’s why most meal-preppers and fitness-focused eaters stick with high-quality canned tuna for everyday salads.
Best Tuna Brands for Salads (Sodium, Oil, Sustainability)
Not all canned tuna is created equal — especially if you’re watching sodium levels or looking for eco-friendly options.
Here are a few top-rated brands that are perfect for your next healthy tuna salad recipe:
Brand
Type
Why It’s Great
Wild Planet
Wild Albacore (Water)
Low mercury, no added water or oil
Safe Catch
Elite Tuna (Water)
Lowest mercury tested, athlete-approved
Whole Foods 365
Skipjack (Water)
Budget-friendly and responsibly caught
Trader Joe’s
Yellowfin in Olive Oil
Flavorful, solid texture
Quick Tip: Always check the label. Look for phrases like pole & line caught, low sodium, or BPA-free can lining. These small details matter if you’re eating tuna salad often as part of your clean diet.
Choosing the right tuna gives your tuna salad recipe a solid foundation — both nutritionally and taste-wise. So take a minute to read the label and select the version that supports your health goals.
Essential Ingredients for a Delicious Tuna Salad Recipe
Classic Base Ingredients for a Tuna Salad
A good tuna salad recipe starts with a solid base. These ingredients are not only pantry staples — they’re the reason this dish is so quick, reliable, and satisfying.
Here’s what you’ll usually need for a simple, classic version:
Canned tuna (in water) – The star of the recipe. One can (5–6 oz) is enough for 1–2 servings.
Chopped celery – Adds crunch and freshness without calories.
Red onion or green onion – Gives the salad a sharp bite and depth.
Lemon juice – Brightens the flavor and adds a light tang.
Salt & pepper – For balance and basic seasoning.
Light mayo or Greek yogurt – Creamy binder (choose based on health goals).
Optional but common:
Dijon mustard – Adds a little zip.
Boiled egg (chopped) – Adds more protein and richness.
Pickles or relish – A touch of sweetness and acidity.
If you’re keeping things basic, this combo delivers flavor, texture, and protein in one easy bowl.
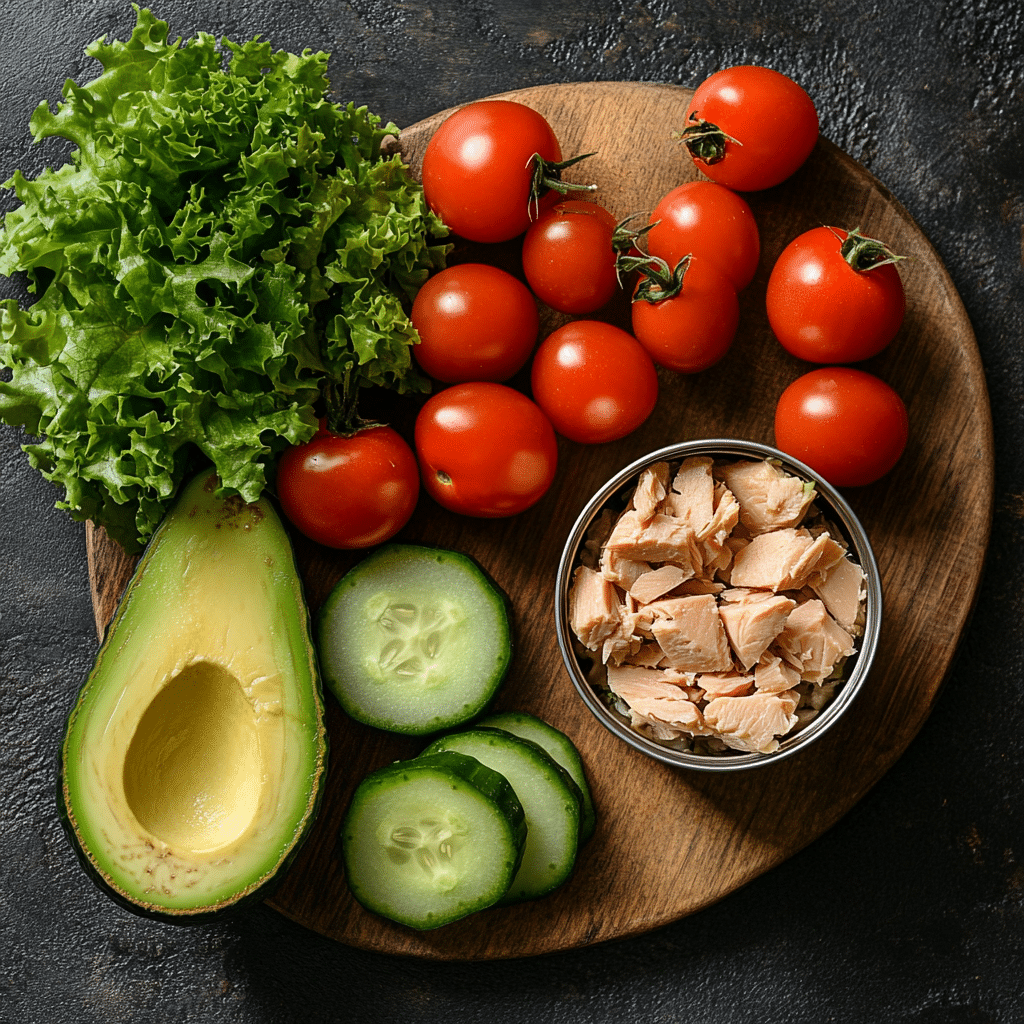
Optional Add-ins for Extra Flavor and Nutrition
Want to level up your tuna salad recipe? These add-ins give you a nutrient boost and make the salad taste fresh every time.
Ingredient
Why Add It
Avocado
Healthy fats, creamy texture
Cherry tomatoes
Juicy burst of freshness
Cucumber
Crisp, low-calorie filler
Spinach or arugula
Adds fiber and greens
Olives
Salty and savory
Chickpeas
Adds plant protein and fiber
Apple slices
Sweetness + crunch
Sriracha or hot sauce
For heat and metabolism boost
You can also make your salad dairy-free, gluten-free, or paleo depending on what ingredients you leave out or substitute. That’s the beauty of this meal — it fits into almost any nutrition plan.
Whether you’re eating low-carb, keto, Mediterranean, or just cutting processed food, there’s a version of this healthy tuna salad recipe that works for you.
How to Make the Perfect Tuna Salad Recipe
Step-by-Step Instructions with Preparation Tips
Making a delicious tuna salad recipe isn’t just about tossing ingredients in a bowl — it’s about balancing texture, flavor, and nutrition. Follow these easy steps to make the perfect tuna salad every single time.
Ingredients (Basic 1–2 Serving Recipe):
1 can tuna in water (5–6 oz), drained
2 tablespoons light mayo or Greek yogurt
1 celery stalk, finely chopped
2 tablespoons red onion, chopped
1 teaspoon Dijon mustard
1 tablespoon lemon juice
Salt and black pepper to taste
Optional Add-ins:
Boiled eggs, diced pickles, avocado, cucumber, cherry tomatoes, hot sauce
Instructions:
Drain the Tuna Well Open the can and press out as much liquid as possible. Excess water will make your salad soggy.
Mix the Base In a medium bowl, combine tuna, mayo or yogurt, celery, onion, mustard, and lemon juice. Stir gently until well mixed.
Season It Right Add salt and pepper to taste. Want a flavor boost? A dash of paprika or garlic powder works great.
Customize the Texture For creamier tuna salad, mash the tuna a little with a fork. For a chunkier bite, leave it more solid.
Taste and Adjust Taste your salad. Add more lemon for tang, more yogurt for creaminess, or a pinch of spice if needed.
Chill Before Serving (Optional) Chilling it for 15–30 minutes helps the flavors blend, but it’s totally fine to eat right away.
Healthy Substitutes to Make Tuna Salad Without Mayonnaise
Yogurt, Avocado, Hummus: Comparing Mayo Alternatives
While mayo gives tuna salad its classic creamy texture, it’s also high in calories and fat. But don’t worry — you can still enjoy a rich, delicious tuna salad recipe without using mayonnaise at all.
Use Greek yogurt or avocado instead of mayo for a healthier salad
Here are some great substitutes that bring flavor, creaminess, and extra health benefits:
Substitute
Texture
Flavor Profile
Calories (2 tbsp)
Why It’s Better
Greek Yogurt
Creamy
Light and tangy
~40
High in protein, low in fat
Mashed Avocado
Smooth
Rich, buttery
~50–60
Heart-healthy fats, potassium
Hummus
Thick
Savory, nutty
~70
Fiber-rich, plant-based
Cottage Cheese
Chunky
Mild, slightly salty
~50
High in protein, calcium-rich
Mustard (Dijon)
Thin
Sharp, tangy
~10
Almost zero calories
Greek yogurt is our personal favorite. It’s creamy like mayo but gives you a protein boost and fewer calories. For a dairy-free option, avocado or hummus works great and adds healthy fats to keep you full longer.
Variations of Tuna Salad Recipe for Every Taste
Mediterranean Tuna Salad Version
Want to upgrade your tuna salad recipe with big, bold flavors? The Mediterranean twist is a favorite — and it’s naturally clean, low-carb, and packed with fresh ingredients.
Fresh and healthy tuna salad ingredients including tuna, celery, Greek yogurt, and lemon
Here’s how to build it:
Ingredients:
1 can tuna (in water or olive oil, drained)
½ cup cherry tomatoes, halved
¼ cup chopped cucumber
2 tablespoons Kalamata olives, sliced
1 tablespoon red onion, chopped
1 tablespoon crumbled feta cheese (optional)
Juice of ½ lemon
1 teaspoon olive oil
Fresh parsley or oregano
Mix it all together and serve chilled. This version ditches mayo and leans into healthy fats and fresh veggies. It’s perfect for summer or when you want something crisp, colorful, and satisfying.
Pro tip: Serve it over mixed greens or inside a whole wheat pita for a quick, wholesome meal.
Meal Prep with Tuna Salad Recipe
How to Store Tuna Salad for the Week
If you’re looking for a high-protein, low-maintenance lunch that fits into your weekly routine, this tuna salad recipe is exactly what you need. It’s fast to prep, lasts for days, and doesn’t lose flavor or texture in the fridge — if you store it right.
Here’s how to make it meal prep–friendly:
1. Use the Right Container Stick with airtight glass containers. Plastic works too, but glass keeps smells in and flavors fresh longer.
2. Keep it Cool Refrigerate your tuna salad within 30 minutes of making it. Stored properly, it will stay fresh for up to 3 days.
3. Prep in Portions Spoon out single servings (about ½ to 1 cup) into containers. Add toppings (greens, avocado, pickles) just before eating to keep everything crisp.
4. Keep Add-Ins Separate If you’re using lettuce, crackers, or boiled eggs, pack them in separate containers. This helps keep textures from getting soggy.
Whether you’re heading to work, school, or just want no-fuss meals on hand, this tuna salad recipe for meal prep has you covered.
Here are a few lunchbox ideas that are simple, filling, and clean:
Option 1: Tuna Salad Bowl
1 cup tuna salad
Side of sliced cucumber, cherry tomatoes, and bell pepper
1 boiled egg or 1 slice whole grain bread
Option 2: Tuna Lettuce Cups
2–3 large lettuce leaves
½ cup tuna salad filling
Topped with jalapeños, mustard, and herbs
Option 3: Tuna & Crackers
½ cup tuna salad in a sealed cup
5–6 whole grain crackers
Apple slices or baby carrots on the side
Option 4: Protein-Packed Wrap
Whole wheat tortilla
1 cup tuna salad
Spinach, shredded carrots, and hummus
All of these are under 400 calories, high in protein, and can be prepped the night before or in batches on Sunday.
Serving Suggestions and Pairings
What to Eat with Tuna Salad (Crackers, Bread, Greens)
The beauty of a tuna salad recipe is how versatile it is. Whether you’re packing lunch, prepping for the week, or whipping up something fast between Zoom calls, how you serve it makes a big difference in both taste and satisfaction.
Here are easy and healthy ways to enjoy your tuna salad:
Serving Option
Why It Works
Whole Grain Crackers
Adds crunch and fiber, easy for dipping
Romaine or Bibb Lettuce Cups
Low-carb, hydrating, and crisp
Whole Wheat Bread or Wraps
Keeps you full, great for lunch-on-the-go
Over Mixed Greens
Light, refreshing, and nutrient-dense
Stuffed in Bell Peppers
Low-cal, colorful, and fun to eat
On Rice Cakes
Crunchy and gluten-free option
Tip: Keep portions in mind. Pair ½ to 1 cup of tuna salad with your chosen base and a side of veggies for a complete, balanced meal.
Best Beverages to Pair with a Light Tuna Dish
Choosing the right drink can enhance digestion, keep you hydrated, and support your overall wellness — all while making your meal feel complete.
Here are clean, weight-loss-friendly beverages that pair well with any tuna salad recipe:
Lemon water – Refreshing and helps reduce bloating
Green tea – Full of antioxidants and metabolism-boosting properties
Sparkling water with lime – Fun fizz without sugar or calories
Iced herbal tea (unsweetened) – Calming and hydrating
Cucumber-infused water – Ultra-light and great for digestion
Skip the soda or sugary drinks — they’ll only weigh you down and counter your clean eating efforts.
Tuna Salad for Weight Loss – Science and Benefits
Does Tuna Salad Really Help Burn Fat?
Short answer? Yes — when made right, a tuna salad recipe is one of the smartest meals you can eat for fat loss. Here’s why:
High Protein = Full for Longer Tuna is loaded with lean protein. One 5 oz can provides around 22–25g of protein, which helps you feel full longer and reduces cravings. This can lead to fewer snacks and better control of daily calorie intake.
Low in Calories and Carbs A typical serving of tuna salad made with Greek yogurt or avocado has under 200–300 calories. It’s also naturally low in carbs, which is great for people on low-carb or keto plans.
Helps Preserve Muscle If you’re losing weight, you want to lose fat — not muscle. Protein-packed meals like this one help protect lean muscle while promoting fat loss, especially when paired with resistance training.
Supports a Calorie Deficit You don’t have to starve to lose weight. Clean meals like tuna salad help you stay in a calorie deficit (burning more than you eat) without feeling tired, moody, or restricted.
Easy to Prep and Stick To Consistency is everything. A tuna salad recipe for weight loss is fast, affordable, and easy to batch — which means you’re more likely to stay on track long-term.
Want real results? Here’s how to make tuna salad work as part of your overall healthy lifestyle — not just as a “diet” meal.
Eat it 2–3 times a week Tuna is safe and beneficial when enjoyed in moderation. Aim for 2–3 servings a week to avoid excess mercury while still getting all the protein benefits.
Rotate your mix-ins Keep things fresh by switching up your ingredients — use different herbs, veggies, or protein add-ins like eggs, beans, or even chickpeas.
Use clean dressings Stick with light binders like Greek yogurt, avocado, or lemon juice instead of heavy mayo or store-bought dressings.
Pair with fiber and healthy fats Tuna salad + veggies + a little olive oil = a balanced plate that keeps your body fueled and happy.
Don’t overthink it Sometimes simple is better. Keep your tuna salad basic, clean, and ready to go — because showing up consistently matters more than making it fancy.
This easy and healthy tuna salad recipe is packed with lean protein and flavor. Perfect for weight loss, meal prep, or a light lunch, it takes just 7 minutes to make and uses clean ingredients like tuna, Greek yogurt, lemon juice, and crisp veggies.
Ingredients
Scale
(For 2 servings – adjust for batch prep)
1 can (5–6 oz) tuna in water, drained
2 tbsp plain Greek yogurt (or mashed avocado)
1 celery stalk, finely chopped
2 tbsp red onion, finely chopped
1 tsp Dijon mustard
1 tbsp fresh lemon juice
Salt and black pepper to taste
Optional Add-ins:
1 boiled egg, chopped
1 tbsp chopped pickles or relish
½ avocado, diced
Cherry tomatoes, cucumbers, herbs (parsley, dill)
Instructions
Drain the canned tuna completely to avoid excess moisture.
In a bowl, combine tuna, Greek yogurt, celery, onion, mustard, and lemon juice.
Stir gently until evenly mixed.
Add salt and pepper to taste.
Chill for 15–30 minutes or serve immediately.
Optional: Add chopped boiled eggs, avocado, or fresh herbs for extra texture and flavor.
Serve with lettuce wraps, crackers, or on mixed greens.
Notes
Swap yogurt for avocado or hummus for dairy-free options.
Add fresh chopped parsley or dill for an herby kick.
For extra creaminess, use half yogurt, half mashed avocado.
Pair with whole-grain crackers or stuff in a lettuce wrap for a low-carb meal.
Prep Time:7 minutes
Cook Time:0 min
Category:Salads
Cuisine:American, Mediterranean
Nutrition
Serving Size:½ to 1 cup per serving
Calories:180–220 kcal
Fat:5g–8g
Carbohydrates:3g–5g
Protein:22g–25g
Conclusion: One Tuna Salad Recipe, Real Results
Healthy eating doesn’t have to be hard — and this tuna salad recipe makes it incredibly simple. It’s fast, affordable, and packed with lean protein, making it the perfect choice for anyone trying to lose weight, meal prep smarter, or just eat clean without overthinking it.
This tuna salad recipe works because it’s easy to customize, full of flavor, and actually keeps you full. Whether you enjoy it in a lettuce wrap, on whole grain crackers, or over fresh greens, it’s a meal that fits into your real life — not just your diet plan.
The best part? You don’t need fancy ingredients or a complicated plan. With this one simple tuna salad recipe for weight loss, you can stay consistent, eat better, and feel better — one meal at a time.
At StayFit Recipes, everything we share — including this go-to tuna salad recipe — is built to help real people make real change, without giving up great food. Your journey doesn’t have to be perfect, but it can start today.
Yes, tuna salad can be a great option for weight loss — as long as it’s made with clean, low-calorie ingredients. Tuna is high in protein and low in fat, which helps you feel full and reduces the urge to snack. If you skip heavy mayonnaise and use Greek yogurt, lemon juice, or avocado instead, your tuna salad stays light, fresh, and diet-friendly. It’s perfect for lunch, meal prep, or a quick dinner that won’t derail your goals.
Is tuna canned good for weight loss?
Canned tuna is one of the easiest and most affordable ways to get lean protein into your diet. When you choose tuna canned in water (not oil), it’s low in calories and fat while still being rich in nutrients like protein and omega-3s. Just be mindful of sodium levels—look for low-sodium or no-salt-added options if you’re watching your intake. Canned tuna is ideal for building fast, protein-packed meals that support weight loss without breaking the bank.
What to mix with tuna healthy for weight loss?
If you’re aiming for fat loss, mix tuna with ingredients that are low in calories but high in fiber or nutrients. Great mix-ins include chopped celery, cucumber, red onion, spinach, and avocado. You can also add lemon juice, Greek yogurt, or a small amount of mustard for creaminess without the calories. Herbs like parsley, dill, or cilantro add flavor without fat. These additions boost nutrition while keeping your tuna salad clean and satisfying.
What can I mix tuna with instead of mayonnaise?
Plain Greek yogurt – creamy and full of protein Mashed avocado – heart-healthy fats and smooth texture Hummus – fiber-rich and adds a savory flavor Cottage cheese – high in protein, mild in taste Mustard or lemon juice – tangy and virtually calorie-free These swaps help you cut calories while still enjoying a creamy, flavorful tuna salad that supports your weight loss journey.