This yogurt marinated chicken recipe was born during my travels in Thailand. One evening, all I had was Greek yogurt, a few Moroccan spices, rice, and a bag of frozen vegetables. I mixed the yogurt with the spices, let the chicken soak for a bit, and then cooked everything together. The result was a simple yet flavorful meal that left me amazed. The yogurt made the chicken tender and juicy, while the spices added warmth and depth. Paired with rice and veggies, it turned into a wholesome dish that felt both comforting and energizing.
Later, when Med and I committed to our 100-day pact—real workouts, real meals, and accountability—we realized recipes like this made the difference. I focused on breakfast and snacks, while Med handled lunches and dinners. That teamwork changed everything. You can read our full story here: our transformation journey.
What I love about yogurt marinated chicken is its versatility. You can grill it, bake it, or pan-sear it, and each method brings out different flavors. It’s healthy, protein-rich, and never boring because small tweaks make big results. Try pairing it with sides like roasted sweet potato salad or quinoa salad for meals that keep you satisfied and excited every time.
The magic of yogurt marinated chicken comes from science. Yogurt contains lactic acid, which gently breaks down proteins in the meat. Unlike vinegar or citrus-based marinades that can toughen the surface, yogurt tenderizes slowly and evenly. This process locks in moisture, so when the chicken cooks, it stays juicy instead of drying out. The yogurt also acts like a flavor sponge, allowing garlic, spices, and herbs to soak deep into the meat. That’s why a yogurt marinade often gives more balanced seasoning compared to oil-heavy marinades.
When I first cooked yogurt marinated chicken in Thailand with just yogurt, Moroccan spices, rice, and frozen vegetables, I noticed how well the flavors blended. The yogurt gave the dish a creamy tang while carrying the spice mix evenly over every bite. That smooth base makes yogurt one of the most reliable marinades for home cooks who want both taste and tenderness without fuss.
Benefits for Health and Cooking
Yogurt marinated chicken is not only flavorful but also a healthy choice. Yogurt is packed with protein, calcium, and probiotics, which support digestion. Using yogurt as the base cuts down on oil, making the dish lighter without losing richness. Chicken itself is a lean protein, and pairing it with vegetables or grains turns it into a complete, balanced meal.
Another benefit is versatility. You can grill yogurt marinated chicken outdoors for smoky flavor, bake it for a hands-off dinner, or try sous vide for restaurant-quality tenderness. Each method transforms the dish while keeping the benefits intact. Meals like this prove you don’t have to sacrifice taste for health. For inspiration, you can check out this tender sous vide chicken breast recipe or upgrade your plate with zesty lemon chicken orzoBoth pair beautifully with yogurt chicken for a fit-friendly spread.
Preparing the Perfect Yogurt Marinade
Essential Ingredients for a Balanced Flavor
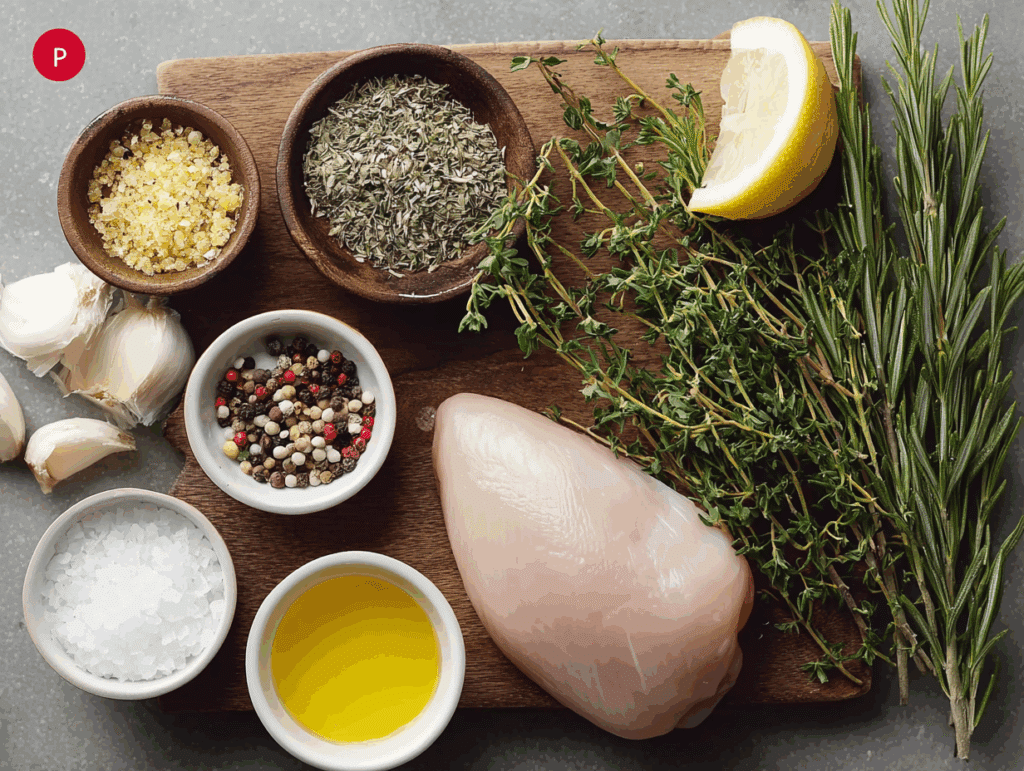
The beauty of yogurt marinated chicken is that the base is simple yet powerful. Plain Greek yogurt is the foundation, offering creaminess and lactic acid for tenderizing. To that, I usually add garlic, lemon juice, and a drizzle of olive oil. Herbs like cilantro, parsley, or mint bring freshness, while spices such as paprika, cumin, ginger, or turmeric add depth. Pink salt and pepper tie everything together.
When I first crafted this marinade during my travels, I only had yogurt, Moroccan spices, and rice on hand, yet it worked beautifully. Since then, I’ve learned that small additions can completely change the character of yogurt marinated chicken. For example, smoked paprika creates a bold flavor perfect for grilling, while fresh dill gives it a Mediterranean vibe. If you enjoy experimenting, try adding ginger or chili flakes for a little kick.
How Long Should You Marinate Chicken in Yogurt?
The length of marination makes a big difference. With yogurt, you don’t need endless hours. Even 30 minutes can improve tenderness and flavor. For best results, marinate chicken for 4–6 hours in the fridge. Overnight is ideal if you want maximum juiciness, but avoid leaving it for more than 24 hours because the lactic acid can start to break down the texture too much.
Stayfit recipes tip: coat the chicken evenly, then cover it well before chilling. The yogurt locks in moisture, so even lean cuts like chicken breast stay flavorful. When you’re ready to cook, remove excess marinade but don’t rinse—it helps create a golden crust while sealing flavor inside.
This simple prep works with so many dishes. For example, you can draw inspiration from teriyaki chicken for a sweet-savory twist or try pairing it with chocolate strawberry yogurt clusters as a fun dessert after a protein-packed dinner. But remember, it’s best to enjoy yogurt marinated chicken at least 2 hours before sleep, so your body has time to digest and recover.
Cooking Yogurt Marinated Chicken Without Curdling
Best Cooking Methods
Once your chicken is marinated, the fun begins—choosing how to cook it. Grilling is a classic choice because the high heat locks in flavor and adds smoky char. Baked yogurt marinated chicken is another easy option, especially for family dinners. Simply spread the chicken on a lined sheet pan and let the oven do the work. Pan-searing on the stovetop also creates a quick weeknight meal, giving you golden crust in minutes. For those who love precision, sous vide is unbeatable. Cooking the chicken in a vacuum-sealed bag keeps it perfectly tender, and finishing with a quick sear adds the final touch.
The key across all these methods is patience. Let the yogurt marinade cling to the meat, but don’t overload the pan or grill. Cooking in smaller batches ensures even heat and avoids steaming instead of searing.
Preventing Yogurt From Curdling
One of the common worries with yogurt marinated chicken is curdling. It happens when yogurt gets exposed to very high heat too quickly. To prevent this, always cook over medium to medium-high heat rather than blasting it on high. Brushing a little olive oil or butter on the chicken before cooking helps, too, since it creates a barrier that protects the yogurt coating.
Another tip is to scrape off extra marinade before cooking. A light coating sticks and caramelizes better, while excess yogurt tends to break apart. If baking, cover with foil for the first half of the cook, then remove it to brown the surface. These small steps keep the chicken moist without losing that creamy tang.
Flavor Variations You’ll Love
Mediterranean-Style Yogurt Marinade
One of the best things about yogurt marinated chicken is how easily it adapts to different cuisines. For a Mediterranean twist, start with plain Greek yogurt, olive oil, garlic, lemon zest, and oregano. The yogurt tenderizes while the herbs and citrus create a bright, sunny flavor. This version tastes amazing baked or grilled, especially when paired with roasted vegetables or a fresh salad.
If you want to go further, add a pinch of smoked paprika for depth or fresh dill for a lighter profile. The balance of creamy yogurt and zesty herbs makes this marinade refreshing yet satisfying. It’s perfect for weeknight meals that feel both simple and elevated. You can enjoy it alongside cottage cheese ranch dip for a fun appetizer spread.
Spicy Indian-Inspired Yogurt Marinade
For those who crave bold flavors, an Indian-inspired yogurt marinade is a must-try. Start with yogurt, then mix in turmeric, cumin, coriander, chili powder, and fresh ginger. This combination infuses the chicken with vibrant color and deep, earthy spice. Unlike heavy cream-based curries, the yogurt keeps the dish light while delivering incredible flavor.
This version shines when grilled or roasted, as the spices form a fragrant crust while keeping the meat tender inside. Serve it with basmati rice or warm naan bread, and you’ve got a complete, protein-rich dinner that’s both satisfying and balanced.
Sweet-Savory Fusion Twist
If you love mixing savory with sweetness, try adding ground cinnamon and a handful of chopped grapes to your yogurt marinade. The cinnamon adds warmth while the grapes bring bursts of natural sweetness that balance the tang of yogurt. Cooked on the grill or baked in the oven, this combination creates an unexpected but delicious twist on classic yogurt marinated chicken. It’s proof that you can get creative with flavors and never run out of ways to enjoy this dish.
Serving and Pairing Ideas
Side Dishes That Complement Yogurt Chicken
A good meal is all about balance, and yogurt marinated chicken makes pairing easy. Because the chicken is creamy and tangy, it works beautifully with fresh, hearty sides. A simple bed of rice or quinoa is classic, but roasted vegetables bring out even more depth. Think zucchini, carrots, or sweet potatoes roasted until caramelized. For a lighter option, crisp salads with lemon vinaigrette cut through the richness while keeping the meal refreshing.
Creative Leftover Ideas
Leftovers don’t have to feel boring. Yogurt marinated chicken is so versatile that it easily transforms into new meals. Slice it thin and tuck it into wraps with lettuce, tomatoes, and a drizzle of tahini for a quick lunch. Shred it and toss into a grain bowl with quinoa, avocado, and roasted peppers for a nutrient-packed dinner. You can even top a green salad with cold yogurt chicken for a refreshing high-protein meal prep option.
If you’re cooking a bigger batch, try adding leftover pieces to a stir-fry or chopping them into bite-sized chunks for protein bowls. The yogurt marinade’s lingering flavor blends beautifully with both savory and slightly sweet ingredients, so you can mix and match without limits. The best part is, with every variation, yogurt marinated chicken tastes fresh and new. That way, you’ll never get stuck eating the same thing twice in a row.
Here’s a simple breakdown to make yogurt marinated chicken at home. The ingredients are flexible, so you can adjust to your taste
Ingredients
Quantity
Plain Greek Yogurt
1 cup
Chicken (breast or thighs)
1.5 lbs
Garlic (minced)
3 cloves
Fresh Ginger (grated)
1 tbsp
Spices (paprika, cumin, turmeric, or mix)
2–3 tsp
Lemon Juice
2 tbsp
Step
Instructions
1
Mix yogurt, garlic, ginger, lemon, and spices in a bowl.
2
Add chicken and coat evenly. Marinate for 4–6 hours.
3
Grill, bake, or pan-sear until chicken reaches 165°F inside.
4
Serve with rice, vegetables, or a fresh side salad.
The nutrition table remains the same. Adding ginger not only boosts flavor but also supports digestion, making it an essential part of yogurt marinated chicken
let’s stayfit together ! Follow us on facebook for more recipes.
What does marinating in yogurt do to chicken?
Marinating chicken in yogurt gently breaks down proteins with lactic acid. This process keeps the meat tender, juicy, and flavorful without making it tough. Yogurt also helps spices and herbs stick better, giving yogurt marinated chicken a rich taste.
How long can you marinate chicken with yogurt?
You can marinate chicken in yogurt for as little as 30 minutes for flavor. For best results, let it rest in the fridge for 4–6 hours. Overnight marination gives even more tenderness, but avoid going past 24 hours or the texture of yogurt marinated chicken may break down too much.
Should you rinse off yogurt marinade?
No, you should not rinse off the yogurt marinade. Instead, scrape off any excess before cooking. Leaving a light coating helps create a golden crust and locks flavor into the chicken. Rinsing would wash away the benefits of the yogurt marinade.
How to cook yogurt marinated chicken without curdling?
To prevent curdling, cook yogurt marinated chicken over medium or medium-high heat rather than very high heat. Remove excess marinade before cooking, brush lightly with oil, and if baking, cover with foil for the first half. These steps keep the yogurt coating smooth and the chicken moist.
This yogurt marinated chicken recipe is juicy, tender, and full of flavor. With Greek yogurt, garlic, ginger, lemon, and spices, it’s healthy, protein-rich, and versatile.
Ingredients
Scale
1 cup plain Greek yogurt
1.5 lbs chicken (breast or thighs)
3 cloves garlic, minced
1 tbsp fresh ginger, grated
2–3 tsp spices (paprika, cumin, turmeric, or blend)
2 tbsp lemon juice
Salt and pepper to taste
Instructions
1. Mix yogurt, garlic, ginger, lemon juice, and spices in a bowl.
2. Add chicken and coat evenly. Cover and refrigerate 4–6 hours, up to overnight.
3. Preheat grill, oven, or skillet. Remove excess marinade before cooking.
4. Cook until chicken reaches 165°F internally. If baking, cover with foil for 20 minutes, then uncover to brown.
5. Serve with rice, roasted vegetables, or salad. Eat at least 2 hours before sleep for best digestion.
Notes
Serve with rice, roasted vegetables, or a fresh salad. Try Mediterranean herbs, Indian spices, or a sweet-savory twist with cinnamon and grapes. Great for meal prep or family dinners.
Prep Time:15 minutes
Cook Time:25 minutes
Category:Main Course
Method:Grill, Bake, Pan-Sear
Cuisine:Fusion
Nutrition
Serving Size:1 portion
Calories:310
Sugar:3g
Sodium:220mg
Fat:10g
Saturated Fat:2.5g
Unsaturated Fat:7.5g
Trans Fat:0g
Carbohydrates:4g
Fiber:0g
Protein:38g
Cholesterol:95mg
Conclusion
Yogurt marinated chicken proves that simple ingredients can deliver incredible results. With yogurt tenderizing the meat and spices layering on flavor, every bite feels comforting yet fresh. Whether you grill, bake, or sear it, this dish stays juicy and versatile. Try new variations, mix in bold or sweet notes, and you’ll never get bored of chicken again. Start your own flavorful journey today with this easy yogurt marinated chicken recipe
When we traveled to Italy last summer, we stopped at a little restaurant tucked away on a quiet street. Scanning the menu, I chose the sous vide chicken breast as a healthy option, expecting something simple. But the first bite left me shocked — tender, juicy, and packed with flavor.
I’d always thought sous vide was just for fancy red meat cuts. Curious, I asked the chef about it, and he happily explained how sous vide chicken breast is one of his favorite tricks for perfect results every time.
Since that trip, it’s become a staple in my kitchen. And because good things shouldn’t be kept secret, I’m sharing my method with you today — so you can experience the same unforgettable flavor, anytime. This sous vide chicken breast recipe is beginner-friendly and easy to adapt for different marinades and serving ideas.
Ingredients and Step-by-Step Instructions for Sous Vide Chicken Breast
Before you get started, here’s everything you need to make this tender, flavorful sous vide chicken breast with a honey-lime-chili marinade.
Ingredients
2 boneless, skinless chicken breasts
1 tablespoon honey
1 tablespoon chili powder
1 tablespoon lime juice
1 tablespoon olive oil
1 teaspoon molasses
1 teaspoon coriander
1 teaspoon salt
½ teaspoon garlic powder
These simple pantry ingredients pack a ton of flavor.
Step-by-Step Instructions
Marinate chicken breasts with honey, lime, chili powder, and spices
Sear and serve. When the chicken is done, remove it from the bag, pat dry with paper towels, and sear in a hot skillet with a little oil for 1–2 minutes per side for a golden crust. Slice and serve hot.
Prepare the marinade. In a small bowl, whisk together the honey, chili powder, lime juice, olive oil, molasses, coriander, salt, and garlic powder to make a smooth marinade.
Coat the chicken.
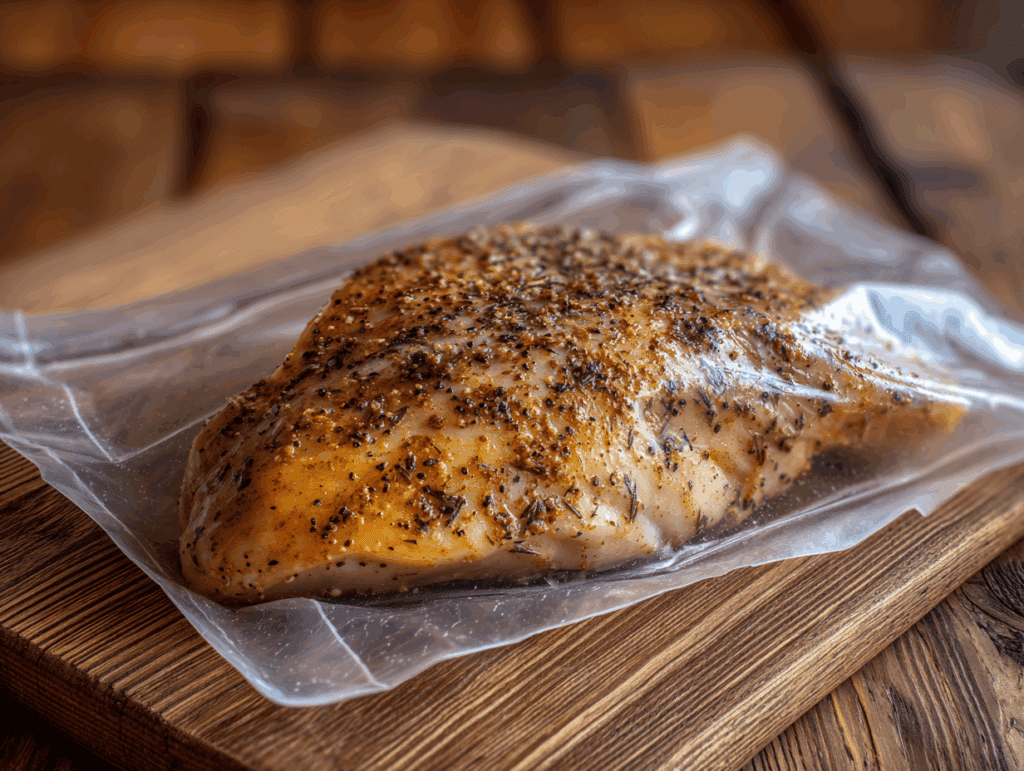
Chicken breasts sealed in a bag and ready for sous vide bath
Place the chicken breasts in a shallow dish or directly into a sous vide bag. Pour the marinade over the chicken and turn to coat evenly. Let sit for 10–15 minutes while you heat the water bath.
Preheat the sous vide. Fill your container or pot with water and set your sous vide machine to 150°F. Let it come to temperature before adding the chicken.
Seal the chicken. If using a vacuum sealer, seal the bag tightly. If using a zip-top freezer bag, remove as much air as possible with the water displacement method.
Cook in sous vide bath. Place the sealed chicken in the water bath and cook for 1½–4 hours. Make sure the bag stays fully submerged.
When it comes to sous vide chicken breast, getting the time and temperature right is key. The beauty of this method is how forgiving it is — you can leave the chicken in longer without worrying about it drying out or overcooking.
What is the recommended sous vide chicken breast temp?
For most home cooks, 150°F is the sweet spot for sous vide chicken breast. At this temperature, the chicken turns out tender, juicy, and fully cooked while maintaining its natural texture. Some chefs prefer going as low as 145°F for even softer meat, though it may appear a little pink. If you like firmer chicken, 155°F works too, though it can lose a bit of juiciness.
Here’s a simple temperature reference:
Temperature
Texture & Notes
145°F
Extra tender, slightly pink
150°F
Juicy, tender, fully cooked
155°F
Firmer, less juicy
No matter which temperature you pick, sous vide keeps the chicken consistent from edge to center. Unlike roasting or grilling, you don’t get dry spots or uneven doneness.
How long should you cook chicken breast in a sous vide?
Can You Sous Vide Frozen Chicken Breast?
Absolutely! One of the great benefits of a sous vide chicken breast recipe is how forgiving it is — even if you start with frozen chicken breast, the results are still juicy and tender. Simply add about 30 extra minutes to your cook time to ensure the chicken reaches the proper internal temperature all the way through. This makes it perfect for busy weeknights or meal prep when you forgot to thaw your chicken in advance.
One of the biggest advantages of sous vide chicken breast is how flexible the cooking time can be. For chicken breasts about 1 inch thick, 1½ hours in the water bath is just right. That gives the meat enough time to reach the target temperature and break down slightly for tenderness.
However, you can leave the chicken in the bath for up to 4 hours if needed — perfect for busy schedules. The steady water temperature ensures it won’t overcook, so you have some freedom.
For thicker breasts (closer to 1½ inches), you may want to add an extra 15–30 minutes just to be sure it cooks through evenly.
Cooking Multiple Chicken Breasts at Once
One of the best things about sous vide chicken breast is how easy it is to scale up. Whether you’re cooking for one or meal prepping for the week, this method delivers the same tender, juicy results every time — even when cooking a big batch. This also applies if you’re starting with frozen chicken breast — just remember to extend the cooking time slightly so every piece reaches a safe temperature.
How many chicken breasts can you sous vide at once?
You can cook as many chicken breasts as will comfortably fit in your water bath, as long as you don’t overcrowd the bag or block water circulation. Most standard sous vide setups can handle at least 4–6 boneless breasts at a time. Arrange them in a single layer inside your bag to ensure even cooking. If you’re cooking a larger batch, use multiple bags and make sure they aren’t stacked on top of each other.
The key here is water flow — the sous vide circulator needs room to move water around each piece of chicken. If you cram too many in, some parts may not cook properly. If you’re using a large container like the 12-quart Rubbermaid bucket, you can fit even more, making it perfect for family dinners or meal prep.
For more batch cooking tips and recipes, check out our meal prep ideas, where we share ways to make your week healthier and easier.
Batch cooking for meal prep
Sous vide chicken breast is ideal for meal prepping. Cook a big batch on Sunday, then store it in the fridge for up to 4 days or freeze for longer. Each piece stays juicy and ready to eat all week, making it perfect for salads, wraps, or quick dinners.
Pro tip: after sous vide, chill extra chicken in an ice bath before storing. This stops cooking instantly and keeps the texture perfect when you reheat. Pair it with sides from our healthy lunch recipes for balanced meals all week long.
Knowing When Sous Vide Chicken is Done
One of the reasons people love sous vide chicken breast is how foolproof it feels. But if you’re new to the method, you might wonder how to tell when it’s actually ready. Here’s what to look for.
How do you know when sous vide chicken is done?
Because sous vide cooks chicken at a low, steady temperature, the inside may still have a faint pink hue when it’s fully cooked — and that’s perfectly safe if you followed the right time and temperature. After at least 1½ hours in the sous vide bath at 150°F, your chicken breast is cooked through.
When you remove it from the bag, it should feel tender to the touch and pull apart easily with a fork. You can also double-check with an instant-read thermometer if you like — it should read at least 150°F. The beauty of sous vide is that the chicken can’t get hotter than the water temperature, which makes overcooking impossible.
If you’re looking for more guidance on safe cooking, you might also enjoy our tips in healthy cooking basics.
Tips for perfect results every time
For the best flavor and presentation, don’t skip the finishing step. Once your sous vide chicken breast is cooked, pat it dry and sear it quickly in a hot skillet with a little olive oil. This gives you a beautiful golden crust and locks in flavor.
Another tip: season generously before cooking. The honey, lime, and chili powder rub in this recipe is a perfect example of how sous vide locks in bold, bright flavors.
Essential Sous Vide Equipment
One reason sous vide chicken breast is such a great addition to your cooking routine is that it doesn’t require a lot of fancy gear. You only need a few key tools — and you probably already have most of them in your kitchen.
What sous vide equipment do you really need?
At its core, sous vide cooking only requires three things:
A sous vide immersion circulator: This is the small device that heats and circulates the water. We love the Anova Sous Vide for its reliability and compact size.
A container or pot: Any large pot you already own will work fine for sous vide. If you plan to cook larger batches often, a dedicated 12-quart plastic container makes it easier to fit more food.
Cooking bags: You can use standard freezer-safe zip-top bags and remove the air with the water displacement method. Or, if you prefer reusable options, silicone bags like Stasher work beautifully.
That’s it — no huge investments required. With these basics, you’re ready to start making sous vide chicken breast at home.
Recommended tools and upgrades
If you cook sous vide regularly, there are a few upgrades worth considering:
A vacuum sealer and pre-cut vacuum bags for quick, secure sealing with no leaks.
Bag clips to attach bags to the side of your container and keep them fully submerged.
A lid or plastic wrap for your container to prevent evaporation during longer cooks.
These extras aren’t necessary to get started, but they can make the process even more convenient and efficient.
Serving and Storing Sous Vide Chicken Breast
Once your sous vide chicken breast is perfectly cooked, you’ll want to make the most of it. The great thing about this method is how versatile and easy it is to store for later.
Best ways to serve sous vide chicken breast
Sous vide chicken breast shines in just about any dish. Slice it thin and serve it over a big green salad with your favorite vinaigrette. Or tuck it into whole-grain wraps with crisp veggies and a smear of hummus for a quick lunch. You can also pair it with roasted vegetables and quinoa for a balanced, satisfying dinner.
Because the chicken stays so moist, it’s also a hit in hot dishes like stir-fries or grain bowls — just add it at the very end so it doesn’t dry out. If you want to try more serving ideas, check our healthy dinner recipes for plenty of inspiration.
How to store and reheat
Sous vide chicken breast stores beautifully. If you’re eating it within 4 days, keep it sealed in an airtight container in the fridge. For longer storage, freeze individual portions for up to 2 months.
When reheating, skip the microwave if you can. Instead, gently warm the chicken in a hot water bath (below 150°F) or in a covered skillet with a splash of broth. This keeps the meat juicy and flavorful, just like when it was freshly cooked.
FAQ
What is the recommended sous vide chicken breast temp?
We recommend cooking sous vide chicken breast at 150°F. This gives you juicy, tender, fully cooked chicken that’s safe to eat while maintaining great texture.
How long should you cook chicken breast in a sous vide?
Cook your chicken breast for 1½ hours for perfect results, though you can safely leave it in the bath for up to 4 hours without overcooking thanks to the steady water temperature.
How many chicken breasts can you sous vide at once?
You can sous vide as many chicken breasts as will fit in your container in a single layer, as long as water can circulate freely around each piece.
How do you know when sous vide chicken is done?
If your chicken has been in the bath for at least 1½ hours and reaches 150°F internally, it’s fully cooked even if slightly pink. It should be tender and easy to shred with a fork.
Can I sous vide frozen chicken breast?
Yes! Cooking a frozen chicken breast sous vide works beautifully — just add 30 minutes to the cooking time. The even temperature control ensures the chicken stays juicy and tender every time.
Juicy, tender sous vide chicken breast with a honey-lime-chili marinade. Foolproof, flavorful, and perfect every time.
Ingredients
Scale
2 boneless, skinless chicken breasts
1 tablespoon honey
1 tablespoon chili powder
1 tablespoon lime juice
1 tablespoon olive oil
1 teaspoon molasses
1 teaspoon coriander
1 teaspoon salt
½ teaspoon garlic powder
Instructions
1. Prepare the marinade: In a small bowl, whisk together honey, chili powder, lime juice, olive oil, molasses, coriander, salt, and garlic powder.
2. Coat the chicken: Place chicken breasts in a dish or sous vide bag and coat evenly with marinade.
3. Preheat sous vide: Fill your container with water and set sous vide to 150°F.
4. Seal chicken: Vacuum seal or remove air with water displacement method.
5. Cook in sous vide bath: Submerge chicken and cook for 1½–4 hours.
6. Sear and serve: Pat dry and sear in a hot skillet for 1–2 minutes per side. Slice and enjoy.
Notes
For more flavor, marinate chicken overnight in the refrigerator.
Store cooked chicken in an airtight container in the fridge for up to 4 days or freeze for up to 2 months.
Prep Time:10 minutes
Cook Time:1 hour 30 minutes
Category:Dinner
Method:Sous Vide
Cuisine:American
Nutrition
Serving Size:1 chicken breast
Calories:240
Sugar:6g
Sodium:620mg
Fat:7g
Saturated Fat:1g
Unsaturated Fat:5g
Trans Fat:0g
Carbohydrates:8g
Fiber:1g
Protein:36g
Cholesterol:85mg
Conclusion
Sous vide chicken breast is one of the simplest ways to take your cooking to the next level. With just a few tools, you can make tender, juicy, perfectly seasoned chicken every single time — whether you’re cooking one or a whole week’s worth.
Since that first bite in Italy, sous vide chicken breast has been one of my favorite ways to eat healthy and still enjoy every meal. And now it’s yours too. Follow the steps in this guide and discover why this method is no longer just a restaurant secret — it’s the smart way to cook at home.
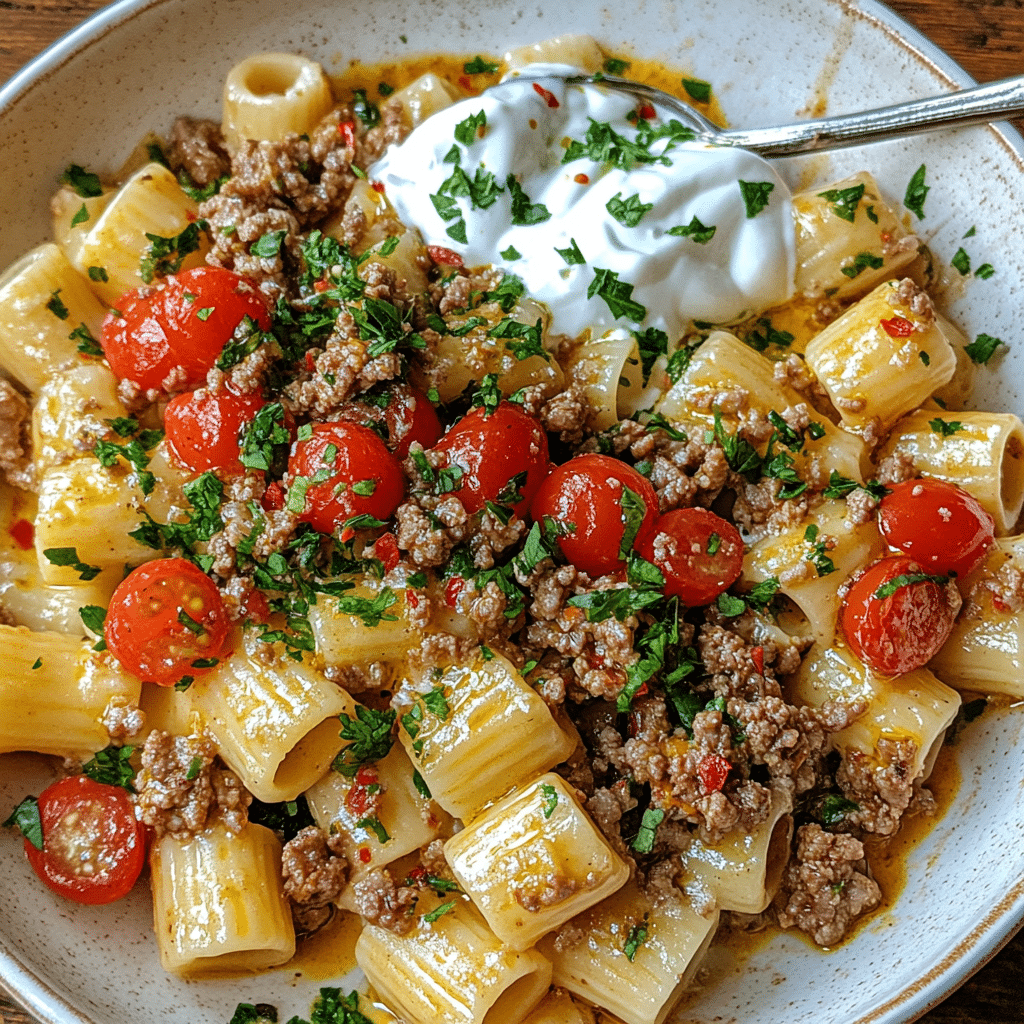
Close-up of Turkish pasta with yogurt garlic sauce and spicy oil drizzle
Turkish pasta recipe might not sound like a typical fitness meal — but for us, it became one of those comfort dishes that actually worked with our goals, not against them.
We’re Chef Dodos, the couple behind StayFit Recipes. When we started this journey, we were stuck. Kiko was lifting hard and eating clean but still felt bloated and frustrated. Med was running on junk calories, feeling weak, and going nowhere with workouts. We both wanted real change — not just for our bodies, but for our habits too.
So, we made a deal. No missed workouts. No cheat meals. A 100-day challenge that turned into a lifestyle. And one of the first meals that made it easy to stick with was this Turkish pasta recipe.
It’s fast, flavorful, and full of real food. Creamy garlic yogurt, a little spiced butter, and pasta made from clean carbs. We skipped the junk, kept the flavor, and turned a viral dish into a healthy go-to.
Now, this Turkish pasta recipe is part of our regular meal rotation — a comfort meal that fits our goals and never makes us feel off-track. Whether you’re starting from scratch or resetting your routine, this is one recipe worth adding to your list.
Table of Contents
Introduction to Turkish Pasta Recipes
What Makes Turkish Pasta Unique Compared to Italian Pasta?
Turkish pasta stands out for its fusion of bold and creamy flavors that go beyond the typical marinara or Alfredo sauce. Instead of cheese or cream, Greek or plain yogurt is used as a base sauce. It’s seasoned with fresh garlic, chili flakes, and topped with a sizzling butter or olive oil drizzle infused with paprika, pepper paste, and sometimes mint. The combination creates a warm, tangy, and spicy flavor that pairs beautifully with soft short pasta.
What truly makes this recipe shine is the Middle Eastern pantry influence. You’ll often see the use of Turkish pepper paste, dried mint, and Turkish chili flakes—though regular ones will work in a pinch. The goal isn’t to overpower, but to layer flavors in a uniquely satisfying way.
History and Cultural Significance of Pasta in Turkish Cuisine
While Italy may have laid claim to pasta’s fame, Turkey has long embraced its own comfort food variations. Known as “makarna”, pasta has been a budget-friendly staple in Turkish households for decades. It’s often served with yogurt or tomato-based sauces and combined with hearty ingredients like lean ground beef, sautéed onions, or even cherry tomatoes.
In Turkish home cooking, pasta isn’t a starter—it’s the star. Recipes are passed down through generations, with each family adding their own twist, whether it’s an extra spoon of tomato paste or a hint of dried mint. This dish, in particular, became viral on social media because of how accessible and aesthetically pleasing it is. The vibrant red oil over snowy white yogurt makes it not just delicious, but Instagram-worthy.
Ingredients Overview for the Perfect Turkish Pasta Recipe
Traditional Ingredients Used in Turkish Pasta Recipe
At the heart of any great Turkish pasta recipe is the harmony between pantry basics and bold, layered flavors. These ingredients don’t just deliver taste—they define the dish.
Fresh ingredients laid out for preparing Turkish pasta
Pasta: While any pasta works, short pasta varieties like elbows, bow ties, or shells are best. Their shape helps soak up the rich, creamy sauce unique to a Turkish pasta recipe.
Lean ground beef: A staple in many Turkish households, using 90% lean beef keeps the dish healthy while still rich in taste. You can go with 80-85% lean if you prefer a little more fat.
Sweet onions: Choose yellow or white sweet onions. They caramelize beautifully and balance out the spices in the Turkish pasta recipe.
Tomato paste: A spoon of this rich concentrate deepens the flavor and enhances the dish’s vibrant color.
Mild pepper paste: This gives the Turkish pasta recipe its signature kick. You can find it in most Middle Eastern grocery stores. If not, swap it with any pepper paste you like.
Chili flakes: While Turkish chili flakes (Pul Biber) are authentic, regular chili flakes still do a fine job in spicing up the dish.
Dried mint: Often overlooked, dried mint adds a surprising depth to the Turkish pasta recipe. Just a pinch can transform the sauce.
Butter or Olive Oil: The finishing drizzle made with melted unsalted butter or olive oil infused with chili or paprika gives the Turkish pasta recipe its signature sizzle.
Greek yogurt or plain yogurt: This forms the creamy sauce base. Full-fat Greek yogurt works best for a thick texture and tangy richness.
Fresh garlic: Minced garlic is stirred into the yogurt, delivering bold flavor to the Turkish pasta recipe.
Cherry tomatoes: These add color and a pop of sweetness. Optional but recommended.
Minced parsley: This herb brightens up the dish and brings a fresh note to the rich, creamy elements..
Choosing the Right Pasta and Yogurt Types for Your Turkish Pasta Recipe
The base of any Turkish pasta recipe is simple—but quality matters. Here’s what to know:
Pasta Tips:
Short pasta types are ideal, holding the yogurt sauce better.
Avoid delicate shapes like angel hair that can break apart or turn mushy.
Whole grain pasta works well for those aiming for a healthier Turkish pasta recipe.
Yogurt Tips:
Greek yogurt gives the best thick and creamy base.
Use plain yogurt if you want a lighter version.
Keep yogurt at room temperature before mixing—it prevents curdling.
Yogurt Type
Texture
Flavor
Best For
Full-fat Greek
Thick
Creamy, tangy
Traditional Turkish pasta recipe
Plain whole-milk
Medium
Mildly tangy
Lighter Turkish pasta variation
Low-fat yogurt
Thin
Less creamy
Calorie-reduced Turkish pasta recipe
Choosing the right yogurt and pasta type is crucial for creating the best Turkish pasta recipe experience—whether you’re going traditional or tweaking it for your taste.
Step-by-Step Guide to the Viral Turkish Pasta Recipe
How to Prepare the Sauce with Garlic, Yogurt, and Chili Oil
This sauce is what makes the Turkish pasta recipe stand out. It’s creamy, spicy, tangy—and incredibly easy to make. Here’s how to master the viral technique:
Step 1: Mix the Yogurt Base In a mixing bowl, combine:
1½ cups of Greek yogurt or plain whole-milk yogurt
2–3 garlic cloves, minced finely
Salt to taste
Whisk until smooth. Let it sit at room temperature while you prep everything else. This keeps it from curdling when mixed with warm pasta later.
Step 2: Infuse the Butter or Oil In a small skillet, melt:
2 tablespoons of unsalted butter (or olive oil for a lighter option)
Add:
½ teaspoon of sweet paprika
½ teaspoon of chili flakes (Turkish chili if available)
Optional: 1 teaspoon of pepper paste for more heat
Stir constantly over low heat until it sizzles and turns a deep red. Set it aside—this will be your final drizzle.
Cooking the Pasta to Turkish Preference
Step 3: Choose and Cook Your Pasta Boil water in a large pot with a generous pinch of salt. Add about 12 ounces of short pasta—shells, elbows, bow ties, or whatever you like.
Cook until al dente—just firm enough to hold the sauce without getting mushy. Drain and set aside, but reserve ½ cup of the pasta water in case your sauce needs thinning.
Step 4: Prepare the Ground Beef (Optional) If using meat:
In a pan, cook ½ lb. of lean ground beef with chopped onions (about 1 small onion), onion powder, salt, pepper, and dried mint.
Cook until browned and aromatic.
Mix in 1 tablespoon of tomato paste and stir for 2 minutes.
This meaty version of the Turkish pasta recipe adds protein and extra heartiness.
Step 5: Combine Everything Toss the warm pasta with the garlic-yogurt mix first. Add a few spoons of reserved pasta water if it seems too thick. Then fold in the ground beef if you’re using it.
Step 6: Finish with the Signature Drizzle Right before serving, pour the spicy butter mixture over the yogurt-coated pasta. Top with:
Fresh parsley
Optional: Cherry tomatoes, halved, for color and acidity
Bonus Tip: Want to elevate the dish even more? Try topping it with a sprinkle of dried mint or a dash of sumac for tang.
This Turkish pasta recipe takes less than 30 minutes, but it feels like a dish you’d get at a café in Istanbul.
Healthier Alternatives for Turkish Pasta
Is There a Way to Make Pasta Healthy? Yes, Here’s How
Absolutely. If you’re watching your calories, carbs, or fats, there are several ways to make a Turkish pasta recipe more health-conscious without losing its authentic charm.
Here’s how to do it:
Use Whole Wheat or Chickpea Pasta Swap traditional white pasta for whole wheat, chickpea, or lentil-based pasta. These add more fiber and protein and reduce your glycemic load.
Go Lean with Protein Choices Stick to 90% lean ground beef or replace it altogether with ground turkey, plant-based crumbles, or even tofu. You’ll still get that satisfying texture with fewer calories.
Use Greek Yogurt for Protein & Creaminess Full-fat Greek yogurt packs in protein and probiotics. You can also opt for non-fat Greek yogurt to reduce fat content further.
Cut Down on Butter Reduce the amount of unsalted butter in the drizzle and substitute with extra virgin olive oil. You can also try using ghee, which has a higher smoke point and rich flavor but in smaller quantities.
Bulk It Up with Veggies Add low-calorie volume by tossing in:
Steamed broccoli
Zucchini noodles
Spinach or kale
Roasted cherry tomatoes
These ingredients not only lower the calorie density but also make your Turkish pasta recipe more filling and nutritious.
Season Smart Instead of loading up on salt, use:
Dried mint
Smoked paprika
Garlic powder
Turkish chili flakes These offer rich flavor without bloating or excess sodium.
Don’t miss our Insulin Control & Weight Loss article for insights into blood sugar-friendly meals that pair well with smart carb choices.
Using Low-Fat Yogurt and Whole Wheat Pasta
Let’s break it down:
Ingredient Swap
Traditional Choice
Healthier Alternative
Benefits
Pasta
Regular white pasta
Whole wheat or chickpea pasta
More fiber, lower glycemic impact
Ground beef
80% lean beef
90–95% lean beef or turkey
Less saturated fat
Yogurt
Full-fat plain
Non-fat or Greek yogurt
More protein, fewer calories
Butter
2 tbsp unsalted
1 tbsp olive oil or light butter
Healthier fats
Garnishes
None or more butter
Parsley, mint, or lemon zest
Adds flavor without calories
With these tweaks, you can enjoy your favorite Turkish pasta recipe on a regular basis—even on a weight-loss plan.
And the best part? You won’t miss a thing when it comes to flavor.
Nutritional Profile and Calorie Count of Turkish Pasta
How Many Calories Are in Turkish Pasta? Detailed Breakdown
If you’ve ever wondered whether a comforting bowl of creamy, spicy pasta could fit into your diet, the answer is: yes—with a little planning.
A healthy version of Turkish pasta with yogurt and cherry tomatoes
The average serving of a Turkish pasta recipe ranges from 350 to 500 calories depending on ingredients and portion size. Here’s what contributes to the total:
Pasta (1 cup cooked): 200 calories
Greek yogurt (½ cup): 90–100 calories
Butter or olive oil drizzle (1 tbsp): 100–120 calories
So, a typical serving sits between 420 and 480 calories, assuming moderate quantities of butter and meat. For a vegetarian version, the calories drop to around 350–400 per bowl.
Here’s a quick table summarizing the estimated calorie range per major ingredient:
Ingredient
Amount
Calories
Cooked pasta
1 cup
200
Greek yogurt (full-fat)
½ cup
100
Butter or olive oil
1 tbsp
100–120
Lean ground beef (90%)
2 oz
140
Tomato & pepper paste
1 tbsp
25
Garlic, onion, spices
—
<10
Total (with meat & butter)
—
450–500
Total (vegetarian, light oil)
—
350–400
Balancing Carbs, Proteins, and Fats in Your Serving
Let’s talk macros. A balanced Turkish pasta recipe should ideally include:
Carbohydrates: From pasta—fuel for energy
Protein: From ground beef and Greek yogurt—great for satiety and muscle repair
Healthy Fats: From olive oil or reduced butter—important for nutrient absorption
Macro distribution per serving (approximate):
Carbs: 40–50g
Protein: 20–25g
Fat: 18–22g
This makes the dish a great option for active individuals, or even for those on a Mediterranean-style eating plan.
Want to reduce the fat further? Swap butter with olive oil and go meatless. Looking to boost protein? Add more yogurt or a poached egg on top—yep, that’s a thing in some Turkish kitchens.
The takeaway? The Turkish pasta recipe is highly adaptable for any diet. You just need to adjust quantities and ingredients smartly.
Customizing Your Turkish Pasta Recipe
Add-Ons: Chicken, Vegetables, or Tofu for Extra Flavor
The beauty of a traditional Turkish pasta recipe lies in its adaptability. Whether you’re feeding picky eaters, vegetarians, or protein lovers, these add-ons let you put your own twist on the dish without sacrificing flavor.
1. Protein Upgrades
Want more protein or trying to avoid red meat? These swaps work beautifully:
Shredded chicken breast – Light and juicy, perfect with yogurt sauce.
Ground turkey – A leaner alternative that mimics beef texture.
Grilled tofu cubes – Ideal for a vegetarian or vegan version.
Chickpeas – Pan-fry for added crunch and protein punch.
2. Veggie Power-Ups
Mix in roasted or sautéed vegetables to boost fiber and color:
Spinach – Wilts quickly and blends well into the yogurt.
Zucchini – Adds texture and pairs well with mint and chili flakes.
Cherry tomatoes – Bursting with sweetness and acidity.
Bell peppers or mushrooms – Sauté lightly before mixing in.
Not only do these boost the nutritional value of your Turkish pasta recipe, but they also add dimension and bite.
Learn more about healthy comfort food alternatives in our Teriyaki Chicken Recipe—another flexible and flavorful favorite.
Spice Variations: From Mild to Fiery Turkish Heat
Whether you like it mild, medium, or mouth-on-fire hot, your spice profile is yours to control.
For a Mild Kick:
Use just a pinch of paprika and dried mint
Skip the chili flakes or use sweet pepper paste
For Medium Heat:
Add ½ tsp chili flakes to your oil or butter drizzle
Use a combo of pepper paste and garlic yogurt for depth
For Serious Heat Lovers:
Go big with 1+ tsp Turkish chili flakes (Pul Biber) or Aleppo pepper
Add a dab of harissa or a sliced fresh chili in the oil
Want a bonus hack? Add a squeeze of lemon just before serving. The acidity balances the yogurt and spice, creating a pop of flavor that lifts the whole dish.
Flavor Tweak Table:
Preference
Ingredient Adjustments
Creamier Texture
Add extra Greek yogurt + pasta water
Spicier Flavor
Use more chili flakes, hot pepper paste
Milder Flavor
Use sweet paprika, skip chili
Rich & Meaty
Add ground meat or shredded chicken
Fresh & Bright
Add parsley, mint, lemon juice, cherry tomatoes
Every version still delivers the heart of what makes a Turkish pasta recipe so special—comfort, spice, and crave-worthy creaminess.
Best Yogurt Options for Authentic Turkish Pasta
What Kind of Yogurt for Turkish Pasta? Greek vs Turkish
If there’s one thing that defines a great Turkish pasta recipe, it’s the yogurt sauce. It should be creamy, tangy, smooth—not watery, bland, or too thin.
The Top 3 Yogurt Choices for This Recipe:
Full-Fat Greek Yogurt
Thick and creamy
Holds up well when mixed with pasta
Offers a rich, slightly tangy flavor
Best overall choice for consistency and taste
Plain Turkish-Style Yogurt
Softer texture than Greek, but more authentic
Slightly looser, but still holds flavor well
Less tangy, smoother finish
Great for traditionalists wanting real Turkish flavor
Low-Fat or Non-Fat Yogurt
Lighter on calories
Can be runny and less flavorful
May need straining to improve thickness
Better for those on strict calorie-conscious plans
If you’re going for authenticity, Turkish-style yogurt wins. But if you prioritize texture and high protein, Greek yogurt is the better option.
How to Make Homemade Yogurt for Better Taste and Nutrition
Making your own yogurt is easier than it sounds—and you get total control over texture, tang, and fat content. Here’s a quick recipe you can follow:
Ingredients:
1 liter whole milk (or low-fat milk)
2 tablespoons plain yogurt (as starter culture)
Directions:
Heat the milk until it just begins to bubble (~180°F).
Let it cool to around 110°F (warm to the touch).
Stir in the yogurt starter and mix well.
Cover and keep in a warm spot (wrapped in a towel or in the oven with the light on).
Let it ferment for 6–8 hours, or overnight for extra tang.
Refrigerate and strain for a thicker Greek-style yogurt.
This DIY version gives your Turkish pasta recipe a fresher, cleaner taste without preservatives or additives.
Pro Tips:
Always let yogurt sit at room temperature before mixing into pasta to prevent curdling.
Whisk it smooth before combining for a silky, even coating.
Add salt and minced garlic directly into the yogurt to build a flavorful sauce base.
Yogurt Comparison Table for Turkish Pasta:
Yogurt Type
Texture
Tang Level
Best For
Greek (Full-Fat)
Thick
High
Creamy Turkish pasta recipe
Turkish-Style (Whole)
Medium
Mild
Traditional authenticity
Low-Fat Plain Yogurt
Thin
Mild
Calorie-focused variations
Homemade Yogurt
Adjustable
Adjustable
Custom flavor & nutrition
Whether you go store-bought or homemade, getting the yogurt right ensures your Turkish pasta recipe turns out creamy, tangy, and totally addictive.
Serving Suggestions and Pairings
Traditional Turkish Sides to Serve with Pasta
In Turkey, pasta isn’t typically served in isolation—it’s often part of a vibrant table spread filled with fresh, tangy, and flavorful side dishes. When you serve your Turkish pasta recipe, try pairing it with:
1. Cacık (Yogurt with Cucumber and Mint)
A refreshing cold dip similar to tzatziki
Balances the spice of the pasta beautifully
Can be made in minutes with Greek yogurt, grated cucumber, garlic, and dried mint
2. Ezme Salad
A finely chopped salad made with tomatoes, onions, parsley, and chili paste
Adds acidity and brightness to the meal
3. Roasted Vegetables
Eggplant, zucchini, and bell peppers roasted in olive oil make excellent veggie companions
4. Olives and Feta Plate
Serve as an appetizer or side with crusty bread for a Mediterranean-style spread
5. Flatbread or Lavash
Perfect for scooping up yogurt sauce or balancing bold flavors
Want something quick? A side of simply dressed arugula salad with lemon and olive oil does the trick, cutting through the richness of your Turkish pasta recipe.
Presentation Tips for a Restaurant-Style Experience at Home
Making food taste great is only part of the experience. Presentation transforms a meal into a moment. Here’s how to give your Turkish pasta recipe the restaurant treatment at home:
1. Use a Wide, Shallow Bowl
Helps spread the pasta evenly and gives room for the signature chili oil drizzle
2. Swirl the Pasta
Create a small nest in the center with tongs to give it that elegant plated look
3. Drizzle With Precision
Use a spoon to pour the chili oil-butter sauce in a spiral pattern
Finish with a few bright drops of oil for visual pop
4. Garnish Like a Pro
Fresh minced parsley
Extra pinch of Turkish chili flakes
A dollop of yogurt or crumbled feta on top
5. Add Color
Halved cherry tomatoes or roasted red pepper strips give the plate vibrance
Quick Table: Side Pairings & Flavors
Side Dish
Flavor Profile
Complements
Cacık
Cool, creamy, herby
Spicy yogurt pasta
Ezme Salad
Tangy, spicy, fresh
Rich ground beef variations
Roasted Veggies
Smoky, savory
Yogurt-forward versions
Flatbread
Warm, chewy
Scooping yogurt, soaking oil
Olive & Feta Plate
Briny, sharp
Balances creamy textures
These pairings not only enhance the taste but also complete the traditional Turkish pasta recipe experience—bold, balanced, and deeply satisfying.
Common Mistakes to Avoid When Making Turkish Pasta
Even the simplest recipes can go sideways with a few missteps. The Turkish pasta recipe may be easy, but these common mistakes can make or break your final dish.
Overcooking Pasta and Undermixing Yogurt Sauce
Let’s start with the foundation—the pasta and yogurt.
Overcooked Pasta
Cooking pasta too long can result in mushy, gluey textures that don’t hold sauce well.
Always cook pasta al dente, especially short shapes like elbows, bow ties, or shells.
Don’t forget to salt the water generously—it’s your first layer of flavor.
Cold or Curdled Yogurt
Mixing cold yogurt directly into hot pasta causes it to curdle.
Solution? Bring the yogurt to room temperature and stir in a bit of pasta water for a silky, even blend.
Flavor Imbalances: Too Much Garlic or Not Enough Salt
Seasoning makes all the difference, and the Turkish pasta recipe relies on a delicate balance of bold and subtle flavors.
Garlic Overload
Garlic is important, but don’t overdo it. Use 1–2 cloves per cup of yogurt, finely minced or crushed.
Too much garlic can overpower the chili oil and the natural creaminess of the sauce.
Underseasoned Yogurt
Yogurt needs help to pop. Don’t skip the salt or the dried mint.
Add a pinch of salt, a small amount of lemon juice, and even a bit of olive oil to enhance the base.
Skipping the Chili Oil Drizzle or Burning the Butter
The oil drizzle is more than just decoration—it’s where spice, aroma, and mouthfeel collide.
Common Chili Oil Mistakes:
Burning the spices in butter or oil creates bitterness. Always infuse over low heat.
Skipping this step robs the dish of its signature color and flavor punch.
To get it right:
Warm your unsalted butter or olive oil gently.
Stir in paprika, chili flakes, and optional pepper paste until they bloom.
Drizzle it just before serving for that dramatic, vibrant finish that defines every true Turkish pasta recipe.
Recap Table: Mistakes & Fixes
Mistake
Fix
Overcooking pasta
Cook al dente with salted water
Mixing cold yogurt
Use room-temp yogurt, stir in warm pasta water
Too much garlic
Stick to 1–2 cloves per cup of yogurt
Underseasoned yogurt
Add salt, lemon, dried mint
Burning chili oil
Infuse spices on low heat
Skipping butter drizzle
Don’t—this is the soul of the Turkish pasta dish
Getting these details right elevates the Turkish pasta recipe from average to unforgettable. It’s not about being fancy—it’s about paying attention to the simple stuff.
This authentic Turkish pasta recipe combines tender short pasta with a tangy garlic-yogurt sauce and a spicy chili oil drizzle. It’s rich, comforting, and ready in under 30 minutes. A Mediterranean comfort food classic that’s easily adaptable for vegetarian, high-protein, or calorie-conscious diets.
Optional: ½ cup cherry tomatoes, halved and grilled
Instructions
Cook the Pasta Boil the pasta in well-salted water until al dente. Reserve ½ cup of pasta water, then drain.
Make the Yogurt Sauce In a bowl, mix yogurt, garlic, and salt until smooth. Let it sit at room temperature while prepping other elements.
Cook the Ground Beef (Optional) In a skillet, sauté onions in a little olive oil, then add beef, tomato paste, onion powder, dried mint, salt, and pepper. Cook until browned and fragrant.
Prepare the Spicy Drizzle In a small pan, melt butter over low heat. Add paprika, chili flakes, and pepper paste. Stir until it sizzles and turns bright red. Set aside.
Combine and Serve Toss the warm pasta with the yogurt sauce. Thin with pasta water if needed. Fold in ground beef if using. Top with chili oil drizzle, parsley, and optional cherry tomatoes.
Notes
Let yogurt come to room temperature to avoid curdling.
For vegetarian versions, skip the beef and add sautéed mushrooms, chickpeas, or zucchini.
To make it spicier, double the chili flakes or add harissa.
Store leftovers in the fridge for up to 2 days. Best served warm or at room temp.
Prep Time:10 minutes
Nutrition
Serving Size:1 bowl
Calories:420–480
Fat:18–22g
Saturated Fat:20 minutes
Carbohydrates:40–50g
Protein:20–25g
Conclusion: Bring Bold Turkish Flavors to Your Kitchen
There you have it—an in-depth journey through every layer of the perfect Turkish pasta recipe. From the creamy yogurt base to the fiery chili butter drizzle, and all the ingredient swaps, side pairings, and prep tips in between, this dish is your ticket to a flavorful, customizable, and culturally rich comfort food experience.
Whether you’re making it spicy with chili flakes or mild with mint, meaty with ground beef or vegan with chickpeas, the Turkish pasta recipe can flex to fit your needs. It’s simple enough for a quick weeknight dinner and bold enough to impress guests.
Ready to get cooking? Revisit our step-by-step Easy Turkish Pasta Recipe to bring this crave-worthy dish to life.
Let’s stay strong, stay healthy, and StayFit — together.
Absolutely. And the Turkish pasta recipe is a perfect example. By swapping regular pasta for whole grain or chickpea varieties and using Greek yogurt instead of cream or cheese, you get a meal that’s both comforting and clean. Healthy pasta is all about balance — smart carbs, quality protein, and healthy fats. Add some garlic and red pepper flakes for flavor, and you’ve got a dish that satisfies cravings without wrecking your progress.
What Is the Viral Turkish Pasta Recipe?
The viral version of the Turkish pasta recipe took over TikTok and Instagram with its creamy yogurt base, spicy butter drizzle, and fast prep time. It’s often served with garlic and Aleppo pepper, and sometimes topped with mint or lemon zest. What makes it go viral? It’s different. It’s beautiful on the plate. And it comes together in 20 minutes or less. We took that base and cleaned it up to
What Kind of Yogurt for Turkish Pasta?
Always go with plain Greek yogurt. It’s thick, rich, and holds up well when mixed with warm pasta. If you’re dairy-free, try plain almond or coconut yogurt — just make sure it’s unsweetened. Sweetened yogurt throws off the whole balance of the dish and doesn’t work well with garlic and spices.
How Many Calories Are in Turkish Pasta?
350 to 450 calories 18–25g protein 10–15g fat 35–45g cab