Mandarin Muffins, No Eggs – Quick, Moist & So Delicious!

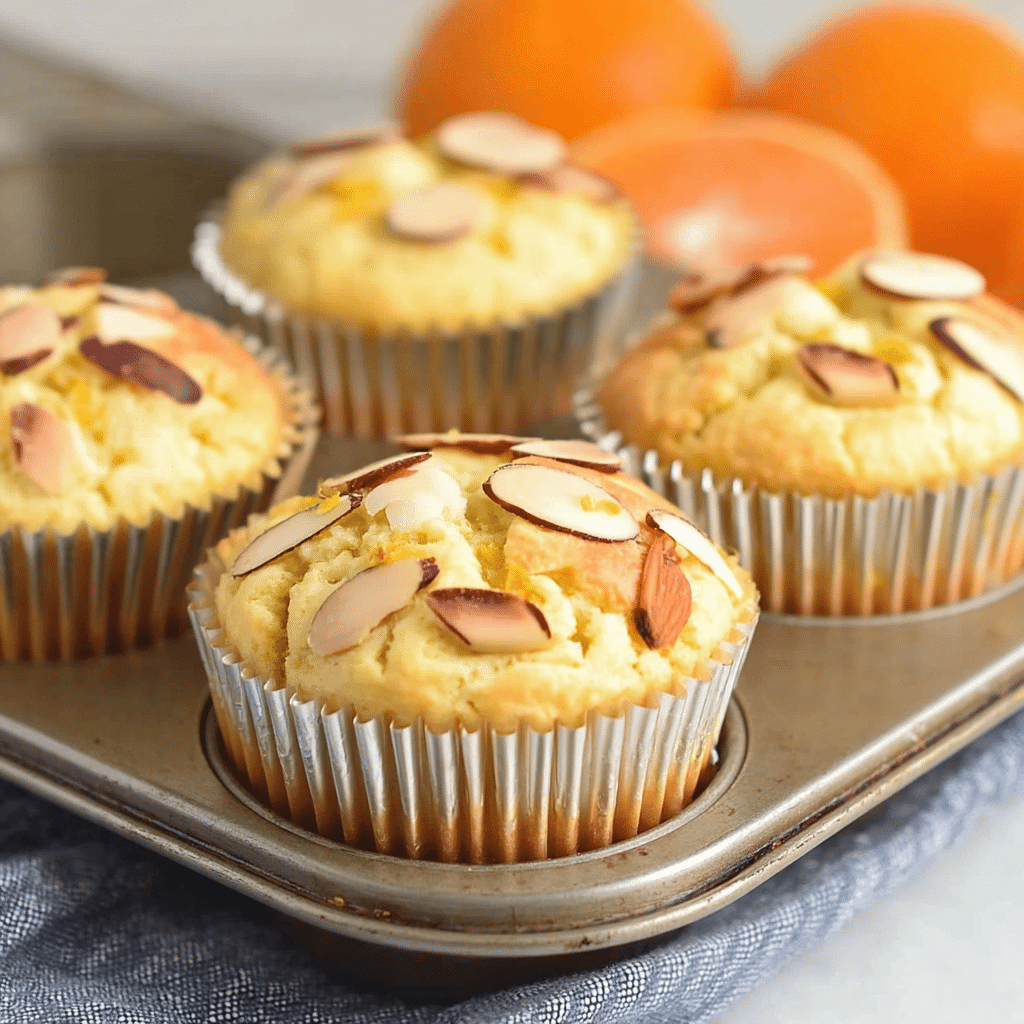
Mandarin Muffins (Healthy, No Eggs) stacked on a cooling rack
Freshly baked mandarin muffins made without eggs
Table of Content

The Muffin That Started It All – Mandarin Muffins, No Eggs

It started with a bowl of extra mandarins and zero eggs in the fridge. We were in the mood for something sweet but not heavy — something wholesome, zesty, and fuss-free. That’s how these Mandarin Muffins (healthy, no eggs) came to life. They’re light, fluffy, and bursting with citrus flavor — no eggs required, and no one misses them.

We get it: muffins are usually packed with butter, eggs, and sugar. But here’s the deal — with a little creativity, you can make Mandarin Muffins (healthy, no eggs) that still feel like an indulgence. These are moist from fresh mandarin juice and dairy-free yogurt, naturally sweetened with unrefined cane sugar, and topped with a toasty almond crunch. They make a great post-workout bite, school snack, or grab-and-go breakfast.

This recipe was a happy accident that quickly turned into a meal-prep staple. The aroma alone — sweet citrus with warm vanilla — makes it worth baking. And just like our Healthy Banana Bread or Chocolate Baked Oat Cups, these muffins prove that clean ingredients and real flavor go hand in hand.

Why Mandarin Muffins?

Mandarins are often overlooked in baking, but they bring something special — a natural balance of sweetness and acidity that keeps things light. The zest adds brightness, while the juice helps create that tender crumb. And because you’re skipping eggs, the moisture from the mandarins and yogurt pulls double duty.

Whether you’re avoiding eggs or just want to shake up your routine, Mandarin Muffins (healthy, no eggs) are the kind of recipe that makes you wonder why you ever baked any other way.

Egg-Free Baking Tips: What to Use Instead of Eggs in Muffins

Making Mandarin Muffins (healthy, no eggs) might sound like a challenge if you’re used to baking with eggs. But once you understand how to replace them, it becomes second nature — and honestly, kind of fun. Whether you’re vegan, allergic, or just out of eggs, these swaps let you bake confidently without compromising texture or taste.

Best Egg Substitutes for Muffins — Banana, Yogurt & More

Eggs usually act as binders and moisture-boosters. But so do plenty of other wholesome ingredients — like mashed bananas, unsweetened applesauce, flax “eggs,” and dairy-free yogurt. Each has its own strengths depending on the recipe.

Here’s a quick cheat sheet:

Egg Substitute Best Use In
Mashed Banana Muffins, pancakes, quick breads
Dairy-Free Yogurt Cakes, brownies, mandarin muffins
Flax Egg (1 tbsp flax + 3 tbsp water) Cookies, denser muffins, protein bars

Looking for a good flax-based snack? Try our Homemade Perfect Protein Bar — it’s packed with healthy fats and fiber.

Why Go Egg-Free? It’s More Than Allergies

Sure, some people skip eggs because of allergies. But others do it for lifestyle, digestion, or sustainability. Some just love a good baking experiment. Whatever your reason, baking Mandarin Muffins (healthy, no eggs) can be even more rewarding than the traditional route.

You’re not sacrificing — you’re gaining variety, nutrients, and flexibility. These muffins are also easier to make with kids (no raw egg risk) and travel well in lunchboxes.

Not sold yet? Grab one of our Berry Cheesecake Overnight Oats next time you’re meal prepping — both are proof that smart swaps = big results.

The Mandarin Muffin Recipe – Step-by-Step

Now that you know these Mandarin Muffins (healthy, no eggs) are the real deal, let’s break down how to make them. This is a simple, single-bowl recipe with minimal cleanup and lots of room to personalize.

Ingredient Breakdown & Smart Swaps

Ingredients for Mandarin Muffins on white background
Whole food ingredients ready to make healthy mandarin muffins

Here’s what makes this recipe work — and how you can make it your own:

  • Self-Rising Flour – Already includes baking powder and salt, so no measuring extras.
  • Almond Flour – Adds moisture and a hint of nuttiness. For nut-free, sub oat flour.
  • Mandarin Juice – Fresh-squeezed is best! It keeps the muffins light and citrusy.
  • Dairy-Free Yogurt – Binds and softens. Coconut or almond-based yogurt works great.
  • Light Olive Oil – Helps the muffins stay moist. Can be replaced with avocado oil.
  • Unrefined Cane Sugar – Adds sweetness without the crash. Maple syrup is another option.
  • Mandarin Zest – Don’t skip this! It’s the flavor booster that brings the whole muffin together.
  • Vanilla Extract – A must for warm, bakery-style flavor.
  • Sliced Almonds – For crunch. You can swap in sunflower seeds for nut-free needs.

These ingredients work in harmony — and you don’t need eggs to pull it off. It’s just like how we reimagined pancakes with our Quick Easy Cottage Cheese Pancakes — different, but just as satisfying.

Foolproof Instructions for Moist, Zesty Muffins
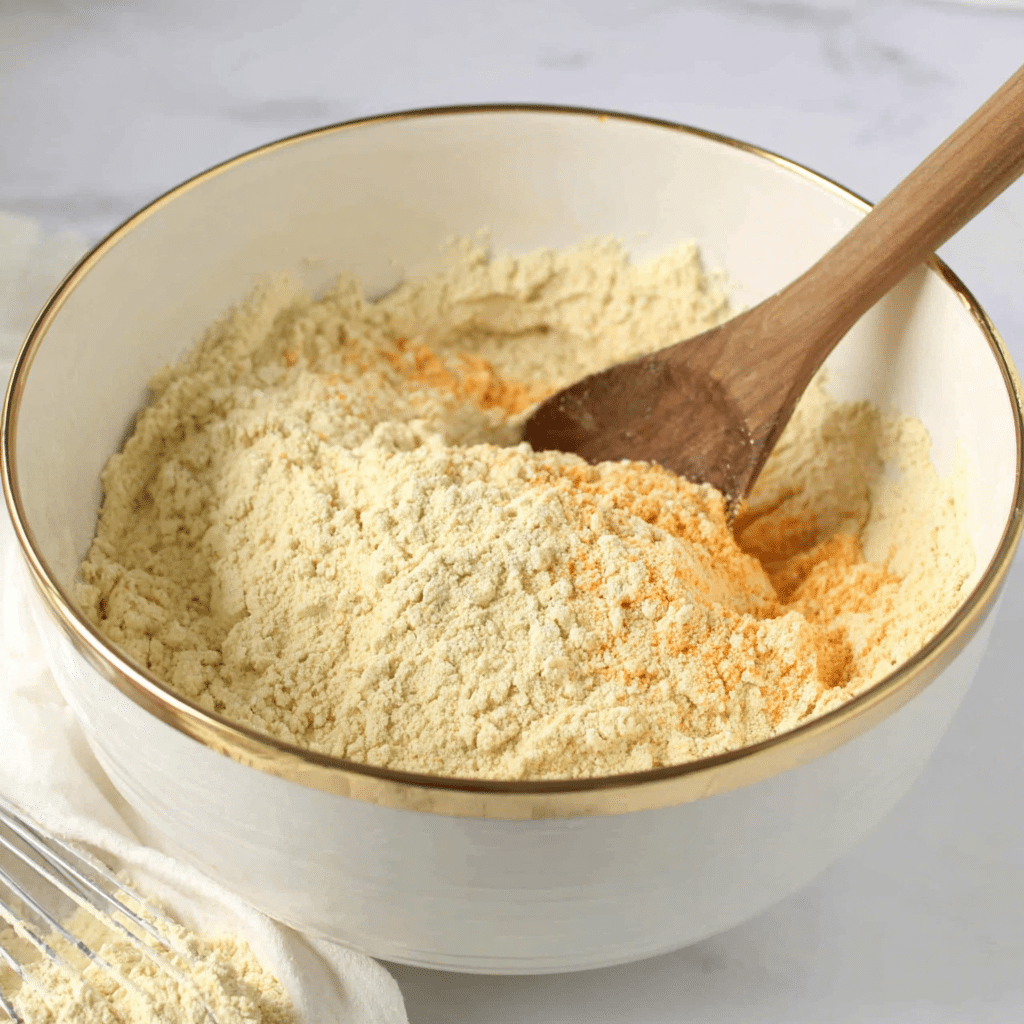
Ingredients for Mandarin Muffins on white background
Combine the dry ingredients in a large mixing bowl.
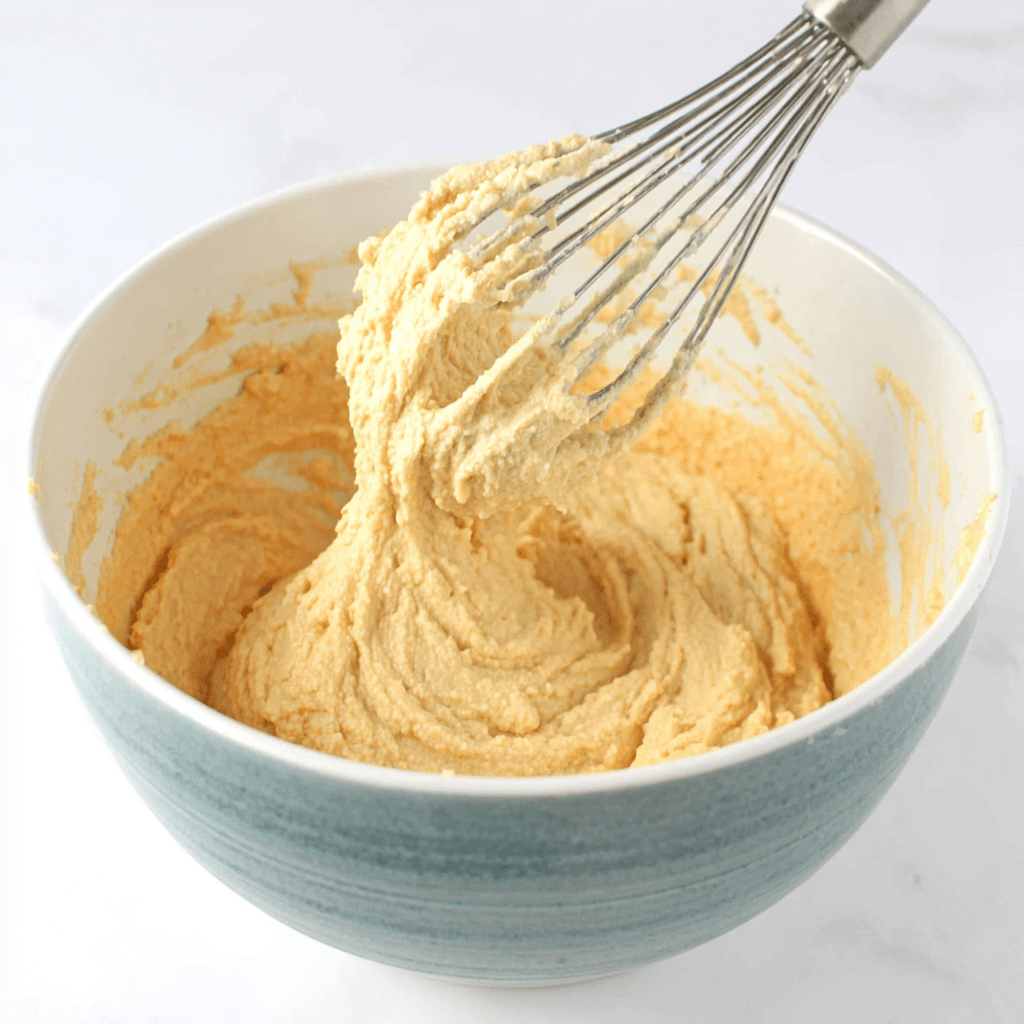
Mixing mandarin muffin batter in a glass bowl
Incorporate the wet ingredients until smooth.
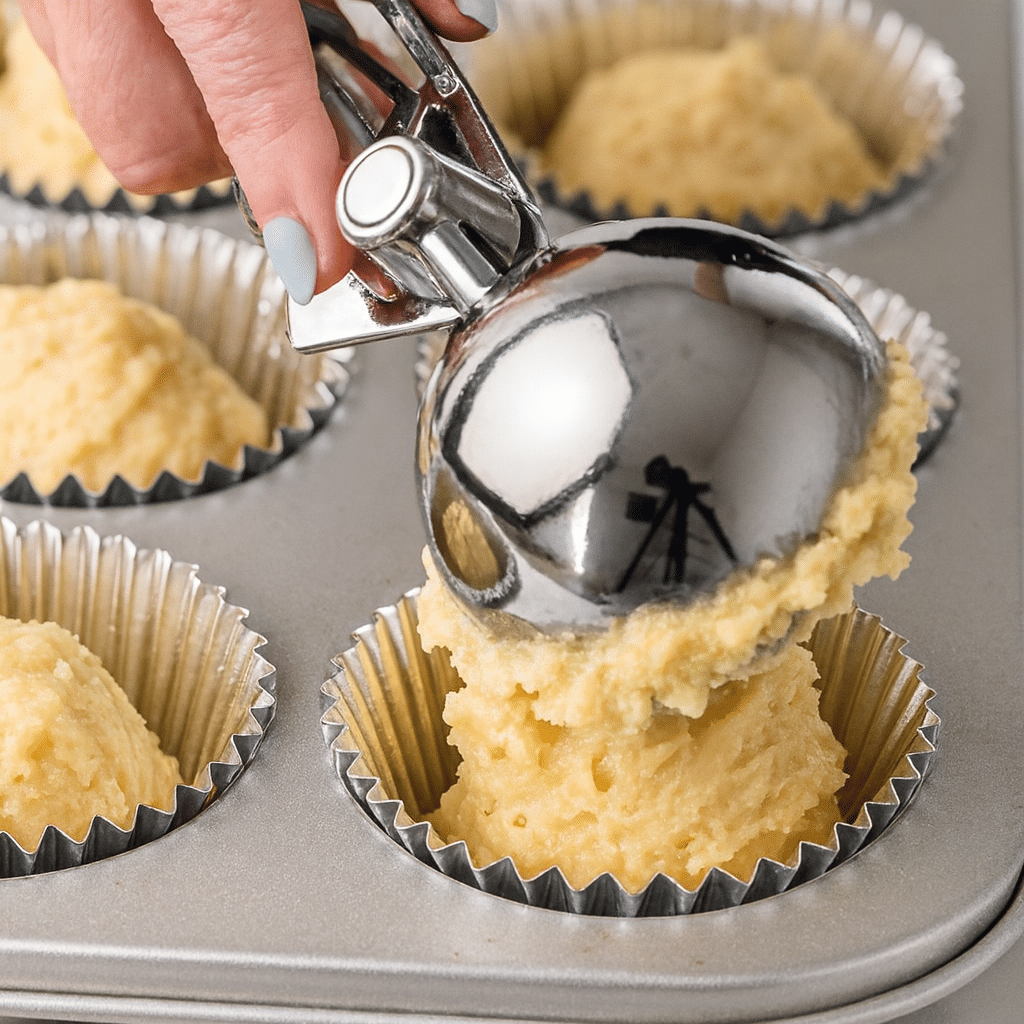
Transfer the batter to a muffin pan with paper cups.
Bake the muffins for 22-25 minutes at 350°F (180°C).
  1. Preheat your oven to 350°F (180°C). Line a 12-hole muffin pan with paper liners and give them a light spray of oil. This helps them release easily.
  2. Juice your mandarins (about 4 large ones) and strain out any seeds. You’ll need around ⅔ cup of juice.
  3. Grate the zest from those same mandarins before juicing. Trust us — you want the zest.
  4. In a large mixing bowl, whisk together the mandarin juice, zest, yogurt, oil, sugar, and vanilla.
  5. Add the flours (self-rising + almond) and fold gently using a rubber spatula. Don’t overmix — a few lumps are fine.
  6. Divide the batter evenly between the 12 muffin cups. Sprinkle sliced almonds on top for crunch.
  7. Bake for 22–25 minutes, or until the tops are golden and a toothpick comes out clean.
  8. Cool completely on a wire rack. This step helps the texture set — and they peel from the wrappers much easier.

Once cooled, store your Mandarin Muffins (healthy, no eggs) in an airtight container for up to 4 days, or freeze for up to 2 months. They’re amazing as a grab-and-go breakfast alongside one of our Chocolate Strawberry Yogurt Clusters.

The texture is moist but not dense, with a bright citrus aroma that’ll have your whole kitchen smelling like summer. And the best part? No eggs. No stress. Just real, whole ingredients that feel as good as they taste.

Variations & Banana Baking Without Eggs

One of the best things about these Mandarin Muffins (healthy, no eggs) is how flexible they are. The base batter is forgiving and adaptable — which means you can mix it up and still get great results. Whether you want to add bananas, swap citrus, or experiment with toppings, there are endless ways to make this recipe your own.

More Egg-Free Muffin Ideas to Try

Once you’ve nailed this base recipe, you can customize it to suit your mood (or pantry). Here are a few fun swaps and add-ins:

  • Swap mandarins for lemon juice and add poppy seeds for a classic twist.
  • Fold in blueberries before baking for bursts of fruity sweetness.
  • Mix in chopped walnuts or dates for texture and natural caramel flavor.
  • Add a swirl of almond or peanut butter for a protein boost.

Just keep your ratios consistent — around 1 ½ cups of dry ingredients and 1 ¼ cups of wet. And don’t be afraid to experiment. These muffins are designed to work with you, not against you.

Need more breakfast inspo? Try our Protein Bagels or prep a batch of Gluten-Free Cinnamon Rolls for weekend mornings.

Banana Cakes & Mandarin Muffins with No Eggs – Yes, It Works!

Let’s bust a myth: you don’t need eggs to make banana muffins or cake. In fact, bananas are one of the best egg substitutes around. They’re naturally sweet, rich in moisture, and great for binding.

For each egg you’d typically use, just swap in ¼ cup of mashed banana. It’s perfect for dense, flavorful muffins or banana snack cakes. You can even combine banana with yogurt, just like in our Mandarin Muffins (healthy, no eggs), to double up on softness and moisture.

So next time you’ve got overripe bananas and no eggs, don’t stress — you’ve already got everything you need to bake something epic.

Q1: What to use instead of egg in banana muffins?

You can use mashed banana, dairy-free yogurt, unsweetened applesauce, or flaxseed meal mixed with water. Each provides moisture and binding — just like an egg would — without changing flavor too much.

Q2: Should muffins have eggs?

Traditionally, yes. Eggs help with lift, texture, and binding. But they’re not essential. You can make soft, fluffy muffins using whole-food substitutes — just like we did in these Mandarin Muffins (healthy, no eggs).

Q3: Can I skip eggs in muffins?

Absolutely. As long as you replace them with something that offers moisture and structure, skipping eggs is no problem. Yogurt, banana, and flax eggs are all solid go-to options.

Q4: What does adding eggs to muffins do?

Eggs typically help muffins rise and hold together. But in egg-free baking, ingredients like baking powder, acidic juices (like mandarin), and creamy add-ins like yogurt can achieve similar effects.

Q5: What can I replace eggs with in a banana cake?

Mashed bananas, applesauce, or even blended silken tofu. Aim for about ¼ cup of substitute per egg. For extra lift, pair with a little baking soda or vinegar.

Q6: What can I bake with bananas and no eggs?

So many things! Muffins, pancakes, quick breads, cookies, and cakes. Bananas are naturally binding and work wonderfully in egg-free recipes — especially when paired with flour and a good fat source.

Print
clock clock iconcutlery cutlery iconflag flag iconfolder folder iconinstagram instagram iconpinterest pinterest iconfacebook facebook iconprint print iconsquares squares iconheart heart iconheart solid heart solid icon
Mandarin Muffins (Healthy, No Eggs) stacked on a cooling rack

Mandarin Muffins, No Eggs – Quick, Moist & So Delicious!


5 Stars 4 Stars 3 Stars 2 Stars 1 Star

No reviews

  • Author: Chef Dodos
  • Total Time: 30minutes
  • Yield: 1 muffin
  • Diet: Vegetarian

Description

This Homemade Perfect Protein Bar is soft, chewy, and packed with wholesome ingredients. An easy no-bake snack you can make in 10 minutes with just 6 pantry staples.


Ingredients

  • 1 ½ cups Self-Rising Flour – (note 1)
  • ¾ cup Almond Flour – (note 2)
  •  cup Light Olive Oil – (note 3)
  •  cup Mandarin Juice – (note 4) about 4 large Mandarin oranges
  • ½ cup Dairy-Free Yogurt – (note 5)
  •  cup Unrefined Cane Sugar – (note 6)
  • 1 tablespoon Mandarin Zest – from the previous mandarins
  • 1 teaspoon Vanilla Extract

Toppings


Instructions

    • Preheat the oven to 350°F (180°C). Line a 12-hole muffin pan with muffin paper cases. Lightly oil the paper cases with oil spray. Set aside.
  • Cut the mandarins in half, and squeeze their juice to get the amount needed. Remove any seeds from the juice if some have dropped. Set aside.
  • Keep the skin to grate on a hand grater and get some zest. Set aside.
  • In a mixing bowl, add the juice, zest, olive oil, vanilla extract, yogurt, and sugar. Whisk to combine.
  • Fold in self-rising flour and flour and using a rubber spatula stir to incorporate and form a smooth muffin batter.
  • Divide the batter evenly into the 12 muffin holes.
  • Bake the muffins on the center rack of your oven for 22-25 minutes at 350°F (180 °C) until a toothpick inserted in the center comes out clean and golden brown outside.
  • Let the muffins cool down completely on a cooling rack.

Notes

Note 1: If you don’t have self-rising flour, stir 1 1/2 cups all-purpose flour with 3 teaspoons of baking powder. I haven’t tried all-purpose gluten-free flour for this recipe, so I can’t guarantee it works.


Note 2: Almond flour adds a moist texture, proteins, and lovely flavor to the muffins. For a nut-free option, swap for an extra 1/2 cup of self-rising flour. Or swap almond flour for the same amount of cashew flour. Oat flour doesn’t work here, the muffin will be dry and dense.


Note 3: Or any light-flavor oil you love.


Note 4: Or use freshly squeezed navel orange juice. Do not use lime juice or lemon juice, it would be too acidic.


Note 5: Any plain dairy-free yogurt works; I don’t bake with dairy, but plain Greek yogurt gives a similar texture.


Note 6: Or coconut sugar (the muffins will be darker with this option) or caster sugar.


Note 7: Zest is optional. It adds a tangy flavor. Skip it if you don’t like its flavor.


Storage: Store the muffins in the fridge in an airtight cake box for up to 4 days.

  • Prep Time: 10 minutes
  • Cook Time: 20 minutes
  • Category: Snacks
  • Method: No Bake
  • Cuisine: American

Nutrition

  • Serving Size: 1 bar
  • Calories: 214.2kcal
  • Sugar: 0g
  • Sodium: 90mg
  • Fat: 11.2g
  • Saturated Fat: 3g
  • Unsaturated Fat: 8g
  • Trans Fat: 0g
  • Carbohydrates: 18g
  • Fiber: 2g
  • Protein: 8g
  • Cholesterol: 0mg

Conclusion: Real Ingredients. Real Flavor. No Eggs Needed.

If you’ve ever felt stuck trying to bake without eggs, this recipe proves you don’t need them to enjoy bakery-style results. These Mandarin Muffins (healthy, no eggs) are moist, bright, and packed with flavor — all without anything artificial, over-processed, or complicated.

Whether you’re avoiding eggs for health, allergies, or just because you ran out, this muffin is a keeper. It’s easy to prep, kid-friendly, and freezable. Plus, it tastes just as good with banana or lemon if you’re feeling creative.

We made this recipe to solve a simple problem — no eggs in the fridge. But we ended up with something way better: a go-to treat that’s fast, fresh, and full of real ingredients.

Bake it once and you’ll see what we mean. ✨ Follow us on facebook for more

Sous Vide steak Guide: Perfect Steak Every Time, Made Easy

sous vide steak guide
Perfect sous vide steak cooked to perfection

If you’ve ever struggled to cook steak perfectly — juicy in the center, evenly cooked from edge to edge — this sous vide steak guide is exactly what you need. With sous vide, you can achieve steakhouse-quality results every single time without stress or guesswork.

We’re Kiko and Med from StayFit Recipes, and we know how hard it is to stick to clean eating when your favorite meals feel out of reach. That’s why we put together this sous vide steak guide — to help you enjoy steak that’s healthy, tender, and full of flavor. During our 100-day fitness challenge, we discovered sous vide cooking and instantly fell in love. It gave us lean, perfectly cooked steak without extra oil or overcooking.

This step-by-step sous vide steak guide will walk you through everything: choosing the right cut, setting the perfect temperature, and finishing with a flawless sear. Whether you’re cooking for one or hosting a dinner party, this guide will help you master steak the StayFit way — delicious, healthy, and stress-free.If you’re ready to change the way you cook steak forever, keep reading — and check out our other sous vide recipes to see what’s possible.

Why Sous Vide Your Steak?

Cooking steak can be tricky. Pan-searing often leads to overcooked edges and an underdone center. Grilling can dry out a beautiful cut in minutes. That’s why this sous vide steak guide is such a game changer — it shows you how to cook steak perfectly every time.

Consistency and precision

This sous vide steak guide helps you lock in precise doneness, so your steak comes out just the way you like it, from edge to edge. By cooking steak in a temperature-controlled water bath, you avoid undercooking, overcooking, and uneven results.

Following our Sous Vide Ribeye Steak example, you’ll see why so many rely on a sous vide steak guide to take the guesswork out of steak night.

Juicier, healthier steak

By sealing steak in its juices and cooking gently, this sous vide steak guide ensures maximum tenderness and flavor. Even leaner cuts stay moist, and you only need a little oil to sear at the end. That means fewer calories but all the satisfaction.

Just like our Salt Beef Sous Vide recipe, the same principles apply — cooking low and slow for unbeatable results.

With this sous vide steak guide, you’ll feel confident cooking steak anytime, knowing it’ll be juicy, healthy, and consistently delicious.

How to Select the Right Steak for Sous Vide

Choosing the right cut is the first step toward success, and this sous vide steak guide will help you pick the perfect one. The beauty of sous vide is that it works with nearly any steak, but some cuts perform better depending on your goal.

sous vide steak guide ingredients
Ingredients for sous vide steak prep

Best cuts to use

This sous vide steak guide recommends tender, flavorful cuts for short cooks of 1–3 hours:

  • Ribeye: rich and marbled for amazing flavor
  • New York Strip: leaner, firmer, yet still tender
  • Filet Mignon: buttery soft and ideal for special occasions

For longer cooks (6–8 hours or more), tougher cuts like flank, hanger, or skirt steak benefit from the extended time. They’ll become tender without losing their meaty flavor.

Thickness and fat content

A good sous vide steak guide also suggests aiming for steaks about 1–1.5 inches thick. Thicker steaks take longer to cook evenly, while very thin cuts can overcook during searing. Fatty cuts like ribeye render beautifully and stay juicy, while leaner cuts benefit from adding a pat of butter or herbs in the bag.

Prep matters

Before cooking, trim any excess fat and pat the steak dry. Season with salt, pepper, and herbs like thyme or rosemary. This sous vide steak guide also recommends using a vacuum sealer for the best results, but a heavy-duty zipper bag with the water displacement method works too.

By selecting and prepping your steak properly, this sous vide steak guide sets you up for success in the next step: choosing the perfect temperature.

How to Select the Right Temperature for Sous Vide Steak

Temperature is the most important decision you’ll make when cooking sous vide, and this sous vide steak guide will help you get it right. The beauty of sous vide is that you can choose your exact level of doneness and know your steak will be cooked evenly from edge to edge.

Why temperature matters

This sous vide steak guide is all about precision. Every degree makes a difference in texture and flavor. For example, a ribeye cooked at 129°F is beautifully medium-rare, with a tender and juicy bite. Cook that same steak at 140°F, and it’ll come out closer to medium, with a firmer texture.

A proper sous vide steak guide teaches you to avoid going too high. Temperatures above 145°F can dry out even the best cuts, defeating the purpose of sous vide cooking. Instead, stay within the recommended ranges below for perfect results.

Recommended temperature ranges

This sous vide steak guide suggests the following target temperatures for steak:

  • Rare: 125°F — deep red, very tender
  • Medium-rare: 129°F — pink and juicy
  • Medium: 135°F — slightly firmer, light pink
  • Medium-well: 145°F — less pink, firmer texture
  • Well-done: 155°F+ — fully cooked through, but can be dry

For most cuts, medium-rare (129°F) is the sweet spot, balancing flavor, moisture, and tenderness. That’s why our Sous Vide Ribeye Steak and Salt Beef Sous Vide recipes both use similar gentle heat to protect the meat’s natural juices.

By using this sous vide steak guide, you can confidently set your water bath knowing the result will be exactly what you expect — every time.

Does Timing Matter for Sous Vide Steak?

Many people believe that sous vide cooking is “set it and forget it,” but this sous vide steak guide explains why timing still matters. While sous vide gives you a bigger window of perfection than traditional cooking, leaving your steak in the water bath too long can still affect the texture.

Minimum and maximum times

This sous vide steak guide recommends letting your steak cook at least long enough to heat through evenly. For most steaks, that’s about 1 hour per inch of thickness. Thinner steaks can be ready in just under an hour, while thicker cuts may need closer to 2–3 hours.

But don’t assume you can leave it forever. After about 4 hours, even tender cuts can start to turn mushy as the muscle fibers break down too much. This sous vide steak guide helps you strike the right balance so your steak stays juicy and tender without becoming soft or grainy.

Holding time for flexibility

One advantage of this sous vide steak guide is that it teaches you how to use the technique’s flexibility. If your guests are running late, or you’re not quite ready to eat, you can hold your steak in the water bath at the target temperature for up to 30–60 minutes past its optimal time without much noticeable change.

This makes meal prep and entertaining stress-free. Whether you’re following our sous vide chicken breast or experimenting with something new, this sous vide steak guide ensures you know exactly when your steak is ready — and when it’s time to take it out.

Timing might be more forgiving with sous vide, but as this sous vide steak guide shows, it’s still an essential part of getting steak just right.

Temperature and Timing Charts for Sous Vide Steak Cuts

One of the biggest advantages of using this sous vide steak guide is having clear, reliable reference points for any cut of steak. With sous vide, precision is everything — and knowing the right temperature and time for your steak guarantees perfect results every time.

Why charts are essential

Even though sous vide cooking is forgiving, following a chart like the one in this sous vide steak guide helps you avoid guesswork. Different cuts and thicknesses require slightly different times and temperatures to reach their full potential. A thick ribeye won’t behave the same as a thin sirloin, and lean cuts like filet mignon need a little more care to keep them juicy.

Recommended sous vide steak temperatures and times

This sous vide steak guide recommends the following settings for common cuts and doneness levels:

Cut Doneness Temp Time
Ribeye Medium-rare 129°F 1–3 hours
Filet Mignon Medium 135°F 1–2 hours
Sirloin Medium-well 145°F 1–2 hours

When using this sous vide steak guide, keep in mind that you can hold the steak at the desired temperature a little longer if needed, but avoid going beyond 4 hours for tender cuts to maintain texture.

This sous vide steak guide isn’t just about cooking — it’s about giving you the confidence and clarity you need to serve steak exactly the way you like it.

How to Cook a Steak Sous Vide, Step by Step

This sous vide steak guide breaks down the process into easy steps so you can cook steak perfectly every time. Follow along, and you’ll feel like a pro in no time.

Step 1: Preheat the Water Bath

Set your sous vide precision cooker to the desired final temperature (use the chart earlier in this sous vide steak guide). Wait for the water bath to reach temperature before adding the steak. This ensures even cooking from the start.

Step 2: Season Generously

Season your steak all over with salt and pepper. Don’t forget the edges — this sous vide steak guide recommends full coverage for better flavor. You can add a sprinkle of garlic powder or other spices if you like.

Step 3: Add Aromatics

Place your seasoned steak in a sous vide bag. Add a few sprigs of rosemary, thyme, or even sliced shallots to the bag for extra aroma and flavor.

Step 4: Seal the Bag

Use a vacuum sealer if you have one. If not, follow the water displacement method described earlier in this sous vide steak guide: slowly lower the bag into water to push out the air, then seal just above the water line.

Step 5: Cook in the Water Bath

Gently submerge the sealed steak into the water bath. Make sure it’s not blocking the circulator and is fully underwater. Cook for the time recommended in this sous vide steak guide, depending on thickness and doneness.

Step 6: Remove and Dry

When done, remove the steak from the bag and place it on a paper towel–lined plate. Pat it dry very well — this sous vide steak guide emphasizes this step because moisture can prevent a good sear.

Step 7: Finish on the Stovetop

Step 4 of sous vide steak cooking

Heat a heavy skillet over high heat until smoking. Add a tablespoon of neutral oil, then lay the steak down gently. Sear for 15–30 seconds per side, flipping as needed until a crust forms. For added richness, toss in a knob of butter and fresh herbs during the last flip.

Step 8: Sear the Edges

Hold the steak with tongs and roll it along the edges in the pan to brown the sides. This takes about 45 seconds and makes your steak look (and taste) professional.

Step 9: Rest and Serve

Place the steak on a cutting board. You can serve immediately — sous vide steak doesn’t need a long rest. Slice against the grain and serve hot, with a little flaky sea salt on top.

This sous vide steak guide shows you just how easy it is to master steak at home, from prep to perfect sear. Now you’re ready to impress every time.

Finishing a Sous Vide Steak on the Stovetop

Searing is where your steak truly comes alive — adding a golden crust, deeper flavor, and irresistible aroma. This sous vide steak guide explains how to finish your steak on the stovetop like a pro.

Why sear after sous vide?

Sous vide cooks steak perfectly on the inside but leaves the outside pale and soft. This sous vide steak guide shows you how a quick, high-heat sear creates that classic steakhouse look and taste without overcooking the center.

Preheat your skillet

Turn on your kitchen vent and open a window — it’s about to get smoky. Place a heavy cast-iron or stainless-steel skillet on your hottest burner. Add a tablespoon of high-smoke-point oil (like canola or vegetable). Wait until the skillet is shimmering and just starting to smoke.

Sear quickly for maximum crust

Lay your steak in the skillet with tongs, pressing it down gently. Sear for 15–30 seconds on the first side, then flip and repeat on the other side. Flip every 15–30 seconds until a deep brown crust forms, usually 1–2 minutes total.

This sous vide steak guide recommends adding a knob of butter and a sprig of rosemary during the final flip for added richness and aroma. Tilt the pan and spoon the hot butter over the steak for extra flavor.

Don’t forget the edges

Use your tongs to hold the steak upright on its edges, rolling it along the skillet until all sides are seared. This adds even more texture and makes your steak presentation-worthy.

This sous vide steak guide proves you don’t need a fancy setup to create steakhouse magic — just a hot skillet and the right technique. Searing is the final step in transforming your perfectly cooked steak into a masterpiece.

Finishing a Sous Vide Steak on the Grill

If you love a smoky flavor and gorgeous grill marks, this sous vide steak guide has you covered. Finishing your sous vide steak on the grill combines precision cooking with the irresistible taste of open flames.

Why finish on the grill?

While the stovetop is convenient, the grill adds a unique, charred flavor and an outdoor cooking vibe. This sous vide steak guide suggests the grill for cookouts, summer meals, or anytime you want that authentic barbecue feel.

Set up for high heat

Your goal is intense, direct heat to sear the outside without overcooking the center. This sous vide steak guide recommends lighting a full chimney of charcoal and spreading the coals over one half of the grill. Let the grill preheat for 5–10 minutes until the grates are hot and clean. On a gas grill, set one side to the highest heat and allow it to preheat fully. Oil the grates with tongs and a paper towel for a non-stick surface.

Sear and rotate

Place your steak directly over the hottest part of the grill. Sear each side for about 30 seconds, flipping and rotating every 15–30 seconds to build even grill marks and prevent flare-ups. If the flames rise too high, move the steak briefly to the cooler side until they die down.

Serve immediately

Once you’ve achieved a deep brown crust with nice grill marks, remove the steak from the grill and serve immediately. This sous vide steak guide reminds you there’s no need to rest — sous vide locks in the juices already.

By finishing your steak on the grill, you get the best of both worlds: the precision of sous vide with the flavor of fire. This sous vide steak guide ensures your steak always turns out beautifully, no matter where you cook it.

Frequently Asked Questions

These are the most common questions readers ask about cooking steak with sous vide. This sous vide steak guide answers them all so you can feel confident every step of the way.

How long do I have to sous vide a steak?

Technically, you only need to cook long enough for the steak to heat through evenly — usually 1–2 hours. But this sous vide steak guide explains that holding it a little longer (up to 3–4 hours) won’t hurt and can even improve tenderness on some cuts.

What is the downside of sous vide?

The biggest downside this sous vide steak guide notes is that sous vide takes longer than traditional methods. You also need to sear afterward to get a crust, and if you cook too long, the texture can become mushy. It also requires some equipment, like a sous vide machine and bags.

Why is my steak tough after sous vide?

If your steak turns out tough, this sous vide steak guide suggests checking your temperature — cooking above 140°F can dry it out. You might also be using a very lean or tough cut without adjusting time properly. Always finish with a sear for the best texture.

Is sous vide safe?

Absolutely. Cooking steak with sous vide at temperatures above 130°F is safe and kills harmful bacteria. This sous vide steak guide follows all food safety guidelines so you can cook worry-free.

Can you sous vide frozen steak?

Yes! One of the perks of this sous vide steak guide is that you can cook steak straight from frozen. Just add 30–60 minutes to the recommended cook time to account for thawing.

Do you have to sear after sous vide?

Technically no, but this sous vide steak guide strongly encourages it. Searing creates the caramelized crust and rich flavor that make steak irresistible. Without it, the outside of your steak will look pale and feel soft.

Conclusion

With this sous vide steak guide, you now have everything you need to make steak night stress-free and delicious. From picking the perfect cut to setting the right temperature and finishing with a gorgeous crust, every step is covered to help you feel confident in the kitchen. Whether you prefer stovetop searing or smoky grill marks, this guide ensures your steak is juicy, tender, and perfectly cooked every time.

Let’s StayFit — together.For More follow us on facebook & pinterest

How to Make Berry Cheesecake Overnight Oats (Fast & Healthy!)

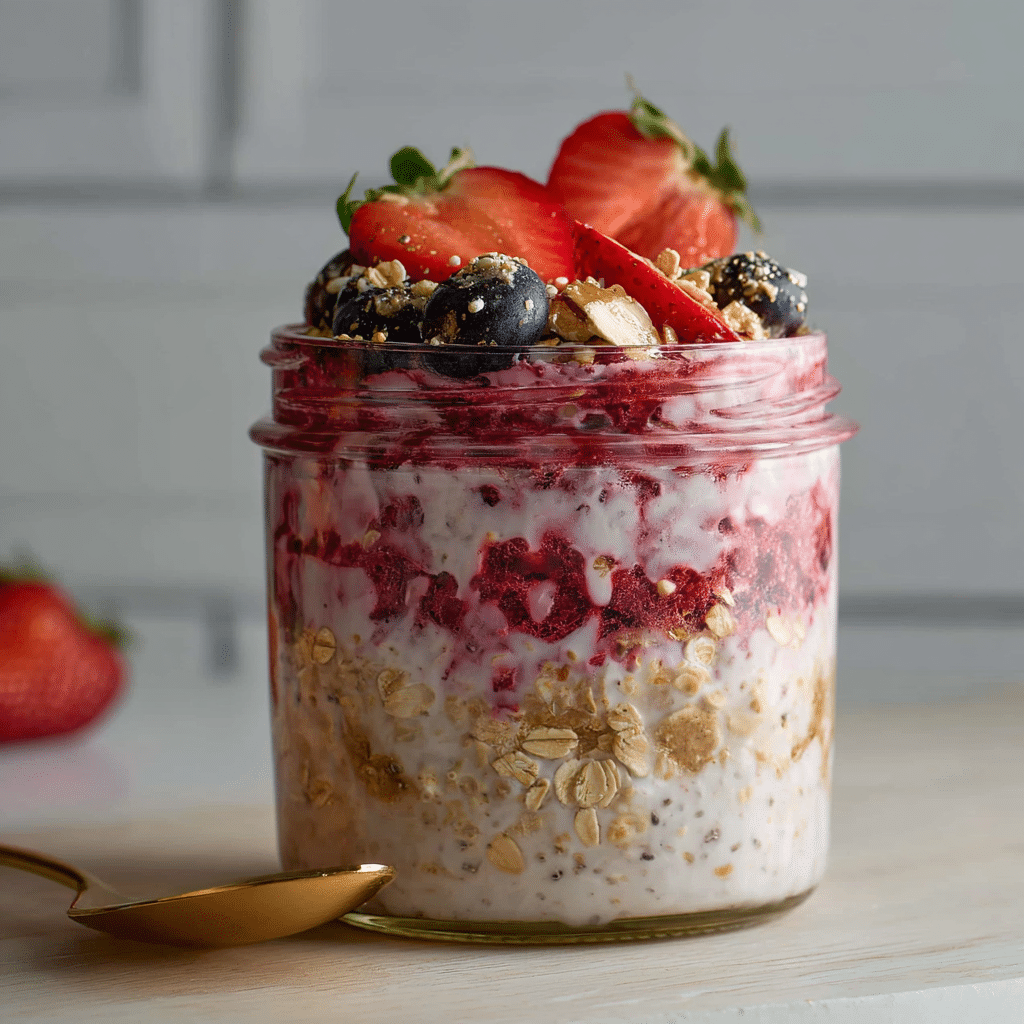
berry cheesecake overnight oats ready to eat with spoon and toppings
berry cheesecake overnight oats in jar with spoon and berries
Berry cheesecake overnight oats served in a jar with crushed graham topping and fresh berries

Berry cheesecake overnight oats are one of the easiest ways to stay on track at night. When we started our 100-day fitness challenge, the evenings were the hardest. We were tired, hungry, and always looking for something sweet. These oats changed that. They’re creamy, tasty, and keep you full — without making you feel guilty.

We used to grab chips or sugary snacks before bed. Now we reach for a jar of berry cheesecake overnight oats. Each one is filled with oats, Greek yogurt, a drizzle of honey, and crushed graham crackers. It tastes like dessert, but it’s packed with protein and fiber. The oats and chia seeds help keep you full, and the berries give a nice sweet touch without any added sugar.

Some nights, we pair it with Chocolate Baked Oat Cups if we need something a little extra. Or we enjoy it with Healthy Banana Bread after a long workout. It’s a snack that feels good and works with your goals.

What Makes the Cheesecake Layer So Good
The best part of berry cheesecake overnight oats is the top layer. It’s made with Greek yogurt, protein powder, and honey. Spread it over the oats like frosting, and it tastes just like cheesecake. It’s rich and creamy without being too heavy. Plus, it adds a big boost of protein.

We use strawberries, blueberries, or raspberries depending on what we have. Frozen berries work great too. They melt overnight and mix right into the oats for extra flavor.

Now we prep these oats every week. They’re simple, tasty, and a smart way to beat late-night cravings. If you want real food that fits your plan, berry cheesecake overnight oats are it.

Benefits of Berry Cheesecake Overnight Oats

Are Overnight Oats Actually Healthy?
Yes — especially when you make them the StayFit way. Berry cheesecake overnight oats give you the perfect mix of protein, fiber, and slow-digesting carbs. Oats are full of heart-healthy fiber that helps with digestion and keeps blood sugar stable. When you add chia seeds and Greek yogurt, you also get healthy fats and protein to stay full longer.

This snack supports your goals, whether you’re trying to lose fat, build muscle, or just avoid junk food at night. Compared to sugary desserts, it’s a smart swap that actually satisfies your cravings. It’s also made with whole ingredients — no mystery stuff, no crash later.

Many of our readers say it helped them stop mindless snacking. We’ve heard similar feedback on Protein Bagels, which work great earlier in the day. But when it comes to late-night hunger, these oats are hard to beat.

The Power of Protein, Berries & Whole Grains
Let’s break it down. Each serving of berry cheesecake overnight oats gives you:

  • Oats: slow carbs to keep you full and steady
  • Chia seeds: a little crunch, plus omega-3s
  • Greek yogurt: thick, creamy, and high in protein
  • Protein powder: extra fuel to help you recover and stay satisfied
  • Berries: loaded with antioxidants and natural sweetness

All of this in one small jar you can eat straight from the fridge.

You can even adjust the recipe depending on your needs. Want more calories? Add a spoonful of peanut butter. Trying to lower sugar? Use plain yogurt and skip the honey. This snack is flexible, and it works with your plan — just like our Zesty Lemon Chicken Orzo works for high-protein dinners.

In short, berry cheesecake overnight oats are more than tasty. They’re good for your body, easy to prep, and perfect when you want something that feels like a treat but fuels your progress.

Key Ingredients & Smart Substitutions

The Best Ingredients for Flavor and Function
What makes berry cheesecake overnight oats so good is the way each layer adds something important — flavor, texture, and nutrition. You only need a few ingredients, but they each serve a purpose.

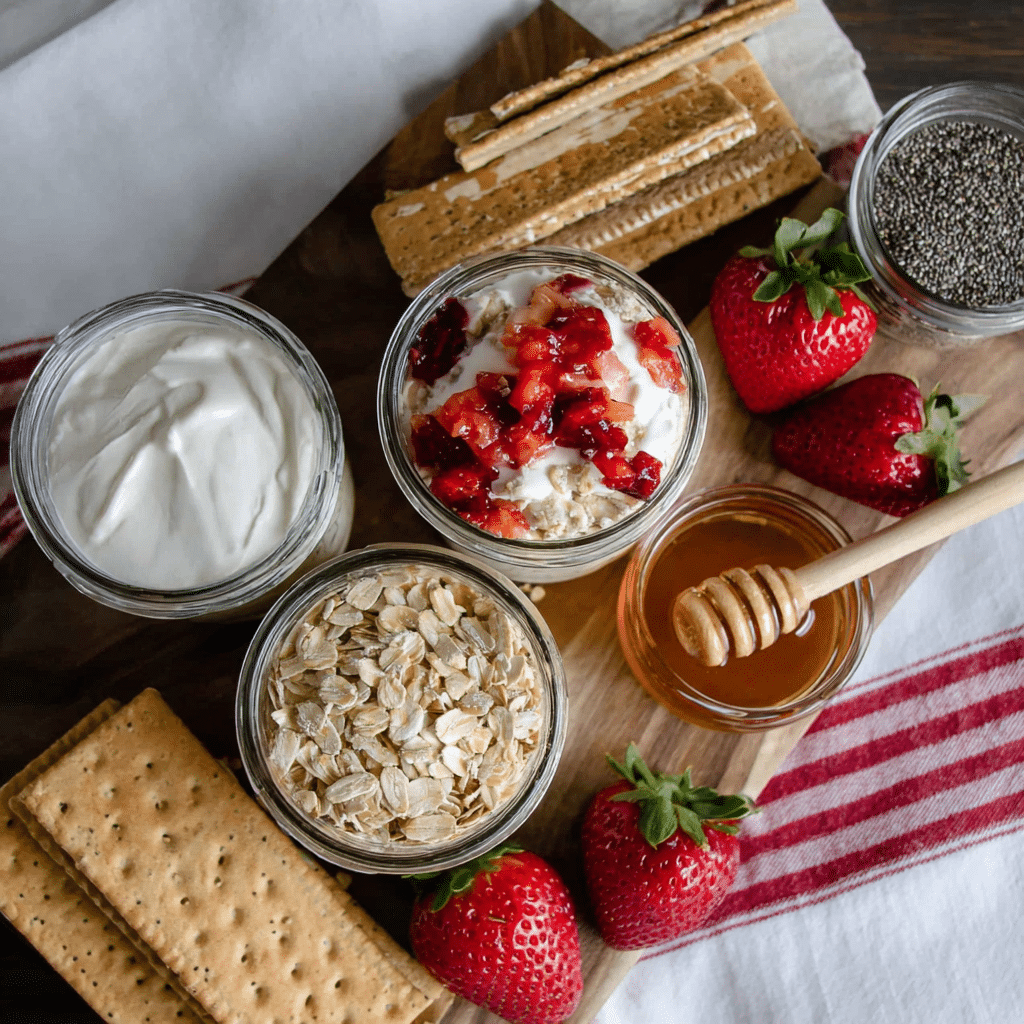
ingredients for berry cheesecake overnight oats laid out on table
Simple ingredients for berry cheesecake overnight oats – oats, Greek yogurt, berries, honey, and chia seeds

Here’s what goes into every jar:

  • Oats – Rolled or quick oats both work. They soak up the liquid overnight and give you that creamy base.
  • Greek yogurt – Thick and tangy, this makes the cheesecake-style topping and adds a solid amount of protein.
  • Chia seeds – These little seeds help hold everything together and give you healthy fats and fiber.
  • Protein powder – Just one scoop adds extra protein and gives the topping a sweet vanilla flavor.
  • Honey – A little honey adds natural sweetness. You can also use maple syrup.
  • Berries – Use fresh or frozen. Berries add color, natural sugar, and antioxidants.
  • Graham crackers – Crushed on top, they bring that true cheesecake feel with a little crunch.

Each ingredient plays its part. The result? A cold, creamy, ready-to-eat snack that feels like dessert but fuels your goals. We love pairing it with Chocolate Strawberry Yogurt Clusters for a sweet and satisfying combo.

Smart Substitutions to Fit Your Goals
One of the best things about berry cheesecake overnight oats is how easy they are to tweak. Whether you’re dairy-free, vegan, gluten-free, or just short on something, you can still make it work.

Here are some easy swaps:

  • No protein powder? Skip it and use vanilla yogurt instead for flavor.
  • No honey? Use maple syrup, agave, or even date syrup.
  • No Greek yogurt? Try plant-based yogurt or Skyr.
  • No chia seeds? Ground flaxseed will do the job.
  • Want it gluten-free? Just use certified gluten-free oats and graham crackers.

You can also change up the fruit. Try peaches in the summer or cherries when they’re in season. Even a mix of frozen berries adds great flavor.

We get asked a lot if these oats still work without dairy or grains. The answer is yes — we’ve seen readers replace ingredients and still love the results. Just like how our Cottage Cheese Ranch Dip can be dairy-free, this snack is just as flexible.

Bottom line: You don’t need to follow the recipe exactly. You just need the basics — oats, something creamy, a sweetener, and berries. Make it your own. That’s what keeps it fun and sustainable.

Mistakes to Avoid with Overnight Oats

What Not to Add in Overnight Oats
Not every ingredient works in overnight oats — especially when you’re making something as creamy and balanced as berry cheesecake overnight oats. Some things can mess with the texture, taste, or even your digestion.

Here’s what we learned to avoid:

  • Too much liquid – Adding too much milk or yogurt will leave your oats runny and hard to enjoy. Stick with just enough to cover the oats and let the chia seeds thicken things up.
  • Crunchy add-ins (too early) – Nuts, seeds, or graham crackers should be added right before eating. Otherwise, they get soggy overnight.
  • Artificial sweeteners – These can leave a weird aftertaste and may cause stomach discomfort. A little honey or maple syrup is a better option.
  • Citrus fruits – Fresh oranges or pineapple can break down the oats too much and make them bitter. Save those for other recipes like our Roasted Sweet Potato Salad.

Making berry cheesecake overnight oats is simple — but keeping it balanced matters. Too many extras can turn your snack into a sugar bomb or make it tough on your stomach.

Why Some Ingredients (Like Berries) Need Timing
Berries are a key part of this recipe, but you have to know when to add them. Frozen berries are perfect to mix in before chilling. They thaw slowly overnight and release a little juice into the oats, giving a natural, sweet flavor.

Fresh berries, though, are better added the next day. Why? Because they hold their shape and texture better that way. If you add fresh strawberries or blueberries too early, they can get mushy or watery.

Another mistake? Skipping the layer order. You want oats and chia seeds at the bottom, yogurt and protein mixed on top, and berries last. That layering keeps the texture perfect and makes every spoonful feel like a real treat.

We’ve had readers ask, “Can you mess up overnight oats?” The truth is: yes, a few small things can throw them off. But once you know what to avoid, it’s easy. Just like How to Fix Your Metabolism starts with simple steps, so does building a better snack.

Berry cheesecake overnight oats should feel indulgent, not disappointing. Get the timing and texture right, and you’ll have a snack that hits every time.

How to Prep Like a Pro

Can You Add Cream Cheese to Overnight Oats?
Yes, you can — but with a few notes. Classic berry cheesecake overnight oats use Greek yogurt for that creamy, tangy layer. It mimics cheesecake without adding a lot of fat or sugar. But if you really want that classic cheesecake taste, adding a little cream cheese is totally fine.

Stick to a small amount — about 1 tablespoon per serving. Make sure it’s softened and blended with the yogurt and honey so it spreads smoothly. It gives that richer flavor, especially if you skip the protein powder. We recommend pairing it with stronger berries like raspberries or blackberries, which balance out the richness.

Still, most people find that Greek yogurt alone gives just the right texture. It’s lighter, high in protein, and makes the prep super easy. That’s why we use it in most of our go-to recipes — like the topping in our Cottage Cheese Ranch Dip, which also gets its creaminess without needing extra cheese.

Meal Prep Tips for Creamy, Fresh Results
When making berry cheesecake overnight oats, the key is layering and portioning. Use jars or containers with lids — anything you can seal and store in the fridge for 3–4 days.

Here’s our go-to prep process:

  1. Start with oats, chia seeds, and just enough milk to cover.
  2. Mix in a scoop of protein powder.
  3. Add a layer of Greek yogurt mixed with honey (and cream cheese if using).
  4. Finish with berries and close the lid.
  5. Add crushed graham crackers right before eating so they stay crunchy.

Want a smoother mix? Blend your oats with milk before layering for a pudding-like texture. Want it sweeter? Add mashed banana instead of honey. This is your snack — build it how you like.

We prep 3–4 jars at once and keep them chilled. They’re perfect for busy nights when cooking feels like too much. If you’re already making Insulin-Control Meals or doing Sunday prep, these oats slide right into your plan.

By prepping ahead, you always have something ready that feels like a treat — but fuels your body right. Berry cheesecake overnight oats aren’t just easy to make. They’re easy to stick with.

FAQs + Pro Tips

Why You Might Feel Bloated After Overnight Oats

Some people feel bloated after eating overnight oats. It’s often because of too much fiber too fast, or because the oats weren’t soaked long enough. In berry cheesecake overnight oats, chia seeds and oats expand overnight, which helps your body digest them better. If you’re still feeling off, try cutting the portion or switching to gluten-free oats.
Also, watch your mix-ins. Adding lots of raw fruit, dairy, and sweeteners all at once can be tough on the stomach. Keep it simple, and adjust based on what your body handles best. Just like with High-Protein Orzo Meals, balance matters.

What Not to Add in Overnight Oats?

Avoid ingredients that mess with the texture or shelf life. Don’t add fresh bananas, crunchy granola, or raw apples overnight — they turn mushy or brown. Don’t add nuts or crushed crackers ahead of time. Save them for right before eating. With berry cheesecake overnight oats, keeping the base clean is the key to a good snack.

Are Overnight Oats Actually Healthy?

Yes, especially when made with real ingredients like oats, Greek yogurt, chia seeds, and berries. This combo gives you fiber, protein, and antioxidants. Unlike sugary snacks, berry cheesecake overnight oats keep you full and steady without a crash. They’re a much smarter choice than store-bought treats or late-night processed foods.

Can You Add Cream Cheese to Overnight Oats?

You can, and it tastes great if you’re aiming for a true cheesecake flavor. Blend a tablespoon of cream cheese into your yogurt layer. It makes the topping extra rich and smooth. Just be careful with the portion — a little goes a long way. We still prefer Greek yogurt alone for ease and balance.

Why Not Add Berries to Overnight Oats?

You can add frozen berries right away — they thaw overnight and release flavor into the oats. But avoid adding fresh ones too early. They get mushy or soggy. For the best texture, add fresh berries right before serving. That keeps berry cheesecake overnight oats tasting fresh and sweet.

What Is the Healthiest Thing to Add to Overnight Oats?

It depends on your goals. Chia seeds are great for healthy fats and fiber. Greek yogurt boosts protein. Berries add antioxidants and natural sweetness. If you want more staying power, try a spoonful of nut butter. The best part about berry cheesecake overnight oats is that you can build them to match your needs — whether it’s fat loss, muscle gain, or just clean fuel.

Print
clock clock iconcutlery cutlery iconflag flag iconfolder folder iconinstagram instagram iconpinterest pinterest iconfacebook facebook iconprint print iconsquares squares iconheart heart iconheart solid heart solid icon
berry cheesecake overnight oats ready to eat with spoon and toppings

Berry cheesecake overnight oats


5 Stars 4 Stars 3 Stars 2 Stars 1 Star

No reviews

  • Author: Chef Dodos
  • Total Time: 6 hours
  • Yield: 1 serving 1x

Description

Berry cheesecake overnight oats are the ultimate high-protein late-night snack. Sweet, creamy, and easy to prep!


Ingredients

Scale

1/2 cup rolled oats

1/2 cup unsweetened almond milk

1 tbsp chia seeds

1/2 scoop vanilla protein powder

1/2 cup Greek yogurt

1 tbsp honey

1/3 cup mixed berries (fresh or frozen)

1 crushed graham cracker (optional)


Instructions

1. In a jar or container, mix oats, chia seeds, almond milk, and protein powder.

2. Let sit for 5 minutes to slightly thicken.

3. In a bowl, mix Greek yogurt and honey until smooth. (Add 1 tbsp cream cheese if desired.)

4. Layer the yogurt mixture over the oat base.

5. Top with berries and cover.

6. Refrigerate overnight (at least 4–6 hours).

7. Before eating, add crushed graham crackers if desired.

Notes

Use frozen berries for juicy flavor overnight.

Swap Greek yogurt for plant-based yogurt for a dairy-free version.

Use gluten-free oats and crackers to make it gluten-free.

  • Prep Time: 5 minutes
  • Cook Time: 0 minutes
  • Category: Snack
  • Method: No-Cook
  • Cuisine: American

Nutrition

  • Serving Size: 1 jar
  • Calories: 320
  • Sugar: 10g
  • Sodium: 150mg
  • Fat: 8g
  • Saturated Fat: 2g
  • Unsaturated Fat: 5g
  • Trans Fat: 0g
  • Carbohydrates: 35g
  • Fiber: 7g
  • Protein: 22g
  • Cholesterol: 10mg

Conclusion

Berry cheesecake overnight oats are more than just a healthy snack — they’re a smart, crave-worthy way to satisfy those late-night cravings while still supporting your goals. With simple ingredients like oats, Greek yogurt, chia seeds, and berries, you get real food that fuels your body without added junk.

This snack became a game-changer during our 100-day fitness challenge. It gave us a way to enjoy something sweet without breaking progress. And the best part? It’s easy to prep, super flexible, and always ready when you need it.

Whether you’re looking to fuel recovery, cut out sugar, or stay consistent with your eating, berry cheesecake overnight oats deliver. Try them tonight — and let them work for you tomorrow.

Let’s StayFit — together. Follow us on facebbok for more

How to Make Healthy Banana Bread That Actually Tastes Good

Healthy banana bread loaf on white kitchen counter
Table of Contents

Why We Swapped Our Banana Bread (and Never Looked Back)

Banana bread used to be our guilty pleasure — like, really guilty. Back when Kiko and I (Med) made our “100 days, no excuses” pact, traditional banana bread was one of the first things to go. But guess what? It came back — stronger, better, and healthy. We just had to flip how we thought about ingredients. Now, our healthy banana bread recipe is on repeat in our kitchen. Moist, sweet, satisfying, and totally in line with our goals.

Let’s be real — most banana bread recipes sneak in loads of refined sugar, white flour, and butter. That stuff might taste good, but it left us feeling bloated and foggy. So, we started experimenting. What if we could get that same comforting flavor and texture… without the crash?

Healthy banana bread loaf on white kitchen counter
reshly baked healthy banana bread — golden and guilt-free.

Turns out, we could. The secret was keeping the essence — those overripe bananas with their natural sweetness — and rebuilding everything else. We swapped white flour for fiber-rich whole wheat. Ditched refined sugar in favor of real stuff like honey and mashed banana. And oils? Only the kind that fuels, not fogs.

We also leaned into the idea that food should work for us, not against us. That’s why we added a dash of protein-rich Greek yogurt and a sprinkle of flax for extra fiber. No compromises, just better balance.

If you’ve ever made a batch of banana bread and felt that sugar hangover an hour later — we’ve been there. But trust me, this recipe is different. It’s indulgent and energizing. And honestly, you’ll never miss the old version once you’ve tried this one.

Looking for other smart breakfast swaps? Our Chocolate Baked Oat Cups hit the same warm, satisfying notes. Pair them with our Cottage Cheese Ranch Dip for a savory snack that’ll keep your goals on track.

Choosing the Right Ingredients for Healthy Banana Bread

When we first started cleaning up our meals, baking was one of the toughest categories to crack — especially banana bread. We wanted that classic flavor and cozy texture, but without the blood sugar rollercoaster. Enter our two go-to flours: oat flour and almond flour. Together, they make this loaf moist, fluffy, and packed with nutrients — no white flour, no gluten, no regrets.

Why Oat and Almond Flour Are a Power Combo

Oat flour gives you that comforting, cake-like structure while adding a boost of soluble fiber — perfect for steady energy and better digestion. Almond flour brings healthy fats, vitamin E, and a hint of natural sweetness. The result? A rich, moist banana bread that doesn’t need oil or butter to stay soft.

We like to use:

  • 1 cup oat flour
  • ½ cup almond flour

This ratio balances structure and tenderness. Too much almond flour can make it crumbly, and too much oat flour can make it gummy — but together, they nail the texture.

Plus, both are naturally gluten-free (just double-check your oats if you’re celiac-sensitive).

Want even more protein? Add a scoop of vanilla protein powder and subtract a bit of flour to keep the ratio balanced.

Here’s a quick guide:

                                                                                       
Flour TypeHealth Benefit
Whole Wheat Pastry FlourHigh in fiber, light texture, nutrient-rich
Oat FlourGluten-free, rich in beta-glucan, great flavor
Almond FlourLow-carb, high in healthy fats and vitamin E

The Best Natural Substitutes for Sugar

The beauty of overripe bananas? They’re naturally sweet. So you’re already halfway there. But if you want to enhance that sweetness without using processed sugar, here’s what we recommend:

  • Mashed medjool dates: High in fiber and potassium.
  • Honey or maple syrup: Natural, flavorful, and easy to mix.
  • Unsweetened applesauce: Great for moisture and subtle sweetness.

One of our favorite tricks? Combine mashed bananas with just a tablespoon of honey. It’s all you need. No spike, no crash — just pure, steady energy.

For another great example of using high-protein, real-food ingredients in baking, check out our Cottage Cheese Pancakes. They’re fluffy, flavorful, and full of fuel — just like this banana bread.

Mastering the Method: Mistakes to Avoid & Tips That Work

You’ve got the right ingredients — now let’s make sure you don’t mess them up. We’ve baked dozens (okay, maybe hundreds) of loaves during our transformation, and one thing became clear: technique matters. One wrong move can turn your dreamy banana bread into a dry brick. But don’t worry — we’ve got your back.

What’s the Number One Mistake When Making Banana Bread?

Hands down: overmixing the batter. It’s easy to do — you’re excited, you want that smooth texture — but here’s the thing: overmixing activates gluten (even in oat flour). That means your banana bread goes from light and tender to dense and gummy. Not what you want.

So here’s our simple rule:
Mix your dry ingredients in one bowl, your wet ingredients in another. Then combine them gently. Fold until just mixed — no electric mixer needed.

You’re not trying to whip air into a soufflé. You’re just marrying banana with flour. Keep it chill.

Another pitfall? Using bananas that aren’t ripe enough. They should be brown-spotted and super soft — borderline “mash-with-a-fork” ripe. That’s where all the natural sugar and moisture comes from.

Pro Tips for Texture, Moisture & Flavor

Let’s level up your loaf. These small adjustments make a huge difference:

  • Use room-temperature eggs: Cold eggs don’t mix evenly and can cause curdling in your batter.
  • Don’t skip the salt: Just 1/4 teaspoon boosts every other flavor.
  • Add Greek yogurt or cottage cheese: For moisture + protein (a tip we also use in our Grilled Chicken Bites — juicy every time).
  • Line your loaf pan with parchment paper for easy removal. No more stuck corners.
  • Don’t guess doneness: Use the toothpick test! Insert into the center — it should come out clean or with just a few moist crumbs.

You can even get playful with mix-ins — walnuts for crunch, dark chocolate chips for flair, or chia seeds for extra fiber. Just don’t overload the batter.

The Full Healthy Banana Bread Recipe (Gluten-Free, No Refined Sugar)

Ready to bake? Here’s the complete recipe for our go-to healthy banana bread using oat flour and almond flour. It’s moist, naturally sweetened, gluten-free, and absolutely perfect for breakfast, snacks, or even dessert.


Ingredients:

Real, clean ingredients that make this loaf a smart swap.
  • 3 very ripe bananas, mashed (about 1 ¼ cups)
  • 2 large eggs (room temperature)
  • ¼ cup maple syrup or 2 mashed medjool dates
  • ⅓ cup plain Greek yogurt (or coconut yogurt for dairy-free)
  • 1 tsp vanilla extract
  • 1 cup oat flour
  • ½ cup almond flour
  • 1 tsp baking soda
  • ½ tsp baking powder
  • ½ tsp cinnamon
  • ¼ tsp salt
  • Optional:
      • ¼ cup dark chocolate chips
      • ¼ cup chopped walnuts

Instructions:

  1. Preheat your oven to 350°F (175°C). Line a 9×5-inch loaf pan with parchment paper or lightly grease it.
  2. In a large bowl, mash the bananas until smooth.
  3. Add in the eggs, maple syrup, Greek yogurt, and vanilla. Whisk together until well combined.
  4. In another bowl, whisk together the oat flour, almond flour, baking soda, baking powder, cinnamon, and salt.
  5. Gently fold the dry ingredients into the wet banana mixture. Do not overmix — stir just until no flour streaks remain.
  6. Fold in optional mix-ins like chocolate chips or walnuts, if using.
  7. Pour the batter into the loaf pan and smooth the top with a spatula.
  8. Bake for 45 to 50 minutes, or until a toothpick inserted into the center comes out clean or with just a few moist crumbs.
  9. Cool in the pan for 10 minutes, then transfer to a wire rack to cool fully before slicing.

Storage:

  • Room Temperature: Store in an airtight container for 2–3 days.
  • Fridge: Stays fresh for up to 5 days.
  • Freezer: Slice, wrap, and freeze for up to 2 months. Reheat or thaw as needed.

How to Make It Your Own (While Staying Fit)

Here’s the fun part — once you’ve nailed the base recipe, you can totally customize it. Whether you’re switching up flavors or batch prepping for the week, this healthy banana bread is flexible enough to match your lifestyle without sacrificing your goals.

Fun Variations & Swaps Without Losing Health Benefits

Just because we made it healthier doesn’t mean it has to be boring. We love playing with flavor profiles and boosting nutrition with creative twists:

healthy-banana-bread-slice.jpg
  • Blueberry Burst: Fold in ½ cup fresh or frozen blueberries.
  • Walnut Crunch: Add ¼ cup chopped walnuts for texture and heart-healthy fats.
  • Chocolate Chip Glow-Up: Use dark chocolate chips (70%+) to keep it antioxidant-rich.
  • Cinnamon Swirl: Mix 1 tsp cinnamon into the batter or swirl with a spoon of almond butter and maple syrup for a marbled effect.

Need it gluten-free? Oat or almond flour work great. Going dairy-free? Use coconut oil and a flax egg (1 tbsp ground flax + 3 tbsp water, let sit 5 min). Want extra protein? Toss in a scoop of your favorite vanilla protein powder — just reduce flour slightly.

The goal is simple: keep the integrity of the ingredients while letting your preferences shine.

We do this same thing with savory meals too — our Mediterranean Ground Beef Skillet shows how swapping spices or greens can completely change the vibe of a dish while keeping the macros strong.

Serving, Storing, and Meal-Prepping for the Week

Banana bread makes an awesome breakfast, snack, or even a pre-workout bite. Here’s how to keep it fresh and functional:

  • Short-term storage: Wrap tightly and store at room temp for 2–3 days.
  • Fridge: Lasts up to 5 days in an airtight container.
  • Freezer: Slice first, then wrap each piece individually. Freeze up to 2 months. Reheat in a toaster or microwave — or just let it thaw naturally.

Pro tip: Make two loaves on Sunday. Eat one this week, freeze the other for later. It’s one of our favorite “no stress” moves — like prepping a batch of our Muhammara Dip to have flavor-packed snacks ready all week.

You can even pack a slice with almond butter and a boiled egg for an on-the-go mini meal that feels like a treat, not a sacrifice.

We’ve got your back.

Let’s StayFit—together.For More follow us on facebook & pinterest

Healthy Banana Bread FAQs

Is there a healthy version of banana bread?

Yes — and this is it! Our version skips refined sugar and white flour in favor of oat flour, almond flour, and natural sweeteners like bananas and maple syrup. It’s nutrient-rich, gluten-free, and still delivers all the flavor and texture you crave.

What is the healthiest flour for banana bread?

Oat flour and almond flour are two of the best. Oat flour is high in fiber and helps stabilize blood sugar, while almond flour is rich in healthy fats and vitamin E. Together, they create a moist, satisfying loaf with a soft crumb

What is a healthy substitute for sugar in banana bread?

We use mashed bananas as the primary sweetener, plus a touch of maple syrup or medjool dates. These natural options offer sweetness with nutrients — no crash, no processed junk.

What is the number one mistake when making banana bread?

Overmixing the batter. It’s tempting to stir until smooth, but that leads to dense, gummy bread. Mix your dry and wet ingredients separately, then fold together gently until just combined.

Print
clock clock iconcutlery cutlery iconflag flag iconfolder folder iconinstagram instagram iconpinterest pinterest iconfacebook facebook iconprint print iconsquares squares iconheart heart iconheart solid heart solid icon
Healthy banana bread loaf on white kitchen counter

Healthy Banana Bread Recipe: Easy, Delicious, and Guilt-Free


5 Stars 4 Stars 3 Stars 2 Stars 1 Star

No reviews

  • Author: Chef Dodos
  • Total Time: 1 hour
  • Yield: 1 loaf (10 slices) 1x

Description

This healthy banana bread is made with oat flour and almond flour, naturally sweetened with bananas and maple syrup. It’s moist, gluten-free, and perfect for breakfast or snacks.


Ingredients

Scale

3 ripe bananas, mashed

2 large eggs (room temperature)

1/4 cup maple syrup or 2 mashed medjool dates

1/3 cup plain Greek yogurt (or coconut yogurt)

1 tsp vanilla extract

1 cup oat flour

1/2 cup almond flour

1 tsp baking soda

1/2 tsp baking powder

1/2 tsp cinnamon

1/4 tsp salt

Optional: 1/4 cup dark chocolate chips or chopped walnuts


Instructions

1. Preheat oven to 350°F (175°C). Line or grease a 9×5-inch loaf pan.

2. Mash bananas in a large bowl. Whisk in eggs, maple syrup, yogurt, and vanilla.

3. In another bowl, combine oat flour, almond flour, baking soda, baking powder, cinnamon, and salt.

4. Gently fold dry ingredients into the wet mixture until just combined.

5. Stir in optional mix-ins if using.

6. Pour batter into the loaf pan and smooth the top.

7. Bake for 45–50 minutes, or until a toothpick comes out clean.

8. Cool in the pan for 10 minutes, then transfer to a wire rack to cool completely.

Notes

Wrap slices individually to freeze up to 2 months.

Use flax eggs and coconut yogurt for a dairy-free, vegan version.

Great for breakfast, snacks, or as a pre-workout meal.

  • Prep Time: 10 minutes
  • Cook Time: 50 minutes
  • Category: Breakfast
  • Method: Baking
  • Cuisine: American

Nutrition

  • Serving Size: 1 slice
  • Calories: 145
  • Sugar: 8g
  • Sodium: 190mg
  • Fat: 5g
  • Saturated Fat: 1g
  • Unsaturated Fat: 3.5g
  • Trans Fat: 0g
  • Carbohydrates: 21g
  • Fiber: 3g
  • Protein: 4g
  • Cholesterol: 35mg

Conclusion

Healthy doesn’t have to mean bland — and this banana bread proves it. With the perfect combo of oat and almond flour, zero refined sugar, and just the right texture, this recipe is one you’ll keep in your regular rotation.

We’ve used it as a pre-workout snack, a grab-and-go breakfast, and a cozy weekend treat — and it fits every phase of our StayFit journey.

Give it a try, tag us when you bake it, and check out more feel-good recipes over on our Chocolate Baked Oat Cups or Muhammara Dip. You don’t have to give up flavor to show up for yourself.

How To Make Chocolate Baked Oat Cups That Taste Like Dessert

Chocolate baked oat cup served with strawberries
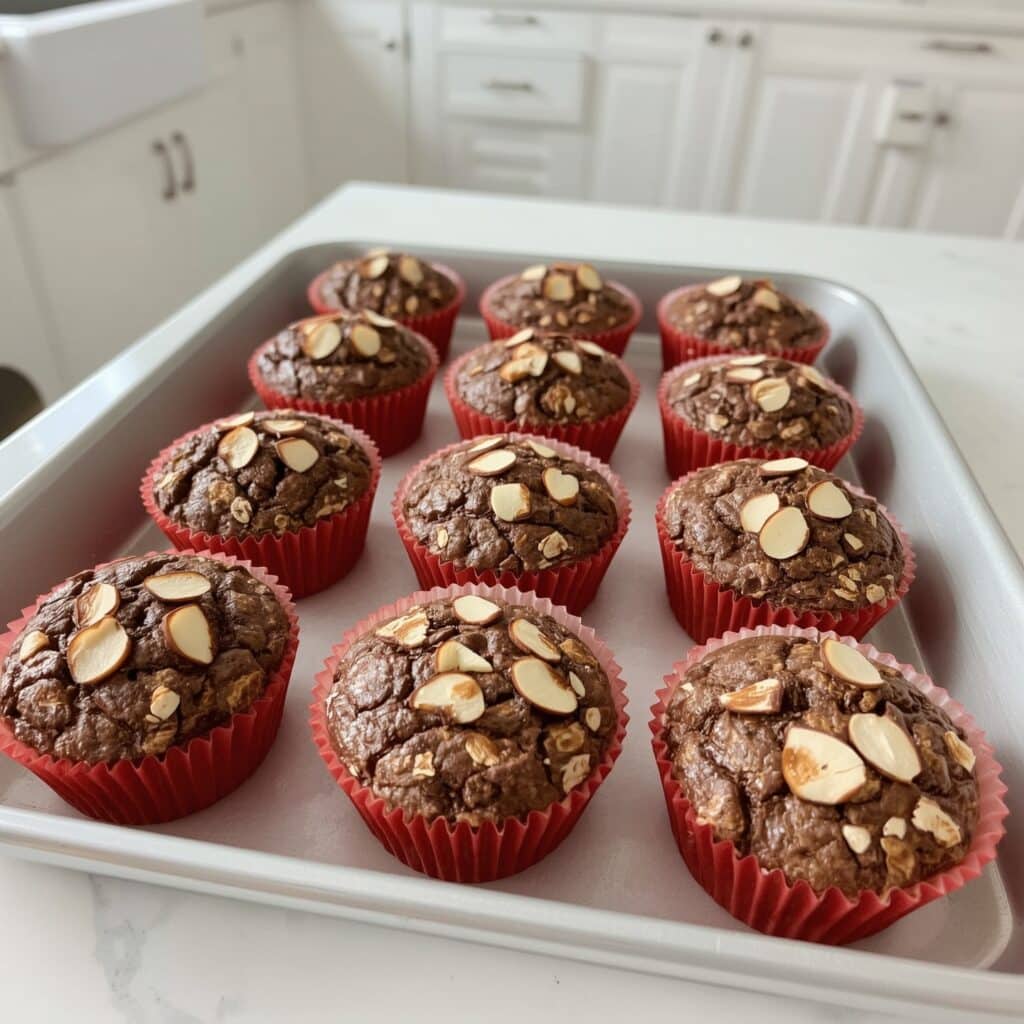
Freshly baked chocolate oat cups in a red silicone muffin tray
Chocolate baked oat cups cooling in a silicone muffin tray—easy, mess-free, and ready to serve.
Table of content

Ever had one of those mornings where you wanted something sweet and chocolatey—but didn’t want to sabotage your goals? We get it. That was us during our first 100-day challenge. Med was craving dessert for breakfast (again), and Kiko had just finished a workout, tired of egg whites. So, we grabbed oats, mashed a banana, added cocoa powder and a little maple syrup—and boom: the chocolate baked oat cup was born.

Soft, rich, and just sweet enough to satisfy, these little cups quickly became a game-changer in our meal prep. Think brownie meets breakfast—with real ingredients and zero regrets. You bake once and have portable snacks for days. No more reaching for processed bars or skipping meals.

And the best part? They’re easy to mix, easy to bake, and even easier to customize. Whether you’re chasing fat loss, need more protein, or just want to enjoy food that fuels your energy—you’re going to love these.

We actually like to pair them with a protein-rich side like these Quick & Easy Cottage Cheese Pancakes or sip on a refreshing Pickle Lemonade Mocktail post-gym for that electrolyte boost.

What You’ll Need for the Base

No complicated blends or expensive powders—just real food. Here’s your basic lineup:

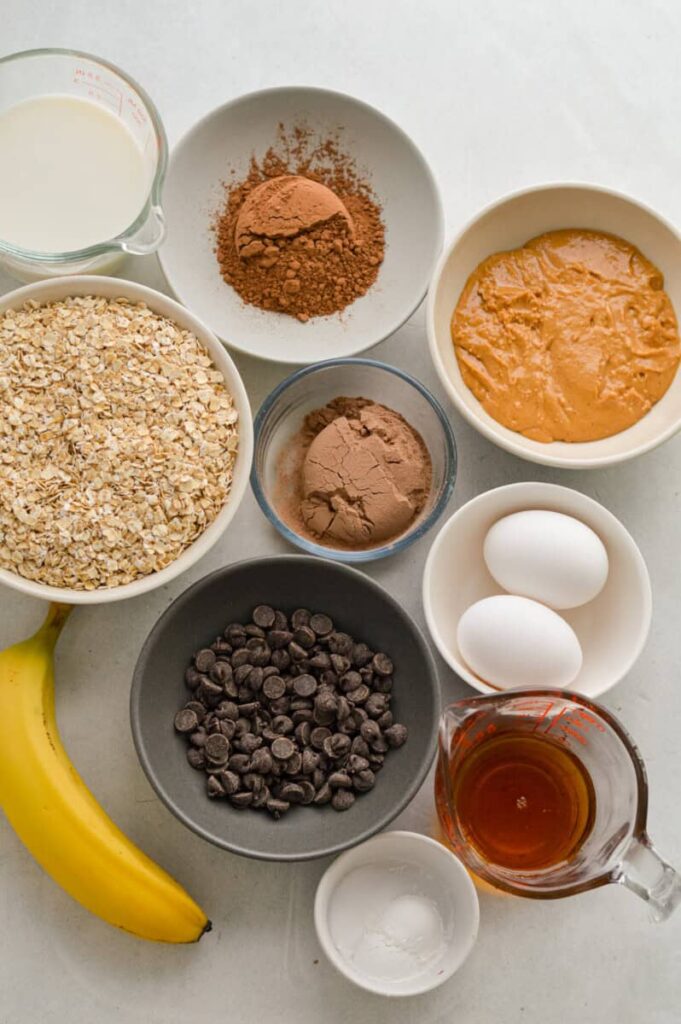
ngredients for chocolate baked oat cups including oats, cocoa, banana, eggs, and chocolate chips
All you need to make healthy chocolate baked oat cups—simple, clean ingredients.
                                                                                                                                                                       
IngredientPurpose
Rolled OatsComplex carbs, fiber
BananaNatural sweetness & moisture
Cocoa PowderRich chocolate flavor
EggBinder & protein
Maple SyrupOptional sweetener
Almond MilkSmooth texture
Baking Powder & VanillaLift and flavor

Feel free to get creative. Toss in chopped walnuts, unsweetened shredded coconut, or even a handful of dark chocolate chips if you’re feelin’ fancy.

To support your goals, check out how these tie into our Insulin Control & Fat Loss tips and try pairing them with dips like our Cottage Cheese Ranch Dip for a satisfying snack combo.

Why Chocolate Baked Oat Cups Are Great for Weight Loss

Real Ingredients That Help You Stay Full

Chocolate baked oat cups aren’t just tasty—they’re smart for weight loss too. Each one is made with real food like oats, banana, cocoa powder, and eggs. They give you energy, help you feel full, and don’t spike your blood sugar. That’s key when you’re trying to eat better and stay on track.

We started eating chocolate baked oat cups during our first 100-day challenge. They became a go-to snack and breakfast fast. Why? Because they taste like a brownie but give your body what it actually needs. And since they’re already portioned, there’s no guessing or overeating.

Want to change them up for your goals? Try one of these easy swaps:

                                                                                       
Your GoalSwap Idea
Cut SugarSkip the syrup and use a ripe banana
Add ProteinMix in a scoop of protein powder
Lower FatUse egg whites instead of whole eggs

Easy Portion Control

Chocolate baked oat cups are already sized just right. No scale. No math. Just grab one when you need a clean, healthy snack.

We like pairing them with Grilled Chicken Bites or Zesty Lemon Chicken Orzo for balanced, protein-rich meals.

How to Customize Chocolate Baked Oat Cups

Easy Banana Substitutes That Still Taste Great

Don’t like bananas? No problem. You can still make chocolate baked oat cups without them. Bananas help with sweetness and texture, but they’re not the only option.

You can use unsweetened applesauce, pumpkin puree, or even mashed sweet potato. Each of these swaps keeps the oat cups moist and adds natural flavor. If you go this route, just taste your batter and add a little maple syrup if it needs more sweetness.

For every banana you skip, use about ½ cup of your chosen swap. We’ve made chocolate baked oat cups with applesauce before a tough leg day, and honestly—they were still delicious.

→ Want to try other flexible recipes? Check out our Turkish Pasta Recipe and Teriyaki Chicken—both super easy to adjust with pantry staples.

Rolled Oats vs. Steel-Cut: What Works Best?

When making chocolate baked oat cups, the kind of oats you use matters. Rolled oats (also called old-fashioned oats) are best. They hold their shape and get soft while baking, giving you that perfect chewy texture.

Steel-cut oats don’t work well in this recipe. They take too long to cook and stay hard. If that’s all you have, cook them first or skip them for now. Quick oats are okay in a pinch, but the texture will be softer and less hearty.

We like sticking with rolled oats for that classic feel—like a muffin and a brownie had a healthy baby.

→ Want more texture-based meals? Try our Cottage Cheese Pancakes and Mediterranean Ground Beef Skillet—both packed with feel-good crunch.

How to Store and Prep Chocolate Baked Oat Cups

How Long Do Chocolate Baked Oat Cups Last?

Chocolate baked oat cup served with strawberries
Enjoy your chocolate oat cup with Greek yogurt and berries for a balanced breakfast.

One of the best parts about chocolate baked oat cups is how well they hold up during the week. Once baked, let them cool completely. Then store them in an airtight container in the fridge. They’ll stay fresh for up to 5 days—perfect for quick breakfasts or post-workout snacks.

Need them to last longer? Freeze them! These cups freeze great. Just wrap them individually or place them in a freezer-safe container. When you’re ready to eat, microwave for 30 to 45 seconds. They come out warm, soft, and ready to go.

Chocolate baked oat cups make busy mornings simple. No mess. No excuses.

→ Planning freezer meals? You’ll love our [Healthy Freezer-Friendly Snacks – Coming Soon] and [StayFit Meal Prep System – Coming Soon].

How to Meal Prep a Week’s Worth Fast

You don’t need hours in the kitchen to meal prep. Making a full batch of chocolate baked oat cups takes about 30 minutes total.

Start by mixing your dry ingredients (oats, cocoa powder, baking powder). In another bowl, mash your bananas (or swap) and stir in eggs, milk, vanilla, and syrup. Combine wet and dry, then spoon the mix into muffin cups.

Bake at 350°F for 22–25 minutes. Done.

Want extra protein? Add a scoop of protein powder. Want more fiber? Toss in chia seeds. Want variety? Use mini chocolate chips in half the batch and blueberries in the other. You’re the chef.

→ Need more batch-friendly recipes? Don’t miss our [StayFit Budget Meals – Coming Soon] and [High-Protein Prep List – Coming Soon].

Chocolate baked oat cups make it easy to stay on track—even when life gets busy. Just grab,heat, and go.

FAQs About Chocolate Baked Oat Cups

Can I make chocolate baked oat cups without bananas?

Yes, you can! If you’re not into bananas or don’t have any on hand, no worries. You can use unsweetened applesauce, pumpkin puree, or mashed sweet potato instead. Use about ½ cup for each banana you’re replacing. Just make sure to taste your batter—you may want to add a little maple syrup or honey to balance the sweetness.

Are chocolate baked oat cups good for weight loss?

They sure are. Chocolate baked oat cups are made with real ingredients, no refined sugar, and they’re already portioned. That means no overeating and no guessing. They’re high in fiber, which helps you stay full longer, and easy to fit into a balanced meal plan. Just stick with healthy mix-ins like dark chocolate or chopped nuts.

How long do chocolate baked oat cups last in the fridge?

When stored in an airtight container, chocolate baked oat cups stay fresh in the fridge for up to 5 days. You can also freeze them for up to 3 months. Just microwave for about 30–45 seconds straight from the freezer. They’re perfect for busy mornings, meal prep, or an after-dinner treat.

4. Can I use steel-cut oats instead of rolled oats?

We don’t recommend it. Steel-cut oats take longer to cook and won’t soften the same way. Your oat cups will come out undercooked and too chewy. For best results, stick to rolled oats (also called old-fashioned oats). Quick oats are okay if that’s what you have, but the texture will be softer.

Wrap-Up: Your Go-To Chocolate Baked Oat Cups

Chocolate baked oat cups are that rare combo of healthy, easy, and crave-worthy. They’re made with simple ingredients, they store well, and they check all the boxes—meal prep, portion control, and real flavor.

Whether you’re eating them for breakfast, snacking post-workout, or curbing a late-night sweet tooth, these cups just work. No fancy tools, no long prep. Just mix, bake, and go.

And remember: real change comes from small habits done consistently. Keeping better food on hand is one of those habits. These cups helped us stay on track, and we’re pretty sure they’ll help you too.

Try the banana-free version. Freeze a batch. Make them your own.

We’ve got your back.

— Let’s StayFit—together.For More follow us on facebook & pinterest

Print
clock clock iconcutlery cutlery iconflag flag iconfolder folder iconinstagram instagram iconpinterest pinterest iconfacebook facebook iconprint print iconsquares squares iconheart heart iconheart solid heart solid icon
Chocolate baked oat cup served with strawberries

How To Make Chocolate Baked Oat Cups That Taste Like Dessert


5 Stars 4 Stars 3 Stars 2 Stars 1 Star

No reviews

  • Author: Chef Dodos
  • Total Time: 35 minutes
  • Yield: 12 oat cups 1x
  • Diet: Gluten Free

Description

These chocolate baked oat cups are soft, healthy, and perfect for meal prep. They’re naturally sweetened, freezer-friendly, and made with real ingredients like oats, banana, cocoa powder, and eggs.


Ingredients

Scale

2 cups rolled oats

2 ripe bananas, mashed

1/3 cup unsweetened cocoa powder

2 large eggs

1/2 cup almond milk

1/4 cup maple syrup (optional)

1 tsp vanilla extract

1 tsp baking powder

1/4 tsp salt

1/4 cup dark chocolate chips (optional)


Instructions

1. Preheat oven to 350°F (175°C) and grease or line a 12-cup muffin tin.

2. In a bowl, mash the bananas and mix in eggs, almond milk, maple syrup, and vanilla extract.

3. In another bowl, combine rolled oats, cocoa powder, baking powder, and salt.

4. Stir dry ingredients into wet mixture until well combined. Fold in chocolate chips if using.

5. Spoon batter evenly into muffin cups, filling each about 3/4 full.

6. Bake for 22–25 minutes or until set and slightly firm on top.

7. Cool for 5 minutes, then remove and let cool completely on a wire rack.

Notes

Swap banana with 1/2 cup unsweetened applesauce or pumpkin puree.

Store in an airtight container in the fridge for up to 5 days or freeze for 3 months.

Microwave frozen oat cups for 30–45 seconds before serving.

  • Prep Time: 10 minutes
  • Cook Time: 25 minutes
  • Category: Breakfast, Snack, Meal Prep
  • Method: Baking
  • Cuisine: American

Nutrition

  • Serving Size: 1 oat cup
  • Calories: 130
  • Sugar: 5g
  • Sodium: 90mg
  • Fat: 4g
  • Saturated Fat: 1g
  • Unsaturated Fat: 2g
  • Trans Fat: 0g
  • Carbohydrates: 20g
  • Fiber: 3g
  • Protein: 4g
  • Cholesterol: 35mg

Quick & Easy Cottage Cheese Pancakes for a Happy Morning

Cottage cheese pancakes served with bananas and almond butter
A high-protein breakfast that keeps you full

Cottage cheese pancakes were one of the first healthy recipes that helped us turn our lives around. Back then, one of us felt tired and out of shape, and the other carried extra weight and wanted to feel stronger. We knew we had to make a change—and it had to start with better food.

These pancakes gave us energy, kept us full, and actually tasted great. They were easy to make and fit right into our new lifestyle. Now they’re a regular part of our mornings, and we’re excited to share them with you too.

Table of Contents

How This Pancake Became Part of Our Transformation

Cottage cheese pancakes were a total game-changer for us. Back when we first started our fitness journey, our mornings looked very different. I (Kiko) was lifting weights but couldn’t shake off stubborn fat. Med was underweight and had no energy all day. We both felt stuck. That’s when we realized—if we wanted real change, it had to start in the kitchen.

One weekend, we found a basic cottage cheese pancake recipe online. It sounded weird at first, but we were willing to try anything to feel better. We made them using just eggs, oats, and cottage cheese. The result? Light, fluffy pancakes with a creamy texture and a boost of protein that kept us full for hours. No sugar crash. No hunger an hour later.

They were so good, we made them again the next day. And the next. That’s how cottage cheese pancakes became a regular part of our mornings. Over time, we added fun toppings like fresh berries or a spoonful of cottage cheese ranch dip for a savory twist. They gave us fuel to power through workouts and helped us finally see the results we’d been working for.

Why Cottage Cheese Pancakes Work So Well

Cottage cheese might sound like a strange pancake ingredient, but trust us—it works. It melts into the batter, making the pancakes soft inside and golden on the outside. Plus, it adds a solid punch of protein without needing protein powder. That’s why we always recommend this recipe to anyone trying to lose fat, gain muscle, or just eat healthier without giving up real food.

They’ve earned a top spot in our g

o-to breakfast lineup, right alongside grilled chicken bites and zesty lemon chicken orzo. It’s just one more way to stay fit—without getting bored.

How to Make the Best Cottage Cheese Pancakes (Step-by-Step Tips)

Simple Ingredients That Keep You Full

Making cottage cheese pancakes is easier than you think. You only need a few ingredients — all clean, natural, and packed with protein. Here’s what we use:

  • 1 cup cottage cheese (full-fat or low-fat both work)
  • 2 eggs
  • ½ cup oats (quick oats or rolled oats)
  • Pinch of salt
  • Dash of cinnamon or vanilla (optional for flavor)

That’s it. No flour, no sugar, no baking soda. Just real ingredients that mix together fast and cook even faster. These pancakes are perfect for busy mornings or weekend meal prep.

We blend everything in a blender until smooth. Then we let the batter rest for 3–5 minutes while we heat a non-stick pan. Spoon it out into small pancakes, cook each side for about 2–3 minutes, and flip carefully. They should be golden and firm on the edges, with a soft, moist center.

Pro Tips for Fluffy, Golden Pancakes

The key to great cottage cheese pancakes is in the balance: not too runny, not too thick. If your batter feels too thick, add a splash of milk. Too thin? Add a few more oats. A good non-stick pan makes all the difference, too — you want that perfect crisp edge without burning.

Cooking cottage cheese pancakes on a pan
Cook pancakes on medium heat until golden

Use medium heat — not high — to avoid burning before the center cooks through. We often batch-cook 6–8 pancakes and store extras in the fridge. They reheat well in a toaster oven or skillet and still taste great the next day.

Looking for topping ideas? Go sweet with banana slices, almond butter, or berries.

Why Cottage Cheese Pancakes Are Better Than Regular Ones

What Cottage Cheese Does in Pancakes

Cottage cheese pancakes aren’t just a healthy twist—they’re an upgrade. So, what does cottage cheese actually do in pancakes? First, it changes the texture. Cottage cheese melts into the batter as it cooks, giving these pancakes a soft, fluffy inside with golden, crispy edges. That rich texture is hard to beat.

Second, cottage cheese pancakes are packed with protein. Just one serving delivers 18 to 20 grams of high-quality protein, which helps keep you full and supports your muscle goals. That’s why these pancakes became one of our go-to meals when we started our fitness journey.

Ingredients for cottage cheese
Cottage cheese

Unlike regular pancakes, cottage cheese pancakes won’t leave you crashing mid-morning. The protein keeps your blood sugar steady and hunger low, which we also cover in our insulin control fat loss guide. These pancakes became a secret weapon in our routine—not just tasty, but truly effective.

Why Cottage Cheese Pancakes Win on Nutrition

Let’s look at the numbers. Here’s what you’re getting in a typical serving of cottage cheese pancakes (3 medium pancakes):

Nutrient Amount
Calories 250–280
Protein 18–20g
Carbs 18–22g
Fat 9–11g

Cottage cheese pancakes give you a perfect mix of macros. They’re high in protein, moderate in carbs, and balanced in healthy fat. And they taste amazing too.

Looking for more meals like this? Try our teriyaki chicken bowls or turkish pasta recipe—easy, satisfying, and always StayFit-approved.

Cottage Cheese Pancake Mistakes (And How to Fix Them)

Why Your Cottage Cheese Pancakes Aren’t Fluffy

If your cottage cheese pancakes are turning out flat, don’t worry—it’s a common issue, and it’s easy to fix. First, the biggest mistake we see is not blending the batter well. If your oats and cottage cheese aren’t fully mixed, the pancakes won’t hold together or rise properly. Use a blender to get a smooth, airy texture.

Second, check your heat. Cooking on high heat might seem faster, but it often leads to burnt outsides and undercooked insides. Use medium heat and give your pancakes time to rise and firm up. Letting the batter rest for 3–5 minutes before cooking also helps air bubbles form, which gives your cottage cheese pancakes more lift.

Also, don’t overcrowd the pan. Give each pancake space so it can cook evenly and stay fluffy.

Can You Swap Cottage Cheese for Milk in Pancakes?

You might be wondering, can I use cottage cheese instead of milk in pancakes? Yes—if you’re following a high-protein or low-carb recipe like this one, cottage cheese works as both the liquid and protein source. But keep in mind: cottage cheese is thicker and richer than milk, so it changes the texture.

If you’re trying to convert a traditional pancake recipe, just swapping milk for cottage cheese won’t work perfectly. You’ll likely need to adjust your oats or flour to match the thicker texture. But in a recipe made for it—like our cottage cheese pancakes—it works perfectly.

And that’s why this recipe became one of our favorites. It’s designed to keep things balanced: fewer ingredients, better texture, and more protein. It fits easily into any clean eating plan, just like our muhammara recipe or protein-packed sweet potato salad.

FAQ About Cottage Cheese Pancakes

What does cottage cheese do to pancakes?

Cottage cheese adds moisture, richness, and protein. It melts into the batter while cooking, giving pancakes a creamy texture and golden, crispy edges. It also boosts the protein content to help you stay full longer.

Why aren’t my cottage cheese pancakes fluffy?

They might not be blended well enough, or your pan might be too hot. Always blend your batter until smooth and cook on medium heat. Letting the batter rest a few minutes before cooking can also help them fluff up.

Can I substitute cottage cheese for milk in pancakes?

Yes, in the right recipe. Cottage cheese works as both a liquid and protein source, but it’s thicker than milk. If you’re not using a recipe built around cottage cheese, you may need to adjust the other ingredients.

What is Queen Elizabeth’s pancake recipe?

Her famous drop scones recipe included eggs, milk, flour, and cream—but not cottage cheese. While hers were more traditional, our cottage cheese pancakes are a modern, high-protein twist for fitness-focused food lovers.

Print
clock clock iconcutlery cutlery iconflag flag iconfolder folder iconinstagram instagram iconpinterest pinterest iconfacebook facebook iconprint print iconsquares squares iconheart heart iconheart solid heart solid icon
Cottage cheese pancakes served with bananas and almond butter

Quick & Easy Cottage Cheese Pancakes for a Happy Morning


5 Stars 4 Stars 3 Stars 2 Stars 1 Star

No reviews

  • Author: Chef Dodos
  • Total Time: 11 mins
  • Yield: 2 servings 1x

Description

These cottage cheese pancakes are fluffy, protein-packed, and perfect for a quick and healthy breakfast. Great for fat loss or muscle gain.


Ingredients

Scale

1 cup cottage cheese

2 eggs

½ cup oats

Pinch of salt

1 tsp vanilla or cinnamon (optional)


Instructions

1. Blend all ingredients until smooth.

2. Let the batter rest for 3–5 minutes.

3. Heat a non-stick pan on medium.

4. Spoon batter into small pancakes.

5. Cook 2–3 minutes per side until golden.

Notes

Use full-fat or low-fat cottage cheese.

Add berries or almond butter as toppings.

Refrigerates well for 2–3 days.

  • Prep Time: 5 mins
  • Cook Time: 6 mins
  • Category: Breakfast
  • Method: Stovetop
  • Cuisine: American

Nutrition

  • Serving Size: 3 pancakes
  • Calories: 270
  • Sugar: 3g
  • Sodium: 390mg
  • Fat: 10g
  • Saturated Fat: 3g
  • Unsaturated Fat: 6g
  • Trans Fat: 0g
  • Carbohydrates: 20g
  • Fiber: 2g
  • Protein: 19g
  • Cholesterol: 130mg

Conclusion: Real Pancakes, Real Results

Cottage cheese pancakes helped us feel stronger, leaner, and more in control of our health. They’re simple to make, packed with nutrients, and don’t sacrifice flavor. If you’re ready to fuel your mornings the StayFit way, this recipe is a great place to start.

Remember, this isn’t about perfection—it’s about consistency. Cottage cheese pancakes became one of our “no excuse” meals, and we hope they become one of yours too. Whether you’re chasing energy, gains, or just a better way to eat, we’ve got your back—one pancake at a time.

Let’s StayFit — together. Follow us on Facebook for more daily recipes
Muhammara Recipe: How to Make It Healthy Red Pepper Dip

muhammara recipe served with fresh veggies and pita

We first made this muhammara recipe when we found out Kiko had anemia. At the time, we were just starting to take our health seriously — reading labels, tracking nutrients, and trying to figure out how food could actually heal us. We needed something rich in iron, vitamin C, and healthy fats… but we also needed it to taste amazing. Enter: muhammara.

This roasted red pepper and walnut dip isn’t just delicious — it’s powerful. The ingredients are naturally packed with the nutrients Kiko needed to bounce back, and honestly, it became one of our go-to recipes during those first few months of real change. We were both tired of bland “health food.” Muhammara was one of the first things that proved we didn’t have to choose between feeling good and eating well.

That moment — discovering that flavorful food could be fuel — was huge for us. It helped spark the idea for StayFit Recipes. Because we believe real change doesn’t start with extreme diets or strict rules. It starts with real food that actually supports your goals.

So if you’re looking for something that’s as nourishing as it is craveable, this muhammara recipe is it. Let’s get started.

Table of Contents

What Is Muhammara? The Story Behind the Dip

We’ll never forget the first time we made this muhammara recipe. We were in the middle of trying to support Kiko’s recovery from anemia — reading everything we could about iron-rich foods and ways to boost energy naturally. That’s when we discovered this vibrant red dip with Middle Eastern roots. Smoky, tangy, creamy, and slightly sweet — one batch and we were obsessed.

This muhammara recipe is based on a traditional Syrian dish made from roasted red peppers, walnuts, breadcrumbs, olive oil, garlic, and pomegranate molasses. The name comes from ahmar — Arabic for “red” — and it’s a perfect description of its bold color and even bolder flavor.

For us, this wasn’t just a dip. It was a turning point. We were done with flavorless “health food” and tired of feeling like clean eating meant bland eating. But this muhammara recipe flipped that belief on its head. It delivered deep, satisfying taste — and it happened to be packed with real, nutrient-dense ingredients our bodies actually needed.

Since then, this muhammara recipe has become a total staple in our home. We spread it on toast, serve it with grilled meats, and even mix it into grain bowls. It’s a game-changer when paired with our Grilled Chicken Bites or next to our Turkish Pasta Recipe for a full-on Mediterranean night.

If you’re looking for a healthy, flavorful snack that’s anything but boring, this muhammara recipe is where to start. It’s proof that eating well doesn’t mean giving up the foods you love — it means discovering better ones.

Simple Ingredients, Stunning Flavor

So what makes this muhammara recipe so craveable? It’s all about the balance — sweet, smoky, tangy, and rich in every spoonful. And the best part? The ingredients are simple, wholesome, and easy to find. You might even have most of them in your pantry already.

Here’s what you’ll need for a classic muhammara recipe:

ingredients for muhammara recipe on a white counter
Simple, clean ingredients — every item in this bowl serves a purpose.
  • Roasted red peppers – You can use jarred or roast your own for deeper flavor.
  • Walnuts – Adds creaminess, crunch, and healthy fats.
  • Breadcrumbs – Thickens the dip and gives it body.
  • Garlic & cumin – For warmth and bold flavor.
  • Pomegranate molasses – That signature tangy-sweet kick.
  • Olive oil & lemon juice – Brings it all together.

You can customize this muhammara recipe depending on your needs. Want it gluten-free? Use almond flour or gluten-free breadcrumbs. Watching calories? Cut back slightly on the oil without losing flavor. Craving heat? Add a pinch of Aleppo pepper or chili flakes.

Why Homemade Is Always Better

Yes, you can buy muhammara at the store. But making it yourself? Way better. Store-bought versions are often loaded with excess oil, sodium, or preservatives — and honestly, they just don’t match the fresh, bright flavor of homemade.

When you make your own muhammara recipe, you’re in full control. You decide how spicy, how smooth, how tart it gets. You know exactly what’s going into your body — no mystery ingredients, no bloating surprises.

It’s also incredibly meal-prep friendly. Pair it with our Roasted Sweet Potato Salad for a powerhouse plant-based lunch, or swirl it into your next Healthy Marry Me Chicken Soup for an unexpected flavor twist.

This muhammara recipe proves that clean eating doesn’t mean boring eating. It’s simple. It’s stunning. And yes — it’s totally snack-worthy.

Is Muhammara Healthy for Weight Loss? Absolutely.

Let’s be real: when we first discovered this muhammara recipe, we weren’t just looking for flavor — we were hunting for fuel. With Kiko recovering from anemia and both of us trying to lose fat without losing our minds, we needed recipes that could satisfy cravings and support our goals. Muhammara did both.

Nutrient-Dense & Naturally Filling

This muhammara recipe isn’t just a tasty dip. It’s packed with ingredients that nourish your body and help manage hunger:

  • Walnuts are rich in omega-3s and protein — ideal for curbing cravings and supporting brain function.
  • Red peppers bring in antioxidants and a dose of vitamin C, which helps with iron absorption (especially helpful for anemia).
  • Olive oil provides healthy fats that keep you feeling full, not sluggish.
  • Garlic, cumin, and lemon juice add flavor without adding calories.

Each serving of this muhammara recipe delivers satisfying texture, clean ingredients, and enough flavor to keep you coming back — without the crash you’d get from ultra-processed snacks.

Smart Snacking for Real Results

Portion control is key when you’re eating calorie-dense foods like walnuts and olive oil. But that’s what makes muhammara such a powerful tool: just 2–3 tablespoons go a long way. Pair it with crunchy veggies, use it as a spread on a protein wrap, or enjoy it with a boiled egg for a smart, post-workout snack.

Want to go deeper on fat-burning foods? Check out our full post on insulin control and weight loss — it’s the science behind the strategy we use. Or create a full high-protein meal by serving this dip with our Zesty Lemon Chicken Orzo.

blending muhammara dip in a food processor
Blend until smooth — the real magic happens right here.

Bottom line? This muhammara recipe isn’t just diet-friendly — it’s lifestyle-approved. And that’s why we keep it on repeat.

Creative Ways to Enjoy Muhammara

Once we made our first batch of this muhammara recipe, it didn’t just sit in the fridge waiting for the next snack attack — it became part of our weekly rhythm. Because once you taste it, you realize: this dip doesn’t belong in just one category. It’s a spread. A sauce. A game-changer.

What to Pair With Muhammara

This muhammara recipe is incredibly versatile. Here are just a few of our favorite ways to enjoy it:

  • As a dip for raw veggies, baked pita chips, or whole grain crackers.
  • Spread on toast or wraps — layer it with grilled chicken, cucumber, or avocado.
  • Swirled into grain bowls with quinoa, lentils, and greens.
  • As a topping for grilled meats or roasted veggies. It’s fantastic on salmon or cauliflower steaks.
  • Even as a pizza base — skip the red sauce and try muhammara with goat cheese and arugula. Trust us.

Planning a fusion dinner? Serve it alongside our Teriyaki Chicken or Grilled Chicken Bites to add unexpected flavor depth.

Make-Ahead Tips & Storage

This muhammara recipe holds up beautifully in the fridge for up to 5 days. In fact, the flavors deepen over time — making it perfect for meal prep. Store it in an airtight glass container and give it a quick stir before serving.

Want to freeze it? You can! Just portion into small containers or silicone molds, freeze, and thaw overnight in the fridge. We like freezing it in 2-tablespoon cubes for quick snacks or spread-ready portions.

Flavor hack: before serving, stir in a dash of smoked paprika or chili flakes if you like extra heat — or drizzle with a little pomegranate molasses to amplify the tang.

From breakfast toast to party platters, this muhammara recipe adapts to your life. It’s easy, exciting, and just plain fun to eat. And once it’s in your rotation, you’ll wonder how you ever went without it.

Print
clock clock iconcutlery cutlery iconflag flag iconfolder folder iconinstagram instagram iconpinterest pinterest iconfacebook facebook iconprint print iconsquares squares iconheart heart iconheart solid heart solid icon
muhammara recipe served with fresh veggies and pita

Muhammara Recipe: How to Make It Healthy Red Pepper Dip


5 Stars 4 Stars 3 Stars 2 Stars 1 Star

No reviews

  • Author: Chef Dodos
  • Total Time: 30 minutes
  • Yield: 8 serving 1x

Description

This authentic muhammara recipe is a bold, smoky, and satisfying Middle Eastern dip made with roasted red peppers, walnuts, olive oil, and pomegranate molasses. It’s naturally dairy-free, full of healthy fats, and packed with flavor — perfect as a dip, spread, or sauce. Whether you’re fueling your fitness journey or just want a clean snack that actually excites you, this muhammara is a game-changer. Ready in 30 minutes, meal-prep friendly, and 100% craveable.


Ingredients

Scale


  • 2 large roasted red bell peppers (or 1 cup jarred, drained)


  • ¾ cup raw walnuts


  • ½ cup plain breadcrumbs (or gluten-free substitute)


  • 1 clove garlic


  • 2 tablespoons pomegranate molasses


  • 2 tablespoons extra virgin olive oil


  • 1 tablespoon lemon juice


  • ½ teaspoon ground cumin


  • ¼ teaspoon smoked paprika (optional)


  • Salt to taste


  • Pinch of chili flakes (optional)


Instructions

  • Roast the peppers (if using fresh): Place over an open flame or under the broiler, turning until charred on all sides. Let cool, peel, and remove seeds.

  • Blend: Add roasted red peppers, walnuts, breadcrumbs, garlic, pomegranate molasses, lemon juice, olive oil, cumin, and paprika to a food processor.

  • Pulse until smooth, scraping down the sides as needed. Adjust salt and lemon juice to taste.Serve: Transfer to a bowl. Drizzle with olive oil or sprinkle chili flakes on top. Enjoy with veggies, crackers, or grilled chicken!

Notes

Make it spicier with Aleppo pepper or more paprika.

Store in an airtight container in the fridge for up to 5 days.

Great for meal prep: freezes well in small portions.

  • Prep Time: 10 minutes
  • Cook Time: 20 minutes
  • Category: Snack, Dip, Appetizer
  • Cuisine: Middle Eastern, Mediterranean

Nutrition

  • Calories: 140
  • Fat: 12g
  • Carbohydrates: 7g
  • Fiber: 2g
  • Protein: 3g

Conclusion: Real Food, Real Results — One Dip at a Time

This muhammara recipe isn’t just another healthy snack. For us, it was one of those early wins — a reminder that food can heal, fuel, and excite you all at once. It helped Kiko bounce back from anemia, fueled our workouts, and turned clean eating into something we genuinely looked forward to.

We’ve learned that staying fit doesn’t mean being strict. It means being strategic. Finding those go-to recipes that hit the sweet spot between flavor, function, and fun. Muhammara does that — and then some.

So if you’re ready to level up your snack game, support your health, and fall in love with real food again, start here. Start with this muhammara recipe. And trust us — it won’t be your last batch.

Let’s StayFit — together.

For more recipes follow me in Facebook and Instagram

FAQs About Muhammara

What is muhammara made of?

A classic muhammara recipe includes roasted red peppers, walnuts, breadcrumbs, olive oil, garlic, lemon juice, cumin, and pomegranate molasses. Some versions may include chili or Aleppo pepper for added heat.

What is the difference between muhammara and romesco?

While both are red pepper–based dips, muhammara comes from the Middle East and features walnuts and pomegranate molasses, giving it a slightly sweet and tangy flavor. Romesco is Spanish, made with almonds, tomatoes, and vinegar, and has a more savory, nutty profile.

Is muhammara healthy for weight loss?

Yes! This muhammara recipe is full of fiber, healthy fats, and anti-inflammatory ingredients. It’s satisfying, nutrient-dense, and easy to portion — making it a smart snack for fat loss and energy balance.

What to pair with muhammara?

Use it as a dip for veggies, a sandwich spread, a sauce over protein, or a base for grain bowls. This muhammara recipe also works beautifully with grilled meats, roasted veggies, or whole grain crackers.