Sous Vide Chicken Breast: Perfect Juicy Results Every Time

Sous vide chicken breast recipe step-by-step
Table of Contents
 Sous vide chicken breast recipe step-by-step
Perfect sous vide chicken breast made at home

When we traveled to Italy last summer, we stopped at a little restaurant tucked away on a quiet street. Scanning the menu, I chose the sous vide chicken breast as a healthy option, expecting something simple. But the first bite left me shocked — tender, juicy, and packed with flavor.

I’d always thought sous vide was just for fancy red meat cuts. Curious, I asked the chef about it, and he happily explained how sous vide chicken breast is one of his favorite tricks for perfect results every time.

Since that trip, it’s become a staple in my kitchen. And because good things shouldn’t be kept secret, I’m sharing my method with you today — so you can experience the same unforgettable flavor, anytime. This sous vide chicken breast recipe is beginner-friendly and easy to adapt for different marinades and serving ideas.

Ingredients and Step-by-Step Instructions for Sous Vide Chicken Breast

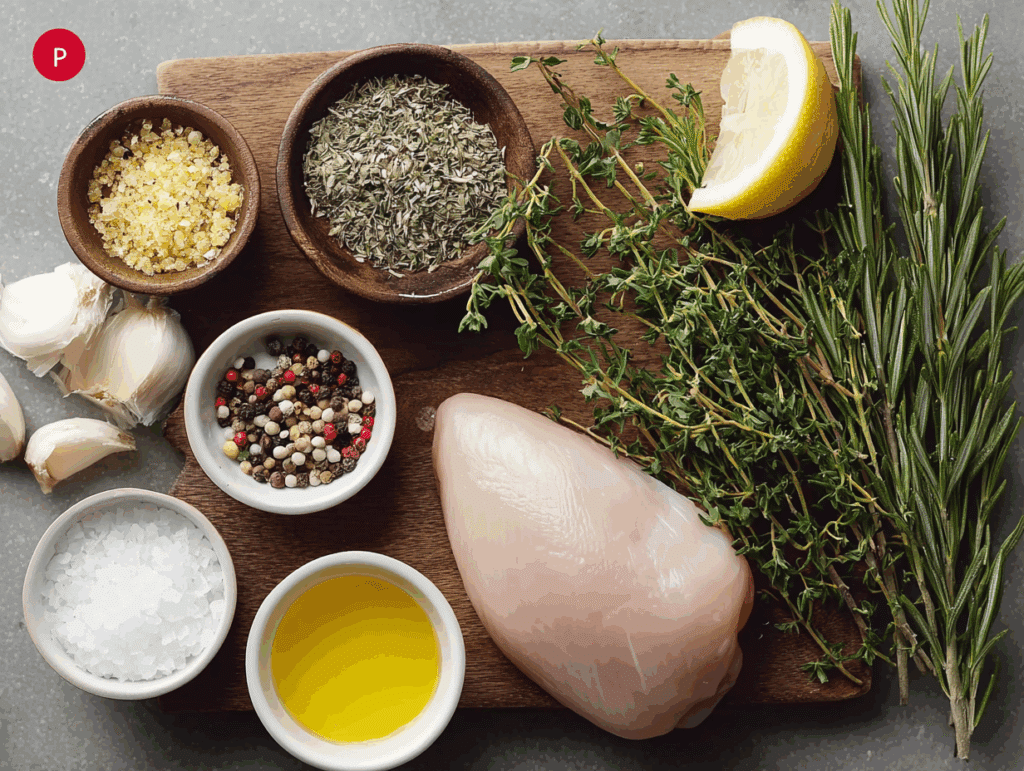
Before you get started, here’s everything you need to make this tender, flavorful sous vide chicken breast with a honey-lime-chili marinade.

Ingredients

  • 2 boneless, skinless chicken breasts
  • 1 tablespoon honey
  • 1 tablespoon chili powder
  • 1 tablespoon lime juice
  • 1 tablespoon olive oil
  • 1 teaspoon molasses
  • 1 teaspoon coriander
  • 1 teaspoon salt
  • ½ teaspoon garlic powder

These simple pantry ingredients pack a ton of flavor.

Step-by-Step Instructions

Marinating chicken breasts for sous vide with honey and spices
Marinate chicken breasts with honey, lime, chili powder, and spices

Sear and serve.
When the chicken is done, remove it from the bag, pat dry with paper towels, and sear in a hot skillet with a little oil for 1–2 minutes per side for a golden crust. Slice and serve hot.

Prepare the marinade.
In a small bowl, whisk together the honey, chili powder, lime juice, olive oil, molasses, coriander, salt, and garlic powder to make a smooth marinade.

Coat the chicken.

Sealing marinated chicken breasts in bag for sous vide
Chicken breasts sealed in a bag and ready for sous vide bath


Place the chicken breasts in a shallow dish or directly into a sous vide bag. Pour the marinade over the chicken and turn to coat evenly. Let sit for 10–15 minutes while you heat the water bath.

Preheat the sous vide.
Fill your container or pot with water and set your sous vide machine to 150°F. Let it come to temperature before adding the chicken.
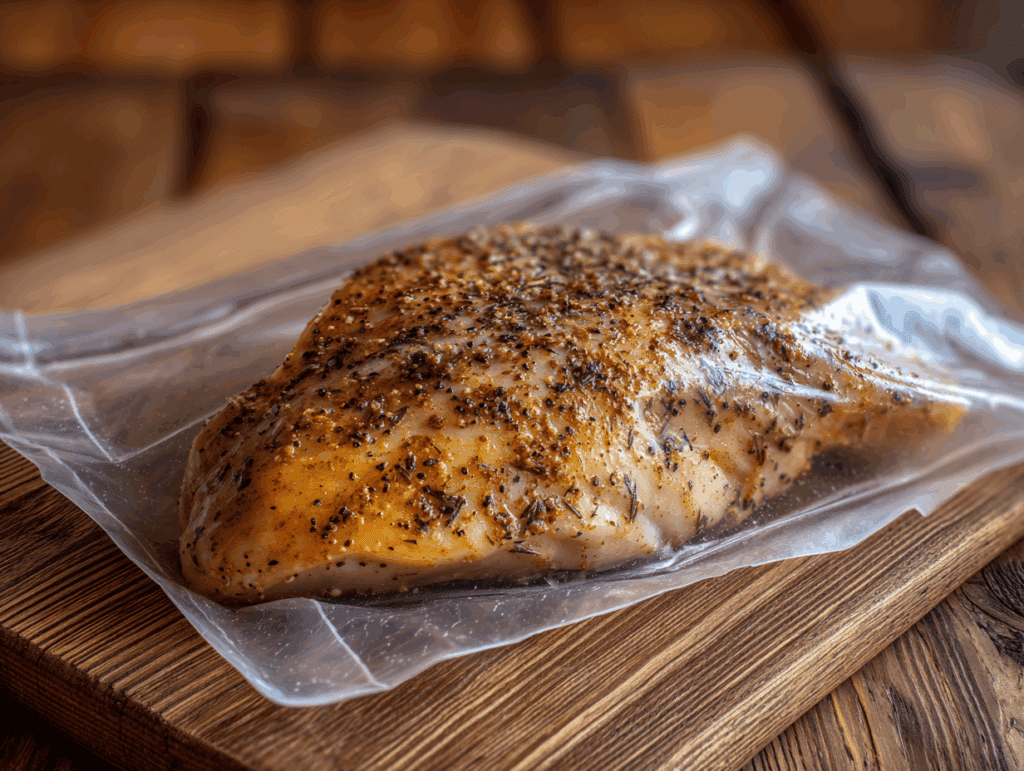
Seal the chicken.
If using a vacuum sealer, seal the bag tightly. If using a zip-top freezer bag, remove as much air as possible with the water displacement method.

Cook in sous vide bath.
Place the sealed chicken in the water bath and cook for 1½–4 hours. Make sure the bag stays fully submerged.

When it comes to sous vide chicken breast, getting the time and temperature right is key. The beauty of this method is how forgiving it is — you can leave the chicken in longer without worrying about it drying out or overcooking.

For most home cooks, 150°F is the sweet spot for sous vide chicken breast. At this temperature, the chicken turns out tender, juicy, and fully cooked while maintaining its natural texture. Some chefs prefer going as low as 145°F for even softer meat, though it may appear a little pink. If you like firmer chicken, 155°F works too, though it can lose a bit of juiciness.

Here’s a simple temperature reference:

Temperature Texture & Notes
145°F Extra tender, slightly pink
150°F Juicy, tender, fully cooked
155°F Firmer, less juicy

No matter which temperature you pick, sous vide keeps the chicken consistent from edge to center. Unlike roasting or grilling, you don’t get dry spots or uneven doneness.

How long should you cook chicken breast in a sous vide?

Can You Sous Vide Frozen Chicken Breast?

Absolutely! One of the great benefits of a sous vide chicken breast recipe is how forgiving it is — even if you start with frozen chicken breast, the results are still juicy and tender. Simply add about 30 extra minutes to your cook time to ensure the chicken reaches the proper internal temperature all the way through. This makes it perfect for busy weeknights or meal prep when you forgot to thaw your chicken in advance.

One of the biggest advantages of sous vide chicken breast is how flexible the cooking time can be. For chicken breasts about 1 inch thick, 1½ hours in the water bath is just right. That gives the meat enough time to reach the target temperature and break down slightly for tenderness.

However, you can leave the chicken in the bath for up to 4 hours if needed — perfect for busy schedules. The steady water temperature ensures it won’t overcook, so you have some freedom.

For thicker breasts (closer to 1½ inches), you may want to add an extra 15–30 minutes just to be sure it cooks through evenly.

Cooking Multiple Chicken Breasts at Once

One of the best things about sous vide chicken breast is how easy it is to scale up. Whether you’re cooking for one or meal prepping for the week, this method delivers the same tender, juicy results every time — even when cooking a big batch. This also applies if you’re starting with frozen chicken breast — just remember to extend the cooking time slightly so every piece reaches a safe temperature.

How many chicken breasts can you sous vide at once?

You can cook as many chicken breasts as will comfortably fit in your water bath, as long as you don’t overcrowd the bag or block water circulation. Most standard sous vide setups can handle at least 4–6 boneless breasts at a time. Arrange them in a single layer inside your bag to ensure even cooking. If you’re cooking a larger batch, use multiple bags and make sure they aren’t stacked on top of each other.

The key here is water flow — the sous vide circulator needs room to move water around each piece of chicken. If you cram too many in, some parts may not cook properly. If you’re using a large container like the 12-quart Rubbermaid bucket, you can fit even more, making it perfect for family dinners or meal prep.

For more batch cooking tips and recipes, check out our meal prep ideas, where we share ways to make your week healthier and easier.

Batch cooking for meal prep

Sous vide chicken breast is ideal for meal prepping. Cook a big batch on Sunday, then store it in the fridge for up to 4 days or freeze for longer. Each piece stays juicy and ready to eat all week, making it perfect for salads, wraps, or quick dinners.

Pro tip: after sous vide, chill extra chicken in an ice bath before storing. This stops cooking instantly and keeps the texture perfect when you reheat. Pair it with sides from our healthy lunch recipes for balanced meals all week long.

Knowing When Sous Vide Chicken is Done

One of the reasons people love sous vide chicken breast is how foolproof it feels. But if you’re new to the method, you might wonder how to tell when it’s actually ready. Here’s what to look for.

How do you know when sous vide chicken is done?

Because sous vide cooks chicken at a low, steady temperature, the inside may still have a faint pink hue when it’s fully cooked — and that’s perfectly safe if you followed the right time and temperature. After at least 1½ hours in the sous vide bath at 150°F, your chicken breast is cooked through.

When you remove it from the bag, it should feel tender to the touch and pull apart easily with a fork. You can also double-check with an instant-read thermometer if you like — it should read at least 150°F. The beauty of sous vide is that the chicken can’t get hotter than the water temperature, which makes overcooking impossible.

If you’re looking for more guidance on safe cooking, you might also enjoy our tips in healthy cooking basics.

Tips for perfect results every time

For the best flavor and presentation, don’t skip the finishing step. Once your sous vide chicken breast is cooked, pat it dry and sear it quickly in a hot skillet with a little olive oil. This gives you a beautiful golden crust and locks in flavor.

Another tip: season generously before cooking. The honey, lime, and chili powder rub in this recipe is a perfect example of how sous vide locks in bold, bright flavors.

Essential Sous Vide Equipment

One reason sous vide chicken breast is such a great addition to your cooking routine is that it doesn’t require a lot of fancy gear. You only need a few key tools — and you probably already have most of them in your kitchen.

What sous vide equipment do you really need?

At its core, sous vide cooking only requires three things:

  • A sous vide immersion circulator: This is the small device that heats and circulates the water. We love the Anova Sous Vide for its reliability and compact size.
  • A container or pot: Any large pot you already own will work fine for sous vide. If you plan to cook larger batches often, a dedicated 12-quart plastic container makes it easier to fit more food.
  • Cooking bags: You can use standard freezer-safe zip-top bags and remove the air with the water displacement method. Or, if you prefer reusable options, silicone bags like Stasher work beautifully.

That’s it — no huge investments required. With these basics, you’re ready to start making sous vide chicken breast at home.

If you cook sous vide regularly, there are a few upgrades worth considering:

  • A vacuum sealer and pre-cut vacuum bags for quick, secure sealing with no leaks.
  • Bag clips to attach bags to the side of your container and keep them fully submerged.
  • A lid or plastic wrap for your container to prevent evaporation during longer cooks.

These extras aren’t necessary to get started, but they can make the process even more convenient and efficient.

Serving and Storing Sous Vide Chicken Breast

Once your sous vide chicken breast is perfectly cooked, you’ll want to make the most of it. The great thing about this method is how versatile and easy it is to store for later.

Best ways to serve sous vide chicken breast

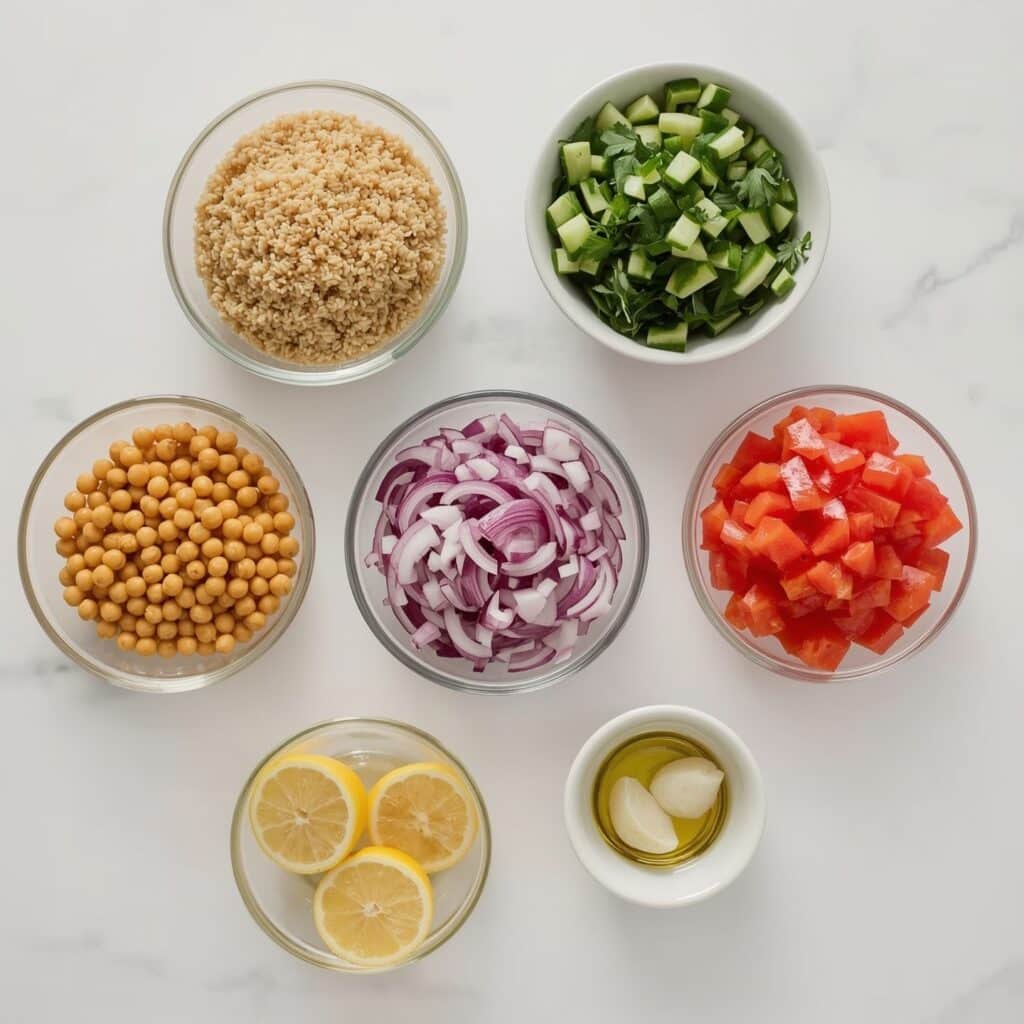
Sous vide chicken breast shines in just about any dish. Slice it thin and serve it over a big green salad with your favorite vinaigrette. Or tuck it into whole-grain wraps with crisp veggies and a smear of hummus for a quick lunch. You can also pair it with roasted vegetables and quinoa for a balanced, satisfying dinner.

Because the chicken stays so moist, it’s also a hit in hot dishes like stir-fries or grain bowls — just add it at the very end so it doesn’t dry out. If you want to try more serving ideas, check our healthy dinner recipes for plenty of inspiration.

How to store and reheat

Sous vide chicken breast stores beautifully. If you’re eating it within 4 days, keep it sealed in an airtight container in the fridge. For longer storage, freeze individual portions for up to 2 months.

When reheating, skip the microwave if you can. Instead, gently warm the chicken in a hot water bath (below 150°F) or in a covered skillet with a splash of broth. This keeps the meat juicy and flavorful, just like when it was freshly cooked.

FAQ

What is the recommended sous vide chicken breast temp?

We recommend cooking sous vide chicken breast at 150°F. This gives you juicy, tender, fully cooked chicken that’s safe to eat while maintaining great texture.

How long should you cook chicken breast in a sous vide?

Cook your chicken breast for 1½ hours for perfect results, though you can safely leave it in the bath for up to 4 hours without overcooking thanks to the steady water temperature.

How many chicken breasts can you sous vide at once?

You can sous vide as many chicken breasts as will fit in your container in a single layer, as long as water can circulate freely around each piece.

How do you know when sous vide chicken is done?

If your chicken has been in the bath for at least 1½ hours and reaches 150°F internally, it’s fully cooked even if slightly pink. It should be tender and easy to shred with a fork.

Can I sous vide frozen chicken breast?

Yes! Cooking a frozen chicken breast sous vide works beautifully — just add 30 minutes to the cooking time. The even temperature control ensures the chicken stays juicy and tender every time.

Print
clock clock iconcutlery cutlery iconflag flag iconfolder folder iconinstagram instagram iconpinterest pinterest iconfacebook facebook iconprint print iconsquares squares iconheart heart iconheart solid heart solid icon
Sous vide chicken breast recipe step-by-step

Sous Vide Chicken Breast: Perfect Juicy Results Every Time


5 Stars 4 Stars 3 Stars 2 Stars 1 Star

No reviews

  • Author: Chef Dodos
  • Total Time: 1 hour 40 minutes
  • Yield: 2 servings 1x

Description

Juicy, tender sous vide chicken breast with a honey-lime-chili marinade. Foolproof, flavorful, and perfect every time.


Ingredients

Scale

2 boneless, skinless chicken breasts

1 tablespoon honey

1 tablespoon chili powder

1 tablespoon lime juice

1 tablespoon olive oil

1 teaspoon molasses

1 teaspoon coriander

1 teaspoon salt

½ teaspoon garlic powder


Instructions

1. Prepare the marinade: In a small bowl, whisk together honey, chili powder, lime juice, olive oil, molasses, coriander, salt, and garlic powder.

2. Coat the chicken: Place chicken breasts in a dish or sous vide bag and coat evenly with marinade.

3. Preheat sous vide: Fill your container with water and set sous vide to 150°F.

4. Seal chicken: Vacuum seal or remove air with water displacement method.

5. Cook in sous vide bath: Submerge chicken and cook for 1½–4 hours.

6. Sear and serve: Pat dry and sear in a hot skillet for 1–2 minutes per side. Slice and enjoy.

Notes

For more flavor, marinate chicken overnight in the refrigerator.

Store cooked chicken in an airtight container in the fridge for up to 4 days or freeze for up to 2 months.

  • Prep Time: 10 minutes
  • Cook Time: 1 hour 30 minutes
  • Category: Dinner
  • Method: Sous Vide
  • Cuisine: American

Nutrition

  • Serving Size: 1 chicken breast
  • Calories: 240
  • Sugar: 6g
  • Sodium: 620mg
  • Fat: 7g
  • Saturated Fat: 1g
  • Unsaturated Fat: 5g
  • Trans Fat: 0g
  • Carbohydrates: 8g
  • Fiber: 1g
  • Protein: 36g
  • Cholesterol: 85mg

Conclusion

Sous vide chicken breast is one of the simplest ways to take your cooking to the next level. With just a few tools, you can make tender, juicy, perfectly seasoned chicken every single time — whether you’re cooking one or a whole week’s worth.

Since that first bite in Italy, sous vide chicken breast has been one of my favorite ways to eat healthy and still enjoy every meal. And now it’s yours too. Follow the steps in this guide and discover why this method is no longer just a restaurant secret — it’s the smart way to cook at home.

Let’s StayFit — together.For More follow us on facebook & pinterest

For more healthy recipes and tips, keep exploring our StayFit Recipes blog — real food, real results, real people.

Quinoa Salad Recipe – A Fresh & Flavorful Way to Stay Fit Daily

Quinoa salad ingredients including chickpeas, cucumber, red onion, parsley, and lemon
Table of Contents

Quinoa salad changed everything for us.

Hey! We’re The DODOs — Kiko & Med. Back when we kicked off our 100-day no-excuses journey, we needed meals that were clean, quick, and actually satisfying. Kiko was in charge of breakfast and snacks, but lunch was all on Med. That’s when the quinoa salad came into our lives — not just as a recipe, but as a reset.

Quinoa salad ingredients including chickpeas, cucumber, red onion, parsley, and lemon
Fresh, whole ingredients used to make our StayFit quinoa salad

We had tried a bunch of salads before, but they left us hungry an hour later. Then Med threw together some quinoa, chickpeas, fresh veggies, and a lemony garlic dressing. We didn’t expect much. But that first bite? Game changer. It was vibrant, filling, and full of texture — the kind of meal that keeps you energized without weighing you down.

This wasn’t just another salad. It became our go-to for post-workout lunches, weeknight dinners, and even next-day leftovers. Today, we’re sharing the exact quinoa salad recipe that helped fuel our transformation — real ingredients, real flavor, real results.

Let’s dive in.

Print
clock clock iconcutlery cutlery iconflag flag iconfolder folder iconinstagram instagram iconpinterest pinterest iconfacebook facebook iconprint print iconsquares squares iconheart heart iconheart solid heart solid icon
Quinoa salad ingredients including chickpeas, cucumber, red onion, parsley, and lemon

Quinoa Salad Recipe – A Fresh & Flavorful Way to Stay Fit Daily


5 Stars 4 Stars 3 Stars 2 Stars 1 Star

No reviews

  • Author: Chef Dodos

Description

A zesty, protein-packed quinoa salad recipe with chickpeas, crisp veggies, and a lemon garlic dressing. Perfect for clean eating and weekly meal prep.


Ingredients

Scale

1 cup uncooked quinoa, rinsed

2 cups water

1 can (15 oz) chickpeas, rinsed and drained

1 medium cucumber, seeded and chopped

1 red bell pepper, chopped

¾ cup red onion, chopped

1 cup parsley, finely chopped

¼ cup olive oil

¼ cup lemon juice (23 lemons)

1 tbsp  vinegar

2 cloves garlic, minced

½ tsp sea salt

Black pepper, to taste


Instructions

1. Rinse quinoa in cold water using a fine-mesh strainer.

2. Combine quinoa and water in saucepan; bring to a boil.

3. Reduce heat to low, simmer uncovered until water is absorbed (about 15 min).

4. Remove from heat, cover, and let rest for 5 min. Fluff with a fork.

5. In a large bowl, mix chickpeas, cucumber, bell pepper, onion, and parsley.

6. Whisk olive oil, lemon juice, vinegar, garlic, and salt in a small bowl.

7. Add quinoa to the large bowl, pour dressing over, and toss to coat.

8. Season with black pepper and more salt if needed.

9. Let salad sit 5–10 minutes before serving.

10. Serve chilled or at room temperature.

Notes

Salad keeps well for up to 4 days in an airtight container.

Add avocado, feta, or grilled chicken for variation.

Perfect for meal prep, picnics, or a post-workout meal.

The Story Behind This Quinoa Salad

How We Discovered Our Go-To Quinoa Salad

Before this quinoa salad became a regular on our meal plan, salads weren’t really our thing. Sure, we ate greens here and there, but they always felt like a side dish — never the main event. That changed one afternoon during week two of our StayFit challenge. Med was experimenting in the kitchen, trying to make something with quinoa that wasn’t, well… boring.

He opened the fridge, pulled out a few basics: a can of chickpeas, some leftover red bell pepper, a cucumber, a handful of parsley, and a red onion. We didn’t have any feta or trendy toppings — just simple, whole ingredients. Then came the homemade dressing: olive oil, lemon juice, red wine vinegar, garlic, salt, and pepper. Light, punchy, and balanced.

When we tossed everything together, something just clicked. The quinoa soaked up the bright lemony flavors. The chickpeas added creamy texture. The crisp veggies brought crunch and freshness. We didn’t even need a second try — it was perfect from the start.

Why Quinoa Salad Became Our Weeknight Lifesaver

Since that first bowl, this quinoa salad has become a staple. It’s easy to make in big batches, keeps in the fridge for days, and tastes even better after the flavors meld. Whenever we’re low on time or energy, we whip up a fresh batch — and just like that, lunch or dinner is done.

It’s also endlessly customizable. Some days we toss in feta and olives, other times it’s avocado and pumpkin seeds. But no matter what version we make, the base stays the same — protein-packed quinoa, colorful veggies, and that zesty lemon dressing.

Key Ingredients in the Perfect Quinoa Salad

What’s in Our Favorite Quinoa Salad

The ingredients for this quinoa salad are refreshingly simple — and each one plays a role in texture, flavor, or nutrition. Here’s the breakdown:

Quinoa salad ingredients including chickpeas, cucumber, red onion, parsley, and lemon
Fresh, whole ingredients used to make our StayFit quinoa salad
  • Quinoa (1 cup, uncooked): It’s the protein-rich base that keeps you full and energized. Make sure to rinse it well to remove any bitterness.
  • Chickpeas (1 can or 1½ cups cooked): They bring fiber, plant protein, and a creamy bite that balances out the crunchy veggies.
  • Cucumber and red bell pepper: These two add color, crunch, and hydration.
  • Red onion: A small amount goes a long way to give your salad that sharp, zesty edge.
  • Fresh parsley: Don’t skip this. It brightens the entire bowl and pairs beautifully with lemon.
  • Lemon-garlic dressing: Made with olive oil, lemon juice, red wine vinegar, garlic, sea salt, and black pepper — it’s light but flavorful enough to tie everything together.

You could pair this salad with high-protein mains like our grilled chicken bites or keep it vegetarian with a scoop of cottage cheese ranch dip on the side.

Why These Ingredients Work So Well Together

Every element of this quinoa salad recipe is designed to balance each other out. The quinoa offers substance without heaviness. Chickpeas bring richness. Crisp veggies keep it refreshing. The lemony garlic dressing brings everything together in a way that feels clean but never bland.

What’s even better? These ingredients are easy to find, easy to prep, and easy to swap. Out of parsley? Try cilantro or fresh mint. Want more crunch? Add chopped celery. Craving more fat? Throw in diced avocado.

The whole point is that this salad doesn’t require perfection — it just requires real food. And when paired with something like our zesty lemon chicken orzo, it rounds out your plate with flavor and nutrients.

Next, let’s walk you through how to cook quinoa just right and toss it all together like a pro.

How to Make Quinoa Salad Step-by-Step

Cooking Fluffy Quinoa the Right Way

The foundation of this quinoa salad is perfectly cooked quinoa — fluffy, not soggy, with a slight bite. It starts with rinsing the quinoa under cold water using a fine-mesh sieve. Don’t skip this step — it removes the natural coating called saponin that can make quinoa taste bitter.

In a medium saucepan, combine 1 cup of rinsed quinoa with 2 cups of water. Bring it to a boil over medium-high heat, then reduce the heat and let it simmer, uncovered, until all the water is absorbed — about 15 minutes. Once the water’s gone, remove it from the heat, cover, and let it sit for 5 minutes. This resting time steams the quinoa gently, making it fluffier. After that, use a fork to fluff it up.

Quinoa stores well too. You can cook it in advance and keep it chilled for 3–4 days. We often make a double batch so we have extra for meal prep — paired with dishes like our Mediterranean ground beef skillet or a side of muhammara spread.

Tossing Everything Together for Best Flavor

Once your quinoa is cool or at least room temp, it’s time to bring everything together. In a large mixing bowl, combine:

  • Cooked quinoa
  • Rinsed chickpeas
  • Chopped cucumber
  • Chopped red bell pepper
  • Chopped red onion
  • Fresh chopped parsley

In a smaller bowl or jar, whisk together ¼ cup olive oil, ¼ cup fresh lemon juice, 1 tablespoon red wine vinegar, 2 cloves minced garlic, ½ teaspoon sea salt, and a few cracks of black pepper. Drizzle it all over the salad and toss until evenly coated.

Let the salad sit for 10 minutes before serving to let the flavors meld — it makes a huge difference. You can serve this with a refreshing drink like our pickle lemonade mocktail for a satisfying, complete light meal.

Next up: creative variations you can try — because quinoa salad never has to be boring.

Quinoa Salad FAQs Answered

Is Quinoa Salad Healthy?

Yes — quinoa salad is one of the healthiest meal options you can make, especially when it’s built on whole, plant-based ingredients like the one we’ve shared here. Quinoa itself is a complete protein, meaning it contains all nine essential amino acids — rare for plant foods. It’s also naturally gluten-free and packed with fiber, magnesium, iron, and antioxidants.

Add in fiber-rich chickpeas, hydrating cucumbers, and antioxidant-loaded parsley, and you’ve got a salad that supports digestion, muscle recovery, and steady energy. And the olive oil-lemon dressing? Full of heart-healthy fats and vitamin C. That combo makes this salad ideal for anyone following a clean eating, Mediterranean, or plant-forward plan.

We often eat this after strength workouts or as a quick dinner when we want something nutrient-dense but easy. It fits right into our 100-day StayFit routine, just like our go-to protein-packed chicken bites and balanced orzo bowls.

What Goes Well with Quinoa in a Salad?

The great thing about quinoa salad is that it plays well with so many ingredients. If you want more creaminess, try adding diced avocado or a spoon of Greek yogurt dressing. For crunch, toss in toasted seeds or chopped almonds. Craving a little sweetness? Add chopped dried apricots or pomegranate seeds.

Other tasty mix-ins include:

  • Roasted vegetables (like sweet potatoes or zucchini)
  • Fresh herbs (mint, basil, cilantro)
  • Crumbled cheeses (goat cheese, feta)
  • Beans or legumes (lentils, black beans)
  • Pickled onions or artichoke hearts

Dressing-wise, vinaigrettes with a citrus or vinegar base work best. That’s why our lemon-garlic dressing hits the sweet spot — tangy enough to brighten the dish without overpowering it.

Looking for other salad-friendly recipes? Our insulin-friendly fat loss guide breaks down why combining protein, fiber, and healthy fats (just like in this salad) leads to sustainable results.

Serving, Storing & Meal Prep Tips

Make-Ahead Magic: How to Store for Days

One of the biggest wins with this quinoa salad recipe? It tastes even better the next day. That’s because the lemony garlic dressing continues to soak into the quinoa and veggies, boosting the flavor with time. It’s ideal for meal prep — make a big batch, store it in an airtight container, and you’ve got lunch or dinner ready for up to 4 days.

We recommend storing the salad undressed if you plan to keep it for more than 2 days. Just keep the dressing in a small jar and mix it in right before serving for maximum freshness and crunch. It’s also great in individual glass containers, so you can grab-and-go for work, gym days, or long car rides.

Pro tip: Pack a side like our turkish muhammara dip or cottage cheese ranch dip for added protein and flavor variety through the week.

How We Meal Prep with This Protein-Packed Bowl

Quinoa salad works hard — it’s more than just a side dish. In our 100-day challenge, this salad played a big role in Med’s lunch prep strategy. Some days he’d toss in grilled chicken, other times it was plant-based with chickpeas and roasted veggies. Once, we even added a dollop of hummus and a soft-boiled egg for a Mediterranean-style power bowl.

It travels well, doesn’t get soggy, and keeps you full without the post-meal crash. That’s why it’s one of our most repeated recipes — and one we always recommend to readers who are just starting out with real food cooking. Whether you’re building a week of meals or just need something clean and satisfying for dinner, quinoa salad has your back.

Want more ideas for prep-ahead meals? Try our grilled chicken bites or lemon orzo bowl — they pair beautifully and bring extra protein to the table.

Let’s StayFit—together. For More follow us on facebook & pinterest

Frequently Asked Questions

Is quinoa salad healthy?

Absolutely. Quinoa is a complete protein packed with fiber, magnesium, and iron, making it an excellent base for a balanced meal. Paired with chickpeas, vegetables, and olive oil, this salad offers slow-digesting carbs, healthy fats, and plant protein. It supports energy, digestion, and even weight management.

What is in the Jennifer Aniston salad?

The Jennifer Aniston salad became popular thanks to a viral TikTok trend. It typically includes cooked quinoa or bulgur, chickpeas, cucumbers, red onion, parsley, mint, pistachios, and a simple lemon-olive oil dressing. It’s similar to our quinoa salad, just with a few added textures and Middle Eastern flair.

What do you put in a quinoa salad?

Start with cooked quinoa, then layer in protein (like chickpeas or grilled chicken), fresh veggies (cucumber, bell pepper, onion), fresh herbs (parsley, mint), and a bright dressing. From there, you can add avocado, feta, seeds, olives, or even fruit like pomegranate or dried apricots.

What salad dressing goes well with quinoa?

Light, citrus-based vinaigrettes are ideal. Our go-to: olive oil, lemon juice, vinegar, garlic, sea salt, and pepper. You could also use tahini dressing, a creamy yogurt-based mix, or even something spicy with chili flakes or sriracha for kick.

Conclusion: Real Food, Real Results

This quinoa salad recipe isn’t just another bowl of greens — it’s a StayFit essential. It’s fast, flexible, and built on real food that keeps you full and feeling good. Whether you’re meal prepping for the week or looking for a quick reset meal after a weekend of takeout, this salad delivers.

We created this during our own transformation — and it helped fuel Med’s midday meals without slowing him down. Add it to your rotation, and see how easy it is to eat clean without getting bored.

StayFit Tip: For a full balanced meal, pair it with grilled chicken bites or a dollop of muhammara dip. Real food, real results — always.

Let’s StayFit—together.For More follow us on facebook & pinterest

The Best Mediterranean Ground Beef Skillet You’ll Ever Try

Top-down view of a Mediterranean ground beef skillet with tomatoes, spinach, kalamata olives, and feta cheese in a cast-iron pan.
Bold Mediterranean flavors in one easy skillet! This quick ground beef dinner with olives, feta, and veggies is your new go-to weeknight meal.
Table Of content

Why This Mediterranean Ground Beef Skillet Is a Game Changer

You know that moment when you open the fridge after a long day, already dreading the cleanup from dinner? That’s exactly where this Mediterranean Ground Beef Skillet came to our rescue. Kiko wanted something protein-packed post-leg day. Med needed veggies, flavor, and zero stress. We threw what we had in a skillet — lean ground beef, zucchini, tomatoes, garlic, onions, and that salty feta magic — and bam: it became a weekly go-to.

This Mediterranean Ground Beef Skillet isn’t just fast — it’s feel-good food. It delivers on everything we aim for at StayFit Recipes: clean, colorful, high-protein meals that don’t cut corners on taste. Whether you’re tracking macros or just want something nourishing and satisfying, this one-pan wonder hits every note.

And the best part? No complicated steps. No weird ingredients. Just whole foods, real flavor, and a skillet.

What Makes It Mediterranean (and Still Muscle-Friendly)?

The Mediterranean diet is all about balance — olive oil over butter, lean meats over processed ones, and lots of colorful produce. That’s exactly why this Mediterranean Ground Beef Skillet works so well. Ground beef may not be the first thing you associate with Mediterranean eating, but when it’s 90% lean or higher, sautéed in heart-healthy olive oil, and paired with vegetables like zucchini, onions, and tomatoes, it fits beautifully into the lifestyle.

We kept the seasoning simple: garlic, oregano, and a pinch of sea salt. The feta adds a creamy, salty flavor that brings everything together. Sprinkle on some fresh parsley and you’ve got a meal that’s just as good for a post-workout recovery as it is for a casual family dinner.

Looking for more protein-rich Mediterranean meals like this Mediterranean Ground Beef Skillet? Try our Zesty Lemon Chicken Orzo Protein Boost or this Roasted Sweet Potato Salad for a vibrant side

Simple Prep, Bold Flavor — No-Fuss Cooking

Ingredients for Mediterranean Ground Beef Skillet laid out on counter
Fresh, whole ingredients for a healthy Mediterranean dinner

Let’s be honest — no one wants to spend their evening stuck in the kitchen chopping, stirring, and cleaning a pile of dishes. That’s exactly why this Mediterranean Ground Beef Skillet is a weeknight hero. It’s quick, easy to make, and delivers bold flavor with balanced macros — all in one pan.

Step-by-Step: How to Make This Skillet Come Together

Start by heating a large skillet over medium heat. Drizzle in a little olive oil and toss in the sliced red and yellow onions. Let them cook until they turn soft and lightly golden — this is where the flavor starts to build.

Next, stir in the minced garlic and cook it just long enough to release that amazing aroma.

Now, add your lean ground beef. Break it apart as it cooks and stir occasionally. Once the meat is browned and crumbly, season with oregano, salt, and pepper.

When the beef is almost fully cooked, mix in the zucchini and cherry tomatoes. Let everything simmer together for a few minutes, just until the vegetables are tender but still have a slight bite.

Turn off the heat and sprinkle the feta over the top. It melts gently into the warm beef and vegetables, adding a creamy, salty finish. A final touch of chopped parsley, and that’s it — your Mediterranean Ground Beef Skillet is ready to serve in under 30 minutes.

Ground beef and onions cooking in a skillet
Browning the beef and onions for bold flavor

The Best Ingredients to Elevate Your Skillet Game

The secret to a great Mediterranean Ground Beef Skillet is using quality ingredients that keep things clean and flavorful. Choose 90% lean ground beef or higher — it’s rich in protein without being greasy. Go for firm zucchini and fresh cherry tomatoes to keep the texture fresh and vibrant.

Stick to real feta — reduced-fat works great if you’re watching calories. A simple blend of garlic, dried oregano, and a pinch of sea salt is all it takes to tie the flavors together.

Want to change things up? Swap zucchini with eggplant or bell peppers. No cherry tomatoes? Diced Roma tomatoes work just fine. Craving heat? Add a pinch of red pepper flakes.

This skillet is all about flexibility — and flavor.

Love simple one-pan meals like this? Be sure to try our Grilled Chicken Bites or the comforting Turkish Pasta Recipe — both are fast, flavorful, and StayFit approved.

Why Ground Beef Works for the Mediterranean Diet

Let’s clear something up — yes, ground beef can be part of a Mediterranean diet. The key? Choose lean, high-quality beef and pair it with the right ingredients. That’s exactly what this Mediterranean Ground Beef Skillet does.

The Mediterranean lifestyle isn’t about cutting out meat — it’s about balance and quality. Ground beef that’s 90% lean or more gives you lots of protein, iron, and B vitamins — without too much saturated fat. When you cook it in olive oil and combine it with fresh veggies, herbs, and a modest sprinkle of feta, it becomes a heartier option that still fits a clean, whole-food approach.

Remember, it’s not about eating steak every day. It’s all about what you put on your plate — and this meal has it all: lean meat, good fats, healthy veggies, and great taste you’ll want over and over.

Choosing the Right Cut: What Beef Fits Best?

If you’re following the Mediterranean diet, choosing the right kind of beef is important. Look for labels that say grass-fed or 90–95% lean. Ground sirloin is a solid pick — it’s tender, flavorful, and naturally lower in fat. Grass-fed beef is a bonus because it tends to have a better fat profile, including more omega-3s.

Avoid overly processed beef blends or anything that doesn’t show the fat percentage. The leaner, the better — not just for your macros, but for how your body feels after you eat.

Print
clock clock iconcutlery cutlery iconflag flag iconfolder folder iconinstagram instagram iconpinterest pinterest iconfacebook facebook iconprint print iconsquares squares iconheart heart iconheart solid heart solid icon
Mediterranean Ground Beef Skillet in cast-iron pan with fresh veggies

The Best Mediterranean Ground Beef Skillet You’ll Ever Try


5 Stars 4 Stars 3 Stars 2 Stars 1 Star

No reviews

  • Author: Chef Dodos
  • Total Time: 30 minutes
  • Yield: 2 servings 1x

Description

This Mediterranean Ground Beef Skillet is a fast, one-pan meal loaded with lean ground beef, fresh vegetables, heart-healthy olive oil, and crumbled feta.


Ingredients

Scale
  • 1 lb lean ground beef (90% lean or higher)  
  • 1 medium zucchini, sliced into half-moons  
  • 1 cup cherry tomatoes, halved  
  • 1 small red onion, thinly sliced  
  • 1 small yellow onion, thinly sliced  
  • 2 cloves garlic, minced  
  • 3.5 oz reduced-fat feta cheese, crumbled  
  • 2 tbsp extra virgin olive oil  
  • 1 tsp dried oregano  
  • Salt and pepper to taste  
  • Fresh parsley, chopped (for garnish)

Instructions

1. Heat olive oil in a large skillet over medium heat.  

2. Add sliced onions and cook until soft and lightly golden.  

3. Stir in garlic.  

4. Add beef, cook until browned and seasoned.  

5. Add zucchini and tomatoes, cook until tender.  

6. Turn off heat, sprinkle feta and parsley. Serve warm.

  • Prep Time: 10 minutes
  • Cook Time: 20 minutes
  • Cuisine: American

Nutrition

  • Calories: 430
  • Fat: 28g
  • Carbohydrates: 9g
  • Fiber: 2g
  • Protein: 38g

Conclusion: One Skillet, Real Results

This Mediterranean Ground Beef Skillet isn’t just quick — it’s the kind of meal you’ll keep coming back to. It’s full of real ingredients, balanced nutrition, and bold flavor. Whether you’re meal prepping, cooking for the family, or trying to eat cleaner without sacrificing taste, this dish checks all the boxes.

Looking for a quick and nutritious dinner? This Mediterranean ground beef skillet is your answer. Packed with Mediterranean flavors like garlic, olives, and fresh herbs, this ground beef skillet is a one-pan wonder perfect for busy nights. Not only is this Mediterranean ground beef skillet simple to make, but it also fits a variety of diets, including low-carb and gluten-free lifestyles. Serve this skillet meal with a side of pita or over rice for a complete Mediterranean-inspired dinner.

Just like every recipe we share, it’s rooted in the way Kiko & Med changed their lives: with real food, real effort, and no excuses.

Your turn.

Let’s StayFit — together. Follow us on Facebook for more daily recipes

FAQs: Ground Beef & the Mediterranean Diet

Is ground beef ok for a Mediterranean diet?

Yes — as long as it’s lean and unprocessed. Ground beef that’s 90% lean or more can fit well into the Mediterranean diet when it’s paired with vegetables, olive oil, and herbs. It’s all about balance and using clean, whole ingredients like in this Mediterranean Ground Beef Skillet.

Can you cook ground beef in a skillet?

Absolutely. A skillet is actually one of the easiest ways to cook ground beef. It browns evenly, cooks quickly, and lets you build flavor with onions, garlic, and herbs — just like we do in this recipe.

Do you put olive oil in the pan before ground beef?

Yes — especially when you’re following a Mediterranean-style meal plan. A small amount of extra virgin olive oil helps prevent sticking, adds heart-healthy fats, and boosts the flavor of the dish.

What is the best beef for the Mediterranean diet?

Go with 90–95% lean ground beef or ground sirloin. Grass-fed beef is a great choice too — it tends to be lower in saturated fat and higher in omega-3s. These options work perfectly in meals like this Mediterranean Ground Beef Skillet.

How To Make Roasted Sweet Potato Salad (Fast & Delicious)

Roasted Sweet Potato Salad in a rustic bowl

How To Make Roasted Sweet Potato Salad (Fast & Delicious)

Roasted sweet potato salad is an easy, tasty, and healthy recipe that fits perfectly into any clean eating plan. This guide will show you how to make it fast, with just a few fresh ingredients. You’ll also learn why it’s great for your body and how to customize it with different toppings and proteins. If you’re looking for a flavorful side dish or a light lunch that helps you stay on track, this roasted sweet potato salad is the one.

Roasted Sweet Potato Salad in a rustic bowl
Fresh and vibrant roasted sweet potato salad

Why We Love Roasted Sweet Potato Salad

Roasted sweet potato salad helped us stay fit

When we started our fitness journey, we needed meals that tasted good and made us feel full and strong. Roasted sweet potato salad became one of our favorites. Kiko first made it during our 100-day challenge, tossing leftover roasted sweet potatoes into a salad. One bite, and we were hooked. It was warm, sweet, filling, and full of flavor — without any junk.

Sweet potatoes gave us energy without the crash. The roasted parts were a little crispy on the outside, soft in the middle. We added leafy greens, crunchy seeds, and lean protein, and it quickly became a regular meal for lunch or after the gym.

Simple food with big benefits

Roasted sweet potato salad is more than just tasty. It’s packed with fiber, vitamins, and slow carbs that help your body feel full longer. It’s great if you’re trying to lose weight or manage blood sugar. You can keep it simple or dress it up with toppings like chicken, eggs, avocado, or feta cheese.

We like to pair it with meals like our zesty lemon chicken orzo or serve it beside our teriyaki chicken recipe for dinner. Whether it’s a side or a full meal, this salad helps us eat clean and stay strong.

What You Need to Make Roasted Sweet Potato Salad

Simple ingredients make this salad easy and healthy

To make a great roasted sweet potato salad, you don’t need anything fancy. The main ingredient, of course, is sweet potatoes. Choose ones that are firm and orange inside — they roast well and taste sweet and rich. You’ll also need olive oil, salt, pepper, and your favorite salad greens. We usually use spinach or arugula, but romaine or mixed greens work too.

Ingredients for roasted sweet potato salad
Simple ingredients to build a powerful meal

Here’s a basic list of what we use:

  • 2 large sweet potatoes (peeled and cubed)
  • 2 tablespoons olive oil
  • Salt and pepper to taste
  • 4 cups salad greens
  • 1/4 red onion (thinly sliced)
  • 1/2 avocado (sliced)
  • 2 boiled eggs or grilled chicken (for protein)
  • Balsamic or mustard vinaigrette

These ingredients are full of nutrients, but they also keep the salad light and satisfying. You can prep everything in under 30 minutes.

Easy swaps to fit your goals

This salad is flexible. If you’re watching carbs or following a meal plan, you can make simple swaps. Try roasted cauliflower instead of sweet potatoes for fewer carbs. Want more protein? Add tuna, chickpeas, or hard-boiled eggs — kind of like we do in our tuna salad lettuce wraps.

If you’re craving something creamy, a little Greek yogurt dressing or crumbled feta can give you that without extra sugar. You can even make it spicy by adding red pepper flakes or some sriracha in the dressing.

When we’re tight on time, we also use pre-roasted sweet potatoes and toss everything together like we do with our Healthy Zesty Chicken — quick, simple, and full of flavor.

How To Make Roasted Sweet Potato Salad Step by Step

Roasting sweet potatoes the right way

Roasted sweet potatoes on a baking tray
Roast your sweet potatoes until golden and crisp

To get the best flavor and texture for your roasted sweet potato salad, roasting is key. It brings out the natural sweetness and gives the outside a light crisp.

Follow these steps:

  1. Preheat your oven to 425°F (220°C).
  2. Wash, peel, and cube 2 large sweet potatoes into bite-size pieces.
  3. Toss the cubes in a bowl with 2 tablespoons olive oil, salt, and pepper.
  4. Spread them in a single layer on a baking sheet.
  5. Roast for 25–30 minutes, flipping once halfway through. They should be soft inside and golden on the edges.

While the sweet potatoes roast, prep the rest of the salad — wash the greens, slice the onions, and get your protein ready. You can use grilled chicken, boiled eggs, or tofu depending on your goals.

Building the perfect salad bowl

Once your sweet potatoes are roasted, it’s time to build your roasted sweet potato salad. Grab a large bowl or plate and layer it like this:

  • Start with 2 cups of greens
  • Add 1/2 cup of warm sweet potato cubes
  • Sprinkle red onion slices
  • Add avocado or cucumber for coolness
  • Top with your protein
  • Drizzle your favorite vinaigrette or dressing

That’s it! Warm, roasted, fresh, and filling.

We sometimes serve this as a full meal with extras on the side — just like our easy Turkish pasta or as a power lunch with something like insulin-friendly meals to keep our energy up.

Store It, Serve It, Make It Yours

How to store roasted sweet potato salad for later

One of the best things about roasted sweet potato salad is how well it stores. You can make a big batch and keep it fresh for meal prep.

Here’s how:

  • Store the roasted sweet potatoes in an airtight container in the fridge for up to 4 days.
  • Keep the greens, dressing, and toppings separate until you’re ready to eat. This keeps everything from getting soggy.
  • When you’re ready to eat, warm the sweet potatoes for 30–60 seconds in the microwave, then build your bowl.

You can even pack it in a mason jar — greens first, then toppings, then potatoes, with the dressing on the side.

Customize it your way

This salad is super flexible. You can make it low-carb, high-protein, dairy-free, or vegan. Some of our favorite add-ons include:

  • Roasted chickpeas or lentils for crunch
  • Quinoa for extra fiber
  • Toasted almonds or pumpkin seeds
  • Feta cheese or goat cheese if you want something creamy
  • A quick mustard vinaigrette or tahini-lemon dressing

For busy days, we keep roasted sweet potatoes ready in the fridge and toss them into salads just like we do with our zesty lemon chicken orzo bowls.

No matter how you tweak it, roasted sweet potato salad is a go-to. It’s easy to make, fills you up, and helps you stay fit without feeling like you’re missing out on flavor.

And remember: you’re not doing this alone. We’re here to help you StayFit—together.

For More follow us on facebook & pinterest

Frequently Asked Questions About Roasted Sweet Potato Salad

1. Is roasted sweet potato salad good for weight loss?

Yes, it can be great for weight loss. Roasted sweet potato salad is full of fiber and nutrients, which help you feel full longer. When paired with lean proteins and healthy fats, it becomes a balanced meal that supports fat loss and steady energy.

2. Can I make roasted sweet potato salad ahead of time?

Absolutely. You can roast the sweet potatoes and prepare the toppings ahead of time. Store everything in separate containers and mix just before serving. This keeps the salad fresh and the greens crisp.

3. What goes well with roasted sweet potato salad?

This salad pairs well with grilled chicken, turkey burgers, baked salmon, It also works as a standalone meal when topped with eggs or legumes.

4. How do I keep sweet potatoes from getting soggy in a salad?

To keep them crisp, roast at high heat (425°F) and don’t overcrowd the baking sheet. Let them cool before adding to the salad. If storing for later, keep them separate until you’re ready to eat.

Conclusion

Roasted sweet potato salad is one of our favorite go-to meals — simple, healthy, and full of flavor. It helped us stay on track during our 100-day fitness challenge, and now it’s a staple in our kitchen. Whether you’re meal-prepping or looking for a clean, satisfying dinner, this salad brings real results with real food.

Want more high-protein recipes or fat-burning meals? Try our tuna salad lettuce wraps or easy Turkish pasta. Let’s StayFit — together.

Print
clock clock iconcutlery cutlery iconflag flag iconfolder folder iconinstagram instagram iconpinterest pinterest iconfacebook facebook iconprint print iconsquares squares iconheart heart iconheart solid heart solid icon
Roasted Sweet Potato Salad in a rustic bowl

How To Make Roasted Sweet Potato Salad (Fast & Delicious)


5 Stars 4 Stars 3 Stars 2 Stars 1 Star

No reviews

  • Author: Chef Ikram
  • Total Time: 40 minutes
  • Yield: 2 servings 1x

Description

This roasted sweet potato salad is a warm, hearty, and clean-eating meal loaded with fiber, vitamins, and flavor. Perfect for lunch or dinner.


Ingredients

Scale
  1. 2 large sweet potatoes (peeled and cubed)
  2. 2 tablespoons olive oil
  3. 1/4 red onion, sliced
  4. 1/2 avocado, sliced
  5. 4 cups mixed greens (spinach, arugula, or romaine)
  6. 2 boiled eggs or 1 grilled chicken breast
  7. Salt and pepper to taste
  8. 2 tablespoons vinaigrette (balsamic or mustard)

Instructions

1. Preheat oven to 425°F (220°C).

2. Toss sweet potato cubes with olive oil, salt, and pepper.

3. Roast on a baking sheet for 25–30 minutes, flipping halfway.

4. Wash and prep greens, slice onion and avocado.

5. Prepare your protein: boil eggs or grill chicken.

6. In a bowl, layer greens, roasted sweet potatoes, toppings, and protein.

7. Drizzle with dressing and serve.

Notes

Keep dressing and roasted potatoes separate if meal prepping.

Add chickpeas, seeds, or feta for extra protein and texture.

Use tahini or yogurt-based dressing for a creamy twist.

  • Prep Time: 10 minutes
  • Cook Time: 30 minutes
  • Category: Salads
  • Method: Roasting
  • Cuisine: American

Nutrition

  • Serving Size: 1 bowl
  • Calories: 320
  • Sugar: 6g
  • Sodium: 250mg
  • Fat: 15g
  • Saturated Fat: 2g
  • Unsaturated Fat: 12g
  • Trans Fat: 0g
  • Carbohydrates: 30g
  • Fiber: 6g
  • Protein: 16g
  • Cholesterol: 185mg

Zesty Lemon Chicken: Irresistibly Juicy, Bold & Easy to Make

Table of Contents

Zesty Lemon Chicken: Bold Flavor, Clean Nutrition

Zesty Lemon Chicken is more than just a delicious dinner—it’s a symbol of how far we’ve come and how food truly changed our lives.

We weren’t always the “fit couple” you see today on StayFit Recipes. Back then, one of us was “skinny fat”—not technically overweight, but always tired and frustrated by stubborn belly fat. The other? Carrying extra weight and feeling stuck in a body that didn’t reflect the strength we dreamed of. Our transformation didn’t start in the gym. It started with what we were cooking in the kitchen.

We remember the first time we tested a lemon chicken recipe. We were exhausted after a long week, craving something healthy but comforting. We threw together what we had—chicken breasts, fresh lemon, garlic, olive oil, and herbs. That dinner? It wasn’t perfect. But it was bold, juicy, and satisfying. It was the first time healthy food actually felt exciting. That was our turning point.

From then on, cooking became our therapy—and Zesty Lemon Chicken became a staple on our weekly menu. Over time, we fine-tuned it: more zest, just the right balance of tangy and savory, and easy enough to whip up even on your busiest day. It wasn’t just a recipe. It was a reminder that real change starts with small steps—and simple meals that taste amazing.

We created StayFit Recipes for people like you. People who want results, but don’t want to give up flavor. People who are tired of boring chicken and bland diets. This isn’t some trendy “clean eating” gimmick. It’s food that fuels your goals and makes you smile. Pair it with this Cottage Cheese Ranch Dip and raw veggies for a clean snack.

That’s what this guide is about. Whether you’re just starting out or looking to switch things up in the kitchen, our Zesty Lemon Chicken will give you flavor, fuel, and inspiration. It’s more than a recipe—it’s part of our story. And we hope it becomes part of yours, too.

Zesty lemon chicken thighs with crispy skin and lemon garnish
Juicy zesty lemon chicken with golden skin and herbs

Zesty Lemon Chicken is more than just a tasty recipe—it’s one of those dishes that turns a regular night into something you’ll remember. With bold citrus flavor, juicy chicken, and clean, wholesome ingredients, it’s the kind of meal that satisfies without leaving you sluggish or guilty. In fact, it’s a favorite here at StayFit Recipes, and it’s earned that title honestly.

We first created this Zesty Lemon Chicken recipe when we were on our own fitness journey. One of us was tired of bland meal preps, the other was burnt out from trying to eat clean with no real satisfaction. Try our flavor-packed Healthy Teriyaki Chicken for another clean, high-protein favorite. That’s when we threw together fresh lemon juice, garlic, herbs, and good-quality chicken thighs—and everything changed.

Chicken thighs, in particular, shine in this dish. They’re juicier and more flavorful than breasts, especially when cooked with the skin on. Lemon’s bright acidity cuts through the richness of the dark meat and crispy skin, creating that perfect flavor balance.

Prefer breasts over thighs? No problem. You can still enjoy Zesty Lemon Chicken with white meat—just be sure to cook them with the skin on if possible, and check for doneness a few minutes earlier. Breasts tend to dry out faster, so careful timing is key.

Health Benefits of Zesty Lemon Chicken

This isn’t a cheat meal. It’s a smart, clean, protein-rich main course that works with your goals—whether that’s weight loss, muscle gain, or just feeling better after a long day. Unlike typical creamy or fried chicken recipes, Zesty Lemon Chicken is made with real, simple ingredients:

Ingredient Why It Works for You
Lemon Juice High in Vitamin C, brightens flavor naturally
Chicken Thighs Juicy and protein-rich, more satisfying than lean cuts
Olive Oil/Butter Healthy fats for heart health and satiety
Garlic & Herbs Add depth without calories or chemicals

Ingredients You’ll Need for a Classic Zesty Lemon Chicken Recipe

Main Ingredients

  • 3 to 4 pounds of chicken thighs or legs (bone-in, skin-on for best results)
  • 4 teaspoons lemon zest (from 2 fresh lemons)
  • 1/3 cup lemon juice (freshly squeezed)
  • 2 cloves garlic, crushed
  • 2 tablespoons fresh chopped thyme (or 2 teaspoons dried)
  • 2 teaspoons fresh chopped rosemary (or ½ teaspoon dried)
  • 1 teaspoon kosher salt
  • 1 teaspoon black pepper
  • 2 tablespoons melted unsalted butter or extra virgin olive oil
  • Lemon slices for garnish

Want to use chicken breasts instead? Try our Grilled Chicken Bites for a fast high-protein version.

Want to use chicken breasts instead? You can Try our Grilled Chicken Bites for a fast high-protein version. Just adjust the cook time and try to leave the skin on during baking—it protects the meat and adds richness to your zesty lemon chicken.


Step-by-Step Instructions

Step 1: Marinate the Chicken
Whisk together lemon zest, juice, garlic, herbs, salt, and pepper. Score each piece of chicken, coat with marinade, and refrigerate for 1–2 hours.

Step 2: Get Ready to Bake
Preheat oven to 425°F. Place chicken in a dish skin side up, brush with olive oil or butter.

Step 3: Bake and Baste
Bake for 20 minutes. Baste with leftover marinade. Bake 15–25 more minutes until golden and cooked through.

Step 4: Rest and Serve
Let chicken rest for 10 minutes. Skim fat from pan juices and serve as a light sauce.s your zesty lemon chicken to another level of juiciness and flavor.

Great Sides for Zesty Lemon Chicken

  • Cauliflower mash or roasted veggies
  • Lemon garlic quinoa
  • Angel hair pasta
  • Zucchini noodles

How to Cook Zesty Lemon Chicken Breasts for Maximum Juiciness

While thighs may steal the spotlight in traditional Zesty Lemon Chicken recipes, chicken breasts are still a fantastic choice—especially if you’re aiming for leaner cuts. The key to making them work? Timing, temperature, and technique.

Chicken breasts are naturally lower in fat, so they cook quicker and dry out easier. But that doesn’t mean they can’t be flavorful. In fact, with the right marinade and a bit of kitchen savvy, Zesty Lemon Chicken breasts can be just as juicy and bold as their thigh counterparts.

Here’s how to do it right:

  • Marinate thoroughly: Let the breasts soak in the lemon zest, juice, garlic, and herb marinade for at least 60 minutes. This infuses flavor deep into the meat and helps tenderize it.
  • Keep the skin on (if possible): Even if you plan to remove it after cooking, the skin acts like a natural moisture barrier.
  • Sear before baking (optional): Give the chicken a quick sear in a hot skillet with a little butter or olive oil. This adds color and locks in flavor before roasting.
  • Watch internal temp: Pull the chicken out as soon as it hits 165°F at the thickest part. Overcooked breasts lose all that lemony juiciness.
  • Let it rest: Give your cooked chicken breasts at least 5–10 minutes under foil to reabsorb their juices before slicing.

Tip: If you’re making a mix of thighs and breasts in one pan, remember—breasts will likely be done earlier. Take them out and keep them warm while the thighs finish.

Meal Prep Ideas Using Lemon Chicken Breasts

Zesty Lemon Chicken breasts are perfect for healthy meal prepping. They’re easy to portion, store well, and can be used in a variety of meals throughout the week. You’ll also love our Mediterranean Ground Beef Skillet — ready in minutes.

Here are some easy ideas to help you put those leftovers to good use:

Meal Idea What to Do
Lemon Chicken Salad Slice and toss with mixed greens, cucumbers, cherry tomatoes, and olive oil
Zesty Chicken Grain Bowl Layer over brown rice or quinoa with roasted veggies and avocado
Lemon Chicken Wraps Roll up in a whole grain or low-carb wrap with hummus, spinach, and red onion
High-Protein Pasta Bowl Chop and mix with chickpea pasta, olive oil, and steamed broccoli
Lemon Chicken Lettuce Cups Use bibb or romaine leaves, add shredded chicken, sliced almonds, and a splash of lemon juice

Zesty Lemon Chicken also freezes well, so you can cook in bulk and portion out for the month.

Why Chicken Thighs Work So Well with Lemon Marinade

If you ask any seasoned cook—or just someone who loves flavor—they’ll tell you: Zesty Lemon Chicken thighs are where the magic happens.

Why? Because chicken thighs, especially bone-in and skin-on, naturally retain more moisture and have a richer flavor profile than breasts. That little extra fat in the dark meat acts like a built-in flavor enhancer, especially when paired with the bright acidity of lemon juice and zest.

When baked at high heat, the skin crisps up beautifully while the inside stays juicy. The result? Chicken that’s golden, tender, and bursting with clean flavor.

And if you’re someone who doesn’t love chicken skin, no worries. Cook with it on to protect the meat during baking, then peel it off after cooking. You’ll still get all the flavor benefits without leaving the skin on your plate.

Oven, Grill, or Pan: Cooking Methods for Zesty Chicken Thighs

Oven-Baked

  • Preheat oven to 425°F
  • Place marinated thighs skin-side up in a baking dish
  • Brush with olive oil or melted butter
  • Bake for 35 to 45 minutes
  • Baste once midway
  • Rest for 10 minutes before serving

Grilled

  • Preheat grill to medium-high
  • Grill skin-side down 5–7 minutes
  • Flip and grill 10–12 more minutes (until 165°F)
  • Add a fresh squeeze of lemon before serving

Pan-Seared

  • Use a cast-iron skillet
  • Sear skin-side down in olive oil 6–8 minutes
  • Flip and cook 8–10 minutes while basting with pan juices

When comfort food meets clean eating, you get Zesty Lemon Chicken Pasta—a dish that feels indulgent but still supports your health goals. This isn’t your heavy, creamy pasta drenched in processed sauce. Instead, it’s lean protein, bold lemon flavor, and a light pasta base that ties it all together.

Pick your pasta:

  • Angel hair or linguine for a classic vibe
  • Chickpea or brown rice pasta to keep it gluten-free
  • Zucchini noodles (zoodles) for a low-carb option

Make the sauce:
Toss cooked pasta in a lemony olive oil sauce made with:

  • Reserved chicken drippings or broth
  • Lemon juice and zest
  • Garlic sautéed in olive oil
  • A touch of butter (optional)
  • Fresh herbs like parsley or thyme

Slice your lemon chicken, lay it over the pasta, and sprinkle with zest. For extra richness, try our High-Protein Alfredo Sauce with a lemon twist.

Best Pasta and Sauce Pairings for Zesty Chicken

Pasta Type Why It Works
Angel Hair Quick-cooking and delicate—lets lemon flavor shine
Whole Grain Penne Adds fiber and holds sauce well
Zucchini Noodles Low-carb and refreshing
Chickpea Pasta High-protein, gluten-free, and satisfying

Sauce Ideas:

  • Lemon Butter Sauce: Lemon juice + zest + butter + pasta water
  • Garlic Herb Sauce: Garlic sautéed in olive oil with herbs
  • Light Creamy Twist: Add a spoonful of plain Greek yogurt off heat

Conclusion

Zesty Lemon Chicken isn’t just another dinner—it’s a flavorful, feel-good staple that fits into any lifestyle. Whether you go with juicy thighs, lean breasts, pasta combinations, or meal prep bowls, this dish brings brightness and balance to your plate.

It’s easy enough for a busy weeknight but bold enough for company. And best of all? It proves you don’t have to choose between clean eating and delicious meals.

So the next time you’re craving something satisfying, don’t fall back on takeout. Whip up this recipe and taste just how good simple food can be.

Ready to make it your own? Try it with our Roasted Sweet Potato Salad, or keep things fresh with a side of Grilled Chicken Bites. However you serve it, Zesty Lemon Chicken has your back.

And remember: you’re not doing this alone. We’re here to help you StayFit—together.

For More follow us on facebook & pinterest

 zesty lemon chicken FAQs Answered

What is a good zesty lemon chicken recipe?

A great zesty lemon chicken recipe uses bone-in, skin-on chicken thighs marinated in lemon juice, garlic, fresh herbs, and olive oil or butter. Bake it at high heat for crispy skin and juicy meat, then garnish with lemon slices and pan drippings. It’s simple, clean, and packed with flavor.

How do you make zesty lemon chicken breast juicy?

To keep chicken breasts juicy, marinate them for at least an hour, sear or bake at a high temperature, and let them rest after cooking. Cooking with the skin on (even if you remove it later) helps seal in moisture and soak up that bold lemon flavor.

Can I use chicken thighs for lemon chicken?

Absolutely. Chicken thighs are ideal for zesty lemon chicken thanks to their richness and ability to absorb marinade. They’re also more forgiving when baking or grilling, meaning they’re less likely to dry out.

What’s a good pasta recipe with lemon chicken?

Toss sliced zesty lemon chicken with angel hair pasta, olive oil, garlic, lemon zest, and a touch of butter. Add steamed veggies or fresh spinach and top with herbs for a healthy comfort food combo.

How is Chinese lemon chicken different from zesty lemon chicken?

Chinese lemon chicken is usually battered, deep-fried, and coated in a sweet, sticky sauce. Zesty lemon chicken, in contrast, is roasted or grilled with real herbs, fresh lemon, and clean ingredients—no sugar or deep-frying required.

Is there an easy zesty lemon chicken recipe?

Yes! Mix lemon juice, lemon zest, garlic, and olive oil or butter. Pour it over chicken thighs or breasts, marinate for at least an hour, and bake. It’s an easy, one-dish meal that’s ready in under an hour with just a few ingredients.

Print
clock clock iconcutlery cutlery iconflag flag iconfolder folder iconinstagram instagram iconpinterest pinterest iconfacebook facebook iconprint print iconsquares squares iconheart heart iconheart solid heart solid icon

Zesty Lemon Chicken


5 Stars 4 Stars 3 Stars 2 Stars 1 Star

No reviews

  • Author: Chef Dodos
  • Total Time: 115 mins

Description

Zesty Lemon Chicken is a flavorful and healthy dish made with bone-in chicken thighs or breasts, marinated in fresh lemon juice, garlic, herbs, and olive oil or butter. It’s high in protein, low in carbs, and perfect for a quick dinner or weekly meal prep.


Ingredients

Scale
  1. 3 to 4 pounds chicken parts (thighs and legs recommended), skin-on, bone-in, trimmed of excess fat
  2. 4 teaspoons lemon zest (about zest from 2 lemons)
  3. 1/3 cup lemon juice
  4. 2 cloves garlic, crushed
  5. 2 tablespoons fresh chopped thyme (or 2 teaspoons dried)
  6. 2 teaspoons fresh chopped rosemary (or 1/2 teaspoon dried)
  7. 1 teaspoon kosher salt
  8. 1 teaspoon black pepper
  9. 2 tablespoons butter, melted
  10. Lemon slices for garnish

Instructions

  • In a large bowl, mix lemon juice, lemon zest, garlic, thyme, rosemary, salt, and pepper to make your marinade.
  • Lightly score the chicken with a knife, then toss it in the marinade to coat well. Cover and refrigerate for 1–2 hours.
  • Preheat your oven to 425°F. Place the marinated chicken skin-side up in a baking dish. Brush with melted butter or olive oil.
  • Bake for 20 minutes, then baste with the remaining marinade.
  • Continue baking for another 15 to 25 minutes, until the skin is crispy and the chicken is fully cooked (internal temp of 165°F).
  • Let the chicken rest for 10 minutes before serving.
  • Serve with your choice of sides—roasted vegetables, pasta, or a light salad.

Notes

10 mins
Cook Time45 mins
Marinating60 mins
Total Time115 mins
Servings4 to 6 servings
  • Prep Time: 10 mins
  • Cook Time: 45 mins

How to Make Irresistibly Healthy Turkish Pasta Recipe in Just 20 Minutes

Turkish pasta recipe with chili oil and yogurt
Close-up of Turkish pasta with yogurt garlic sauce and spicy oil drizzle

Turkish pasta recipe might not sound like a typical fitness meal — but for us, it became one of those comfort dishes that actually worked with our goals, not against them.

We’re Chef Dodos, the couple behind StayFit Recipes. When we started this journey, we were stuck. Kiko was lifting hard and eating clean but still felt bloated and frustrated. Med was running on junk calories, feeling weak, and going nowhere with workouts. We both wanted real change — not just for our bodies, but for our habits too.

So, we made a deal. No missed workouts. No cheat meals. A 100-day challenge that turned into a lifestyle. And one of the first meals that made it easy to stick with was this Turkish pasta recipe.

It’s fast, flavorful, and full of real food. Creamy garlic yogurt, a little spiced butter, and pasta made from clean carbs. We skipped the junk, kept the flavor, and turned a viral dish into a healthy go-to.

Now, this Turkish pasta recipe is part of our regular meal rotation — a comfort meal that fits our goals and never makes us feel off-track. Whether you’re starting from scratch or resetting your routine, this is one recipe worth adding to your list.

Table of Contents

Introduction to Turkish Pasta Recipes

What Makes Turkish Pasta Unique Compared to Italian Pasta?

Turkish pasta stands out for its fusion of bold and creamy flavors that go beyond the typical marinara or Alfredo sauce. Instead of cheese or cream, Greek or plain yogurt is used as a base sauce. It’s seasoned with fresh garlic, chili flakes, and topped with a sizzling butter or olive oil drizzle infused with paprika, pepper paste, and sometimes mint. The combination creates a warm, tangy, and spicy flavor that pairs beautifully with soft short pasta.

What truly makes this recipe shine is the Middle Eastern pantry influence. You’ll often see the use of Turkish pepper paste, dried mint, and Turkish chili flakes—though regular ones will work in a pinch. The goal isn’t to overpower, but to layer flavors in a uniquely satisfying way.

History and Cultural Significance of Pasta in Turkish Cuisine

While Italy may have laid claim to pasta’s fame, Turkey has long embraced its own comfort food variations. Known as “makarna”, pasta has been a budget-friendly staple in Turkish households for decades. It’s often served with yogurt or tomato-based sauces and combined with hearty ingredients like lean ground beef, sautéed onions, or even cherry tomatoes.

In Turkish home cooking, pasta isn’t a starter—it’s the star. Recipes are passed down through generations, with each family adding their own twist, whether it’s an extra spoon of tomato paste or a hint of dried mint. This dish, in particular, became viral on social media because of how accessible and aesthetically pleasing it is. The vibrant red oil over snowy white yogurt makes it not just delicious, but Instagram-worthy.

Ingredients Overview for the Perfect Turkish Pasta Recipe

Traditional Ingredients Used in Turkish Pasta Recipe

At the heart of any great Turkish pasta recipe is the harmony between pantry basics and bold, layered flavors. These ingredients don’t just deliver taste—they define the dish.

Ingredients for Turkish pasta recipe on kitchen counter
Fresh ingredients laid out for preparing Turkish pasta
  • Pasta: While any pasta works, short pasta varieties like elbows, bow ties, or shells are best. Their shape helps soak up the rich, creamy sauce unique to a Turkish pasta recipe.
  • Lean ground beef: A staple in many Turkish households, using 90% lean beef keeps the dish healthy while still rich in taste. You can go with 80-85% lean if you prefer a little more fat.
  • Sweet onions: Choose yellow or white sweet onions. They caramelize beautifully and balance out the spices in the Turkish pasta recipe.
  • Tomato paste: A spoon of this rich concentrate deepens the flavor and enhances the dish’s vibrant color.
  • Mild pepper paste: This gives the Turkish pasta recipe its signature kick. You can find it in most Middle Eastern grocery stores. If not, swap it with any pepper paste you like.
  • Chili flakes: While Turkish chili flakes (Pul Biber) are authentic, regular chili flakes still do a fine job in spicing up the dish.
  • Dried mint: Often overlooked, dried mint adds a surprising depth to the Turkish pasta recipe. Just a pinch can transform the sauce.
  • Butter or Olive Oil: The finishing drizzle made with melted unsalted butter or olive oil infused with chili or paprika gives the Turkish pasta recipe its signature sizzle.
  • Greek yogurt or plain yogurt: This forms the creamy sauce base. Full-fat Greek yogurt works best for a thick texture and tangy richness.
  • Fresh garlic: Minced garlic is stirred into the yogurt, delivering bold flavor to the Turkish pasta recipe.
  • Cherry tomatoes: These add color and a pop of sweetness. Optional but recommended.
  • Minced parsley: This herb brightens up the dish and brings a fresh note to the rich, creamy elements..

Choosing the Right Pasta and Yogurt Types for Your Turkish Pasta Recipe

The base of any Turkish pasta recipe is simple—but quality matters. Here’s what to know:

Pasta Tips:

  • Short pasta types are ideal, holding the yogurt sauce better.
  • Avoid delicate shapes like angel hair that can break apart or turn mushy.
  • Whole grain pasta works well for those aiming for a healthier Turkish pasta recipe.

Yogurt Tips:

  • Greek yogurt gives the best thick and creamy base.
  • Use plain yogurt if you want a lighter version.
  • Keep yogurt at room temperature before mixing—it prevents curdling.
Yogurt TypeTextureFlavorBest For
Full-fat GreekThickCreamy, tangyTraditional Turkish pasta recipe
Plain whole-milkMediumMildly tangyLighter Turkish pasta variation
Low-fat yogurtThinLess creamyCalorie-reduced Turkish pasta recipe

Choosing the right yogurt and pasta type is crucial for creating the best Turkish pasta recipe experience—whether you’re going traditional or tweaking it for your taste.

Step-by-Step Guide to the Viral Turkish Pasta Recipe

How to Prepare the Sauce with Garlic, Yogurt, and Chili Oil

This sauce is what makes the Turkish pasta recipe stand out. It’s creamy, spicy, tangy—and incredibly easy to make. Here’s how to master the viral technique:

Step 1: Mix the Yogurt Base
In a mixing bowl, combine:

  • 1½ cups of Greek yogurt or plain whole-milk yogurt
  • 2–3 garlic cloves, minced finely
  • Salt to taste

Whisk until smooth. Let it sit at room temperature while you prep everything else. This keeps it from curdling when mixed with warm pasta later.

Step 2: Infuse the Butter or Oil
In a small skillet, melt:

  • 2 tablespoons of unsalted butter (or olive oil for a lighter option)

Add:

  • ½ teaspoon of sweet paprika
  • ½ teaspoon of chili flakes (Turkish chili if available)
  • Optional: 1 teaspoon of pepper paste for more heat

Stir constantly over low heat until it sizzles and turns a deep red. Set it aside—this will be your final drizzle.

Cooking the Pasta to Turkish Preference

Step 3: Choose and Cook Your Pasta
Boil water in a large pot with a generous pinch of salt. Add about 12 ounces of short pasta—shells, elbows, bow ties, or whatever you like.

Cook until al dente—just firm enough to hold the sauce without getting mushy. Drain and set aside, but reserve ½ cup of the pasta water in case your sauce needs thinning.

Step 4: Prepare the Ground Beef (Optional)
If using meat:

  • In a pan, cook ½ lb. of lean ground beef with chopped onions (about 1 small onion), onion powder, salt, pepper, and dried mint.
  • Cook until browned and aromatic.
  • Mix in 1 tablespoon of tomato paste and stir for 2 minutes.

This meaty version of the Turkish pasta recipe adds protein and extra heartiness.

Step 5: Combine Everything
Toss the warm pasta with the garlic-yogurt mix first. Add a few spoons of reserved pasta water if it seems too thick. Then fold in the ground beef if you’re using it.

Step 6: Finish with the Signature Drizzle
Right before serving, pour the spicy butter mixture over the yogurt-coated pasta. Top with:

  • Fresh parsley
  • Optional: Cherry tomatoes, halved, for color and acidity

Bonus Tip: Want to elevate the dish even more? Try topping it with a sprinkle of dried mint or a dash of sumac for tang.

This Turkish pasta recipe takes less than 30 minutes, but it feels like a dish you’d get at a café in Istanbul.

Healthier Alternatives for Turkish Pasta

Is There a Way to Make Pasta Healthy? Yes, Here’s How

Absolutely. If you’re watching your calories, carbs, or fats, there are several ways to make a Turkish pasta recipe more health-conscious without losing its authentic charm.

Here’s how to do it:

  1. Use Whole Wheat or Chickpea Pasta
    Swap traditional white pasta for whole wheat, chickpea, or lentil-based pasta. These add more fiber and protein and reduce your glycemic load.
  2. Go Lean with Protein Choices
    Stick to 90% lean ground beef or replace it altogether with ground turkey, plant-based crumbles, or even tofu. You’ll still get that satisfying texture with fewer calories.
  3. Use Greek Yogurt for Protein & Creaminess
    Full-fat Greek yogurt packs in protein and probiotics. You can also opt for non-fat Greek yogurt to reduce fat content further.
  4. Cut Down on Butter
    Reduce the amount of unsalted butter in the drizzle and substitute with extra virgin olive oil. You can also try using ghee, which has a higher smoke point and rich flavor but in smaller quantities.
  5. Bulk It Up with Veggies
    Add low-calorie volume by tossing in:
    • Steamed broccoli
    • Zucchini noodles
    • Spinach or kale
    • Roasted cherry tomatoes

These ingredients not only lower the calorie density but also make your Turkish pasta recipe more filling and nutritious.

  1. Season Smart
    Instead of loading up on salt, use:
    • Dried mint
    • Smoked paprika
    • Garlic powder
    • Turkish chili flakes
      These offer rich flavor without bloating or excess sodium.

Don’t miss our Insulin Control & Weight Loss article for insights into blood sugar-friendly meals that pair well with smart carb choices.

Using Low-Fat Yogurt and Whole Wheat Pasta

Let’s break it down:

Ingredient SwapTraditional ChoiceHealthier AlternativeBenefits
PastaRegular white pastaWhole wheat or chickpea pastaMore fiber, lower glycemic impact
Ground beef80% lean beef90–95% lean beef or turkeyLess saturated fat
YogurtFull-fat plainNon-fat or Greek yogurtMore protein, fewer calories
Butter2 tbsp unsalted1 tbsp olive oil or light butterHealthier fats
GarnishesNone or more butterParsley, mint, or lemon zestAdds flavor without calories

With these tweaks, you can enjoy your favorite Turkish pasta recipe on a regular basis—even on a weight-loss plan.

And the best part? You won’t miss a thing when it comes to flavor.

Nutritional Profile and Calorie Count of Turkish Pasta

How Many Calories Are in Turkish Pasta? Detailed Breakdown

If you’ve ever wondered whether a comforting bowl of creamy, spicy pasta could fit into your diet, the answer is: yes—with a little planning.

The average serving of a Turkish pasta recipe ranges from 350 to 500 calories depending on ingredients and portion size. Here’s what contributes to the total:

  • Pasta (1 cup cooked): 200 calories
  • Greek yogurt (½ cup): 90–100 calories
  • Butter or olive oil drizzle (1 tbsp): 100–120 calories
  • Lean ground beef (2 oz): 120–150 calories
  • Tomato & pepper paste (1 tbsp combined): 25 calories
  • Garlic, onion, spices, parsley: Negligible calories

So, a typical serving sits between 420 and 480 calories, assuming moderate quantities of butter and meat. For a vegetarian version, the calories drop to around 350–400 per bowl.

Here’s a quick table summarizing the estimated calorie range per major ingredient:

IngredientAmountCalories
Cooked pasta1 cup200
Greek yogurt (full-fat)½ cup100
Butter or olive oil1 tbsp100–120
Lean ground beef (90%)2 oz140
Tomato & pepper paste1 tbsp25
Garlic, onion, spices<10
Total (with meat & butter)450–500
Total (vegetarian, light oil)350–400

Balancing Carbs, Proteins, and Fats in Your Serving

Let’s talk macros. A balanced Turkish pasta recipe should ideally include:

  • Carbohydrates: From pasta—fuel for energy
  • Protein: From ground beef and Greek yogurt—great for satiety and muscle repair
  • Healthy Fats: From olive oil or reduced butter—important for nutrient absorption

Macro distribution per serving (approximate):

  • Carbs: 40–50g
  • Protein: 20–25g
  • Fat: 18–22g

This makes the dish a great option for active individuals, or even for those on a Mediterranean-style eating plan.

Want to reduce the fat further? Swap butter with olive oil and go meatless. Looking to boost protein? Add more yogurt or a poached egg on top—yep, that’s a thing in some Turkish kitchens.

The takeaway? The Turkish pasta recipe is highly adaptable for any diet. You just need to adjust quantities and ingredients smartly.

Customizing Your Turkish Pasta Recipe

Add-Ons: Chicken, Vegetables, or Tofu for Extra Flavor

The beauty of a traditional Turkish pasta recipe lies in its adaptability. Whether you’re feeding picky eaters, vegetarians, or protein lovers, these add-ons let you put your own twist on the dish without sacrificing flavor.

1. Protein Upgrades

Want more protein or trying to avoid red meat? These swaps work beautifully:

  • Shredded chicken breast – Light and juicy, perfect with yogurt sauce.
  • Ground turkey – A leaner alternative that mimics beef texture.
  • Grilled tofu cubes – Ideal for a vegetarian or vegan version.
  • Chickpeas – Pan-fry for added crunch and protein punch.

2. Veggie Power-Ups

Mix in roasted or sautéed vegetables to boost fiber and color:

  • Spinach – Wilts quickly and blends well into the yogurt.
  • Zucchini – Adds texture and pairs well with mint and chili flakes.
  • Cherry tomatoes – Bursting with sweetness and acidity.
  • Bell peppers or mushrooms – Sauté lightly before mixing in.

Not only do these boost the nutritional value of your Turkish pasta recipe, but they also add dimension and bite.

Learn more about healthy comfort food alternatives in our Teriyaki Chicken Recipe—another flexible and flavorful favorite.

Spice Variations: From Mild to Fiery Turkish Heat

Whether you like it mild, medium, or mouth-on-fire hot, your spice profile is yours to control.

For a Mild Kick:

  • Use just a pinch of paprika and dried mint
  • Skip the chili flakes or use sweet pepper paste

For Medium Heat:

  • Add ½ tsp chili flakes to your oil or butter drizzle
  • Use a combo of pepper paste and garlic yogurt for depth

For Serious Heat Lovers:

  • Go big with 1+ tsp Turkish chili flakes (Pul Biber) or Aleppo pepper
  • Add a dab of harissa or a sliced fresh chili in the oil

Want a bonus hack? Add a squeeze of lemon just before serving. The acidity balances the yogurt and spice, creating a pop of flavor that lifts the whole dish.

Flavor Tweak Table:

PreferenceIngredient Adjustments
Creamier TextureAdd extra Greek yogurt + pasta water
Spicier FlavorUse more chili flakes, hot pepper paste
Milder FlavorUse sweet paprika, skip chili
Rich & MeatyAdd ground meat or shredded chicken
Fresh & BrightAdd parsley, mint, lemon juice, cherry tomatoes

Every version still delivers the heart of what makes a Turkish pasta recipe so special—comfort, spice, and crave-worthy creaminess.

Best Yogurt Options for Authentic Turkish Pasta

What Kind of Yogurt for Turkish Pasta? Greek vs Turkish

If there’s one thing that defines a great Turkish pasta recipe, it’s the yogurt sauce. It should be creamy, tangy, smooth—not watery, bland, or too thin.

The Top 3 Yogurt Choices for This Recipe:

  1. Full-Fat Greek Yogurt
    • Thick and creamy
    • Holds up well when mixed with pasta
    • Offers a rich, slightly tangy flavor
    • Best overall choice for consistency and taste
  2. Plain Turkish-Style Yogurt
    • Softer texture than Greek, but more authentic
    • Slightly looser, but still holds flavor well
    • Less tangy, smoother finish
    • Great for traditionalists wanting real Turkish flavor
  3. Low-Fat or Non-Fat Yogurt
    • Lighter on calories
    • Can be runny and less flavorful
    • May need straining to improve thickness
    • Better for those on strict calorie-conscious plans

If you’re going for authenticity, Turkish-style yogurt wins. But if you prioritize texture and high protein, Greek yogurt is the better option.

How to Make Homemade Yogurt for Better Taste and Nutrition

Making your own yogurt is easier than it sounds—and you get total control over texture, tang, and fat content. Here’s a quick recipe you can follow:

Ingredients:

  • 1 liter whole milk (or low-fat milk)
  • 2 tablespoons plain yogurt (as starter culture)

Directions:

  1. Heat the milk until it just begins to bubble (~180°F).
  2. Let it cool to around 110°F (warm to the touch).
  3. Stir in the yogurt starter and mix well.
  4. Cover and keep in a warm spot (wrapped in a towel or in the oven with the light on).
  5. Let it ferment for 6–8 hours, or overnight for extra tang.
  6. Refrigerate and strain for a thicker Greek-style yogurt.

This DIY version gives your Turkish pasta recipe a fresher, cleaner taste without preservatives or additives.

Pro Tips:

  • Always let yogurt sit at room temperature before mixing into pasta to prevent curdling.
  • Whisk it smooth before combining for a silky, even coating.
  • Add salt and minced garlic directly into the yogurt to build a flavorful sauce base.

Yogurt Comparison Table for Turkish Pasta:

Yogurt TypeTextureTang LevelBest For
Greek (Full-Fat)ThickHighCreamy Turkish pasta recipe
Turkish-Style (Whole)MediumMildTraditional authenticity
Low-Fat Plain YogurtThinMildCalorie-focused variations
Homemade YogurtAdjustableAdjustableCustom flavor & nutrition

Whether you go store-bought or homemade, getting the yogurt right ensures your Turkish pasta recipe turns out creamy, tangy, and totally addictive.

Serving Suggestions and Pairings

Traditional Turkish Sides to Serve with Pasta

In Turkey, pasta isn’t typically served in isolation—it’s often part of a vibrant table spread filled with fresh, tangy, and flavorful side dishes. When you serve your Turkish pasta recipe, try pairing it with:

1. Cacık (Yogurt with Cucumber and Mint)

  • A refreshing cold dip similar to tzatziki
  • Balances the spice of the pasta beautifully
  • Can be made in minutes with Greek yogurt, grated cucumber, garlic, and dried mint

2. Ezme Salad

  • A finely chopped salad made with tomatoes, onions, parsley, and chili paste
  • Adds acidity and brightness to the meal

3. Roasted Vegetables

  • Eggplant, zucchini, and bell peppers roasted in olive oil make excellent veggie companions

4. Olives and Feta Plate

  • Serve as an appetizer or side with crusty bread for a Mediterranean-style spread

5. Flatbread or Lavash

  • Perfect for scooping up yogurt sauce or balancing bold flavors

Want something quick? A side of simply dressed arugula salad with lemon and olive oil does the trick, cutting through the richness of your Turkish pasta recipe.

Presentation Tips for a Restaurant-Style Experience at Home

Making food taste great is only part of the experience. Presentation transforms a meal into a moment. Here’s how to give your Turkish pasta recipe the restaurant treatment at home:

1. Use a Wide, Shallow Bowl

  • Helps spread the pasta evenly and gives room for the signature chili oil drizzle

2. Swirl the Pasta

  • Create a small nest in the center with tongs to give it that elegant plated look

3. Drizzle With Precision

  • Use a spoon to pour the chili oil-butter sauce in a spiral pattern
  • Finish with a few bright drops of oil for visual pop

4. Garnish Like a Pro

  • Fresh minced parsley
  • Extra pinch of Turkish chili flakes
  • A dollop of yogurt or crumbled feta on top

5. Add Color

  • Halved cherry tomatoes or roasted red pepper strips give the plate vibrance

Quick Table: Side Pairings & Flavors

Side DishFlavor ProfileComplements
CacıkCool, creamy, herbySpicy yogurt pasta
Ezme SaladTangy, spicy, freshRich ground beef variations
Roasted VeggiesSmoky, savoryYogurt-forward versions
FlatbreadWarm, chewyScooping yogurt, soaking oil
Olive & Feta PlateBriny, sharpBalances creamy textures

These pairings not only enhance the taste but also complete the traditional Turkish pasta recipe experience—bold, balanced, and deeply satisfying.

Common Mistakes to Avoid When Making Turkish Pasta

Even the simplest recipes can go sideways with a few missteps. The Turkish pasta recipe may be easy, but these common mistakes can make or break your final dish.

Overcooking Pasta and Undermixing Yogurt Sauce

Let’s start with the foundation—the pasta and yogurt.

Overcooked Pasta

  • Cooking pasta too long can result in mushy, gluey textures that don’t hold sauce well.
  • Always cook pasta al dente, especially short shapes like elbows, bow ties, or shells.
  • Don’t forget to salt the water generously—it’s your first layer of flavor.

Cold or Curdled Yogurt

  • Mixing cold yogurt directly into hot pasta causes it to curdle.
  • Solution? Bring the yogurt to room temperature and stir in a bit of pasta water for a silky, even blend.

Flavor Imbalances: Too Much Garlic or Not Enough Salt

Seasoning makes all the difference, and the Turkish pasta recipe relies on a delicate balance of bold and subtle flavors.

Garlic Overload

  • Garlic is important, but don’t overdo it. Use 1–2 cloves per cup of yogurt, finely minced or crushed.
  • Too much garlic can overpower the chili oil and the natural creaminess of the sauce.

Underseasoned Yogurt

  • Yogurt needs help to pop. Don’t skip the salt or the dried mint.
  • Add a pinch of salt, a small amount of lemon juice, and even a bit of olive oil to enhance the base.

Looking for flavor-balancing inspiration? Try our Zesty Lemon Chicken Orzo – Protein Boost to see how citrus can amplify savory dishes.

Skipping the Chili Oil Drizzle or Burning the Butter

The oil drizzle is more than just decoration—it’s where spice, aroma, and mouthfeel collide.

Common Chili Oil Mistakes:

  • Burning the spices in butter or oil creates bitterness. Always infuse over low heat.
  • Skipping this step robs the dish of its signature color and flavor punch.

To get it right:

  • Warm your unsalted butter or olive oil gently.
  • Stir in paprika, chili flakes, and optional pepper paste until they bloom.
  • Drizzle it just before serving for that dramatic, vibrant finish that defines every true Turkish pasta recipe.

Recap Table: Mistakes & Fixes

MistakeFix
Overcooking pastaCook al dente with salted water
Mixing cold yogurtUse room-temp yogurt, stir in warm pasta water
Too much garlicStick to 1–2 cloves per cup of yogurt
Underseasoned yogurtAdd salt, lemon, dried mint
Burning chili oilInfuse spices on low heat
Skipping butter drizzleDon’t—this is the soul of the Turkish pasta dish

Getting these details right elevates the Turkish pasta recipe from average to unforgettable. It’s not about being fancy—it’s about paying attention to the simple stuff.

Print
clock clock iconcutlery cutlery iconflag flag iconfolder folder iconinstagram instagram iconpinterest pinterest iconfacebook facebook iconprint print iconsquares squares iconheart heart iconheart solid heart solid icon
Turkish pasta recipe with chili oil and yogurt

How to Make Irresistibly Healthy Turkish Pasta Recipe in Just 20 Minutes


5 Stars 4 Stars 3 Stars 2 Stars 1 Star

No reviews

  • Author: Chef Dodos
  • Total Time: 10 minutes

Description

This authentic Turkish pasta recipe combines tender short pasta with a tangy garlic-yogurt sauce and a spicy chili oil drizzle. It’s rich, comforting, and ready in under 30 minutes. A Mediterranean comfort food classic that’s easily adaptable for vegetarian, high-protein, or calorie-conscious diets.


Ingredients

Scale

For the Pasta:


  • 12 oz short pasta (bow ties, shells, or elbows)


  • Salted water for boiling


For the Garlic Yogurt Sauce:


  • 1½ cups full-fat Greek yogurt (or plain Turkish-style yogurt)


  • 2 garlic cloves, finely minced


  • ¼ tsp salt


  • 12 tbsp reserved pasta water (as needed)


For the Spicy Oil Drizzle:


  • 2 tbsp unsalted butter (or olive oil)


  • ½ tsp sweet paprika


  • ½ tsp chili flakes (regular or Turkish Pul Biber)


  • 1 tsp mild pepper paste (optional)


Optional Protein Add-On:


  • ½ lb lean ground beef (90% lean)


  • 1 small sweet onion, finely chopped


  • 1 tbsp tomato paste


  • ½ tsp onion powder


  • ½ tsp dried mint


  • Salt and pepper to taste


Garnishes:


  • 1 tbsp chopped parsley


  • Optional: ½ cup cherry tomatoes, halved and grilled


Instructions

  1. Cook the Pasta
    Boil the pasta in well-salted water until al dente. Reserve ½ cup of pasta water, then drain.

  2. Make the Yogurt Sauce
    In a bowl, mix yogurt, garlic, and salt until smooth. Let it sit at room temperature while prepping other elements.

  3. Cook the Ground Beef (Optional)
    In a skillet, sauté onions in a little olive oil, then add beef, tomato paste, onion powder, dried mint, salt, and pepper. Cook until browned and fragrant.

  4. Prepare the Spicy Drizzle
    In a small pan, melt butter over low heat. Add paprika, chili flakes, and pepper paste. Stir until it sizzles and turns bright red. Set aside.

  5. Combine and Serve
    Toss the warm pasta with the yogurt sauce. Thin with pasta water if needed. Fold in ground beef if using. Top with chili oil drizzle, parsley, and optional cherry tomatoes.

Notes

Let yogurt come to room temperature to avoid curdling.

For vegetarian versions, skip the beef and add sautéed mushrooms, chickpeas, or zucchini.

To make it spicier, double the chili flakes or add harissa.

Store leftovers in the fridge for up to 2 days. Best served warm or at room temp.

  • Prep Time: 10 minutes

Nutrition

  • Serving Size: 1 bowl
  • Calories: 420–480
  • Fat: 18–22g
  • Saturated Fat: 20 minutes
  • Carbohydrates: 40–50g
  • Protein: 20–25g

Conclusion: Bring Bold Turkish Flavors to Your Kitchen

There you have it—an in-depth journey through every layer of the perfect Turkish pasta recipe. From the creamy yogurt base to the fiery chili butter drizzle, and all the ingredient swaps, side pairings, and prep tips in between, this dish is your ticket to a flavorful, customizable, and culturally rich comfort food experience.

Whether you’re making it spicy with chili flakes or mild with mint, meaty with ground beef or vegan with chickpeas, the Turkish pasta recipe can flex to fit your needs. It’s simple enough for a quick weeknight dinner and bold enough to impress guests.

Ready to get cooking? Revisit our step-by-step Easy Turkish Pasta Recipe to bring this crave-worthy dish to life.

Let’s stay strong, stay healthy, and StayFit — together.

For More follow us on facebook & pinterest

Is There a Way to Make Pasta Healthy?

Absolutely. And the Turkish pasta recipe is a perfect example. By swapping regular pasta for whole grain or chickpea varieties and using Greek yogurt instead of cream or cheese, you get a meal that’s both comforting and clean.
Healthy pasta is all about balance — smart carbs, quality protein, and healthy fats. Add some garlic and red pepper flakes for flavor, and you’ve got a dish that satisfies cravings without wrecking your progress.

What Is the Viral Turkish Pasta Recipe?

The viral version of the Turkish pasta recipe took over TikTok and Instagram with its creamy yogurt base, spicy butter drizzle, and fast prep time. It’s often served with garlic and Aleppo pepper, and sometimes topped with mint or lemon zest.
What makes it go viral? It’s different. It’s beautiful on the plate. And it comes together in 20 minutes or less. We took that base and cleaned it up to

What Kind of Yogurt for Turkish Pasta?

Always go with plain Greek yogurt. It’s thick, rich, and holds up well when mixed with warm pasta. If you’re dairy-free, try plain almond or coconut yogurt — just make sure it’s unsweetened. Sweetened yogurt throws off the whole balance of the dish and doesn’t work well with garlic and spices.

How Many Calories Are in Turkish Pasta?

350 to 450 calories
18–25g protein
10–15g fat
35–45g cab