How To Make Eggless, Dairy-Free Orange Muffins That Wow

Eggless dairy-free orange muffins on a rustic table
Fluffy orange muffins made without eggs or dairy
Table Of Contents

Introduction

These soft, fluffy orange muffins are 100% egg-free and dairy-free — but you’d never know it from the taste. They’re bright, moist, and packed with real orange flavor. Whether you’re vegan, have allergies, or just ran out of eggs and milk, this recipe is here to help. We’ve made them for brunch, snacks, and even bake sales, and they always disappear fast. In this article, we’ll show you exactly how to make these muffins from scratch with simple ingredients you already have at home. You’ll also get tips on mixing, baking, and storing — plus the answers to the most asked questions about baking orange muffins (no eggs, no dairy). Let’s bake something amazing — without the stuff your body doesn’t need.

Our Muffin Story

Why we made these orange muffins
Back when Kiko was cutting dairy and I (Med) was skipping eggs, we had one problem: we missed muffins. We tried a few recipes, but they always turned out flat or dry. We wanted the kind of muffin that was soft, moist, and full of flavor — just like the ones from our childhood bakeries.

So, we grabbed two fresh oranges, a tub of almond yogurt, and a lot of hope. After a few tries, we got it right. The orange juice and zest gave a bold citrus flavor. The olive oil made them tender. And the yogurt added richness without the dairy.

Since then, we’ve made these orange muffins (no eggs, no dairy) dozens of times. They’ve become a go-to for Sunday mornings, post-gym snacks, and even gifts. You’ll also love our mandarin muffins if you’re craving more citrus flavor, or check out the chocolate baked oat cups for another egg-free favorite.

The problem with most eggless muffins
Most egg-free muffins turn out heavy or gummy. But here’s what we learned: it’s not just about what you leave out. It’s about what you put in. You need moisture, structure, and something to help the muffins rise. In this recipe, we use a mix of orange juice, olive oil, and self-rising flour to get that soft, bakery-style crumb — without any eggs or milk.

Key Ingredients That Make It Work

Why self-rising flour is your best friend
If you’re baking orange muffins with no eggs and no dairy, self-rising flour makes everything easier. It’s already mixed with baking powder and a touch of salt, so you don’t have to measure those out. This is important because, without eggs, your batter needs all the help it can get to rise properly.

No self-rising flour? Just use 1 cup of all-purpose flour with 2 teaspoons of baking powder and ¼ teaspoon salt. We’ve used this method in our gluten-free cinnamon rolls, and the result is always light and fluffy.

This flour gives the muffins structure. It helps them rise in the oven, creating a soft center and gently golden top — the kind you’d expect from a bakery, not a vegan recipe.

Simple swaps for eggs and dairy
To keep these orange muffins both egg-free and dairy-free, we use a mix of three smart swaps. First, plant-based yogurt — almond or coconut — gives the muffins a creamy texture and helps bind the batter. Next, light olive oil adds richness and keeps them moist. And finally, the fresh orange juice works with the baking powder to give a gentle lift.

But it’s not just about texture. These ingredients also boost flavor. The orange juice and zest bring brightness, the yogurt adds depth, and the oil ties it all together. These swaps don’t just replace eggs and dairy — they improve the whole bite.

Want more egg-free breakfast inspiration? Check out these quick cottage cheese pancakes or our popular berry cheesecake overnight oats.

Step-by-Step Baking Process

Whisking orange muffin batter with zest
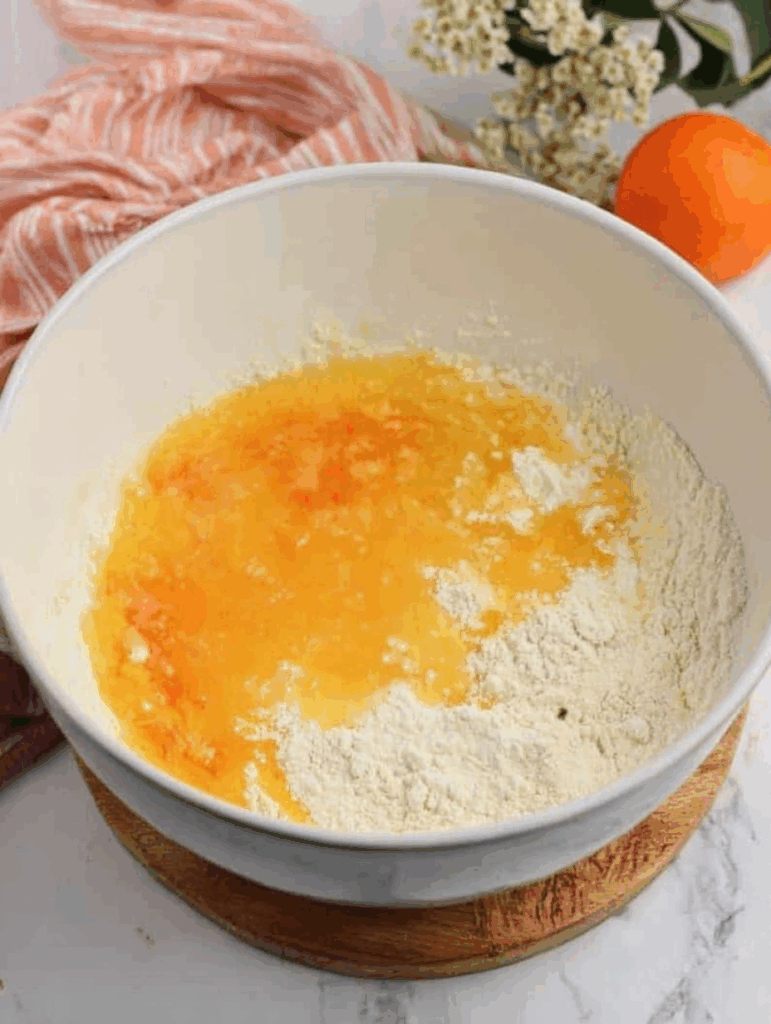
Juice the oranges and measure how much you need. Add the orange juice, other liquids, and sugar to a large bowl.
Whisking orange muffin batter with zest
Add the self-rising flour to the bowl with the wet ingredients.
Whisking orange muffin batter with zest
Mixing orange juice, yogurt, and zest for muffin batter
Scooping dairy-free muffin batter into pan
Filling muffin cups with eggless orange batter

How to mix for soft, fluffy muffins
Making these orange muffins without eggs or dairy is super simple. Start by preheating your oven to 350°F (175°C). Line a muffin tin with paper liners or lightly grease it. Now grab two bowls: one for the dry ingredients, and one for the wet.

In the first bowl, add the self-rising flour. Give it a quick stir to break up any clumps. In the second bowl, mix the orange juice, plant-based yogurt, olive oil, sugar, orange zest, and vanilla. Whisk until smooth.

Now pour the wet mixture into the dry bowl. Gently fold with a spatula — don’t overmix. A few lumps are totally fine. If you stir too much, the muffins can turn dense. For added texture, you can mix in nuts, dried cranberries, or even chopped chocolate. We sometimes toss in a handful of fruit like we do with our chocolate strawberry yogurt clusters for a little twist.

Baking tips that make all the difference
Scoop the batter into your muffin tin, filling each cup about ¾ full. Bake for 20–22 minutes. The muffins should rise with golden tops, and a toothpick poked in the center should come out clean.

Once out of the oven, let the muffins sit in the pan for 5 minutes before moving them to a wire rack. This resting time helps them set up without drying out. We like enjoying these orange muffins (no eggs, no dairy) while they’re still warm, paired with a smoothie like our green juice recipe.

That’s it — no stress, no complicated steps. Just real ingredients and real flavor.

Flavor & Texture Upgrades

Easy add-ins to make them your own
Once you master the base recipe for these orange muffins without eggs or dairy, you can start having fun with flavors. We love folding in dairy-free chocolate chips for a dessert-like muffin. You can also add dried cranberries, chopped dates, or sunflower seeds for a more wholesome snack.

Want extra crunch? Try topping the muffins with slivered almonds or a sprinkle of rolled oats before baking. For kids or picky eaters, mini muffin tins work great too — same flavor, smaller bites. It’s a trick we also use in our chocolate baked oat cups, and it always works.

No matter how you switch it up, stick to ½ to ¾ cup of add-ins total. That keeps the texture light and avoids overloading the batter.

How to control sweetness or tang
These orange muffins strike a nice balance — sweet, but not too sweet. Still, you can adjust it to your taste. If you like things less sugary, reduce the unrefined sugar to ¾ cup. Prefer more tang? Add an extra teaspoon of orange zest or use slightly less sugar.

If you’re using store-bought orange juice instead of fresh, check the label. Some versions are sweeter than others and could make the muffins taste overly sugary. We prefer squeezing our own, like we do in our mandarin muffin recipe — more flavor, more control.

Even small changes make a big difference in these orange muffins (no eggs, no dairy). You’ll find your favorite version in no time.

Storage & Make-Ahead Tips

How to store orange muffins the right way
After baking a batch of orange muffins (no eggs, no dairy), you’ll want to keep them fresh as long as possible. Once they’ve cooled completely, place them in an airtight container. Keep them at room temperature for up to two days. If your kitchen runs warm, store them in the fridge instead to prevent spoilage.

In the fridge, they’ll stay good for about 4 days. Just warm them for 10–15 seconds in the microwave before serving. This softens them up and brings back that fresh-baked texture. We do the same when prepping snacks like our homemade protein bars — quick, simple, and ready when you are.

Don’t store muffins while they’re still warm. That traps steam, makes them soggy, and causes mold fast.

Freezing and reheating tips
Want to make a big batch ahead of time? Freeze them. These eggless, dairy-free orange muffins freeze beautifully. Wrap each muffin in parchment or foil, then place them in a zip-top freezer bag. Label the bag with the date and pop it in the freezer — they’ll last up to 1 month.

When you’re ready to enjoy one, unwrap and let it sit at room temperature for 30–60 minutes, or reheat in the microwave for about 30 seconds. The result? Still soft, still citrusy, still amazing. We follow the same freezing method for other baked recipes like our healthy banana bread, and it works every time.

Planning ahead means you always have a tasty, allergen-friendly snack ready — no stress. Follow us for more in facebook

Frequently Asked Questions

Can I make orange muffins without eggs and dairy?
Yes! You can make orange muffins with no eggs and no dairy by using plant-based yogurt, orange juice, and light olive oil. They turn out fluffy and flavorful without any animal products.
What can I use instead of self-rising flour?
You can mix 1 cup of all-purpose flour with 2 teaspoons of baking powder and ¼ teaspoon salt to make your own self-rising flour — perfect for these eggless orange muffins.
Do eggless orange muffins turn out fluffy?
Yes. The acidity in orange juice reacts with baking powder, helping these orange muffins (no eggs, no dairy) rise naturally for a light, airy texture.
How should I store dairy-free orange muffins?
Keep muffins in an airtight container for 2 days at room temp, or refrigerate for up to 4 days. You can freeze them for 1 month and reheat as needed.

Conclusion

These orange muffins (no eggs, no dairy) prove that you don’t need eggs or milk to bake something delicious. With the right swaps and simple techniques, you’ll get soft, golden muffins bursting with orange flavor — every time. Whether you’re avoiding allergens or just looking for a clean, plant-based treat, this recipe delivers.

Try pairing these muffins with one of our green juices or protein-packed snacks for a balanced start to your day.

Now it’s your turn to bake, taste, and share. Let’s StayFit — together.

Print
clock clock iconcutlery cutlery iconflag flag iconfolder folder iconinstagram instagram iconpinterest pinterest iconfacebook facebook iconprint print iconsquares squares iconheart heart iconheart solid heart solid icon
Eggless dairy-free orange muffins on a rustic table

How To Make Eggless, Dairy-Free Orange Muffins That Wow


5 Stars 4 Stars 3 Stars 2 Stars 1 Star

No reviews

  • Author: Chef Dodos
  • Total Time: 30 minutes
  • Yield: 12 muffins 1x
  • Diet: Vegan

Description

Soft, fluffy orange muffins with no eggs and no dairy. Made with fresh juice, zest, and plant-based yogurt. Perfect for breakfast or snack time.


Ingredients

Scale

2 cups Self-Rising Flour

½ cup Light Olive Oil

½ cup Orange Juice (about 2 large oranges)

½ cup Dairy-Free Yogurt (coconut or almond)

1 cup Unrefined Sugar

1 tablespoon Orange Zest

1 teaspoon Vanilla Extract


Instructions

1. Preheat the oven to 350°F (175°C) and line or grease a muffin pan.

2. In a large bowl, whisk the flour to remove clumps.

3. In a separate bowl, combine orange juice, olive oil, yogurt, sugar, zest, and vanilla.

4. Pour wet ingredients into dry and gently fold until just combined — don’t overmix.

5. Scoop the batter evenly into the muffin cups, filling about ¾ full.

6. Bake for 20–22 minutes or until a toothpick comes out clean.

7. Cool in the pan for 5 minutes, then transfer to a wire rack to finish cooling.

Notes

For homemade self-rising flour: Mix 1 cup all-purpose flour with 2 tsp baking powder and ¼ tsp salt.

Store muffins in an airtight container at room temperature for 2 days, or refrigerate for up to 4.

Freeze individually wrapped muffins for up to 1 month.

  • Prep Time: 10 minutes
  • Cook Time: 20 minutes
  • Category: Snacks
  • Method: Baking
  • Cuisine: American

Nutrition

  • Serving Size: 1 muffin
  • Calories: 185
  • Sugar: 12g
  • Sodium: 110mg
  • Fat: 8g
  • Saturated Fat: 1g
  • Unsaturated Fat: 6g
  • Trans Fat: 0g
  • Carbohydrates: 26g
  • Fiber: 1g
  • Protein: 2g
  • Cholesterol: 0mg

Gluten Free Cinnamon Rolls: Soft & Healthy Recipe Made Easy

Gluten free cinnamon rolls served warm with soft texture and golden tops
Table of Contents

If you’re deciding to get healthy, here’s one powerful piece of advice: you don’t need to give up the foods you love — you just need to get smart. Swap the bad ingredients for wholesome, healthy alternatives and you’ll still enjoy every bite, guilt-free. That’s exactly what we learned when we developed our gluten free cinnamon rolls recipe: it’s possible to eat deliciously and stay on track with your goals.

Freshly baked gluten free cinnamon rolls styled for a modern food blog

At StayFit Recipes, we believe in real food, real results, and real people. We’re The DODOs — Kiko & Med. A couple of years ago, we made a deal to transform our health in 100 days. Back then, cinnamon rolls were off-limits because of all the refined flour, sugar, and unhealthy fats. But we didn’t want to feel deprived. So we took Kiko’s passion for breakfast and baked a better version — gluten free, optionally egg and dairy free, and just as warm, soft, and sweet as the originals.

Our first attempt was messy (spoiler: the dough stuck everywhere), but every try taught us what makes gluten free cinnamon rolls soft, flavorful, and easy to roll. Now it’s one of our go-to healthy breakfast recipes, and readers love that you can find more ideas in our breakfast category and even snacks to pair with your morning coffee.

Whether you’re avoiding gluten for health reasons or just want to bake a healthier treat for your family, these gluten free cinnamon rolls won’t disappoint. Stick with this guide to learn our foolproof method, pro tips, and how to store and freeze them for later.

Now, let’s talk ingredients and the smart swaps that make all the difference.

Ingredients & Alternatives: How to Make Smart Swaps Without Sacrificing Taste

Baking gluten free cinnamon rolls at home is one of the best ways to enjoy a comforting treat while staying true to your health goals. With our easy recipe, you can make soft, fluffy, and flavorful gluten free cinnamon rolls every single time. Below you’ll find the exact ingredients and clear, step-by-step instructions for perfect results.

Ingredients You’ll Need for Gluten Free Cinnamon Rolls

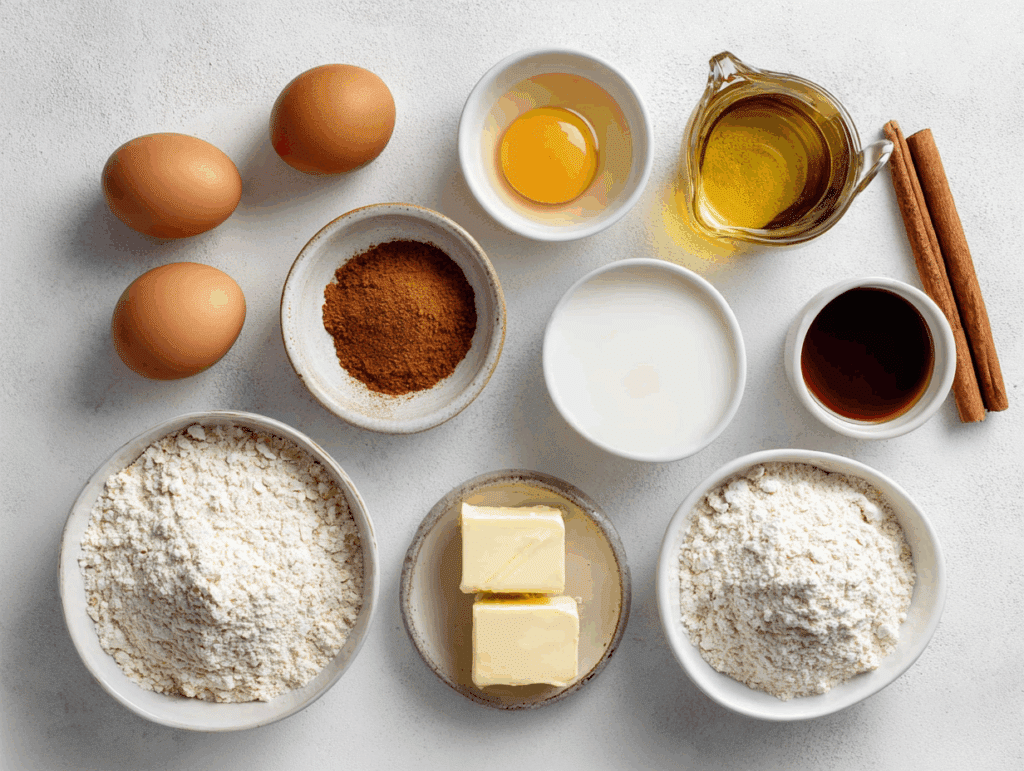
To make these amazing gluten free cinnamon rolls, start with the yeast and milk mixture. Combine 1 ¼ cups (264 grams) of milk — regular or non-dairy works — with 1 tablespoon of fast-acting yeast and 1 tablespoon of organic cane sugar. Let this sit for 5–10 minutes until foamy.

Ingredients for gluten free cinnamon rolls measured in bowls on marble countertop
Flat lay of all ingredients for gluten free cinnamon rolls, ready to bake

For the yeast and milk mixture:

  • 1 ¼ cups (264 grams) milk (regular or non-dairy)
  • 1 tablespoon fast-acting yeast
  • 2 teaspoons agave syrup

For the dough:

  • 1 ¾ cups (286 grams) gluten free all-purpose flour
  • ½ cup (88 grams) potato starch
  • ½ cup (75 grams) Expandex
  • ⅓ cup (72 grams) avocado oil
  • 3 tablespoons agave syrup
  • 1 ½ teaspoons baking powder
  • 2 teaspoons xanthan or guar gum
  • ¾ teaspoon salt
  • 2 large eggs or 3 ounces applesauce

For the filling:

  • 4 tablespoons softened butter or vegan butter
  • ½ cup agave syrup
  • 2 teaspoons ground cinnamon

For the pan:

  • 4 tablespoons milk or cream
  • 2 tablespoons melted butter

How to Make Gluten Free Cinnamon Rolls Step by Step

Step-by-Step Instructions for Gluten Free Cinnamon Rolls with Agave

Start by preheating your oven to 200°F and brushing your baking pan with 2 tablespoons melted butter.

Warm the milk just until lukewarm, then stir in the yeast and 2 teaspoons agave syrup. Set this aside for about 5–10 minutes to foam. This step ensures your yeast is active and will help your gluten free cinnamon rolls rise properly.

While the yeast activates, place the flour, potato starch, Expandex, baking powder, xanthan gum, and salt into the bowl of your stand mixer. Add the avocado oil, eggs (or applesauce), and 3 tablespoons of agave syrup to the bowl. Once the yeast mixture is foamy, pour it in as well.

Using the paddle attachment, mix on low to medium speed at first, then increase to high for about 1 minute. You should have a sticky, smooth dough — this is normal for gluten free cinnamon rolls.

On a lightly oiled piece of parchment, turn out the dough. Spray your hands with oil and gently press the dough into a rectangle about 14 by 12 inches.

Spread the softened butter over the dough, leaving about half an inch around the edges. Drizzle the agave syrup evenly across the surface, then sprinkle with the ground cinnamon.

Using the parchment to guide you, roll the dough tightly into a log, seam-side down. If needed, sprinkle a little potato starch on your hands to handle the dough more easily. Use a ruler to mark every 1 ½ inches and cut into 9 even rolls.

Arrange the rolls in your prepared pan, spacing them evenly. Brush the tops with 2 tablespoons of milk or cream. Cover with a towel and place in the warm oven (turned off) to rise for about 35–40 minutes.

Remove the pan, preheat your oven to 375°F, and brush the rolls with the remaining milk or cream. Bake your gluten free cinnamon rolls for 18–19 minutes if you like a gooey center or 20–22 minutes for firmer rolls.

Essential Gluten Free Cinnamon Roll Ingredients You’ll Need

Start by gathering everything you need so the process is smooth. For the yeast mixture, you’ll use warm milk — dairy or non-dairy both work — with instant yeast and a little sugar to feed it. The dough relies on a gluten free flour blend (we prefer King Arthur’s Measure for Measure), potato starch, Expandex for elasticity, organic cane sugar, avocado oil, baking powder, xanthan gum, salt, and two eggs.

If you’ve never baked gluten free before, don’t worry. Combining flours and starches properly is what gives these gluten free cinnamon rolls their signature soft bite. You can also find more inspiration for healthier baked goods in our healthy baking section.

The filling is classic: softened butter, brown sugar, and cinnamon. To finish, we like a drizzle of cream cheese frosting, but you can skip it or use a vegan version.

Here’s the full table of ingredients for easy reference:

Ingredient Amount
Gluten free flour blend 1 ¾ cups
Potato starch ½ cup
Expandex ½ cup
Avocado oil ⅓ cup

Egg-Free and Dairy-Free Modifications That Actually Work

One of the best things about this recipe is how adaptable it is. If you’re avoiding eggs, simply substitute 3 ounces of applesauce for the two eggs — it keeps the dough moist and soft. For dairy-free, just use unsweetened almond milk and vegan butter wherever milk or butter is called for.

We’ve even tested this recipe side-by-side with these swaps and found that the flavor and texture of these gluten free cinnamon rolls hold up beautifully.

Step-by-Step: How to Make Gluten Free Cinnamon Rolls That Are Soft and Delicious

Now that you’ve got your ingredients ready, it’s time to roll up your sleeves and make the best gluten free cinnamon rolls you’ve ever tasted. Follow these simple steps and you’ll have warm, fluffy rolls ready to serve.

Preparing the Yeast and Mixing the Dough Properly

Start by warming your milk to about 110°F — warm enough to activate the yeast but not too hot. In a small bowl, mix the warm milk, instant yeast, and a tablespoon of sugar. Let it sit for 5–10 minutes until it starts to foam. This ensures your yeast is alive and ready to help your gluten free cinnamon rolls rise.

While the yeast is proofing, combine your dry ingredients: gluten free flour blend, potato starch, Expandex, cane sugar, baking powder, xanthan gum, and salt in a large mixing bowl. Whisk until everything is evenly distributed.

Next, add the eggs (or applesauce for egg-free), avocado oil, and the foamy yeast mixture to the dry ingredients. Using a stand mixer with a paddle attachment, mix on medium speed for about 3–4 minutes until the dough is smooth and slightly sticky. Don’t worry — gluten free dough won’t feel exactly like wheat dough, and it’s supposed to be softer.

Sprinkle a little extra flour on a piece of parchment paper, then turn your dough onto it and gently pat it into a rectangle. Keeping it slightly sticky helps these gluten free cinnamon rolls stay soft when baked.

Rolling, Filling, and Baking to Perfection

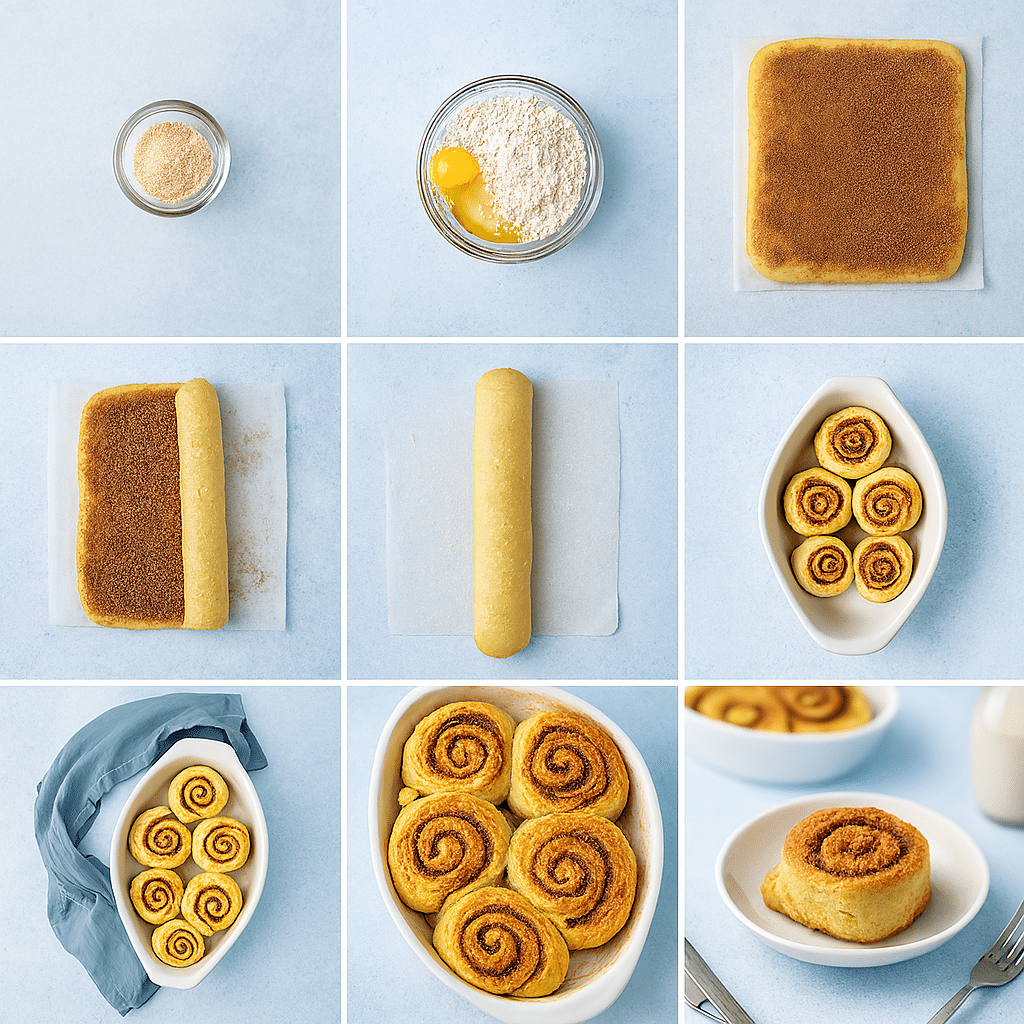
Step-by-step process of making gluten free cinnamon rolls on white marble countertop
Step-by-step collage of gluten free cinnamon rolls recipe: from mixing dough to golden baked rolls

Now spread softened butter evenly over the surface of your dough rectangle. In a small bowl, mix the brown sugar and cinnamon, then sprinkle it generously over the buttered dough.

Using the parchment paper to help, carefully roll the dough into a log. Don’t press too hard — just keep it tight enough to hold its shape. Once rolled, use a sharp knife or dental floss to cut the log into 8–10 even rolls.

Arrange the rolls in a greased baking dish, leaving a little space between each one so they can expand. Cover the pan with a clean kitchen towel and let them rise for 30–40 minutes. Yes, even gluten free cinnamon rolls need time to rise — and this step makes them extra soft.

Preheat your oven to 350°F. Once risen, bake the rolls for about 25–30 minutes, or until they’re golden brown and smell irresistible. If you’d like, brush the tops with melted butter halfway through for even more flavor.

You can top them with cream cheese frosting or leave them as-is for a slightly lighter option. Either way, you’ll have a tray of warm, comforting gluten free cinnamon rolls perfect for breakfast, brunch, or even dessert.

Tips and Tricks for Perfect Gluten Free Cinnamon Rolls Every Time

Making gluten free cinnamon rolls that are soft, fluffy, and full of flavor isn’t hard — but there are a few smart tricks we’ve learned along the way. If you’ve ever baked gluten free and ended up with dense or dry results, these tips will help you fix that for good.

The Secret Techniques for Soft, Fluffy Results

The number one secret to soft gluten free cinnamon rolls is hydration. Gluten free flours are more absorbent than wheat flour, so keeping the dough slightly sticky is key. Don’t be tempted to add too much extra flour when rolling it out — it’s supposed to feel a little tacky.

Another tip: give your dough time to rise. Many people think gluten free dough doesn’t rise, but that’s not true. As long as your yeast is active and your environment is warm enough (around 75–80°F), the rolls will puff up beautifully.

We also recommend brushing the tops with a little melted butter before baking. This keeps them moist and adds a rich, golden color.

Finally, bake just until they’re golden brown. Overbaking is one of the most common mistakes and leads to hard rolls. Use a toothpick to check the center roll — it should come out clean, and the rolls should feel springy.

Common Mistakes to Avoid for Better Texture and Flavor

One common mistake is skipping the proofing step. Even though gluten free dough won’t double in size the same way wheat dough does, it still needs time for the yeast to work its magic and create a light texture. Be patient — it’s worth the wait.

Another pitfall: using the wrong flour blend. Not all gluten free blends are equal. We’ve had the best results with King Arthur’s Measure for Measure or similar high-quality blends. Cheap or unbalanced blends can result in gritty or crumbly rolls.

Finally, don’t skip the xanthan or guar gum. These ingredients help mimic the elasticity that gluten provides. Leaving them out will make your rolls fall apart.

Storing and Freezing Gluten Free Cinnamon Rolls the Right Way

One of the best things about these gluten free cinnamon rolls is that they’re just as good the next day — if you store them properly. Whether you’re making a big batch ahead of time or saving leftovers, these simple tips will keep your rolls soft and satisfying.

Best Ways to Store and Reheat Without Drying Them Out

Gluten free baked goods tend to dry out faster than their wheat-based counterparts. To prevent that, let your cinnamon rolls cool completely after baking, then cover them tightly with plastic wrap or store them in an airtight container. They’ll stay fresh at room temperature for up to two days.

If you need them to last longer, refrigerate them for up to five days. Before serving, warm them gently in the microwave for 10–15 seconds or in a 300°F oven for about 5 minutes. This brings back the soft, fluffy texture and makes the cinnamon filling gooey again.

For more reheating ideas and tips, you can also check our snacks category — many of our healthy treats are freezer-friendly too.

How to Freeze and Enjoy Later

If you want to save a batch for another week, freezing your gluten free cinnamon rolls is a great option. Once baked and cooled, wrap each roll individually in plastic wrap and place them in a freezer-safe bag. They’ll keep well for up to two months.

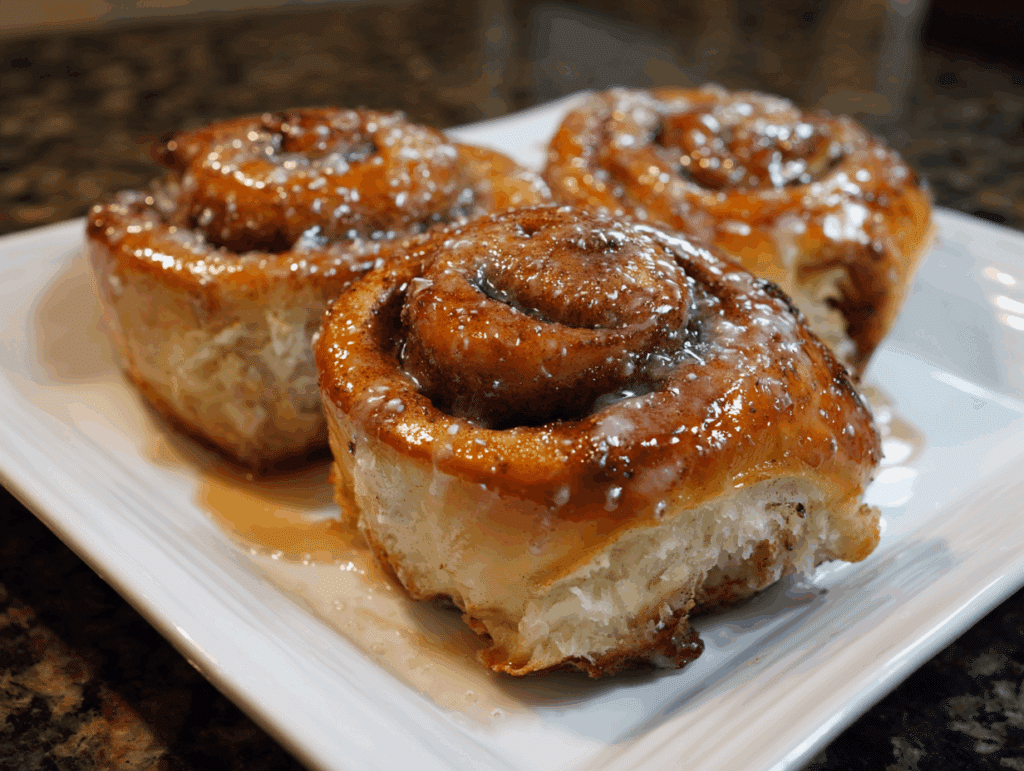
Gluten free cinnamon roll served on a plate with fork and linen napkin
Warm gluten free cinnamon roll served at a cozy breakfast table

When you’re ready to enjoy them, let them thaw at room temperature for about an hour, then warm them in the oven or microwave as above. Freezing works especially well if you like having healthy breakfast options ready on busy mornings — just like our breakfast recipes that make meal prep a breeze.

Proper storage and gentle reheating keep your gluten free cinnamon rolls tasting just as fresh as the day you made them. Next, let’s answer some of the most common questions we get about making, baking, and enjoying these rolls.

Print
clock clock iconcutlery cutlery iconflag flag iconfolder folder iconinstagram instagram iconpinterest pinterest iconfacebook facebook iconprint print iconsquares squares iconheart heart iconheart solid heart solid icon
Gluten free cinnamon roll served on a plate with fork and linen napkin

Gluten Free Cinnamon Rolls: Soft & Healthy Recipe Made Easy


5 Stars 4 Stars 3 Stars 2 Stars 1 Star

No reviews

  • Author: Chef Dodos
  • Total Time: 1 hour 30 minutes
  • Yield: 9 rolls 1x
  • Diet: Gluten Free

Description

Soft, sweet, and healthy gluten free cinnamon rolls made with agave syrup instead of sugar — perfect for breakfast or dessert.


Ingredients

Scale

For the Yeast + Milk Mixture

1 ¼ cups (264g) milk (regular or non-dairy)

1 tablespoon fast-acting yeast

2 teaspoons agave syrup

For the Dough

1 ¾ cups (286g) gluten free all-purpose flour

½ cup (88g) potato starch

½ cup (75g) Expandex

⅓ cup (72g) avocado oil

3 tablespoons agave syrup

1 ½ teaspoons baking powder

2 teaspoons xanthan or guar gum

¾ teaspoon salt

2 large eggs or 3 oz applesauce

For the Filling

4 tablespoons softened butter or vegan butter

½ cup agave syrup

2 teaspoons ground cinnamon

For the Pan

4 tablespoons milk or cream

2 tablespoons melted butter


Instructions

1. Preheat oven to 200°F and brush pan with 2 tbsp melted butter.

2. Warm milk to lukewarm, stir in yeast and 2 tsp agave syrup, set aside to foam.

3. Combine dry ingredients in stand mixer bowl: flour, potato starch, Expandex, baking powder, xanthan gum, salt. Add oil, eggs/applesauce, and 3 tbsp agave syrup. Add yeast mixture.

4. Mix on high for about 1 minute until sticky dough forms.

5. Press dough onto oiled parchment into 14×12 inch rectangle.

6. Spread softened butter, drizzle agave syrup, sprinkle cinnamon.

7. Roll up dough using parchment, seam-side down. Cut into 9 even rolls.

8. Place rolls in prepared pan, brush with 2 tbsp milk/cream. Cover and proof in warm oven for 35–40 minutes.

9. Remove pan, preheat oven to 375°F. Brush rolls with remaining milk. Bake 18–22 minutes.

10. Let cool slightly, then serve warm.

Notes

Sticky dough is normal — don’t add more flour.

Use applesauce and plant-based milk/butter for egg- and dairy-free.

Store covered at room temp for 2 days or refrigerate up to 5 days.

  • Prep Time: 25 minutes
  • Cook Time: 20 minutes
  • Category: Breakfast
  • Method: Baking
  • Cuisine: American

Nutrition

  • Serving Size: 1 roll
  • Calories: 210
  • Sugar: 10g
  • Sodium: 150mg
  • Fat: 8g
  • Saturated Fat: 2g
  • Unsaturated Fat: 5g
  • Trans Fat: 0g
  • Carbohydrates: 32g
  • Fiber: 3g
  • Protein: 3g
  • Cholesterol: 30mg

FAQs About Gluten Free Cinnamon Rolls

We get a lot of questions about making and baking gluten free cinnamon rolls. Here are clear answers to the most common ones, so you can feel confident every time you make them.

Do Gluten Free Cinnamon Rolls Still Need to Rise?

Yes! Even though there’s no gluten to develop, the yeast still needs time to create air pockets in the dough, making the rolls soft and fluffy. Don’t skip the rise — usually 30–40 minutes in a warm spot is enough. This step is key to achieving the perfect texture.

How Long Should I Let the Cinnamon Roll Dough Rise?

After you’ve rolled and cut your dough, place the rolls in your greased pan and let them rise until slightly puffy — about 30–40 minutes. They won’t double in size like wheat rolls, but you’ll see some lift. This short rise is what helps make these gluten free cinnamon rolls tender and airy.

How Do I Know When the Homemade Gluten Free Cinnamon Rolls Are Done?

Bake your rolls at 350°F for 25–30 minutes. They’re done when the tops are golden brown, the filling is bubbly, and the center roll feels springy to the touch. If you insert a toothpick, it should come out clean. Overbaking can make them dry, so keep an eye on them toward the end of baking time.

Why Are My Gluten Free Cinnamon Rolls Hard?

If your rolls turn out hard, it’s often because too much flour was added or they were baked too long. Gluten free dough is naturally sticky — resist the urge to over-flour while rolling it out. Also, store them properly and avoid overbaking to keep them soft.

Conclusion: Yes, You Can Have Soft, Delicious Gluten Free Cinnamon Rolls

Getting healthy doesn’t mean giving up comfort foods — it just means making smarter choices. These gluten free cinnamon rolls prove you can enjoy every warm, gooey bite while sticking to your goals. With the right flour mix, a little patience, and our tested method, you’ll bake rolls that are soft, flavorful, and just as satisfying as the originals.

Whether you make them egg-free, dairy-free, or as written, you’ll have a tray of cinnamon rolls that are perfect for breakfast, brunch, or dessert. For more wholesome ideas like this, visit our healthy baking or breakfast sections.

Happy baking — and remember, the best way to stay on track is to make healthy eating enjoyable

Let’s StayFit—together. For More follow us on facebook & pinterest

Protein Bagels in the Air Fryer: Quick, Healthy & High-Protein Breakfast

protein bagels fresh from air fryer on table
Table of Contents

Our Story + Why These Air Fryer Protein Bagels Work

Protein bagels weren’t something we grew up eating — but now, we can’t imagine our week without them. When we kicked off our 100-Day StayFit Challenge, we knew we had to find meals that actually fueled our goals. Kiko was stuck with stubborn belly fat despite lifting daily. Med? He lived on takeout and burgers and felt drained by noon.

So, we made a deal: Kiko would handle breakfast, and Med would take over dinner. That’s when we started playing around with bagel recipes. We needed something easy, high in protein, and satisfying enough to replace a drive-thru breakfast. These air fryer bagels turned out to be the perfect fix.

 protein bagels fresh from air fryer on table
reshly cooked protein bagels

With just a handful of ingredients and a quick air fryer session, we had golden, chewy bagels that didn’t taste “healthy” — they tasted legit good. Even better, Med started using them as burger buns, calling them the “ultimate post-workout sandwich base.”

They’re crisp on the outside, fluffy inside, and packed with protein thanks to Greek yogurt. One batch keeps us set for the week. Whether we’re topping them with eggs and spinach or peanut butter and banana, these bagels fit right into our routine.

Benefits of Air Fryer Protein Bagels

Protein bagels aren’t just a trend — they’re a smart choice for anyone trying to eat clean and stay full longer. Unlike the processed, carb-heavy bagels from the store, these are made with real ingredients that fuel your body, not spike your blood sugar.

What makes them even better is the air fryer. Instead of waiting for the oven to preheat, you get warm, golden bagels in under 15 minutes. The texture is perfect — crisp outside, soft and chewy inside. No oil, no mess, no guesswork.

The real magic, though, is in the macros. Thanks to Greek yogurt and self-rising flour, these protein bagels offer a balanced mix of protein and carbs. That means better energy, improved recovery, and fewer cravings between meals. For us, they became a go-to swap when we ditched sugary cereals and dry toast.

Med likes his protein bagels stacked with grilled chicken and egg for a power-packed start. I usually keep it simple — just some nut butter or a soft-boiled egg. Either way, they’re satisfying and easy to customize. If you want more meal inspiration, check out our grilled chicken bites or chocolate strawberry yogurt clusters — two staples we rotate with these bagels.

They also store well, so you can prep a batch for the week. Just reheat and go. It’s the kind of simple, real food that helped us stay on track — and it can do the same for you.

Ingredients & Prep Tips

Making protein bagels at home is surprisingly simple. You don’t need yeast, long rise times, or complicated flours. Just a few basic ingredients you likely already have — and an air fryer.

ingredients for homemade protein bagels
Greek yogurt, flour, egg, and seasoning prepped for protein bagels

The base of these bagels is a combo of self-rising flour and non-fat Greek yogurt. The flour gives structure, and the yogurt adds protein while keeping the dough soft. If you want to boost the protein even more, you can mix in a scoop of unflavored whey or collagen powder. Just be sure to adjust the flour slightly to keep the texture right.

You can also change up the flours. We’ve tested these with whole wheat and oat flour — both work well. For gluten-free options, use a 1:1 gluten-free baking blend. It holds together better than almond flour alone.

As for flavor, that’s where you get to play. Try garlic powder and cheddar for a savory twist, or cinnamon and a dash of maple for a sweeter version. Topping them with Everything Bagel seasoning before air frying gives them that classic crunch and aroma.

The dough is quick to pull together. Mix until it’s tacky but not sticky. Lightly flour your hands, shape into four even rings, and don’t worry about perfection. Once cooked, they’ll look golden and feel springy to the touch.

Want more clean breakfast recipes that keep you full? Try our quick cottage cheese pancakes or chocolate baked oat cups — both pair great with these protein bagels for a full StayFit start.

Make a double batch. Once you taste them warm from the air fryer, you’ll want extras ready for the week.

Step-by-Step Cooking Instructions

You don’t need to be a baker to make these air fryer protein bagels. They come together in minutes, and the cooking process is nearly foolproof. Once you’ve made them once, you’ll know the drill by heart.

Start by mixing your dough. Combine self-rising flour and Greek yogurt in a bowl. Use a spoon or your hands to mix until it forms a tacky ball. If it’s too dry, add a spoonful of yogurt. If too sticky, sprinkle a bit more flour.

Divide the dough into four equal parts. Roll each into a log, then connect the ends to form a ring. Don’t stress about perfect shapes — a rustic look adds charm. For a golden crust, brush each with a whisked egg, then sprinkle your favorite toppings.

dividing protein bagel dough into portions
Protein bagel dough divided into four equal parts, ready to be shaped

Preheat your air fryer to 300°F if your model recommends it. Place two bagels in the basket, giving them room to expand. Air fry for 10–12 minutes, flipping once at the halfway mark. They should be golden brown and firm when done. Let them rest for 5 minutes before slicing.

Want a full StayFit-style breakfast? Slice one open and add some zesty lemon chicken orzo or a few spoonfuls of our roasted sweet potato salad. It’s a great way to add variety without losing the focus on whole, protein-rich foods.

These protein bagels store well in the fridge for up to 4 days. To reheat, pop one back in the air fryer at 325°F for 2–3 minutes. It comes out crispy and warm — just like freshly made.

Once you get the feel, you’ll never go back to store-bought. Real food, real fast, and always satisfying.

Common Questions About Protein Bagels

We get asked about protein bagels a lot — especially once people realize they can make them with just a few ingredients and an air fryer. Let’s break down the most common questions we hear from our StayFit community.

Can bagels be cooked in an air fryer?
Absolutely. In fact, the air fryer is one of the best ways to cook bagels at home. You get a golden, crisp crust without drying out the inside. It’s faster than baking in the oven, and there’s no preheat time. Plus, the air fryer makes batch-cooking easy for meal prep.

Are protein bagels healthy?
Yes — especially when you make them yourself. These aren’t the sugary, white-flour bagels from a coffee shop. They’re built from Greek yogurt and flour, giving you a good balance of protein and carbs. They help keep blood sugar stable and support muscle recovery. Add a topping like eggs or our Mediterranean ground beef for an even more balanced plate.

Can you heat up a bagel in an air fryer?
Yes, and it’s one of the best ways to do it. Just set your air fryer to 325°F and heat the bagel for 2–3 minutes. It’ll come out warm, slightly crispy, and way better than a microwave version. Try it with a slice of cheese or our cottage cheese ranch dip on top.

Can you air fry bagels instead of toasting them?
Definitely. You can slice them and toss them into the air fryer for a quick toast. It works especially well with leftovers. Just a few minutes gives you a crunchy finish with zero fuss.

Whether you’re reheating or baking from scratch, protein bagels and air fryers are a match made for real-life eating.

Serving, Storing & Customizing

Now that your protein bagels are golden and ready, let’s talk about how to enjoy them — and keep them fresh. These aren’t just for breakfast. They’re a versatile base for meals throughout your day.

How to Serve Them
Go savory with turkey, avocado, and a soft-boiled egg. For a classic breakfast vibe, stuff your bagel with scrambled eggs and a slice of lean sausage. If you’re craving sweet, try peanut butter and banana, or our chocolate strawberry yogurt clusters spread on top.

For Med, the ultimate is turning these into a burger — chicken, spicy sauce, and lettuce stacked between two warm bagel halves. They’re firm enough to hold up and soft enough to bite through easily.

Storing & Freezing Tips
Let your bagels cool completely before storing. Keep them in an airtight container in the fridge for up to 4 days. To reheat, air fry at 325°F for 2–3 minutes, and they’re good as new.

Want to freeze a batch? No problem. Wrap each one in parchment or foil, then store in a freezer-safe bag. When you’re ready, toss it straight into the air fryer — no thawing needed.

Customizing Your Flavor
These protein bagels are a blank canvas. Add chopped herbs or grated cheese to the dough. Swap in cinnamon and vanilla for a sweeter version. Or top with Everything Bagel seasoning for that classic crunch.

Pair them with meals that keep you on track — like our zesty lemon chicken orzo or even sliced with a side of cottage cheese and fruit for a fast lunch.

Once you find your favorite combo, you’ll wonder how you ever did mornings without these.

FAQs

Can bagels be cooked in an air fryer?

Yes, bagels cook perfectly in an air fryer. Whether you’re making fresh dough or reheating leftovers, the air fryer gives you a crisp exterior and soft inside in just 10–12 minutes — no oven needed.

Are protein bagels healthy?

Homemade protein bagels are a healthy choice, especially when made with Greek yogurt and minimal ingredients. They’re high in protein, lower in sugar, and more filling than traditional white flour bagels.

Can you heat up a bagel in an air fryer?

Definitely. To reheat, place your bagel in the air fryer at 325°F for 2–3 minutes. It warms through evenly and keeps its texture better than microwaving.

Can you air fry bagels instead of toasting them?

Yes. Slice your protein bagel in half and pop it into the air fryer. Toast at 350°F for 2–4 minutes for a warm, crispy result without a traditional toaster.

Conclusion

You don’t need fancy ingredients or a full kitchen to eat better — just real food, a plan, and a little commitment. These protein bagels have become one of our most dependable recipes. They’re simple to make, easy to customize, and fit perfectly into a busy, balanced life.

Whether you’re looking for a quick breakfast, a burger swap, or a grab-and-go snack, this one recipe can do it all. And because they’re cooked in the air fryer, they’re as efficient as they are delicious.

We’ve used these bagels to power our mornings, fuel workouts, and even replace fast food cravings. They helped us StayFit — now it’s your turn.

let’s stayfit together ! Follow us for more on facebook

Print
clock clock iconcutlery cutlery iconflag flag iconfolder folder iconinstagram instagram iconpinterest pinterest iconfacebook facebook iconprint print iconsquares squares iconheart heart iconheart solid heart solid icon
protein bagels fresh from air fryer on table

Protein Bagels in the Air Fryer: Quick, Healthy & High-Protein Breakfast


5 Stars 4 Stars 3 Stars 2 Stars 1 Star

No reviews

  • Author: Chef Dodos
  • Total Time: 17 min
  • Yield: 4 bagels 1x

Description

These easy air fryer protein bagels are made with just 3 ingredients, no yeast, and pack over 12g of protein each. Perfect for healthy breakfasts or meal prep.


Ingredients

Scale

1 cup self-rising flour

1 cup non-fat Greek yogurt

1 egg (for egg wash, optional)

1 tbsp Everything Bagel seasoning (optional)


Instructions

1. Mix the flour and Greek yogurt in a bowl until it forms a dough.

2. Transfer to a floured surface and knead gently until smooth.

3. Divide into 4 equal parts, roll into logs, and shape into rings.

4. Brush with egg wash and sprinkle seasoning if using.

5. Preheat air fryer to 300°F. Place 2 bagels in the basket with space.

6. Air fry 10–12 minutes, flipping at halfway for even browning.

7. Cool for 5 minutes before slicing and serving.

Notes

Use whole wheat or oat flour for extra fiber.

Freeze extras and reheat in the air fryer straight from frozen.

Add cinnamon or garlic powder to customize the flavor.

  • Prep Time: 5 min
  • Cook Time: 12 min
  • Category: Breakfast, Snack
  • Method: Air Fryer
  • Cuisine: American

Nutrition

  • Serving Size: 1 bagel
  • Calories: 145
  • Sugar: 1g
  • Sodium: 170mg
  • Fat: 2g
  • Saturated Fat: 0.5g
  • Unsaturated Fat: 1.5g
  • Trans Fat: 0g
  • Carbohydrates: 21g
  • Fiber: 2g
  • Protein: 12g
  • Cholesterol: 40mg

How to Make Healthy Banana Bread That Actually Tastes Good

Healthy banana bread loaf on white kitchen counter
Table of Contents

Why We Swapped Our Banana Bread (and Never Looked Back)

Banana bread used to be our guilty pleasure — like, really guilty. Back when Kiko and I (Med) made our “100 days, no excuses” pact, traditional banana bread was one of the first things to go. But guess what? It came back — stronger, better, and healthy. We just had to flip how we thought about ingredients. Now, our healthy banana bread recipe is on repeat in our kitchen. Moist, sweet, satisfying, and totally in line with our goals.

Let’s be real — most banana bread recipes sneak in loads of refined sugar, white flour, and butter. That stuff might taste good, but it left us feeling bloated and foggy. So, we started experimenting. What if we could get that same comforting flavor and texture… without the crash?

Healthy banana bread loaf on white kitchen counter
reshly baked healthy banana bread — golden and guilt-free.

Turns out, we could. The secret was keeping the essence — those overripe bananas with their natural sweetness — and rebuilding everything else. We swapped white flour for fiber-rich whole wheat. Ditched refined sugar in favor of real stuff like honey and mashed banana. And oils? Only the kind that fuels, not fogs.

We also leaned into the idea that food should work for us, not against us. That’s why we added a dash of protein-rich Greek yogurt and a sprinkle of flax for extra fiber. No compromises, just better balance.

If you’ve ever made a batch of banana bread and felt that sugar hangover an hour later — we’ve been there. But trust me, this recipe is different. It’s indulgent and energizing. And honestly, you’ll never miss the old version once you’ve tried this one.

Looking for other smart breakfast swaps? Our Chocolate Baked Oat Cups hit the same warm, satisfying notes. Pair them with our Cottage Cheese Ranch Dip for a savory snack that’ll keep your goals on track.

Choosing the Right Ingredients for Healthy Banana Bread

When we first started cleaning up our meals, baking was one of the toughest categories to crack — especially banana bread. We wanted that classic flavor and cozy texture, but without the blood sugar rollercoaster. Enter our two go-to flours: oat flour and almond flour. Together, they make this loaf moist, fluffy, and packed with nutrients — no white flour, no gluten, no regrets.

Why Oat and Almond Flour Are a Power Combo

Oat flour gives you that comforting, cake-like structure while adding a boost of soluble fiber — perfect for steady energy and better digestion. Almond flour brings healthy fats, vitamin E, and a hint of natural sweetness. The result? A rich, moist banana bread that doesn’t need oil or butter to stay soft.

We like to use:

  • 1 cup oat flour
  • ½ cup almond flour

This ratio balances structure and tenderness. Too much almond flour can make it crumbly, and too much oat flour can make it gummy — but together, they nail the texture.

Plus, both are naturally gluten-free (just double-check your oats if you’re celiac-sensitive).

Want even more protein? Add a scoop of vanilla protein powder and subtract a bit of flour to keep the ratio balanced.

Here’s a quick guide:

                                                                                       
Flour TypeHealth Benefit
Whole Wheat Pastry FlourHigh in fiber, light texture, nutrient-rich
Oat FlourGluten-free, rich in beta-glucan, great flavor
Almond FlourLow-carb, high in healthy fats and vitamin E

The Best Natural Substitutes for Sugar

The beauty of overripe bananas? They’re naturally sweet. So you’re already halfway there. But if you want to enhance that sweetness without using processed sugar, here’s what we recommend:

  • Mashed medjool dates: High in fiber and potassium.
  • Honey or maple syrup: Natural, flavorful, and easy to mix.
  • Unsweetened applesauce: Great for moisture and subtle sweetness.

One of our favorite tricks? Combine mashed bananas with just a tablespoon of honey. It’s all you need. No spike, no crash — just pure, steady energy.

For another great example of using high-protein, real-food ingredients in baking, check out our Cottage Cheese Pancakes. They’re fluffy, flavorful, and full of fuel — just like this banana bread.

Mastering the Method: Mistakes to Avoid & Tips That Work

You’ve got the right ingredients — now let’s make sure you don’t mess them up. We’ve baked dozens (okay, maybe hundreds) of loaves during our transformation, and one thing became clear: technique matters. One wrong move can turn your dreamy banana bread into a dry brick. But don’t worry — we’ve got your back.

What’s the Number One Mistake When Making Banana Bread?

Hands down: overmixing the batter. It’s easy to do — you’re excited, you want that smooth texture — but here’s the thing: overmixing activates gluten (even in oat flour). That means your banana bread goes from light and tender to dense and gummy. Not what you want.

So here’s our simple rule:
Mix your dry ingredients in one bowl, your wet ingredients in another. Then combine them gently. Fold until just mixed — no electric mixer needed.

You’re not trying to whip air into a soufflé. You’re just marrying banana with flour. Keep it chill.

Another pitfall? Using bananas that aren’t ripe enough. They should be brown-spotted and super soft — borderline “mash-with-a-fork” ripe. That’s where all the natural sugar and moisture comes from.

Pro Tips for Texture, Moisture & Flavor

Let’s level up your loaf. These small adjustments make a huge difference:

  • Use room-temperature eggs: Cold eggs don’t mix evenly and can cause curdling in your batter.
  • Don’t skip the salt: Just 1/4 teaspoon boosts every other flavor.
  • Add Greek yogurt or cottage cheese: For moisture + protein (a tip we also use in our Grilled Chicken Bites — juicy every time).
  • Line your loaf pan with parchment paper for easy removal. No more stuck corners.
  • Don’t guess doneness: Use the toothpick test! Insert into the center — it should come out clean or with just a few moist crumbs.

You can even get playful with mix-ins — walnuts for crunch, dark chocolate chips for flair, or chia seeds for extra fiber. Just don’t overload the batter.

The Full Healthy Banana Bread Recipe (Gluten-Free, No Refined Sugar)

Ready to bake? Here’s the complete recipe for our go-to healthy banana bread using oat flour and almond flour. It’s moist, naturally sweetened, gluten-free, and absolutely perfect for breakfast, snacks, or even dessert.


Ingredients:

Real, clean ingredients that make this loaf a smart swap.
  • 3 very ripe bananas, mashed (about 1 ¼ cups)
  • 2 large eggs (room temperature)
  • ¼ cup maple syrup or 2 mashed medjool dates
  • ⅓ cup plain Greek yogurt (or coconut yogurt for dairy-free)
  • 1 tsp vanilla extract
  • 1 cup oat flour
  • ½ cup almond flour
  • 1 tsp baking soda
  • ½ tsp baking powder
  • ½ tsp cinnamon
  • ¼ tsp salt
  • Optional:
      • ¼ cup dark chocolate chips
      • ¼ cup chopped walnuts

Instructions:

  1. Preheat your oven to 350°F (175°C). Line a 9×5-inch loaf pan with parchment paper or lightly grease it.
  2. In a large bowl, mash the bananas until smooth.
  3. Add in the eggs, maple syrup, Greek yogurt, and vanilla. Whisk together until well combined.
  4. In another bowl, whisk together the oat flour, almond flour, baking soda, baking powder, cinnamon, and salt.
  5. Gently fold the dry ingredients into the wet banana mixture. Do not overmix — stir just until no flour streaks remain.
  6. Fold in optional mix-ins like chocolate chips or walnuts, if using.
  7. Pour the batter into the loaf pan and smooth the top with a spatula.
  8. Bake for 45 to 50 minutes, or until a toothpick inserted into the center comes out clean or with just a few moist crumbs.
  9. Cool in the pan for 10 minutes, then transfer to a wire rack to cool fully before slicing.

Storage:

  • Room Temperature: Store in an airtight container for 2–3 days.
  • Fridge: Stays fresh for up to 5 days.
  • Freezer: Slice, wrap, and freeze for up to 2 months. Reheat or thaw as needed.

How to Make It Your Own (While Staying Fit)

Here’s the fun part — once you’ve nailed the base recipe, you can totally customize it. Whether you’re switching up flavors or batch prepping for the week, this healthy banana bread is flexible enough to match your lifestyle without sacrificing your goals.

Fun Variations & Swaps Without Losing Health Benefits

Just because we made it healthier doesn’t mean it has to be boring. We love playing with flavor profiles and boosting nutrition with creative twists:

healthy-banana-bread-slice.jpg
  • Blueberry Burst: Fold in ½ cup fresh or frozen blueberries.
  • Walnut Crunch: Add ¼ cup chopped walnuts for texture and heart-healthy fats.
  • Chocolate Chip Glow-Up: Use dark chocolate chips (70%+) to keep it antioxidant-rich.
  • Cinnamon Swirl: Mix 1 tsp cinnamon into the batter or swirl with a spoon of almond butter and maple syrup for a marbled effect.

Need it gluten-free? Oat or almond flour work great. Going dairy-free? Use coconut oil and a flax egg (1 tbsp ground flax + 3 tbsp water, let sit 5 min). Want extra protein? Toss in a scoop of your favorite vanilla protein powder — just reduce flour slightly.

The goal is simple: keep the integrity of the ingredients while letting your preferences shine.

We do this same thing with savory meals too — our Mediterranean Ground Beef Skillet shows how swapping spices or greens can completely change the vibe of a dish while keeping the macros strong.

Serving, Storing, and Meal-Prepping for the Week

Banana bread makes an awesome breakfast, snack, or even a pre-workout bite. Here’s how to keep it fresh and functional:

  • Short-term storage: Wrap tightly and store at room temp for 2–3 days.
  • Fridge: Lasts up to 5 days in an airtight container.
  • Freezer: Slice first, then wrap each piece individually. Freeze up to 2 months. Reheat in a toaster or microwave — or just let it thaw naturally.

Pro tip: Make two loaves on Sunday. Eat one this week, freeze the other for later. It’s one of our favorite “no stress” moves — like prepping a batch of our Muhammara Dip to have flavor-packed snacks ready all week.

You can even pack a slice with almond butter and a boiled egg for an on-the-go mini meal that feels like a treat, not a sacrifice.

We’ve got your back.

Let’s StayFit—together.For More follow us on facebook & pinterest

Healthy Banana Bread FAQs

Is there a healthy version of banana bread?

Yes — and this is it! Our version skips refined sugar and white flour in favor of oat flour, almond flour, and natural sweeteners like bananas and maple syrup. It’s nutrient-rich, gluten-free, and still delivers all the flavor and texture you crave.

What is the healthiest flour for banana bread?

Oat flour and almond flour are two of the best. Oat flour is high in fiber and helps stabilize blood sugar, while almond flour is rich in healthy fats and vitamin E. Together, they create a moist, satisfying loaf with a soft crumb

What is a healthy substitute for sugar in banana bread?

We use mashed bananas as the primary sweetener, plus a touch of maple syrup or medjool dates. These natural options offer sweetness with nutrients — no crash, no processed junk.

What is the number one mistake when making banana bread?

Overmixing the batter. It’s tempting to stir until smooth, but that leads to dense, gummy bread. Mix your dry and wet ingredients separately, then fold together gently until just combined.

Print
clock clock iconcutlery cutlery iconflag flag iconfolder folder iconinstagram instagram iconpinterest pinterest iconfacebook facebook iconprint print iconsquares squares iconheart heart iconheart solid heart solid icon
Healthy banana bread loaf on white kitchen counter

Healthy Banana Bread Recipe: Easy, Delicious, and Guilt-Free


5 Stars 4 Stars 3 Stars 2 Stars 1 Star

No reviews

  • Author: Chef Dodos
  • Total Time: 1 hour
  • Yield: 1 loaf (10 slices) 1x

Description

This healthy banana bread is made with oat flour and almond flour, naturally sweetened with bananas and maple syrup. It’s moist, gluten-free, and perfect for breakfast or snacks.


Ingredients

Scale

3 ripe bananas, mashed

2 large eggs (room temperature)

1/4 cup maple syrup or 2 mashed medjool dates

1/3 cup plain Greek yogurt (or coconut yogurt)

1 tsp vanilla extract

1 cup oat flour

1/2 cup almond flour

1 tsp baking soda

1/2 tsp baking powder

1/2 tsp cinnamon

1/4 tsp salt

Optional: 1/4 cup dark chocolate chips or chopped walnuts


Instructions

1. Preheat oven to 350°F (175°C). Line or grease a 9×5-inch loaf pan.

2. Mash bananas in a large bowl. Whisk in eggs, maple syrup, yogurt, and vanilla.

3. In another bowl, combine oat flour, almond flour, baking soda, baking powder, cinnamon, and salt.

4. Gently fold dry ingredients into the wet mixture until just combined.

5. Stir in optional mix-ins if using.

6. Pour batter into the loaf pan and smooth the top.

7. Bake for 45–50 minutes, or until a toothpick comes out clean.

8. Cool in the pan for 10 minutes, then transfer to a wire rack to cool completely.

Notes

Wrap slices individually to freeze up to 2 months.

Use flax eggs and coconut yogurt for a dairy-free, vegan version.

Great for breakfast, snacks, or as a pre-workout meal.

  • Prep Time: 10 minutes
  • Cook Time: 50 minutes
  • Category: Breakfast
  • Method: Baking
  • Cuisine: American

Nutrition

  • Serving Size: 1 slice
  • Calories: 145
  • Sugar: 8g
  • Sodium: 190mg
  • Fat: 5g
  • Saturated Fat: 1g
  • Unsaturated Fat: 3.5g
  • Trans Fat: 0g
  • Carbohydrates: 21g
  • Fiber: 3g
  • Protein: 4g
  • Cholesterol: 35mg

Conclusion

Healthy doesn’t have to mean bland — and this banana bread proves it. With the perfect combo of oat and almond flour, zero refined sugar, and just the right texture, this recipe is one you’ll keep in your regular rotation.

We’ve used it as a pre-workout snack, a grab-and-go breakfast, and a cozy weekend treat — and it fits every phase of our StayFit journey.

Give it a try, tag us when you bake it, and check out more feel-good recipes over on our Chocolate Baked Oat Cups or Muhammara Dip. You don’t have to give up flavor to show up for yourself.