Homemade Perfect Protein Bar: Easy Guide to Amazing Results

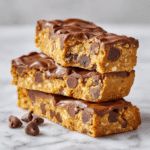
Homemade Perfect Protein Bar on kitchen table

We all have that one snack we keep coming back to — for us, it’s Perfect Bars. Soft, creamy, just the right balance of sweet and salty, and packed with protein to keep you going. But at $3–4 a bar? Not exactly sustainable.

That’s why we decided to take matters into our own hands. After a little kitchen experimenting, we created our own Homemade Perfect Protein Bar — and we couldn’t be happier with the results. This easy, no-bake recipe gives you everything you love about the original: amazing taste, satisfying texture, and a solid nutritional boost. And it’s made with just six everyday ingredients you probably already have.

In this guide, we’ll walk you through exactly how to make these bars step-by-step. You’ll learn what goes into a Perfect Bar, how to store them, how to customize for dietary needs, and what makes them so irresistible. By the end, you’ll have the perfect snack for busy days, workouts, or just keeping your energy steady — without the hefty price tag.

Our Story & Why We Made the Homemade Perfect Protein Bar

How This Homemade Perfect Protein Bar Changed Everything

We’re Kiko & Med — and not too long ago, we were stuck. Kiko was putting in the hours at the gym but still felt drained. Med was underweight, running out of steam by mid-afternoon, and frustrated. We knew we needed better fuel to feel better and get results.

That’s when we discovered Perfect Bars. They were a quick win: creamy, satisfying, and easy to grab when we were busy. But after a few weeks, the cost started to add up — and we weren’t willing to keep paying so much just for a snack.

One weekend we decided to experiment and came up with this Homemade Perfect Protein Bar recipe. With just a handful of ingredients and no baking, our Homemade Perfect Protein Bar turned out soft, chewy, and even more affordable than we expected. We’ve been making this Homemade Perfect Protein Bar every week since — and now we’re sharing it here so you can, too.

If you’re looking for more simple, wholesome snack ideas to pair with your Homemade Perfect Protein Bar, you might also enjoy our Chocolate Strawberry Yogurt Clusters or our Berry Cheesecake Overnight Oats, both healthy and easy to prep.

Why Make Your Own?

Making your own Homemade Perfect Protein Bar means you’re in control. You can adjust the sweetness, skip preservatives, and even make it nut-free or gluten-free if you need to.

We also love knowing we’ve got a batch of Homemade Perfect Protein Bars in the fridge — one less thing to think about on busy days. Just like our Grilled Chicken Bites or our Mediterranean Ground Beef Skillet, these bars help keep us on track without feeling like extra work.

Ingredients Explained – What’s in a Perfect Bar?

What You’ll Find in the Original Perfect Bar

If you’ve ever read the label on a store-bought Perfect Bar, you know it’s packed with a long list of ingredients. Peanut butter, honey, dried milk powder, egg powder, and a proprietary “superfood” blend of greens and seeds. Those extras sound impressive, but the real magic of a Perfect Bar comes down to just a few essentials: nut butter, a sweetener, and something to hold it all together.

That’s why our Homemade Perfect Protein Bar keeps it simple. With only six pantry staples, you still get the same creamy, chewy, satisfying texture — but without unnecessary additives. And the flavor? Just as good, if not better.

Here’s what goes into our recipe:

  • Peanut butter — creamy, rich, and full of healthy fats.
  • Honey — natural sweetness and a sticky binder.
  • Coconut oil — adds moisture and helps everything hold.
  • Oat flour — hearty and satisfying without being heavy.
  • Protein powder — optional, but it gives each Homemade Perfect Protein Bar an extra boost.
  • A pinch of salt — to balance all that sweetness.
Homemade Perfect Protein Bar ingredients on counter
Ingredients for making a Homemade Perfect Protein Bar laid out neatly

Why These Ingredients Work So Well

Each ingredient in this Homemade Perfect Protein Bar plays a role. The nut butter and coconut oil keep the bars soft. Honey holds everything together. Oat flour adds bulk and a chewy texture. And protein powder, if you choose to use it, makes the bars more filling and ideal for post-workout recovery.

We love customizing our bars depending on the week. Sometimes we mix in mini chocolate chips or sprinkle sea salt on top. Other times we go for a more dessert-inspired vibe, like our Healthy Banana Bread or these Chocolate Baked Oat Cups — proof that healthy doesn’t have to mean boring.

You can also experiment with different nut butters, swap in maple syrup for honey, or use almond flour if you’re avoiding oats. That’s the beauty of making your own Homemade Perfect Protein Bar — you can adjust it to fit your needs.

How to Make the Perfect Bar – Step-by-Step

Step-by-Step Guide to the Homemade Perfect Protein Bar

The beauty of the Homemade Perfect Protein Bar is how easy it is to make. No baking, no fancy equipment — just one bowl, a spatula, and a little fridge time. Here’s how to make a batch in about 10 minutes.

Step 1: Mix the Wet Ingredients
In a large mixing bowl, combine peanut butter, melted coconut oil, and honey. Stir until the mixture is completely smooth. The coconut oil helps loosen the peanut butter and makes it easier to combine.

Step 2: Add the Dry Ingredients
Next, fold in oat flour, protein powder, and a pinch of salt. Use a sturdy spatula and mix until everything comes together into a thick, cookie-dough-like batter. If it feels too sticky, add a teaspoon or two more oat flour.

Step 3: Shape & Chill
Line a small baking dish or pan with parchment paper. Press the mixture firmly into an even layer, making sure it reaches all the edges. Refrigerate for at least an hour to let it firm up. Then slice into bars or squares, and enjoy!

That’s it — you’ve just made your first batch of Homemade Perfect Protein Bars.

Tips & Fun Variations

Once you’ve mastered the basic recipe, have fun with add-ins. Fold in mini chocolate chips, chopped nuts, or even crushed graham crackers for a s’mores vibe. A sprinkle of flaky sea salt on top also makes each bite pop.

These bars are easy to customize for your mood, just like our Quick & Easy Cottage Cheese Pancakes or the versatile Zesty Lemon Chicken Orzo Protein Boost. You can even cut them into bite-sized pieces for little snack squares when you’re on the go.

By making your own Homemade Perfect Protein Bar, you save time, money, and gain a snack you actually look forward to.

Healthy or Not? Are Perfect Bars Actually Good for You?

The Nutritional Benefits of a Homemade Perfect Protein Bar

One of the biggest questions we get about the Homemade Perfect Protein Bar is whether it’s actually healthy. The answer? Absolutely — when you make it yourself, you’re using whole, nutritious ingredients you can feel good about.

Each bar gives you a balance of healthy fats, natural sugars, complex carbs, and protein. That mix helps keep your energy stable, your cravings in check, and your stomach full between meals. Plus, by making your own bars, you can control the amount of sweetener, adjust the protein level, and skip unnecessary fillers.

They’re especially great as a pre-workout snack, a quick breakfast, or a mid-afternoon pick-me-up. If you pair your Homemade Perfect Protein Bar with a piece of fruit or some yogurt, you’ve got a perfectly balanced mini meal — much like our Pistachio Ice Cream recipe which proves healthy eating can still feel like a treat.

When to Enjoy and When to Watch Portions

While the Homemade Perfect Protein Bar is packed with nutrients, it’s also calorie-dense — which is why we recommend eating it mindfully if weight loss is your goal. Each bar is designed to fill you up, not to replace a meal or snack you’d eat mindlessly.

That said, it’s miles better than grabbing processed candy or skipping meals altogether. And because it’s homemade, you can always adjust the size of each bar or cut them into smaller bites to suit your needs — similar to how you can portion out Muhammara Dip for a lighter snack option.

So, are Perfect Bars healthy? Yes — as long as you keep portions in mind and use high-quality ingredients, the Homemade Perfect Protein Bar is a smart, satisfying choice you can feel good about.

Storing and Shelf Life of No Bake Protein Bars

How Long Does a Homemade Perfect Protein Bar Last?

One of the best parts about making a Homemade Perfect Protein Bar is how well it keeps. You can make a batch on Sunday and have a healthy snack ready to grab all week long. Properly stored in an airtight container in the fridge, your bars will stay fresh for about 7–10 days.

For even longer storage, wrap each bar individually in parchment paper or plastic wrap and freeze them. Frozen, a Homemade Perfect Protein Bar can last up to three months. Just pull one out and let it thaw for a few minutes before enjoying.

Tips to Keep Your Bars Fresh and Tasty

Here are a few simple tips to get the most out of your Homemade Perfect Protein Bar:

  • Use a tightly sealed container to prevent them from drying out.
  • Place parchment between layers if stacking to keep them from sticking.
  • Keep them in the coldest part of the fridge to maintain texture.

We also recommend cutting the bars into your preferred size before chilling. That way, you can grab just what you need, when you need it, without having to cut frozen or cold dough.

Making a Homemade Perfect Protein Bar not only saves money, it also gives you the freedom to prep ahead — so you’re always ready with something healthy and satisfying.

Why Do Perfect Bars Taste So Good? The Secret

The Flavor Magic of a Homemade Perfect Protein Bar

If you’ve ever wondered why Perfect Bars — and by extension, the Homemade Perfect Protein Bar — taste so good, it’s all about balance. Every bite delivers the perfect harmony of creamy, sweet, salty, and satisfying.

Nut butter gives a rich, slightly roasted flavor that feels indulgent without being over the top. Honey brings just the right amount of sweetness while acting as a binder. A pinch of salt makes the sweetness pop and keeps the flavor from feeling flat. Combine that with the chewy texture from oat flour and a soft finish from coconut oil, and you’ve got something that tastes more like dessert than a protein bar.

We find it’s that soft, cookie-dough-like texture that makes a Homemade Perfect Protein Bar irresistible compared to dry, chalky store-bought options. For more proof that healthy can still feel indulgent, try our Cottage Cheese Ranch Dip or even this Pickle Lemonade Mocktail — both unexpected and full of flavor.

How You Can Make Them Even Better

The beauty of the Homemade Perfect Protein Bar is that you can adjust it to your taste. Want more chew? Add a drizzle more honey. Prefer a firmer bar? Mix in a little extra oat flour. Love chocolate? Stir in dark chocolate chips or drizzle melted chocolate on top after chilling.

We like to think of these bars as a blank canvas — easy to customize, but always delicious. And because you’re making them at home, you can tweak the flavor and texture until they’re perfect for you.

That’s why we keep coming back to the Homemade Perfect Protein Bar — it’s the snack that tastes as good as it makes you feel.

FAQs About the Homemade Perfect Protein Bar

What are the ingredients in a Perfect Bar?

The original Perfect Bar includes nut butter, honey, dry milk powder, egg powder, and a proprietary superfood blend. Our Homemade Perfect Protein Bar uses just six ingredients: peanut butter, honey, coconut oil, oat flour, protein powder, and a pinch of salt.

What is a good substitute for protein powder in bars?

If you don’t want to use protein powder, you can replace it with more oat flour or almond flour for texture. Keep in mind it will lower the protein content of your Homemade Perfect Protein Bar slightly.

Are Perfect Bars healthy?

Yes — when made with whole, simple ingredients, they’re a nutrient-dense snack with healthy fats, protein, and carbs. Just watch portion sizes, as they are calorie-rich.

How long do no bake protein bars last?

Your Homemade Perfect Protein Bar will keep in the fridge for 7–10 days in an airtight container, or up to 3 months in the freezer.

Why do Perfect Bars taste so good?

it’s the perfect mix of creamy nut butter, sweet honey, a hint of salt, and a soft, chewy texture — just like a cookie dough bite

How to create the Perfect Bar?

Follow our simple recipe: mix wet ingredients, fold in dry, press into a pan, chill, and cut into bars.
Print
clock clock iconcutlery cutlery iconflag flag iconfolder folder iconinstagram instagram iconpinterest pinterest iconfacebook facebook iconprint print iconsquares squares iconheart heart iconheart solid heart solid icon
Homemade Perfect Protein Bar on kitchen table

Homemade Perfect Protein Bar: Easy Guide to Amazing Results


5 Stars 4 Stars 3 Stars 2 Stars 1 Star

No reviews

  • Author: Chef Dodos
  • Total Time: 1 hour 10 minutes
  • Yield: 12 bars 1x
  • Diet: Vegetarian

Description

This Homemade Perfect Protein Bar is soft, chewy, and packed with wholesome ingredients. An easy no-bake snack you can make in 10 minutes with just 6 pantry staples.


Ingredients

Scale

1 cup creamy peanut butter

1/3 cup honey

2 tbsp melted coconut oil

1 1/2 cups oat flour

1/2 cup vanilla protein powder

1/4 tsp sea salt


Instructions

1. In a mixing bowl, stir together peanut butter, honey, and melted coconut oil until smooth.

2. Fold in oat flour, protein powder, and salt until a thick dough forms.

3. Line a baking dish with parchment and press the dough evenly into the pan.

4. Refrigerate for at least 1 hour to firm up.

5. Cut into bars or squares and enjoy.

Notes

Store bars in an airtight container in the fridge for up to 7–10 days or freeze for up to 3 months.

Customize with chocolate chips, nuts, or dried fruit as desired.

  • Prep Time: 10 minutes
  • Cook Time: 0 minutes
  • Category: Snacks
  • Method: No Bake
  • Cuisine: American

Nutrition

  • Serving Size: 1 bar
  • Calories: 210
  • Sugar: 6g
  • Sodium: 90mg
  • Fat: 12g
  • Saturated Fat: 3g
  • Unsaturated Fat: 8g
  • Trans Fat: 0g
  • Carbohydrates: 18g
  • Fiber: 2g
  • Protein: 8g
  • Cholesterol: 0mg

Conclusion

The Homemade Perfect Protein Bar proves that you don’t have to overpay to enjoy a snack that’s delicious, healthy, and satisfying. With just a few pantry staples and a little time, you can whip up a batch that fuels your workouts, keeps you full between meals, and tastes better than anything off the shelf.

Whether you’re customizing your own flavors or sticking with the classic recipe, you’ll feel good knowing exactly what’s in your snack. Real food. Real results. Real people — that’s what StayFit Recipes is all about.

Now it’s your turn: grab a bowl, mix up a batch, and enjoy your own Homemade Perfect Protein Bar all week long. Follow us for more on Facebook

How to Make Pistachio Ice Cream: Simple, Creamy, Healthy Recipe

how to make pistachio ice cream – creamy homemade dessert
Table of Contents

Our StayFit Story and Why It’s Worth It

 how to make pistachio ice cream – creamy homemade dessert
How to make Healthy pistachio ice cream – creamy homemade dessert

How to make pistachio ice cream was a question we never thought we’d ask — until our StayFit journey made us look at dessert differently.

How to make pistachio ice cream wasn’t something we planned to learn. But once our StayFit challenge started, we began looking at dessert in a new way. When Kiko and I made our deal — 100 days of no excuses, just real meals — we thought desserts had to go. Like most people trying to get in shape, we believed anything sweet or creamy didn’t fit into a healthy life.

Then came one hot morning. After our workout, we were wiped. Kiko opened the freezer and stared at a half-empty tub of ice cream. “Why does everything good feel so fake?” he said. He was right. The label was full of fake flavors, preservatives, and more sugar than we’d usually eat in a week.That’s when I remembered the bag of pistachios we had in the pantry. I wondered if we could make something better. I searched how to make pistachio ice cream at home — and what I found shocked me. It was easy. All we needed were real pistachios, milk, cream, eggs, and a little sugar.

That night, we gave it a shot. We peeled the pistachios, blended them into a paste, and stirred it into a warm custard. After cooling and churning, the result blew us away. It was creamy, nutty, and just sweet enough. We were hooked. This ice cream fit our goals and tasted better than anything store-bought. Knowing how to make pistachio ice cream gave us more than a dessert. It gave us control — and another reason to stick to real food.

Let’s StayFit — together.

Why Making Pistachio Ice Cream at Home Beats Store-Bought Every Time

Back when Kiko stood in front of that freezer, holding a half-melted tub of store-bought ice cream, something clicked. We realized it wasn’t just the sugar or the additives that bothered us — it was how disconnected we felt from the food we used to love. That’s when we started wondering how to make pistachio ice cream from scratch.

Turns out, it wasn’t just doable — it was better in every way. Here’s why we’ve never looked back.

Control the Ingredients for a Healthier Treat

One of the biggest reasons we started making our own was to ditch the fake flavors. Most store brands rely on artificial pistachio extract, food coloring, and way too much sugar. But when you make it yourself, you’re in charge.

We use real pistachios, creamy coconut milk, and a touch of honey or maple butter. A pinch of sea salt adds balance. You can even make it fully dairy-free without losing that smooth, rich taste. That flexibility fits perfectly with our StayFit mindset — just like our chocolate strawberry yogurt clusters and homemade protein bars, it’s all about clean comfort.

Customize the Texture and Flavor to Fit You

That first batch we made was simple — just a pistachio paste blended into a banana-coconut base. But over time, we started playing with it. More cream for a smoother finish. Dark chocolate chunks for crunch. Fresh berries for brightness. It’s like building your perfect bowl, just like we do with our baked oat cups or gluten-free cinnamon rolls.

Once you know how to make pistachio ice cream your way, you stop settling. It becomes a dessert you feel good about — because you built it, and you kept it real.

SteStep-by-Step Guide: How to Make Pistachio Ice Cream at Home

Learning how to make pistachio ice cream at home is easier than you think. This version is dairy-free, egg-free, and uses just five clean ingredients. It’s creamy, lightly sweet, and needs no fancy custard or machine.

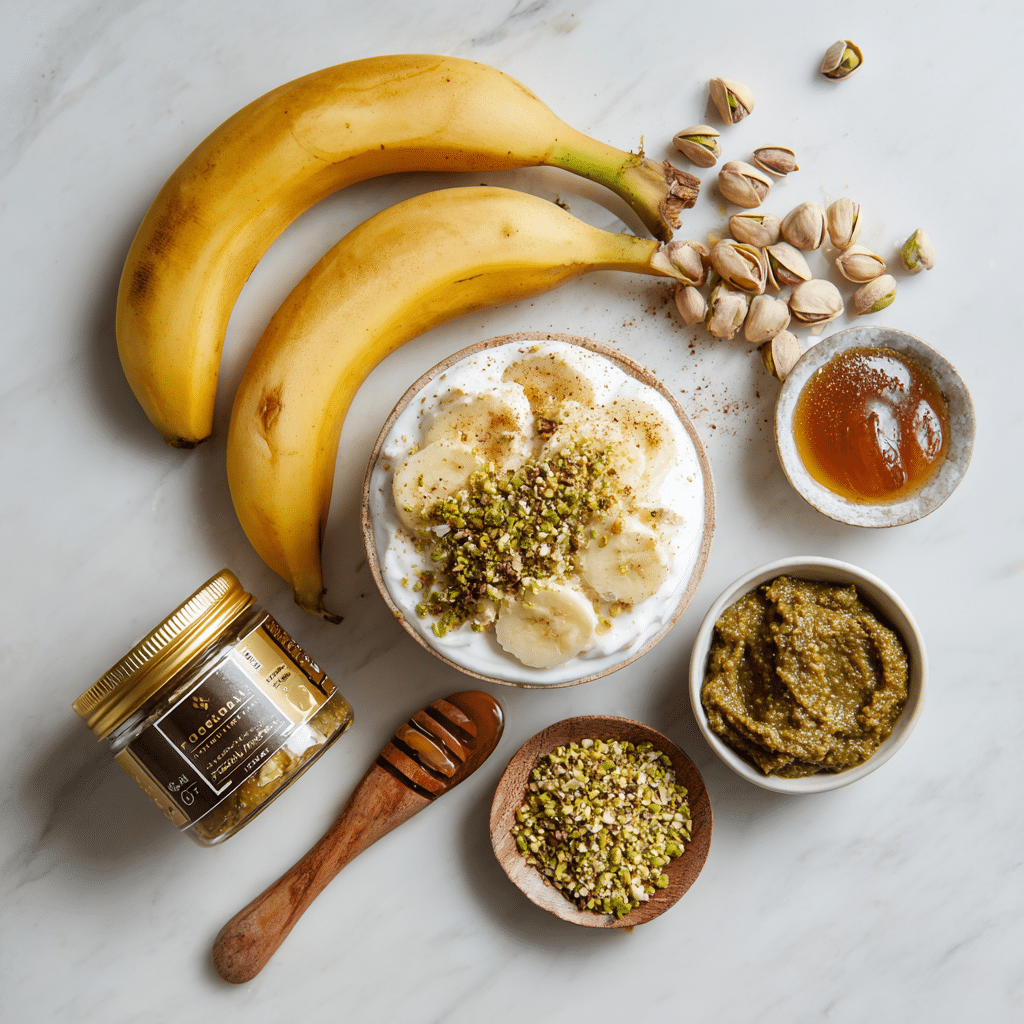
 ingredients for homemade pistachio ice cream recipe
Ingredients for homemade pistachio ice cream

Ingredients You’ll Need

  • 2 bananas (frozen for 12 hours, peeled)
  • 1 can full-fat coconut milk (refrigerated for 12 hours)
  • 6 Tbsp pistachio paste
  • 4 Tbsp maple butter or honey
  • 1 handful pistachios (chopped, for garnish)

A high-speed blender or food processor works best. Regular blenders won’t give you that smooth, creamy finish. If you’re still building your StayFit kitchen, check out our kitchen gear guide for tips.

Quick Method

  1. Open the chilled coconut milk and scoop out the cream. Save the liquid for smoothies.
  2. Add frozen bananas, coconut cream, pistachio paste, and maple butter or honey to a high-speed blender.
  3. Blend until smooth and creamy.
  4. Transfer to a freezer-safe container and freeze for about 4 hours.
  5. Let it soften for 10–15 minutes before scooping. Top with chopped pistachios.

Bonus: Quick Answers to Common Pistachio Ice Cream Questions

What makes pistachio ice cream green?
Real pistachios give the ice cream a soft green tint. For a brighter color, you can add a handful of spinach or a touch of matcha.

How can I make it without eggs?
No eggs are needed here. The bananas and coconut cream create the perfect creamy base.

Can I make it without cream?
Yes. Just use the bananas and pistachio paste for a lighter, soft-serve version.

What if I don’t have an ice cream maker?
No problem — this recipe is made to freeze and scoop without one.

How can I use a Vitamix for this?
Just follow the same steps using your Vitamix. It blends everything perfectly.

How to Serve and Store Pistachio Ice Cream the Right Way

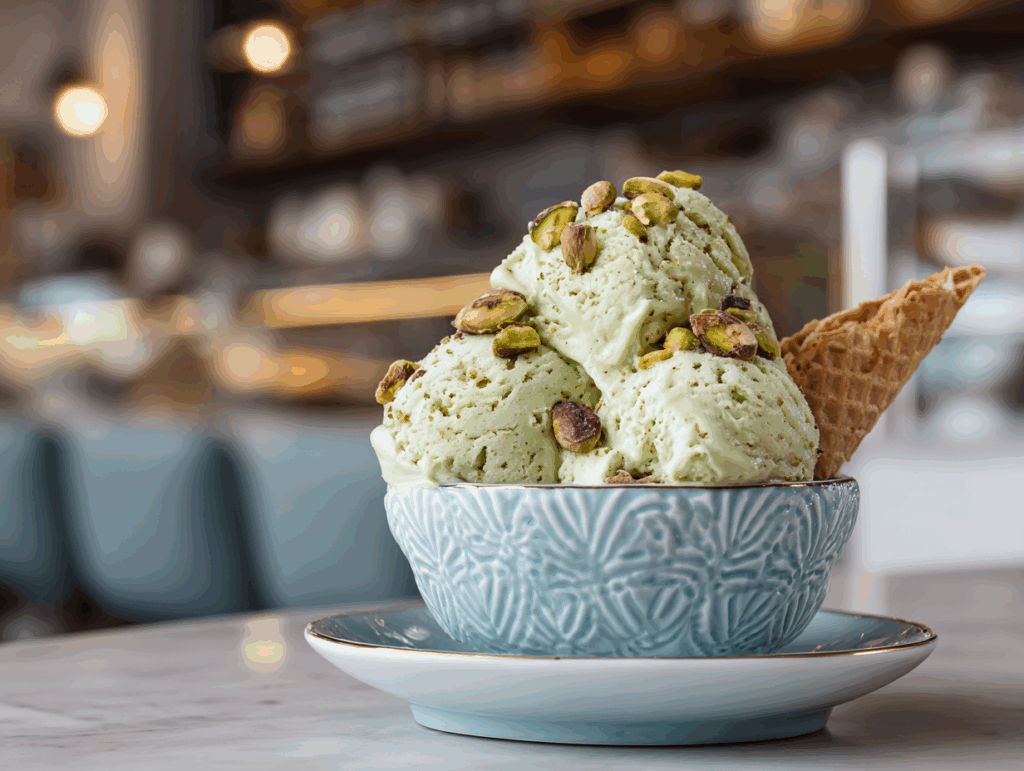
served pistachio ice cream with chopped pistachios
Served pistachio ice cream with chopped pistachios

Now that you’ve learned how to make pistachio ice cream at home, it’s time to enjoy it the right way. From fun toppings to smart storage, here’s how to get the most out of your homemade treat.

Creative Ways to Serve Pistachio Ice Cream

Sure, it’s great right from the container — but why stop there? Add some crunch with chopped pistachios or cacao nibs. For something bright and fresh, toss on a few raspberries. Want to go all in? Serve a scoop between two of our high-protein cookies for a StayFit-style ice cream sandwich.

For a fancier twist, drizzle a bit of dark chocolate on top or garnish with mint. It’s a great way to dress it up without overdoing it.

Want more topping and dessert ideas? Our chocolate strawberry yogurt clusters are full of flavor and easy to pair with frozen treats.

Remember — this ice cream is rich and filling. A small scoop goes a long way.

Proper Storage for Freshness

Since this recipe is made from real ingredients, it’s best within 1–2 weeks. Here’s how to keep it tasting great:

  • Store in a sealed, freezer-safe container.
  • Press parchment or wax paper against the top before sealing.
  • Keep it in the coldest part of your freezer.

Before scooping, let it sit at room temp for 10–15 minutes. Want to keep your meals fresh too? Don’t miss our storage tips and tricks for healthy food that lasts.

When you store it right, your homemade pistachio ice cream stays creamy, smooth, and ready any time.

Can Pets Have Pistachio Ice Cream? What You Need to Know

If you’ve ever sat down with a bowl of your favorite frozen treat and noticed your dog or cat giving you those big eyes, you’re not alone. But here’s the honest answer: this isn’t something to share with them.

Why Dogs Shouldn’t Have It

Pistachios aren’t toxic in small amounts, but the sugar, fat, and creamy base in this dessert can mess with your dog’s digestion. Many dogs struggle with dairy, which can lead to gas, bloating, or worse — like pancreatitis.

Instead of taking the risk, give your pup a simple homemade snack made just for dogs — no dairy, no sugar, and no ingredients that could upset their stomach. They’ll still get something tasty, and you’ll feel good knowing it’s safe.

Even though it might be tempting to let them have a taste, it’s safest to keep this treat just for you.

Why Cats Should Skip It Too

Cats have an even tougher time with dairy, and the sugar and fat content offer no benefit. Even a small bite can cause vomiting or diarrhea — or lead to longer-term issues.

Stick to safe rewards like plain, cooked meats or something from our list of healthy snacks that won’t cause problems.

We get it — sharing food feels like love. But this one’s better left untouched by your furry friends. It’s rich, cool, and made just for you.

FAQs and Final Thoughts on Making Pistachio Ice Cream

How to make pistachio ice cream at home?

Start by freezing bananas and chilling coconut milk overnight. Blend the coconut cream, frozen bananas, pistachio paste, and maple butter or honey in a high-speed blender. Freeze for 4 hours, then serve sprinkled with chopped pistachios.

What makes pistachio ice cream green?

The green color comes naturally from pistachios, though some recipes add food coloring. For a brighter hue without artificial dyes, try blending in a little spinach or matcha powder.

How do you make pistachio ice cream without eggs?

Our recipe is already egg-free, relying on bananas and coconut cream for smooth texture.
How do you make pistachio ice cream without cream?
You can skip coconut cream and just use bananas and pistachio paste for a softer, lighter ice cream.

Can dogs or cats eat pistachio ice cream?

No — pistachio ice cream contains sugar, dairy, and fat that can harm pets. Stick with safer treats from our FAQs about StayFit desserts for more ideas.

Final Thoughts: Why Homemade Pistachio Ice Cream Is Worth It

Making this recipe taught us something more than just how to enjoy dessert — it showed us that sweet treats don’t have to set you back. When you use real ingredients and skip the fake stuff, you get flavor that feels good.

So grab your blender, prep your pantry, and give it a go. This isn’t just ice cream — it’s proof that when you choose better, everything changes. Including you.

Let’s StayFit — together.For More follow us on facebook & pinterest

Print
clock clock iconcutlery cutlery iconflag flag iconfolder folder iconinstagram instagram iconpinterest pinterest iconfacebook facebook iconprint print iconsquares squares iconheart heart iconheart solid heart solid icon
served pistachio ice cream with chopped pistachios

How to Make Pistachio Ice Cream: Simple, Creamy, Healthy Recipe


5 Stars 4 Stars 3 Stars 2 Stars 1 Star

No reviews

  • Author: Chef Dodos
  • Total Time: ~4 hr 10 min (including freeze)
  • Yield: 46 servings 1x

Description

Creamy, nutty, and healthier pistachio ice cream made with bananas, coconut milk, and real pistachio paste.


Ingredients

Scale

2 bananas (frozen for 12 hours)

1 can full-fat coconut milk (refrigerated for 12 hours)

6 Tbsp pistachio paste

4 Tbsp maple butter or honey

1 handful pistachios (for garnish)


Instructions

1. Scoop chilled coconut cream into blender.

2. Add frozen bananas, pistachio paste, and maple butter or honey.

3. Blend until smooth and creamy.

4. Transfer to freezer-safe container and freeze for about 4 hours.

5. Let soften for 10–15 minutes before serving and garnish with chopped pistachios.

Notes

Best enjoyed within 1–2 weeks. Store airtight. Let thaw slightly before scooping.

  • Prep Time: ~10 min
  • Cook Time: 0 min
  • Category: Dairy-Free
  • Method: Blend & Freeze
  • Cuisine: American, Italian

Nutrition

  • Calories: 167 kcal
  • Fat: 9g
  • Carbohydrates: 20 g
  • Protein: 3 g

How to Make Chocolate Strawberry Yogurt Clusters (Quick & Healthy!)

Chocolate Strawberry Yogurt Clusters frozen on parchment with fresh strawberries
Chocolate Strawberry Yogurt Clusters with creamy centers and a crisp chocolate shell

Chocolate Strawberry Yogurt Clusters – A Simple Snack You’ll Love

Chocolate Strawberry Yogurt Clusters all started on a Thursday night after leg day. Kiko was in the kitchen looking for something sweet but not too heavy—something that wouldn’t undo the work at the gym. The pantry was full of old temptations: cookies, sugary bars, processed “protein” snacks. None of them felt right

So, he opened the fridge. Greek yogurt. A bowl of chopped strawberries Med had left from lunch prep. Inspiration struck. He scooped yogurt into a bowl, tossed in the berries, and gave it a good mix. A minute later, Med walked in, dipped a spoon, and grinned. “This needs chocolate.”

And that’s how Chocolate Strawberry Yogurt Clusters were born. They were the perfect post-workout sweet fix—cool, creamy, fruity, and covered in a snap of dark chocolate that made them taste like a treat from a fancy dessert bar. We froze a batch overnight, and by the next afternoon, it was clear: these little clusters were going to be a regular in our kitchen.

What makes Chocolate Strawberry Yogurt Clusters so good isn’t just how they taste—it’s how they feel. The cold bite, the creamy inside, the brightness of strawberry, and that chocolate shell—it’s comfort and fuel in one. Unlike processed desserts that spike your energy then crash it, these clusters keep things steady. They became Kiko’s go-to snack when cravings hit and Med’s late-night sweet tooth fix.

We realized it wasn’t just a recipe. It was a swap—trading in junk for something homemade, honest, and still delicious. And the best part? Anyone can make them in under 10 minutes. They’re like Chocolate Baked Oat Cups: minimal effort, maximum reward.

So whether you’re post-gym, on the couch, or prepping for the week, Chocolate Strawberry Yogurt Clusters are a snack worth keeping around.

What Are Chocolate Strawberry Yogurt Clusters?

At their core, Chocolate Strawberry Yogurt Clusters are exactly what they sound like—small spoonfuls of strawberries mixed into creamy yogurt, frozen until solid, and dipped in a thin shell of melted chocolate. But don’t let the simplicity fool you. These little clusters pack a satisfying crunch and a creamy center that makes them feel like a mini dessert—without the guilt.

Here’s what you’re really getting with each bite:

  • Strawberries, rich in antioxidants like vitamin C and known to support skin health, immune defense, and even post-workout recovery.
  • Greek yogurt, a protein-dense base that supports muscle repair and gut health thanks to probiotics.
  • Dark chocolate, loaded with flavonoids, helps reduce inflammation and adds a bold contrast to the tangy-sweet core.
Ingredients for Chocolate Strawberry Yogurt Clusters including strawberries, yogurt, chocolate, and coconut oil
Simple and clean ingredients used to make Chocolate Strawberry Yogurt Clusters

It’s not just a snack—it’s a smart choice. These clusters are a cousin to our Healthy Banana Bread, which also hits that sweet-meets-nutritious balance. You’re not just satisfying cravings, you’re nourishing your body.

What makes Chocolate Strawberry Yogurt Clusters special is how adaptable they are. Want something low-sugar? Use plain yogurt and berries alone. Prefer more richness? Choose 85% cacao chocolate. Need it dairy-free? Use coconut yogurt—it still works beautifully.

Think of them as frozen bites of balance—protein, fiber, healthy fats, and just enough natural sugar to keep your energy steady. You could even toss in a sprinkle of chia seeds or flax if you’re feeling fancy. The result is a freezer snack that feels indulgent but fits right in with real-food goals.

And like our Roasted Sweet Potato Salad, it’s a dish that looks good, feels right, and actually fuels your day.

How to Make Chocolate Strawberry Yogurt Clusters

Making Chocolate Strawberry Yogurt Clusters is easier than you think—no fancy tools, no complicated steps. Just a mixing bowl, a spoon, a freezer, and a little patience.

Here’s how we do it at StayFitRecipes:

  1. Chop your strawberries. Dice them small enough so they blend into the yogurt evenly, but not so fine that they disappear. About 1 cup of fresh strawberries is perfect.
  2. Mix with Greek yogurt. Use thick, full-fat Greek yogurt (we love plain for lower sugar). Mix until all the fruit is coated. You want just enough yogurt to hold everything together—about ¾ cup works great.
  3. Scoop onto a tray. Line a baking sheet with parchment paper. Use a spoon to drop small clusters of the mixture onto the sheet. Think bite-sized.
  4. Freeze until solid. Pop the tray in the freezer for 60–90 minutes. This step matters—don’t rush it. You want the clusters firm before adding chocolate.
  5. Dip in melted chocolate. Melt ½ cup dark chocolate chips with 1 teaspoon coconut oil. Dip each cluster halfway, or drizzle if you prefer.
  6. Freeze again. Let them set for another 20 minutes so the chocolate hardens.
Strawberry yogurt mixture fully combined with visible fruit chunks in a white bowl
Strawberry yogurt filling mixed and ready to be scooped into clusters

That’s it. Six simple steps to snack satisfaction.

Avoid These Common Mistakes
– Using runny yogurt. This turns the mix into a puddle. Go thick, like Greek or Skyr.
– Not freezing long enough. If the clusters aren’t fully solid, the chocolate won’t stick.
– Overloading ingredients. Less is more for shape and structure.

We’ve learned from trial and error—just like with our Quick Easy Cottage Cheese Pancakes, texture makes or breaks the recipe. Stick to the ratios, and you’ll get those perfect creamy centers and snappy chocolate shells every time.

Why They’re a Healthy Snack

There are plenty of snacks out there that seem healthy—until you check the label. Sugar, preservatives, low protein, mystery oils. Chocolate Strawberry Yogurt Clusters? None of that. They’re the real deal: minimal ingredients, maximum benefit.

Low Sugar, High Impact
These clusters keep it clean. Fresh strawberries bring natural sweetness without overload. Choose plain Greek yogurt and dark chocolate (70% or higher) to keep added sugars low while still getting that rich flavor. Each cluster is a bite-sized balance of protein, fiber, and antioxidants.

Greek yogurt delivers around 10 grams of protein per 100g serving—enough to support muscle recovery and keep you full. Strawberries add fiber, vitamin C, and hydration. Dark chocolate brings flavonoids, which support heart health and reduce inflammation. That’s powerful nutrition packed into a sweet, frozen snack.

If you’re already hooked on snacks like our Healthy Banana Bread, then Chocolate Strawberry Yogurt Clusters fit right into your routine—whole ingredients, smart fuel, no filler.

Better Than Store-Bought Treats
Compare these clusters to commercial yogurt-covered snacks and fruit bars. Most of those are loaded with sugar, artificial flavors, and oils that you don’t need in your system. Plus, they often leave you hungry again in 20 minutes.

Homemade clusters? You’re in control. You can make them high-protein, dairy-free, or even low-carb depending on your needs. Want something crunchy and savory on the side? Pair them with Grilled Chicken Bites for a full meal approach.

And since they’re stored in the freezer, you’re not tempted to eat the whole batch at once. Portion control happens naturally.

Bottom line: these aren’t just “better-for-you”—they are good for you. Real food. Real benefits. No junk.

Creative Variations You Can Try

Once you master the basic Chocolate Strawberry Yogurt Clusters, you’ll probably start thinking, “What else can I toss in?” Good news: this recipe is super flexible. With just a few tweaks, you can keep things interesting—and still stay healthy.

Switch It Up with Flavors
Don’t limit yourself to strawberries. Blueberries and raspberries work just as well and freeze beautifully. Want a tropical vibe? Try chopped mango with coconut yogurt. Love peanut butter? Stir a spoonful into the yogurt before freezing.

You can also play with the chocolate: white chocolate for a dessert-like twist, or extra dark for a more intense finish. The key is to keep the base creamy and the add-ins fresh.

This is where the creativity gets fun—kind of like our Pickle Lemonade Mocktail, which surprised even us by becoming a fan favorite. Unexpected combos can work when you get the texture and chill factor right.

Add-Ons for More Nutrition
Want to boost the protein or fiber even more? Add 1 tablespoon of chia seeds, hemp hearts, or crushed walnuts into your yogurt-fruit mix before scooping. This gives your clusters an extra punch of nutrients without changing the flavor much.

Looking for a gut-friendly option? Mix in a little high-protein cottage cheese—seriously. It blends right in and adds richness, just like we do in our Cottage Cheese Ranch Dip. You’ll barely notice the change, but your macros will thank you.

If you’re prepping for a busy week or want to create different versions for the family, divide your base mix and experiment with flavors. Kids love them with a drizzle of almond butter, while we prefer ours simple and dark-chocolate-dipped.

These clusters are endlessly customizable—and every version still supports your goals.

Serving, Storage & When to Eat Them

One of the best things about Chocolate Strawberry Yogurt Clusters? They’re as practical as they are tasty. Whether you’re meal-prepping or just need something to grab between Zoom calls, these clusters fit right in.

Meal Prep Friendly
You can make a big batch in under 15 minutes. Once they’re frozen solid, transfer them to an airtight container or a freezer-safe bag. They’ll keep well for up to two weeks—though honestly, ours never last that long.

We recommend placing parchment paper between layers if you’re stacking them. That way, they won’t stick together, and you can pull out a few at a time without making a mess.

Think of them like frozen protein pops—except they’re not loaded with weird gums or sweeteners. Just like our Zesty Lemon Chicken Orzo Protein Boost, these clusters are a prep-ahead favorite because they save time and keep you satisfied.

Serving Ideas
These clusters aren’t just a snack—they’re a solution. Eat them post-workout for a quick protein boost. Use them as a late-night dessert swap. Bring them out when friends come over—they look like fancy chocolate truffles but feel way more nourishing.

Need a full plate idea? Pair a few clusters with Grilled Chicken Bites and a green smoothie for a satisfying post-workout meal that hits protein, carbs, and healthy fats.

And here’s a pro tip: serve them with coffee. The chill from the cluster and warmth from the mug make a ridiculously satisfying combo. Trust us on this one.

In the end, Chocolate Strawberry Yogurt Clusters aren’t just another Pinterest snack—they’re a go-to fuel option that actually tastes good and works with your life. And when you’re eating real food that makes you feel this good, it’s a lot easier to stay on track.

FAQs About Chocolate Strawberry Yogurt Clusters

How do you make chocolate strawberry yogurt clusters?

You simply mix chopped strawberries with thick Greek yogurt, scoop small clusters onto parchment paper, freeze until solid, then dip or drizzle with melted chocolate. Freeze again to set, and they’re ready to enjoy.

Is strawberry yogurt a healthy snack?

It can be, especially when made at home. Plain Greek yogurt with fresh strawberries is high in protein, calcium, and vitamin C without added sugars or preservatives. Always check store-bought options for added ingredients.

How to make yogurt clusters?

Start with a creamy, thick yogurt. Mix in your favorite fruit or add-ins like chia seeds, then spoon into small clusters on a tray. Freeze them, then dip in chocolate or nut butter for flavor. Simple, quick, and perfect for batch prep.

Are chocolate-covered berries healthy?

Yes, in moderation. Dark chocolate offers antioxidants and heart health benefits, while berries bring fiber and vitamins. When you control the ingredients—like with these clusters—they’re a smart, satisfying treat.

Print
clock clock iconcutlery cutlery iconflag flag iconfolder folder iconinstagram instagram iconpinterest pinterest iconfacebook facebook iconprint print iconsquares squares iconheart heart iconheart solid heart solid icon
Chocolate Strawberry Yogurt Clusters frozen on parchment with fresh strawberries

How to Make Chocolate Strawberry Yogurt Clusters (Quick & Healthy!)


5 Stars 4 Stars 3 Stars 2 Stars 1 Star

No reviews

  • Author: Chef Dodos
  • Total Time: 1 hour 30 minutes
  • Yield: 12 clusters 1x

Description

These Chocolate Strawberry Yogurt Clusters are creamy, fruity, and dipped in rich dark chocolate. The perfect healthy freezer snack that satisfies sweet cravings without the guilt.


Ingredients

Scale

1 cup chopped strawberries

3/4 cup thick Greek yogurt

1/2 cup dark chocolate chips

1 tsp coconut oil


Instructions

1. Mix chopped strawberries and yogurt.

2. Scoop small clusters onto parchment-lined tray.

3. Freeze 60–90 minutes until solid.

4. Melt chocolate with coconut oil.

5. Dip or drizzle over clusters.

6. Freeze again 20 minutes. Serve cold.

Notes

Use dairy-free yogurt for a vegan version.

Store in airtight container up to 2 weeks.

Try with blueberries or raspberries for variety.

  • Prep Time: 10 minutes
  • Cook Time: 0 minutes
  • Category: smart-sweets-baking
  • Method: Freezer
  • Cuisine: American

Nutrition

  • Serving Size: 3 clusters
  • Calories: 105
  • Sugar: 7g
  • Sodium: 15mg
  • Fat: 5g
  • Saturated Fat: 3g
  • Unsaturated Fat: 2g
  • Trans Fat: 0g
  • Carbohydrates: 10g
  • Fiber: 1g
  • Protein: 6g
  • Cholesterol: 2mg

Conclusion

We created Chocolate Strawberry Yogurt Clusters out of pure necessity—a healthy, sweet snack that didn’t ruin our progress or leave us crashing. And they’ve stuck with us through the StayFit journey.

These clusters are more than just a recipe. They’re a reminder that real food can be quick, tasty, and fit your goals. No more guessing what to eat when cravings hit—you’ve got a freezer full of answers.

So whether you’re just starting your journey or deep in it, recipes like these make healthy eating feel doable. Just like we did, you can swap the junk for something better.

Let’s StayFit—together. For More follow us on facebook