Sous Vide Chicken Breast: Perfect Juicy Results Every Time

Sous vide chicken breast recipe step-by-step
Table of Contents
 Sous vide chicken breast recipe step-by-step
Perfect sous vide chicken breast made at home

When we traveled to Italy last summer, we stopped at a little restaurant tucked away on a quiet street. Scanning the menu, I chose the sous vide chicken breast as a healthy option, expecting something simple. But the first bite left me shocked — tender, juicy, and packed with flavor.

I’d always thought sous vide was just for fancy red meat cuts. Curious, I asked the chef about it, and he happily explained how sous vide chicken breast is one of his favorite tricks for perfect results every time.

Since that trip, it’s become a staple in my kitchen. And because good things shouldn’t be kept secret, I’m sharing my method with you today — so you can experience the same unforgettable flavor, anytime. This sous vide chicken breast recipe is beginner-friendly and easy to adapt for different marinades and serving ideas.

Ingredients and Step-by-Step Instructions for Sous Vide Chicken Breast

Before you get started, here’s everything you need to make this tender, flavorful sous vide chicken breast with a honey-lime-chili marinade.

Ingredients

  • 2 boneless, skinless chicken breasts
  • 1 tablespoon honey
  • 1 tablespoon chili powder
  • 1 tablespoon lime juice
  • 1 tablespoon olive oil
  • 1 teaspoon molasses
  • 1 teaspoon coriander
  • 1 teaspoon salt
  • ½ teaspoon garlic powder

These simple pantry ingredients pack a ton of flavor.

Step-by-Step Instructions
Marinating chicken breasts for sous vide with honey and spices
Marinate chicken breasts with honey, lime, chili powder, and spices

Sear and serve.
When the chicken is done, remove it from the bag, pat dry with paper towels, and sear in a hot skillet with a little oil for 1–2 minutes per side for a golden crust. Slice and serve hot.

Prepare the marinade.
In a small bowl, whisk together the honey, chili powder, lime juice, olive oil, molasses, coriander, salt, and garlic powder to make a smooth marinade.

Coat the chicken.
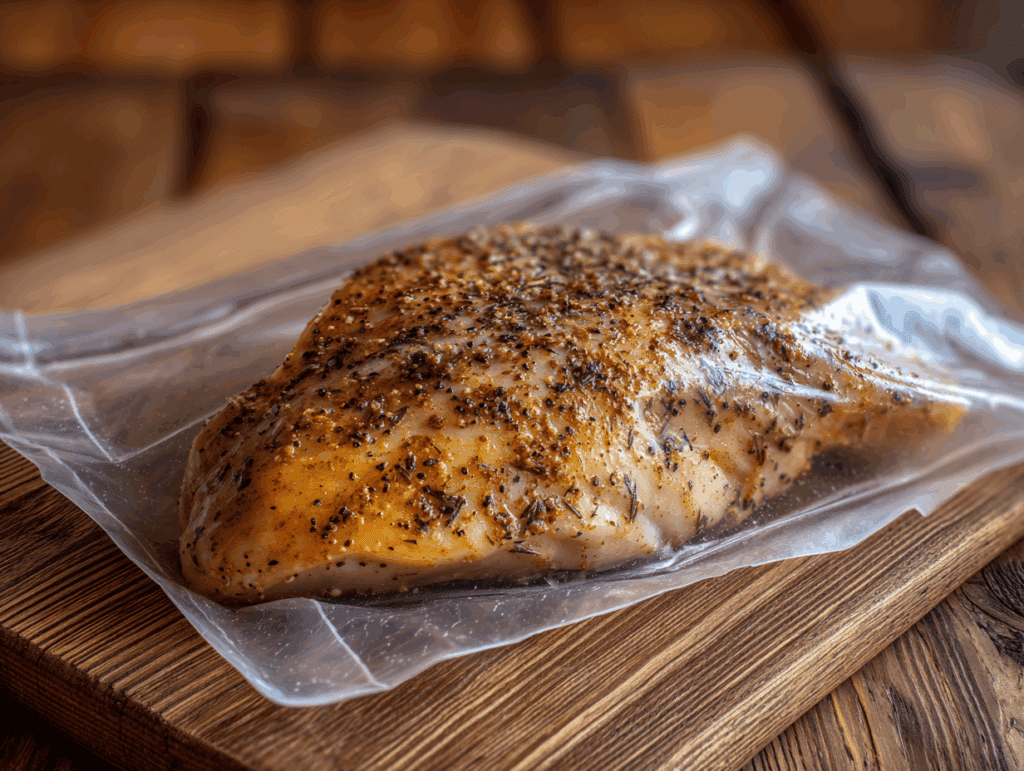
Sealing marinated chicken breasts in bag for sous vide
Chicken breasts sealed in a bag and ready for sous vide bath


Place the chicken breasts in a shallow dish or directly into a sous vide bag. Pour the marinade over the chicken and turn to coat evenly. Let sit for 10–15 minutes while you heat the water bath.

Preheat the sous vide.
Fill your container or pot with water and set your sous vide machine to 150°F. Let it come to temperature before adding the chicken.

Seal the chicken.
If using a vacuum sealer, seal the bag tightly. If using a zip-top freezer bag, remove as much air as possible with the water displacement method.

Cook in sous vide bath.
Place the sealed chicken in the water bath and cook for 1½–4 hours. Make sure the bag stays fully submerged.

When it comes to sous vide chicken breast, getting the time and temperature right is key. The beauty of this method is how forgiving it is — you can leave the chicken in longer without worrying about it drying out or overcooking.

For most home cooks, 150°F is the sweet spot for sous vide chicken breast. At this temperature, the chicken turns out tender, juicy, and fully cooked while maintaining its natural texture. Some chefs prefer going as low as 145°F for even softer meat, though it may appear a little pink. If you like firmer chicken, 155°F works too, though it can lose a bit of juiciness.

Here’s a simple temperature reference:

Temperature Texture & Notes
145°F Extra tender, slightly pink
150°F Juicy, tender, fully cooked
155°F Firmer, less juicy

No matter which temperature you pick, sous vide keeps the chicken consistent from edge to center. Unlike roasting or grilling, you don’t get dry spots or uneven doneness.

How long should you cook chicken breast in a sous vide?

Can You Sous Vide Frozen Chicken Breast?

Absolutely! One of the great benefits of a sous vide chicken breast recipe is how forgiving it is — even if you start with frozen chicken breast, the results are still juicy and tender. Simply add about 30 extra minutes to your cook time to ensure the chicken reaches the proper internal temperature all the way through. This makes it perfect for busy weeknights or meal prep when you forgot to thaw your chicken in advance.

One of the biggest advantages of sous vide chicken breast is how flexible the cooking time can be. For chicken breasts about 1 inch thick, 1½ hours in the water bath is just right. That gives the meat enough time to reach the target temperature and break down slightly for tenderness.

However, you can leave the chicken in the bath for up to 4 hours if needed — perfect for busy schedules. The steady water temperature ensures it won’t overcook, so you have some freedom.

For thicker breasts (closer to 1½ inches), you may want to add an extra 15–30 minutes just to be sure it cooks through evenly.

Cooking Multiple Chicken Breasts at Once

One of the best things about sous vide chicken breast is how easy it is to scale up. Whether you’re cooking for one or meal prepping for the week, this method delivers the same tender, juicy results every time — even when cooking a big batch. This also applies if you’re starting with frozen chicken breast — just remember to extend the cooking time slightly so every piece reaches a safe temperature.

How many chicken breasts can you sous vide at once?

You can cook as many chicken breasts as will comfortably fit in your water bath, as long as you don’t overcrowd the bag or block water circulation. Most standard sous vide setups can handle at least 4–6 boneless breasts at a time. Arrange them in a single layer inside your bag to ensure even cooking. If you’re cooking a larger batch, use multiple bags and make sure they aren’t stacked on top of each other.

The key here is water flow — the sous vide circulator needs room to move water around each piece of chicken. If you cram too many in, some parts may not cook properly. If you’re using a large container like the 12-quart Rubbermaid bucket, you can fit even more, making it perfect for family dinners or meal prep.

For more batch cooking tips and recipes, check out our meal prep ideas, where we share ways to make your week healthier and easier.

Batch cooking for meal prep

Sous vide chicken breast is ideal for meal prepping. Cook a big batch on Sunday, then store it in the fridge for up to 4 days or freeze for longer. Each piece stays juicy and ready to eat all week, making it perfect for salads, wraps, or quick dinners.

Pro tip: after sous vide, chill extra chicken in an ice bath before storing. This stops cooking instantly and keeps the texture perfect when you reheat. Pair it with sides from our healthy lunch recipes for balanced meals all week long.

Knowing When Sous Vide Chicken is Done

One of the reasons people love sous vide chicken breast is how foolproof it feels. But if you’re new to the method, you might wonder how to tell when it’s actually ready. Here’s what to look for.

How do you know when sous vide chicken is done?

Because sous vide cooks chicken at a low, steady temperature, the inside may still have a faint pink hue when it’s fully cooked — and that’s perfectly safe if you followed the right time and temperature. After at least 1½ hours in the sous vide bath at 150°F, your chicken breast is cooked through.

When you remove it from the bag, it should feel tender to the touch and pull apart easily with a fork. You can also double-check with an instant-read thermometer if you like — it should read at least 150°F. The beauty of sous vide is that the chicken can’t get hotter than the water temperature, which makes overcooking impossible.

If you’re looking for more guidance on safe cooking, you might also enjoy our tips in healthy cooking basics.

Tips for perfect results every time

For the best flavor and presentation, don’t skip the finishing step. Once your sous vide chicken breast is cooked, pat it dry and sear it quickly in a hot skillet with a little olive oil. This gives you a beautiful golden crust and locks in flavor.

Another tip: season generously before cooking. The honey, lime, and chili powder rub in this recipe is a perfect example of how sous vide locks in bold, bright flavors.

Essential Sous Vide Equipment

One reason sous vide chicken breast is such a great addition to your cooking routine is that it doesn’t require a lot of fancy gear. You only need a few key tools — and you probably already have most of them in your kitchen.

What sous vide equipment do you really need?

At its core, sous vide cooking only requires three things:

  • A sous vide immersion circulator: This is the small device that heats and circulates the water. We love the Anova Sous Vide for its reliability and compact size.
  • A container or pot: Any large pot you already own will work fine for sous vide. If you plan to cook larger batches often, a dedicated 12-quart plastic container makes it easier to fit more food.
  • Cooking bags: You can use standard freezer-safe zip-top bags and remove the air with the water displacement method. Or, if you prefer reusable options, silicone bags like Stasher work beautifully.

That’s it — no huge investments required. With these basics, you’re ready to start making sous vide chicken breast at home.

If you cook sous vide regularly, there are a few upgrades worth considering:

  • A vacuum sealer and pre-cut vacuum bags for quick, secure sealing with no leaks.
  • Bag clips to attach bags to the side of your container and keep them fully submerged.
  • A lid or plastic wrap for your container to prevent evaporation during longer cooks.

These extras aren’t necessary to get started, but they can make the process even more convenient and efficient.

Serving and Storing Sous Vide Chicken Breast

Once your sous vide chicken breast is perfectly cooked, you’ll want to make the most of it. The great thing about this method is how versatile and easy it is to store for later.

Best ways to serve sous vide chicken breast

Sous vide chicken breast shines in just about any dish. Slice it thin and serve it over a big green salad with your favorite vinaigrette. Or tuck it into whole-grain wraps with crisp veggies and a smear of hummus for a quick lunch. You can also pair it with roasted vegetables and quinoa for a balanced, satisfying dinner.

Because the chicken stays so moist, it’s also a hit in hot dishes like stir-fries or grain bowls — just add it at the very end so it doesn’t dry out. If you want to try more serving ideas, check our healthy dinner recipes for plenty of inspiration.

How to store and reheat

Sous vide chicken breast stores beautifully. If you’re eating it within 4 days, keep it sealed in an airtight container in the fridge. For longer storage, freeze individual portions for up to 2 months.

When reheating, skip the microwave if you can. Instead, gently warm the chicken in a hot water bath (below 150°F) or in a covered skillet with a splash of broth. This keeps the meat juicy and flavorful, just like when it was freshly cooked.

FAQ

What is the recommended sous vide chicken breast temp?

We recommend cooking sous vide chicken breast at 150°F. This gives you juicy, tender, fully cooked chicken that’s safe to eat while maintaining great texture.

How long should you cook chicken breast in a sous vide?

Cook your chicken breast for 1½ hours for perfect results, though you can safely leave it in the bath for up to 4 hours without overcooking thanks to the steady water temperature.

How many chicken breasts can you sous vide at once?

You can sous vide as many chicken breasts as will fit in your container in a single layer, as long as water can circulate freely around each piece.

How do you know when sous vide chicken is done?

If your chicken has been in the bath for at least 1½ hours and reaches 150°F internally, it’s fully cooked even if slightly pink. It should be tender and easy to shred with a fork.

Can I sous vide frozen chicken breast?

Yes! Cooking a frozen chicken breast sous vide works beautifully — just add 30 minutes to the cooking time. The even temperature control ensures the chicken stays juicy and tender every time.

Print
clock clock iconcutlery cutlery iconflag flag iconfolder folder iconinstagram instagram iconpinterest pinterest iconfacebook facebook iconprint print iconsquares squares iconheart heart iconheart solid heart solid icon
Sous vide chicken breast recipe step-by-step

Sous Vide Chicken Breast: Perfect Juicy Results Every Time


5 Stars 4 Stars 3 Stars 2 Stars 1 Star

No reviews

  • Author: Chef Dodos
  • Total Time: 1 hour 40 minutes
  • Yield: 2 servings 1x

Description

Juicy, tender sous vide chicken breast with a honey-lime-chili marinade. Foolproof, flavorful, and perfect every time.


Ingredients

Scale

2 boneless, skinless chicken breasts

1 tablespoon honey

1 tablespoon chili powder

1 tablespoon lime juice

1 tablespoon olive oil

1 teaspoon molasses

1 teaspoon coriander

1 teaspoon salt

½ teaspoon garlic powder


Instructions

1. Prepare the marinade: In a small bowl, whisk together honey, chili powder, lime juice, olive oil, molasses, coriander, salt, and garlic powder.

2. Coat the chicken: Place chicken breasts in a dish or sous vide bag and coat evenly with marinade.

3. Preheat sous vide: Fill your container with water and set sous vide to 150°F.

4. Seal chicken: Vacuum seal or remove air with water displacement method.

5. Cook in sous vide bath: Submerge chicken and cook for 1½–4 hours.

6. Sear and serve: Pat dry and sear in a hot skillet for 1–2 minutes per side. Slice and enjoy.

Notes

For more flavor, marinate chicken overnight in the refrigerator.

Store cooked chicken in an airtight container in the fridge for up to 4 days or freeze for up to 2 months.

  • Prep Time: 10 minutes
  • Cook Time: 1 hour 30 minutes
  • Category: Dinner
  • Method: Sous Vide
  • Cuisine: American

Nutrition

  • Serving Size: 1 chicken breast
  • Calories: 240
  • Sugar: 6g
  • Sodium: 620mg
  • Fat: 7g
  • Saturated Fat: 1g
  • Unsaturated Fat: 5g
  • Trans Fat: 0g
  • Carbohydrates: 8g
  • Fiber: 1g
  • Protein: 36g
  • Cholesterol: 85mg

Conclusion

Sous vide chicken breast is one of the simplest ways to take your cooking to the next level. With just a few tools, you can make tender, juicy, perfectly seasoned chicken every single time — whether you’re cooking one or a whole week’s worth.

Since that first bite in Italy, sous vide chicken breast has been one of my favorite ways to eat healthy and still enjoy every meal. And now it’s yours too. Follow the steps in this guide and discover why this method is no longer just a restaurant secret — it’s the smart way to cook at home.

Let’s StayFit — together.For More follow us on facebook & pinterest

For more healthy recipes and tips, keep exploring our StayFit Recipes blog — real food, real results, real people.

Sous Vide steak Guide: Perfect Steak Every Time, Made Easy

sous vide steak guide
Perfect sous vide steak cooked to perfection

If you’ve ever struggled to cook steak perfectly — juicy in the center, evenly cooked from edge to edge — this sous vide steak guide is exactly what you need. With sous vide, you can achieve steakhouse-quality results every single time without stress or guesswork.

We’re Kiko and Med from StayFit Recipes, and we know how hard it is to stick to clean eating when your favorite meals feel out of reach. That’s why we put together this sous vide steak guide — to help you enjoy steak that’s healthy, tender, and full of flavor. During our 100-day fitness challenge, we discovered sous vide cooking and instantly fell in love. It gave us lean, perfectly cooked steak without extra oil or overcooking.

This step-by-step sous vide steak guide will walk you through everything: choosing the right cut, setting the perfect temperature, and finishing with a flawless sear. Whether you’re cooking for one or hosting a dinner party, this guide will help you master steak the StayFit way — delicious, healthy, and stress-free.If you’re ready to change the way you cook steak forever, keep reading — and check out our other sous vide recipes to see what’s possible.

Why Sous Vide Your Steak?

Cooking steak can be tricky. Pan-searing often leads to overcooked edges and an underdone center. Grilling can dry out a beautiful cut in minutes. That’s why this sous vide steak guide is such a game changer — it shows you how to cook steak perfectly every time.

Consistency and precision

This sous vide steak guide helps you lock in precise doneness, so your steak comes out just the way you like it, from edge to edge. By cooking steak in a temperature-controlled water bath, you avoid undercooking, overcooking, and uneven results.

Following our Sous Vide Ribeye Steak example, you’ll see why so many rely on a sous vide steak guide to take the guesswork out of steak night.

Juicier, healthier steak

By sealing steak in its juices and cooking gently, this sous vide steak guide ensures maximum tenderness and flavor. Even leaner cuts stay moist, and you only need a little oil to sear at the end. That means fewer calories but all the satisfaction.

Just like our Salt Beef Sous Vide recipe, the same principles apply — cooking low and slow for unbeatable results.

With this sous vide steak guide, you’ll feel confident cooking steak anytime, knowing it’ll be juicy, healthy, and consistently delicious.

How to Select the Right Steak for Sous Vide

Choosing the right cut is the first step toward success, and this sous vide steak guide will help you pick the perfect one. The beauty of sous vide is that it works with nearly any steak, but some cuts perform better depending on your goal.

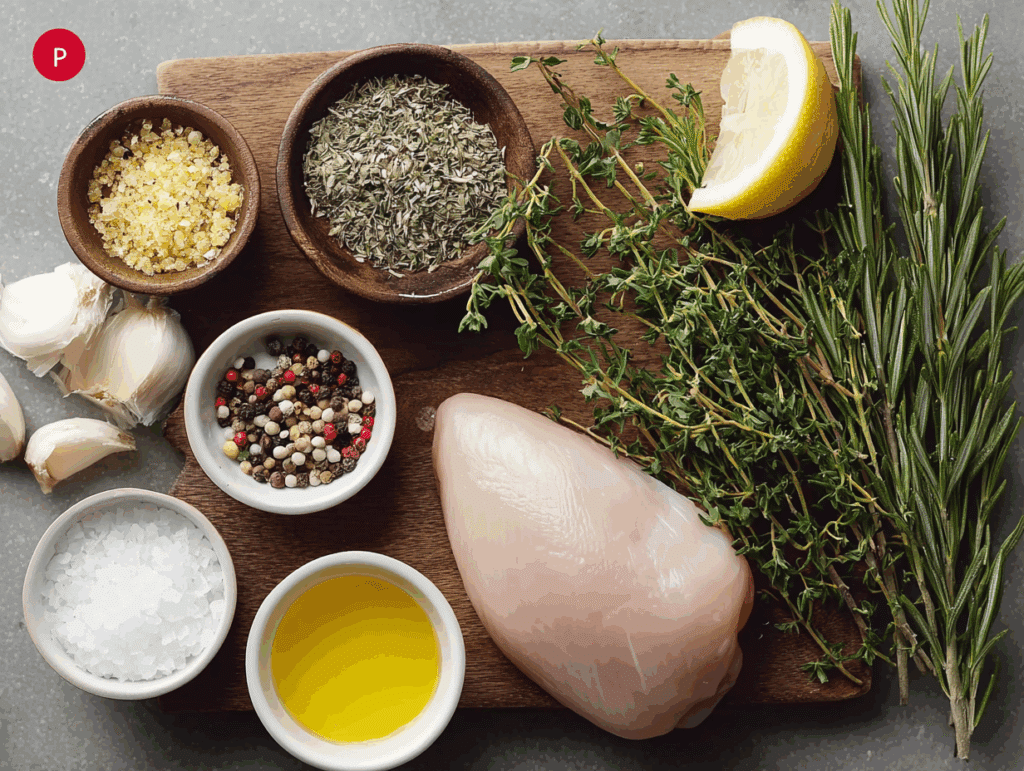
sous vide steak guide ingredients
Ingredients for sous vide steak prep

Best cuts to use

This sous vide steak guide recommends tender, flavorful cuts for short cooks of 1–3 hours:

  • Ribeye: rich and marbled for amazing flavor
  • New York Strip: leaner, firmer, yet still tender
  • Filet Mignon: buttery soft and ideal for special occasions

For longer cooks (6–8 hours or more), tougher cuts like flank, hanger, or skirt steak benefit from the extended time. They’ll become tender without losing their meaty flavor.

Thickness and fat content

A good sous vide steak guide also suggests aiming for steaks about 1–1.5 inches thick. Thicker steaks take longer to cook evenly, while very thin cuts can overcook during searing. Fatty cuts like ribeye render beautifully and stay juicy, while leaner cuts benefit from adding a pat of butter or herbs in the bag.

Prep matters

Before cooking, trim any excess fat and pat the steak dry. Season with salt, pepper, and herbs like thyme or rosemary. This sous vide steak guide also recommends using a vacuum sealer for the best results, but a heavy-duty zipper bag with the water displacement method works too.

By selecting and prepping your steak properly, this sous vide steak guide sets you up for success in the next step: choosing the perfect temperature.

How to Select the Right Temperature for Sous Vide Steak

Temperature is the most important decision you’ll make when cooking sous vide, and this sous vide steak guide will help you get it right. The beauty of sous vide is that you can choose your exact level of doneness and know your steak will be cooked evenly from edge to edge.

Why temperature matters

This sous vide steak guide is all about precision. Every degree makes a difference in texture and flavor. For example, a ribeye cooked at 129°F is beautifully medium-rare, with a tender and juicy bite. Cook that same steak at 140°F, and it’ll come out closer to medium, with a firmer texture.

A proper sous vide steak guide teaches you to avoid going too high. Temperatures above 145°F can dry out even the best cuts, defeating the purpose of sous vide cooking. Instead, stay within the recommended ranges below for perfect results.

Recommended temperature ranges

This sous vide steak guide suggests the following target temperatures for steak:

  • Rare: 125°F — deep red, very tender
  • Medium-rare: 129°F — pink and juicy
  • Medium: 135°F — slightly firmer, light pink
  • Medium-well: 145°F — less pink, firmer texture
  • Well-done: 155°F+ — fully cooked through, but can be dry

For most cuts, medium-rare (129°F) is the sweet spot, balancing flavor, moisture, and tenderness. That’s why our Sous Vide Ribeye Steak and Salt Beef Sous Vide recipes both use similar gentle heat to protect the meat’s natural juices.

By using this sous vide steak guide, you can confidently set your water bath knowing the result will be exactly what you expect — every time.

Does Timing Matter for Sous Vide Steak?

Many people believe that sous vide cooking is “set it and forget it,” but this sous vide steak guide explains why timing still matters. While sous vide gives you a bigger window of perfection than traditional cooking, leaving your steak in the water bath too long can still affect the texture.

Minimum and maximum times

This sous vide steak guide recommends letting your steak cook at least long enough to heat through evenly. For most steaks, that’s about 1 hour per inch of thickness. Thinner steaks can be ready in just under an hour, while thicker cuts may need closer to 2–3 hours.

But don’t assume you can leave it forever. After about 4 hours, even tender cuts can start to turn mushy as the muscle fibers break down too much. This sous vide steak guide helps you strike the right balance so your steak stays juicy and tender without becoming soft or grainy.

Holding time for flexibility

One advantage of this sous vide steak guide is that it teaches you how to use the technique’s flexibility. If your guests are running late, or you’re not quite ready to eat, you can hold your steak in the water bath at the target temperature for up to 30–60 minutes past its optimal time without much noticeable change.

This makes meal prep and entertaining stress-free. Whether you’re following our sous vide chicken breast or experimenting with something new, this sous vide steak guide ensures you know exactly when your steak is ready — and when it’s time to take it out.

Timing might be more forgiving with sous vide, but as this sous vide steak guide shows, it’s still an essential part of getting steak just right.

Temperature and Timing Charts for Sous Vide Steak Cuts

One of the biggest advantages of using this sous vide steak guide is having clear, reliable reference points for any cut of steak. With sous vide, precision is everything — and knowing the right temperature and time for your steak guarantees perfect results every time.

Why charts are essential

Even though sous vide cooking is forgiving, following a chart like the one in this sous vide steak guide helps you avoid guesswork. Different cuts and thicknesses require slightly different times and temperatures to reach their full potential. A thick ribeye won’t behave the same as a thin sirloin, and lean cuts like filet mignon need a little more care to keep them juicy.

Recommended sous vide steak temperatures and times

This sous vide steak guide recommends the following settings for common cuts and doneness levels:

Cut Doneness Temp Time
Ribeye Medium-rare 129°F 1–3 hours
Filet Mignon Medium 135°F 1–2 hours
Sirloin Medium-well 145°F 1–2 hours

When using this sous vide steak guide, keep in mind that you can hold the steak at the desired temperature a little longer if needed, but avoid going beyond 4 hours for tender cuts to maintain texture.

This sous vide steak guide isn’t just about cooking — it’s about giving you the confidence and clarity you need to serve steak exactly the way you like it.

How to Cook a Steak Sous Vide, Step by Step

This sous vide steak guide breaks down the process into easy steps so you can cook steak perfectly every time. Follow along, and you’ll feel like a pro in no time.

Step 1: Preheat the Water Bath

Set your sous vide precision cooker to the desired final temperature (use the chart earlier in this sous vide steak guide). Wait for the water bath to reach temperature before adding the steak. This ensures even cooking from the start.

Step 2: Season Generously

Season your steak all over with salt and pepper. Don’t forget the edges — this sous vide steak guide recommends full coverage for better flavor. You can add a sprinkle of garlic powder or other spices if you like.

Step 3: Add Aromatics

Place your seasoned steak in a sous vide bag. Add a few sprigs of rosemary, thyme, or even sliced shallots to the bag for extra aroma and flavor.

Step 4: Seal the Bag

Use a vacuum sealer if you have one. If not, follow the water displacement method described earlier in this sous vide steak guide: slowly lower the bag into water to push out the air, then seal just above the water line.

Step 5: Cook in the Water Bath

Gently submerge the sealed steak into the water bath. Make sure it’s not blocking the circulator and is fully underwater. Cook for the time recommended in this sous vide steak guide, depending on thickness and doneness.

Step 6: Remove and Dry

When done, remove the steak from the bag and place it on a paper towel–lined plate. Pat it dry very well — this sous vide steak guide emphasizes this step because moisture can prevent a good sear.

Step 7: Finish on the Stovetop

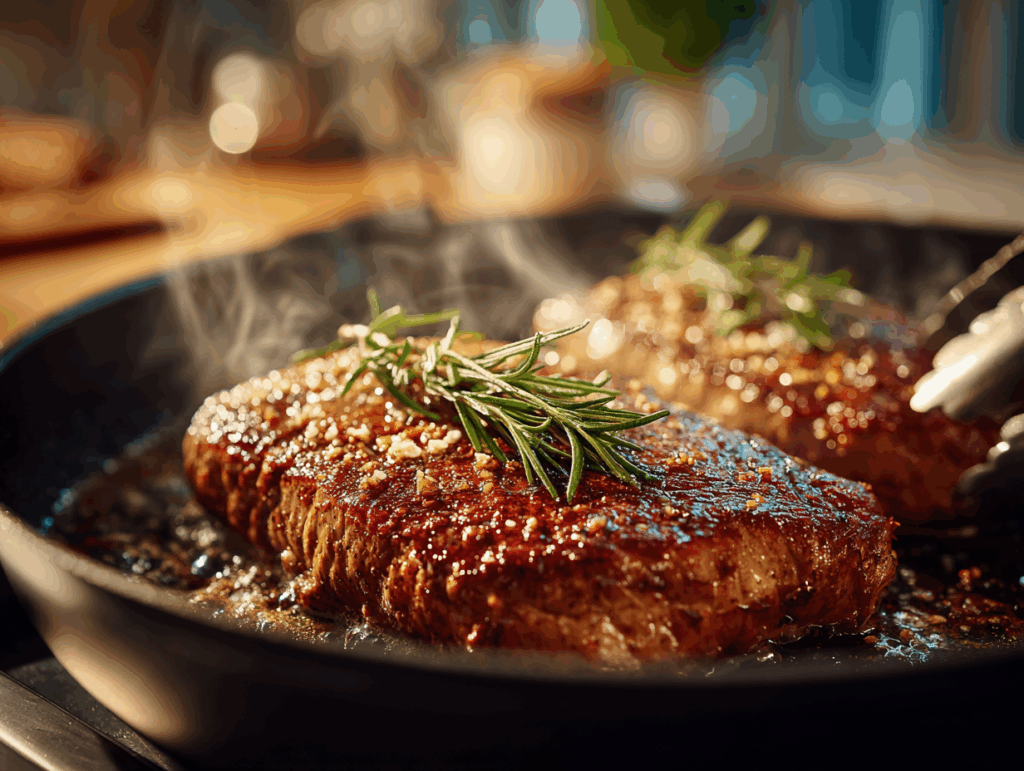
Step 4 of sous vide steak cooking

Heat a heavy skillet over high heat until smoking. Add a tablespoon of neutral oil, then lay the steak down gently. Sear for 15–30 seconds per side, flipping as needed until a crust forms. For added richness, toss in a knob of butter and fresh herbs during the last flip.

Step 8: Sear the Edges

Hold the steak with tongs and roll it along the edges in the pan to brown the sides. This takes about 45 seconds and makes your steak look (and taste) professional.

Step 9: Rest and Serve

Place the steak on a cutting board. You can serve immediately — sous vide steak doesn’t need a long rest. Slice against the grain and serve hot, with a little flaky sea salt on top.

This sous vide steak guide shows you just how easy it is to master steak at home, from prep to perfect sear. Now you’re ready to impress every time.

Finishing a Sous Vide Steak on the Stovetop

Searing is where your steak truly comes alive — adding a golden crust, deeper flavor, and irresistible aroma. This sous vide steak guide explains how to finish your steak on the stovetop like a pro.

Why sear after sous vide?

Sous vide cooks steak perfectly on the inside but leaves the outside pale and soft. This sous vide steak guide shows you how a quick, high-heat sear creates that classic steakhouse look and taste without overcooking the center.

Preheat your skillet

Turn on your kitchen vent and open a window — it’s about to get smoky. Place a heavy cast-iron or stainless-steel skillet on your hottest burner. Add a tablespoon of high-smoke-point oil (like canola or vegetable). Wait until the skillet is shimmering and just starting to smoke.

Sear quickly for maximum crust

Lay your steak in the skillet with tongs, pressing it down gently. Sear for 15–30 seconds on the first side, then flip and repeat on the other side. Flip every 15–30 seconds until a deep brown crust forms, usually 1–2 minutes total.

This sous vide steak guide recommends adding a knob of butter and a sprig of rosemary during the final flip for added richness and aroma. Tilt the pan and spoon the hot butter over the steak for extra flavor.

Don’t forget the edges

Use your tongs to hold the steak upright on its edges, rolling it along the skillet until all sides are seared. This adds even more texture and makes your steak presentation-worthy.

This sous vide steak guide proves you don’t need a fancy setup to create steakhouse magic — just a hot skillet and the right technique. Searing is the final step in transforming your perfectly cooked steak into a masterpiece.

Finishing a Sous Vide Steak on the Grill

If you love a smoky flavor and gorgeous grill marks, this sous vide steak guide has you covered. Finishing your sous vide steak on the grill combines precision cooking with the irresistible taste of open flames.

Why finish on the grill?

While the stovetop is convenient, the grill adds a unique, charred flavor and an outdoor cooking vibe. This sous vide steak guide suggests the grill for cookouts, summer meals, or anytime you want that authentic barbecue feel.

Set up for high heat

Your goal is intense, direct heat to sear the outside without overcooking the center. This sous vide steak guide recommends lighting a full chimney of charcoal and spreading the coals over one half of the grill. Let the grill preheat for 5–10 minutes until the grates are hot and clean. On a gas grill, set one side to the highest heat and allow it to preheat fully. Oil the grates with tongs and a paper towel for a non-stick surface.

Sear and rotate

Place your steak directly over the hottest part of the grill. Sear each side for about 30 seconds, flipping and rotating every 15–30 seconds to build even grill marks and prevent flare-ups. If the flames rise too high, move the steak briefly to the cooler side until they die down.

Serve immediately

Once you’ve achieved a deep brown crust with nice grill marks, remove the steak from the grill and serve immediately. This sous vide steak guide reminds you there’s no need to rest — sous vide locks in the juices already.

By finishing your steak on the grill, you get the best of both worlds: the precision of sous vide with the flavor of fire. This sous vide steak guide ensures your steak always turns out beautifully, no matter where you cook it.

Frequently Asked Questions

These are the most common questions readers ask about cooking steak with sous vide. This sous vide steak guide answers them all so you can feel confident every step of the way.

How long do I have to sous vide a steak?

Technically, you only need to cook long enough for the steak to heat through evenly — usually 1–2 hours. But this sous vide steak guide explains that holding it a little longer (up to 3–4 hours) won’t hurt and can even improve tenderness on some cuts.

What is the downside of sous vide?

The biggest downside this sous vide steak guide notes is that sous vide takes longer than traditional methods. You also need to sear afterward to get a crust, and if you cook too long, the texture can become mushy. It also requires some equipment, like a sous vide machine and bags.

Why is my steak tough after sous vide?

If your steak turns out tough, this sous vide steak guide suggests checking your temperature — cooking above 140°F can dry it out. You might also be using a very lean or tough cut without adjusting time properly. Always finish with a sear for the best texture.

Is sous vide safe?

Absolutely. Cooking steak with sous vide at temperatures above 130°F is safe and kills harmful bacteria. This sous vide steak guide follows all food safety guidelines so you can cook worry-free.

Can you sous vide frozen steak?

Yes! One of the perks of this sous vide steak guide is that you can cook steak straight from frozen. Just add 30–60 minutes to the recommended cook time to account for thawing.

Do you have to sear after sous vide?

Technically no, but this sous vide steak guide strongly encourages it. Searing creates the caramelized crust and rich flavor that make steak irresistible. Without it, the outside of your steak will look pale and feel soft.

Conclusion

With this sous vide steak guide, you now have everything you need to make steak night stress-free and delicious. From picking the perfect cut to setting the right temperature and finishing with a gorgeous crust, every step is covered to help you feel confident in the kitchen. Whether you prefer stovetop searing or smoky grill marks, this guide ensures your steak is juicy, tender, and perfectly cooked every time.

Let’s StayFit — together.For More follow us on facebook & pinterest