How to Make Pistachio Ice Cream: Simple, Creamy, Healthy Recipe

how to make pistachio ice cream – creamy homemade dessert
Table of Contents

Our StayFit Story and Why It’s Worth It

 how to make pistachio ice cream – creamy homemade dessert
How to make Healthy pistachio ice cream – creamy homemade dessert

How to make pistachio ice cream was a question we never thought we’d ask — until our StayFit journey made us look at dessert differently.

How to make pistachio ice cream wasn’t something we planned to learn. But once our StayFit challenge started, we began looking at dessert in a new way. When Kiko and I made our deal — 100 days of no excuses, just real meals — we thought desserts had to go. Like most people trying to get in shape, we believed anything sweet or creamy didn’t fit into a healthy life.

Then came one hot morning. After our workout, we were wiped. Kiko opened the freezer and stared at a half-empty tub of ice cream. “Why does everything good feel so fake?” he said. He was right. The label was full of fake flavors, preservatives, and more sugar than we’d usually eat in a week.That’s when I remembered the bag of pistachios we had in the pantry. I wondered if we could make something better. I searched how to make pistachio ice cream at home — and what I found shocked me. It was easy. All we needed were real pistachios, milk, cream, eggs, and a little sugar.

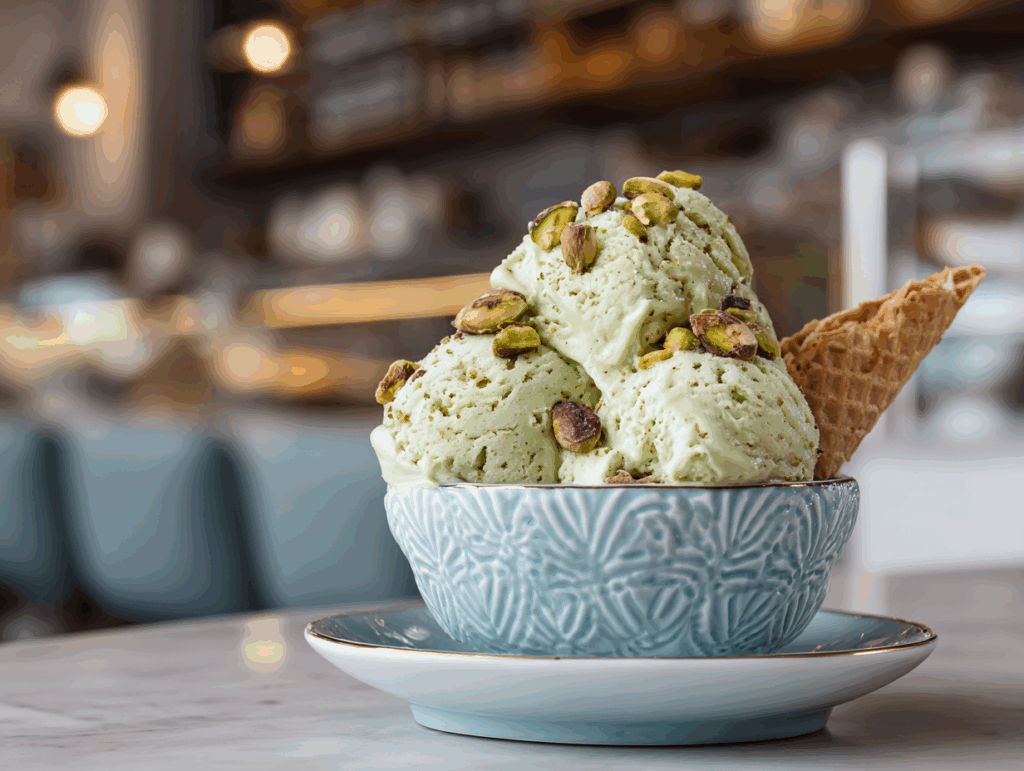
That night, we gave it a shot. We peeled the pistachios, blended them into a paste, and stirred it into a warm custard. After cooling and churning, the result blew us away. It was creamy, nutty, and just sweet enough. We were hooked. This ice cream fit our goals and tasted better than anything store-bought. Knowing how to make pistachio ice cream gave us more than a dessert. It gave us control — and another reason to stick to real food.

Let’s StayFit — together.

Why Making Pistachio Ice Cream at Home Beats Store-Bought Every Time

Back when Kiko stood in front of that freezer, holding a half-melted tub of store-bought ice cream, something clicked. We realized it wasn’t just the sugar or the additives that bothered us — it was how disconnected we felt from the food we used to love. That’s when we started wondering how to make pistachio ice cream from scratch.

Turns out, it wasn’t just doable — it was better in every way. Here’s why we’ve never looked back.

Control the Ingredients for a Healthier Treat

One of the biggest reasons we started making our own was to ditch the fake flavors. Most store brands rely on artificial pistachio extract, food coloring, and way too much sugar. But when you make it yourself, you’re in charge.

We use real pistachios, creamy coconut milk, and a touch of honey or maple butter. A pinch of sea salt adds balance. You can even make it fully dairy-free without losing that smooth, rich taste. That flexibility fits perfectly with our StayFit mindset — just like our chocolate strawberry yogurt clusters and homemade protein bars, it’s all about clean comfort.

Customize the Texture and Flavor to Fit You

That first batch we made was simple — just a pistachio paste blended into a banana-coconut base. But over time, we started playing with it. More cream for a smoother finish. Dark chocolate chunks for crunch. Fresh berries for brightness. It’s like building your perfect bowl, just like we do with our baked oat cups or gluten-free cinnamon rolls.

Once you know how to make pistachio ice cream your way, you stop settling. It becomes a dessert you feel good about — because you built it, and you kept it real.

SteStep-by-Step Guide: How to Make Pistachio Ice Cream at Home

Learning how to make pistachio ice cream at home is easier than you think. This version is dairy-free, egg-free, and uses just five clean ingredients. It’s creamy, lightly sweet, and needs no fancy custard or machine.

 ingredients for homemade pistachio ice cream recipe
Ingredients for homemade pistachio ice cream

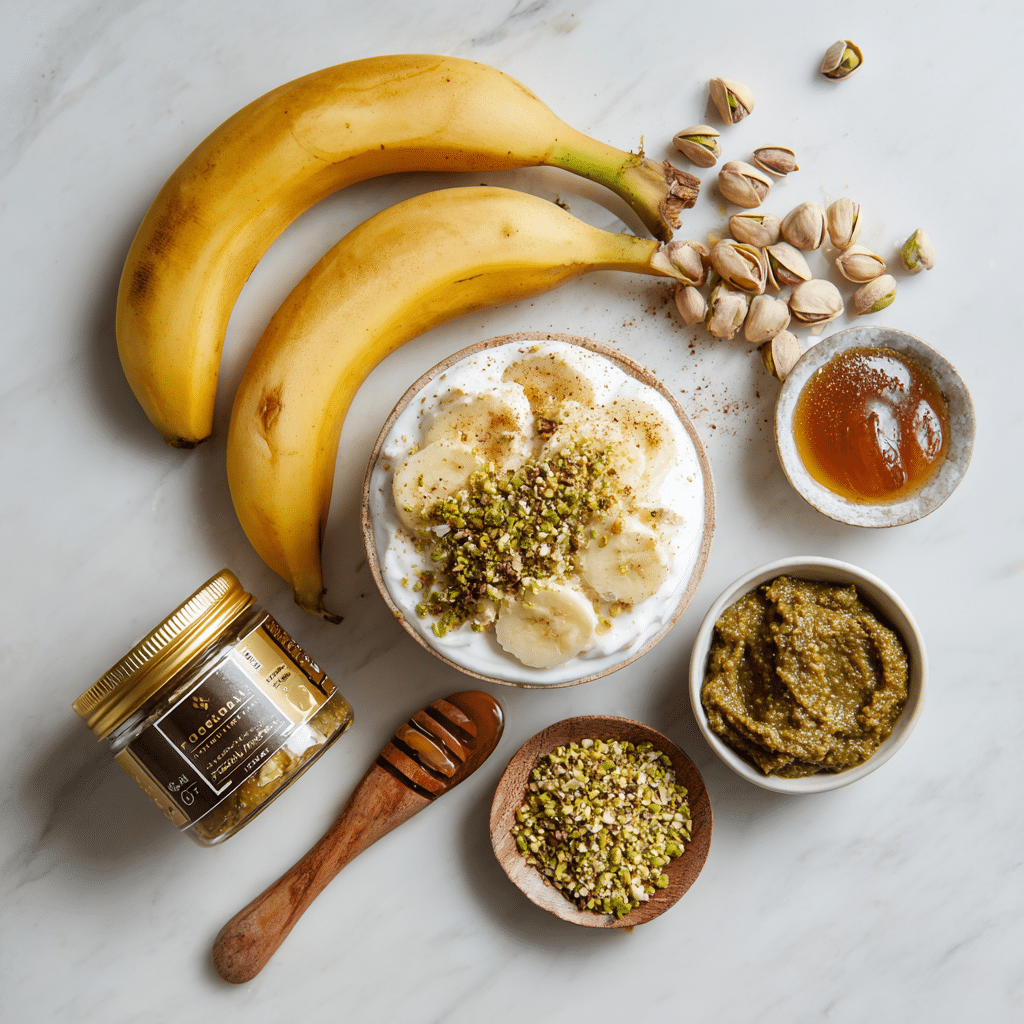
Ingredients You’ll Need

  • 2 bananas (frozen for 12 hours, peeled)
  • 1 can full-fat coconut milk (refrigerated for 12 hours)
  • 6 Tbsp pistachio paste
  • 4 Tbsp maple butter or honey
  • 1 handful pistachios (chopped, for garnish)

A high-speed blender or food processor works best. Regular blenders won’t give you that smooth, creamy finish. If you’re still building your StayFit kitchen, check out our kitchen gear guide for tips.

Quick Method

  1. Open the chilled coconut milk and scoop out the cream. Save the liquid for smoothies.
  2. Add frozen bananas, coconut cream, pistachio paste, and maple butter or honey to a high-speed blender.
  3. Blend until smooth and creamy.
  4. Transfer to a freezer-safe container and freeze for about 4 hours.
  5. Let it soften for 10–15 minutes before scooping. Top with chopped pistachios.

Bonus: Quick Answers to Common Pistachio Ice Cream Questions

What makes pistachio ice cream green?
Real pistachios give the ice cream a soft green tint. For a brighter color, you can add a handful of spinach or a touch of matcha.

How can I make it without eggs?
No eggs are needed here. The bananas and coconut cream create the perfect creamy base.

Can I make it without cream?
Yes. Just use the bananas and pistachio paste for a lighter, soft-serve version.

What if I don’t have an ice cream maker?
No problem — this recipe is made to freeze and scoop without one.

How can I use a Vitamix for this?
Just follow the same steps using your Vitamix. It blends everything perfectly.

How to Serve and Store Pistachio Ice Cream the Right Way

served pistachio ice cream with chopped pistachios
Served pistachio ice cream with chopped pistachios

Now that you’ve learned how to make pistachio ice cream at home, it’s time to enjoy it the right way. From fun toppings to smart storage, here’s how to get the most out of your homemade treat.

Creative Ways to Serve Pistachio Ice Cream

Sure, it’s great right from the container — but why stop there? Add some crunch with chopped pistachios or cacao nibs. For something bright and fresh, toss on a few raspberries. Want to go all in? Serve a scoop between two of our high-protein cookies for a StayFit-style ice cream sandwich.

For a fancier twist, drizzle a bit of dark chocolate on top or garnish with mint. It’s a great way to dress it up without overdoing it.

Want more topping and dessert ideas? Our chocolate strawberry yogurt clusters are full of flavor and easy to pair with frozen treats.

Remember — this ice cream is rich and filling. A small scoop goes a long way.

Proper Storage for Freshness

Since this recipe is made from real ingredients, it’s best within 1–2 weeks. Here’s how to keep it tasting great:

  • Store in a sealed, freezer-safe container.
  • Press parchment or wax paper against the top before sealing.
  • Keep it in the coldest part of your freezer.

Before scooping, let it sit at room temp for 10–15 minutes. Want to keep your meals fresh too? Don’t miss our storage tips and tricks for healthy food that lasts.

When you store it right, your homemade pistachio ice cream stays creamy, smooth, and ready any time.

Can Pets Have Pistachio Ice Cream? What You Need to Know

If you’ve ever sat down with a bowl of your favorite frozen treat and noticed your dog or cat giving you those big eyes, you’re not alone. But here’s the honest answer: this isn’t something to share with them.

Why Dogs Shouldn’t Have It

Pistachios aren’t toxic in small amounts, but the sugar, fat, and creamy base in this dessert can mess with your dog’s digestion. Many dogs struggle with dairy, which can lead to gas, bloating, or worse — like pancreatitis.

Instead of taking the risk, give your pup a simple homemade snack made just for dogs — no dairy, no sugar, and no ingredients that could upset their stomach. They’ll still get something tasty, and you’ll feel good knowing it’s safe.

Even though it might be tempting to let them have a taste, it’s safest to keep this treat just for you.

Why Cats Should Skip It Too

Cats have an even tougher time with dairy, and the sugar and fat content offer no benefit. Even a small bite can cause vomiting or diarrhea — or lead to longer-term issues.

Stick to safe rewards like plain, cooked meats or something from our list of healthy snacks that won’t cause problems.

We get it — sharing food feels like love. But this one’s better left untouched by your furry friends. It’s rich, cool, and made just for you.

FAQs and Final Thoughts on Making Pistachio Ice Cream

How to make pistachio ice cream at home?

Start by freezing bananas and chilling coconut milk overnight. Blend the coconut cream, frozen bananas, pistachio paste, and maple butter or honey in a high-speed blender. Freeze for 4 hours, then serve sprinkled with chopped pistachios.

What makes pistachio ice cream green?

The green color comes naturally from pistachios, though some recipes add food coloring. For a brighter hue without artificial dyes, try blending in a little spinach or matcha powder.

How do you make pistachio ice cream without eggs?

Our recipe is already egg-free, relying on bananas and coconut cream for smooth texture.
How do you make pistachio ice cream without cream?
You can skip coconut cream and just use bananas and pistachio paste for a softer, lighter ice cream.

Can dogs or cats eat pistachio ice cream?

No — pistachio ice cream contains sugar, dairy, and fat that can harm pets. Stick with safer treats from our FAQs about StayFit desserts for more ideas.

Final Thoughts: Why Homemade Pistachio Ice Cream Is Worth It

Making this recipe taught us something more than just how to enjoy dessert — it showed us that sweet treats don’t have to set you back. When you use real ingredients and skip the fake stuff, you get flavor that feels good.

So grab your blender, prep your pantry, and give it a go. This isn’t just ice cream — it’s proof that when you choose better, everything changes. Including you.

Let’s StayFit — together.For More follow us on facebook & pinterest

Print
clock clock iconcutlery cutlery iconflag flag iconfolder folder iconinstagram instagram iconpinterest pinterest iconfacebook facebook iconprint print iconsquares squares iconheart heart iconheart solid heart solid icon
served pistachio ice cream with chopped pistachios

How to Make Pistachio Ice Cream: Simple, Creamy, Healthy Recipe


5 Stars 4 Stars 3 Stars 2 Stars 1 Star

No reviews

  • Author: Chef Dodos
  • Total Time: ~4 hr 10 min (including freeze)
  • Yield: 46 servings 1x

Description

Creamy, nutty, and healthier pistachio ice cream made with bananas, coconut milk, and real pistachio paste.


Ingredients

Scale

2 bananas (frozen for 12 hours)

1 can full-fat coconut milk (refrigerated for 12 hours)

6 Tbsp pistachio paste

4 Tbsp maple butter or honey

1 handful pistachios (for garnish)


Instructions

1. Scoop chilled coconut cream into blender.

2. Add frozen bananas, pistachio paste, and maple butter or honey.

3. Blend until smooth and creamy.

4. Transfer to freezer-safe container and freeze for about 4 hours.

5. Let soften for 10–15 minutes before serving and garnish with chopped pistachios.

Notes

Best enjoyed within 1–2 weeks. Store airtight. Let thaw slightly before scooping.

  • Prep Time: ~10 min
  • Cook Time: 0 min
  • Category: Dairy-Free
  • Method: Blend & Freeze
  • Cuisine: American, Italian

Nutrition

  • Calories: 167 kcal
  • Fat: 9g
  • Carbohydrates: 20 g
  • Protein: 3 g

How to Make Berry Cheesecake Overnight Oats (Fast & Healthy!)

berry cheesecake overnight oats ready to eat with spoon and toppings
berry cheesecake overnight oats in jar with spoon and berries
Berry cheesecake overnight oats served in a jar with crushed graham topping and fresh berries

Berry cheesecake overnight oats are one of the easiest ways to stay on track at night. When we started our 100-day fitness challenge, the evenings were the hardest. We were tired, hungry, and always looking for something sweet. These oats changed that. They’re creamy, tasty, and keep you full — without making you feel guilty.

We used to grab chips or sugary snacks before bed. Now we reach for a jar of berry cheesecake overnight oats. Each one is filled with oats, Greek yogurt, a drizzle of honey, and crushed graham crackers. It tastes like dessert, but it’s packed with protein and fiber. The oats and chia seeds help keep you full, and the berries give a nice sweet touch without any added sugar.

Some nights, we pair it with Chocolate Baked Oat Cups if we need something a little extra. Or we enjoy it with Healthy Banana Bread after a long workout. It’s a snack that feels good and works with your goals.

What Makes the Cheesecake Layer So Good
The best part of berry cheesecake overnight oats is the top layer. It’s made with Greek yogurt, protein powder, and honey. Spread it over the oats like frosting, and it tastes just like cheesecake. It’s rich and creamy without being too heavy. Plus, it adds a big boost of protein.

We use strawberries, blueberries, or raspberries depending on what we have. Frozen berries work great too. They melt overnight and mix right into the oats for extra flavor.

Now we prep these oats every week. They’re simple, tasty, and a smart way to beat late-night cravings. If you want real food that fits your plan, berry cheesecake overnight oats are it.

Benefits of Berry Cheesecake Overnight Oats

Are Overnight Oats Actually Healthy?
Yes — especially when you make them the StayFit way. Berry cheesecake overnight oats give you the perfect mix of protein, fiber, and slow-digesting carbs. Oats are full of heart-healthy fiber that helps with digestion and keeps blood sugar stable. When you add chia seeds and Greek yogurt, you also get healthy fats and protein to stay full longer.

This snack supports your goals, whether you’re trying to lose fat, build muscle, or just avoid junk food at night. Compared to sugary desserts, it’s a smart swap that actually satisfies your cravings. It’s also made with whole ingredients — no mystery stuff, no crash later.

Many of our readers say it helped them stop mindless snacking. We’ve heard similar feedback on Protein Bagels, which work great earlier in the day. But when it comes to late-night hunger, these oats are hard to beat.

The Power of Protein, Berries & Whole Grains
Let’s break it down. Each serving of berry cheesecake overnight oats gives you:

  • Oats: slow carbs to keep you full and steady
  • Chia seeds: a little crunch, plus omega-3s
  • Greek yogurt: thick, creamy, and high in protein
  • Protein powder: extra fuel to help you recover and stay satisfied
  • Berries: loaded with antioxidants and natural sweetness

All of this in one small jar you can eat straight from the fridge.

You can even adjust the recipe depending on your needs. Want more calories? Add a spoonful of peanut butter. Trying to lower sugar? Use plain yogurt and skip the honey. This snack is flexible, and it works with your plan — just like our Zesty Lemon Chicken Orzo works for high-protein dinners.

In short, berry cheesecake overnight oats are more than tasty. They’re good for your body, easy to prep, and perfect when you want something that feels like a treat but fuels your progress.

Key Ingredients & Smart Substitutions

The Best Ingredients for Flavor and Function
What makes berry cheesecake overnight oats so good is the way each layer adds something important — flavor, texture, and nutrition. You only need a few ingredients, but they each serve a purpose.

ingredients for berry cheesecake overnight oats laid out on table
Simple ingredients for berry cheesecake overnight oats – oats, Greek yogurt, berries, honey, and chia seeds

Here’s what goes into every jar:

  • Oats – Rolled or quick oats both work. They soak up the liquid overnight and give you that creamy base.
  • Greek yogurt – Thick and tangy, this makes the cheesecake-style topping and adds a solid amount of protein.
  • Chia seeds – These little seeds help hold everything together and give you healthy fats and fiber.
  • Protein powder – Just one scoop adds extra protein and gives the topping a sweet vanilla flavor.
  • Honey – A little honey adds natural sweetness. You can also use maple syrup.
  • Berries – Use fresh or frozen. Berries add color, natural sugar, and antioxidants.
  • Graham crackers – Crushed on top, they bring that true cheesecake feel with a little crunch.

Each ingredient plays its part. The result? A cold, creamy, ready-to-eat snack that feels like dessert but fuels your goals. We love pairing it with Chocolate Strawberry Yogurt Clusters for a sweet and satisfying combo.

Smart Substitutions to Fit Your Goals
One of the best things about berry cheesecake overnight oats is how easy they are to tweak. Whether you’re dairy-free, vegan, gluten-free, or just short on something, you can still make it work.

Here are some easy swaps:

  • No protein powder? Skip it and use vanilla yogurt instead for flavor.
  • No honey? Use maple syrup, agave, or even date syrup.
  • No Greek yogurt? Try plant-based yogurt or Skyr.
  • No chia seeds? Ground flaxseed will do the job.
  • Want it gluten-free? Just use certified gluten-free oats and graham crackers.

You can also change up the fruit. Try peaches in the summer or cherries when they’re in season. Even a mix of frozen berries adds great flavor.

We get asked a lot if these oats still work without dairy or grains. The answer is yes — we’ve seen readers replace ingredients and still love the results. Just like how our Cottage Cheese Ranch Dip can be dairy-free, this snack is just as flexible.

Bottom line: You don’t need to follow the recipe exactly. You just need the basics — oats, something creamy, a sweetener, and berries. Make it your own. That’s what keeps it fun and sustainable.

Mistakes to Avoid with Overnight Oats

What Not to Add in Overnight Oats
Not every ingredient works in overnight oats — especially when you’re making something as creamy and balanced as berry cheesecake overnight oats. Some things can mess with the texture, taste, or even your digestion.

Here’s what we learned to avoid:

  • Too much liquid – Adding too much milk or yogurt will leave your oats runny and hard to enjoy. Stick with just enough to cover the oats and let the chia seeds thicken things up.
  • Crunchy add-ins (too early) – Nuts, seeds, or graham crackers should be added right before eating. Otherwise, they get soggy overnight.
  • Artificial sweeteners – These can leave a weird aftertaste and may cause stomach discomfort. A little honey or maple syrup is a better option.
  • Citrus fruits – Fresh oranges or pineapple can break down the oats too much and make them bitter. Save those for other recipes like our Roasted Sweet Potato Salad.

Making berry cheesecake overnight oats is simple — but keeping it balanced matters. Too many extras can turn your snack into a sugar bomb or make it tough on your stomach.

Why Some Ingredients (Like Berries) Need Timing
Berries are a key part of this recipe, but you have to know when to add them. Frozen berries are perfect to mix in before chilling. They thaw slowly overnight and release a little juice into the oats, giving a natural, sweet flavor.

Fresh berries, though, are better added the next day. Why? Because they hold their shape and texture better that way. If you add fresh strawberries or blueberries too early, they can get mushy or watery.

Another mistake? Skipping the layer order. You want oats and chia seeds at the bottom, yogurt and protein mixed on top, and berries last. That layering keeps the texture perfect and makes every spoonful feel like a real treat.

We’ve had readers ask, “Can you mess up overnight oats?” The truth is: yes, a few small things can throw them off. But once you know what to avoid, it’s easy. Just like How to Fix Your Metabolism starts with simple steps, so does building a better snack.

Berry cheesecake overnight oats should feel indulgent, not disappointing. Get the timing and texture right, and you’ll have a snack that hits every time.

How to Prep Like a Pro

Can You Add Cream Cheese to Overnight Oats?
Yes, you can — but with a few notes. Classic berry cheesecake overnight oats use Greek yogurt for that creamy, tangy layer. It mimics cheesecake without adding a lot of fat or sugar. But if you really want that classic cheesecake taste, adding a little cream cheese is totally fine.

Stick to a small amount — about 1 tablespoon per serving. Make sure it’s softened and blended with the yogurt and honey so it spreads smoothly. It gives that richer flavor, especially if you skip the protein powder. We recommend pairing it with stronger berries like raspberries or blackberries, which balance out the richness.

Still, most people find that Greek yogurt alone gives just the right texture. It’s lighter, high in protein, and makes the prep super easy. That’s why we use it in most of our go-to recipes — like the topping in our Cottage Cheese Ranch Dip, which also gets its creaminess without needing extra cheese.

Meal Prep Tips for Creamy, Fresh Results
When making berry cheesecake overnight oats, the key is layering and portioning. Use jars or containers with lids — anything you can seal and store in the fridge for 3–4 days.

Here’s our go-to prep process:

  1. Start with oats, chia seeds, and just enough milk to cover.
  2. Mix in a scoop of protein powder.
  3. Add a layer of Greek yogurt mixed with honey (and cream cheese if using).
  4. Finish with berries and close the lid.
  5. Add crushed graham crackers right before eating so they stay crunchy.

Want a smoother mix? Blend your oats with milk before layering for a pudding-like texture. Want it sweeter? Add mashed banana instead of honey. This is your snack — build it how you like.

We prep 3–4 jars at once and keep them chilled. They’re perfect for busy nights when cooking feels like too much. If you’re already making Insulin-Control Meals or doing Sunday prep, these oats slide right into your plan.

By prepping ahead, you always have something ready that feels like a treat — but fuels your body right. Berry cheesecake overnight oats aren’t just easy to make. They’re easy to stick with.

FAQs + Pro Tips

Why You Might Feel Bloated After Overnight Oats

Some people feel bloated after eating overnight oats. It’s often because of too much fiber too fast, or because the oats weren’t soaked long enough. In berry cheesecake overnight oats, chia seeds and oats expand overnight, which helps your body digest them better. If you’re still feeling off, try cutting the portion or switching to gluten-free oats.
Also, watch your mix-ins. Adding lots of raw fruit, dairy, and sweeteners all at once can be tough on the stomach. Keep it simple, and adjust based on what your body handles best. Just like with High-Protein Orzo Meals, balance matters.

What Not to Add in Overnight Oats?

Avoid ingredients that mess with the texture or shelf life. Don’t add fresh bananas, crunchy granola, or raw apples overnight — they turn mushy or brown. Don’t add nuts or crushed crackers ahead of time. Save them for right before eating. With berry cheesecake overnight oats, keeping the base clean is the key to a good snack.

Are Overnight Oats Actually Healthy?

Yes, especially when made with real ingredients like oats, Greek yogurt, chia seeds, and berries. This combo gives you fiber, protein, and antioxidants. Unlike sugary snacks, berry cheesecake overnight oats keep you full and steady without a crash. They’re a much smarter choice than store-bought treats or late-night processed foods.

Can You Add Cream Cheese to Overnight Oats?

You can, and it tastes great if you’re aiming for a true cheesecake flavor. Blend a tablespoon of cream cheese into your yogurt layer. It makes the topping extra rich and smooth. Just be careful with the portion — a little goes a long way. We still prefer Greek yogurt alone for ease and balance.

Why Not Add Berries to Overnight Oats?

You can add frozen berries right away — they thaw overnight and release flavor into the oats. But avoid adding fresh ones too early. They get mushy or soggy. For the best texture, add fresh berries right before serving. That keeps berry cheesecake overnight oats tasting fresh and sweet.

What Is the Healthiest Thing to Add to Overnight Oats?

It depends on your goals. Chia seeds are great for healthy fats and fiber. Greek yogurt boosts protein. Berries add antioxidants and natural sweetness. If you want more staying power, try a spoonful of nut butter. The best part about berry cheesecake overnight oats is that you can build them to match your needs — whether it’s fat loss, muscle gain, or just clean fuel.

Print
clock clock iconcutlery cutlery iconflag flag iconfolder folder iconinstagram instagram iconpinterest pinterest iconfacebook facebook iconprint print iconsquares squares iconheart heart iconheart solid heart solid icon
berry cheesecake overnight oats ready to eat with spoon and toppings

Berry cheesecake overnight oats


5 Stars 4 Stars 3 Stars 2 Stars 1 Star

No reviews

  • Author: Chef Dodos
  • Total Time: 6 hours
  • Yield: 1 serving 1x

Description

Berry cheesecake overnight oats are the ultimate high-protein late-night snack. Sweet, creamy, and easy to prep!


Ingredients

Scale

1/2 cup rolled oats

1/2 cup unsweetened almond milk

1 tbsp chia seeds

1/2 scoop vanilla protein powder

1/2 cup Greek yogurt

1 tbsp honey

1/3 cup mixed berries (fresh or frozen)

1 crushed graham cracker (optional)


Instructions

1. In a jar or container, mix oats, chia seeds, almond milk, and protein powder.

2. Let sit for 5 minutes to slightly thicken.

3. In a bowl, mix Greek yogurt and honey until smooth. (Add 1 tbsp cream cheese if desired.)

4. Layer the yogurt mixture over the oat base.

5. Top with berries and cover.

6. Refrigerate overnight (at least 4–6 hours).

7. Before eating, add crushed graham crackers if desired.

Notes

Use frozen berries for juicy flavor overnight.

Swap Greek yogurt for plant-based yogurt for a dairy-free version.

Use gluten-free oats and crackers to make it gluten-free.

  • Prep Time: 5 minutes
  • Cook Time: 0 minutes
  • Category: Snack
  • Method: No-Cook
  • Cuisine: American

Nutrition

  • Serving Size: 1 jar
  • Calories: 320
  • Sugar: 10g
  • Sodium: 150mg
  • Fat: 8g
  • Saturated Fat: 2g
  • Unsaturated Fat: 5g
  • Trans Fat: 0g
  • Carbohydrates: 35g
  • Fiber: 7g
  • Protein: 22g
  • Cholesterol: 10mg

Conclusion

Berry cheesecake overnight oats are more than just a healthy snack — they’re a smart, crave-worthy way to satisfy those late-night cravings while still supporting your goals. With simple ingredients like oats, Greek yogurt, chia seeds, and berries, you get real food that fuels your body without added junk.

This snack became a game-changer during our 100-day fitness challenge. It gave us a way to enjoy something sweet without breaking progress. And the best part? It’s easy to prep, super flexible, and always ready when you need it.

Whether you’re looking to fuel recovery, cut out sugar, or stay consistent with your eating, berry cheesecake overnight oats deliver. Try them tonight — and let them work for you tomorrow.

Let’s StayFit — together. Follow us on facebbok for more