How to Make Berry Cheesecake Overnight Oats (Fast & Healthy!)

berry cheesecake overnight oats ready to eat with spoon and toppings
berry cheesecake overnight oats in jar with spoon and berries
Berry cheesecake overnight oats served in a jar with crushed graham topping and fresh berries

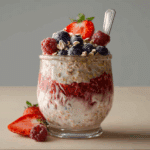
Berry cheesecake overnight oats are one of the easiest ways to stay on track at night. When we started our 100-day fitness challenge, the evenings were the hardest. We were tired, hungry, and always looking for something sweet. These oats changed that. They’re creamy, tasty, and keep you full — without making you feel guilty.

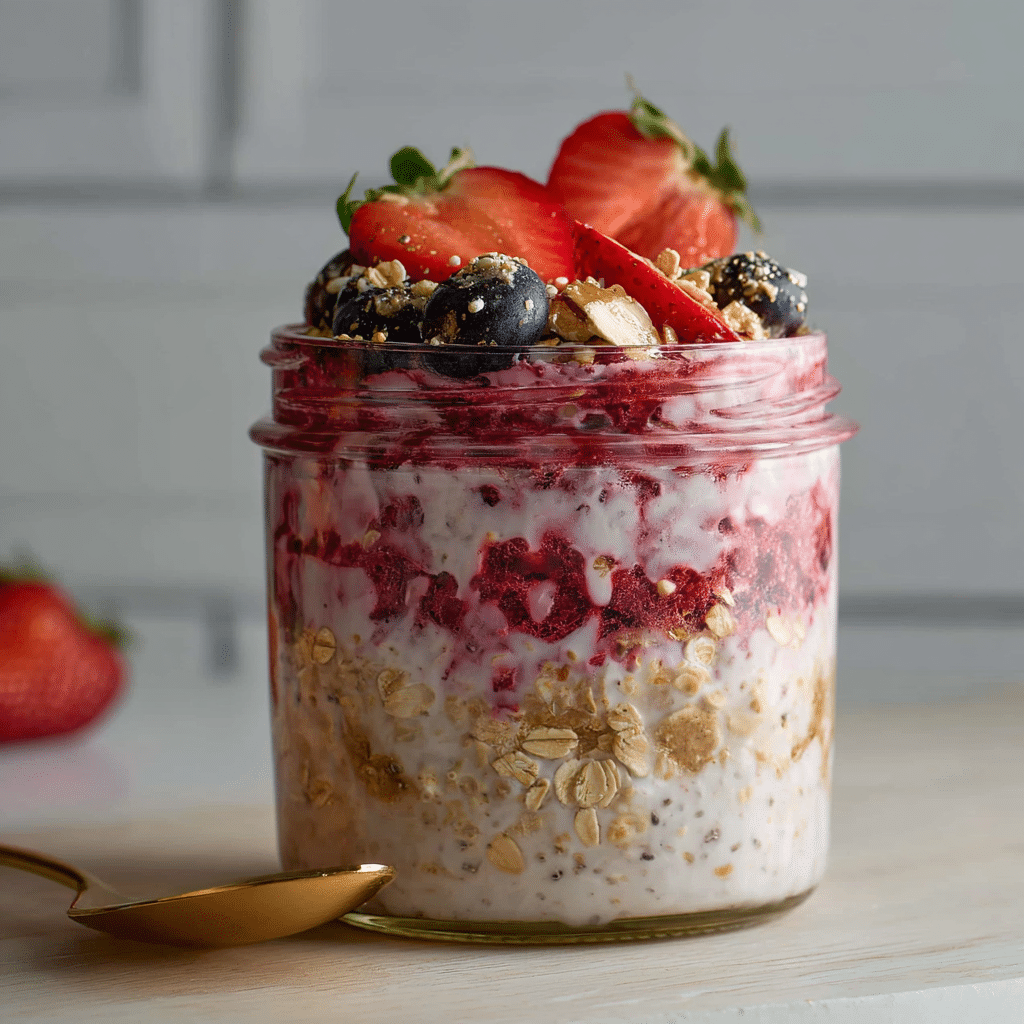
We used to grab chips or sugary snacks before bed. Now we reach for a jar of berry cheesecake overnight oats. Each one is filled with oats, Greek yogurt, a drizzle of honey, and crushed graham crackers. It tastes like dessert, but it’s packed with protein and fiber. The oats and chia seeds help keep you full, and the berries give a nice sweet touch without any added sugar.

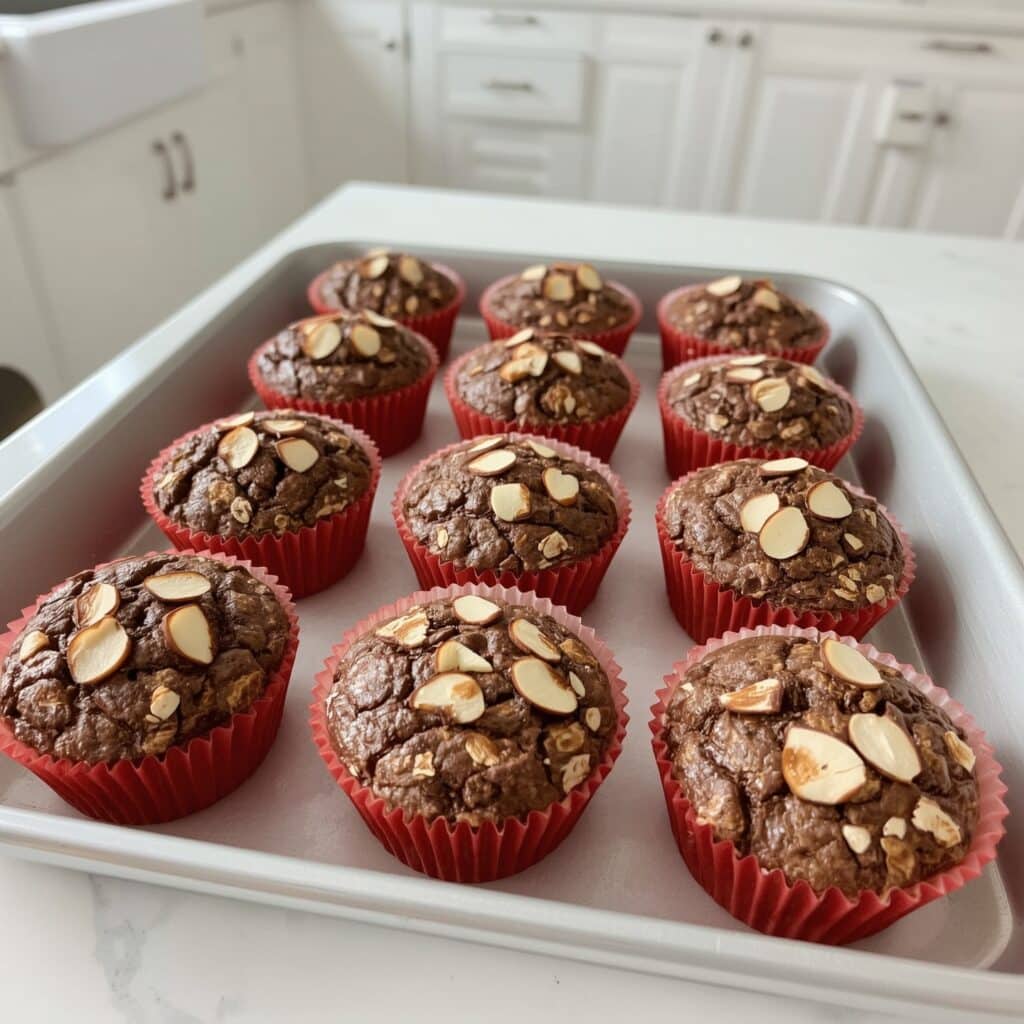
Some nights, we pair it with Chocolate Baked Oat Cups if we need something a little extra. Or we enjoy it with Healthy Banana Bread after a long workout. It’s a snack that feels good and works with your goals.

What Makes the Cheesecake Layer So Good
The best part of berry cheesecake overnight oats is the top layer. It’s made with Greek yogurt, protein powder, and honey. Spread it over the oats like frosting, and it tastes just like cheesecake. It’s rich and creamy without being too heavy. Plus, it adds a big boost of protein.

We use strawberries, blueberries, or raspberries depending on what we have. Frozen berries work great too. They melt overnight and mix right into the oats for extra flavor.

Now we prep these oats every week. They’re simple, tasty, and a smart way to beat late-night cravings. If you want real food that fits your plan, berry cheesecake overnight oats are it.

Benefits of Berry Cheesecake Overnight Oats

Are Overnight Oats Actually Healthy?
Yes — especially when you make them the StayFit way. Berry cheesecake overnight oats give you the perfect mix of protein, fiber, and slow-digesting carbs. Oats are full of heart-healthy fiber that helps with digestion and keeps blood sugar stable. When you add chia seeds and Greek yogurt, you also get healthy fats and protein to stay full longer.

This snack supports your goals, whether you’re trying to lose fat, build muscle, or just avoid junk food at night. Compared to sugary desserts, it’s a smart swap that actually satisfies your cravings. It’s also made with whole ingredients — no mystery stuff, no crash later.

Many of our readers say it helped them stop mindless snacking. We’ve heard similar feedback on Protein Bagels, which work great earlier in the day. But when it comes to late-night hunger, these oats are hard to beat.

The Power of Protein, Berries & Whole Grains
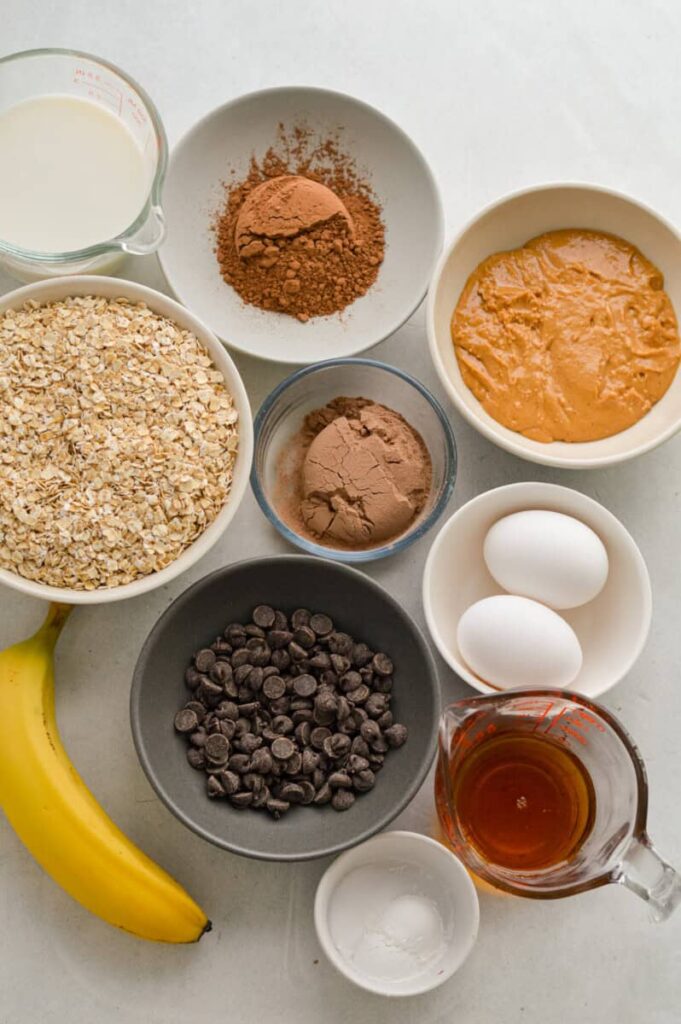
Let’s break it down. Each serving of berry cheesecake overnight oats gives you:

  • Oats: slow carbs to keep you full and steady
  • Chia seeds: a little crunch, plus omega-3s
  • Greek yogurt: thick, creamy, and high in protein
  • Protein powder: extra fuel to help you recover and stay satisfied
  • Berries: loaded with antioxidants and natural sweetness

All of this in one small jar you can eat straight from the fridge.

You can even adjust the recipe depending on your needs. Want more calories? Add a spoonful of peanut butter. Trying to lower sugar? Use plain yogurt and skip the honey. This snack is flexible, and it works with your plan — just like our Zesty Lemon Chicken Orzo works for high-protein dinners.

In short, berry cheesecake overnight oats are more than tasty. They’re good for your body, easy to prep, and perfect when you want something that feels like a treat but fuels your progress.

Key Ingredients & Smart Substitutions

The Best Ingredients for Flavor and Function
What makes berry cheesecake overnight oats so good is the way each layer adds something important — flavor, texture, and nutrition. You only need a few ingredients, but they each serve a purpose.

ingredients for berry cheesecake overnight oats laid out on table
Simple ingredients for berry cheesecake overnight oats – oats, Greek yogurt, berries, honey, and chia seeds

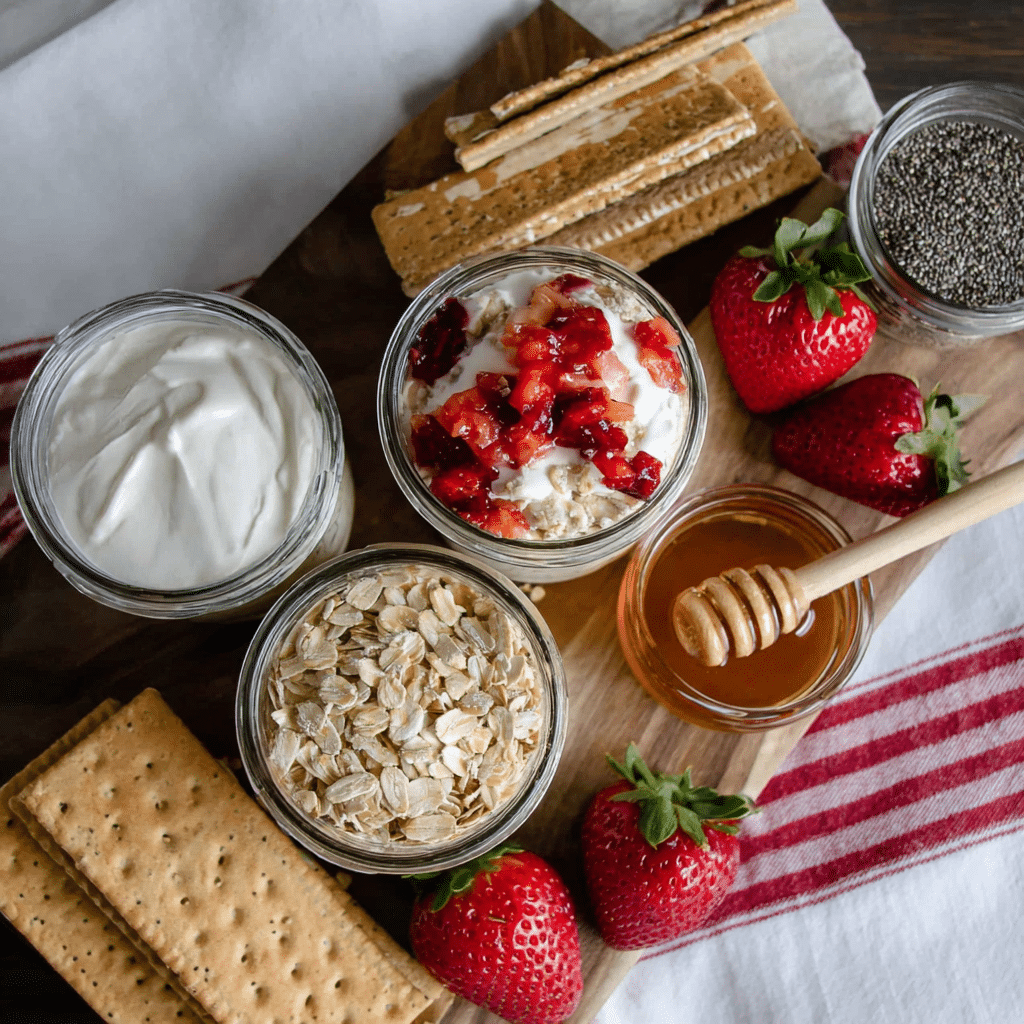
Here’s what goes into every jar:

  • Oats – Rolled or quick oats both work. They soak up the liquid overnight and give you that creamy base.
  • Greek yogurt – Thick and tangy, this makes the cheesecake-style topping and adds a solid amount of protein.
  • Chia seeds – These little seeds help hold everything together and give you healthy fats and fiber.
  • Protein powder – Just one scoop adds extra protein and gives the topping a sweet vanilla flavor.
  • Honey – A little honey adds natural sweetness. You can also use maple syrup.
  • Berries – Use fresh or frozen. Berries add color, natural sugar, and antioxidants.
  • Graham crackers – Crushed on top, they bring that true cheesecake feel with a little crunch.

Each ingredient plays its part. The result? A cold, creamy, ready-to-eat snack that feels like dessert but fuels your goals. We love pairing it with Chocolate Strawberry Yogurt Clusters for a sweet and satisfying combo.

Smart Substitutions to Fit Your Goals
One of the best things about berry cheesecake overnight oats is how easy they are to tweak. Whether you’re dairy-free, vegan, gluten-free, or just short on something, you can still make it work.

Here are some easy swaps:

  • No protein powder? Skip it and use vanilla yogurt instead for flavor.
  • No honey? Use maple syrup, agave, or even date syrup.
  • No Greek yogurt? Try plant-based yogurt or Skyr.
  • No chia seeds? Ground flaxseed will do the job.
  • Want it gluten-free? Just use certified gluten-free oats and graham crackers.

You can also change up the fruit. Try peaches in the summer or cherries when they’re in season. Even a mix of frozen berries adds great flavor.

We get asked a lot if these oats still work without dairy or grains. The answer is yes — we’ve seen readers replace ingredients and still love the results. Just like how our Cottage Cheese Ranch Dip can be dairy-free, this snack is just as flexible.

Bottom line: You don’t need to follow the recipe exactly. You just need the basics — oats, something creamy, a sweetener, and berries. Make it your own. That’s what keeps it fun and sustainable.

Mistakes to Avoid with Overnight Oats

What Not to Add in Overnight Oats
Not every ingredient works in overnight oats — especially when you’re making something as creamy and balanced as berry cheesecake overnight oats. Some things can mess with the texture, taste, or even your digestion.

Here’s what we learned to avoid:

  • Too much liquid – Adding too much milk or yogurt will leave your oats runny and hard to enjoy. Stick with just enough to cover the oats and let the chia seeds thicken things up.
  • Crunchy add-ins (too early) – Nuts, seeds, or graham crackers should be added right before eating. Otherwise, they get soggy overnight.
  • Artificial sweeteners – These can leave a weird aftertaste and may cause stomach discomfort. A little honey or maple syrup is a better option.
  • Citrus fruits – Fresh oranges or pineapple can break down the oats too much and make them bitter. Save those for other recipes like our Roasted Sweet Potato Salad.

Making berry cheesecake overnight oats is simple — but keeping it balanced matters. Too many extras can turn your snack into a sugar bomb or make it tough on your stomach.

Why Some Ingredients (Like Berries) Need Timing
Berries are a key part of this recipe, but you have to know when to add them. Frozen berries are perfect to mix in before chilling. They thaw slowly overnight and release a little juice into the oats, giving a natural, sweet flavor.

Fresh berries, though, are better added the next day. Why? Because they hold their shape and texture better that way. If you add fresh strawberries or blueberries too early, they can get mushy or watery.

Another mistake? Skipping the layer order. You want oats and chia seeds at the bottom, yogurt and protein mixed on top, and berries last. That layering keeps the texture perfect and makes every spoonful feel like a real treat.

We’ve had readers ask, “Can you mess up overnight oats?” The truth is: yes, a few small things can throw them off. But once you know what to avoid, it’s easy. Just like How to Fix Your Metabolism starts with simple steps, so does building a better snack.

Berry cheesecake overnight oats should feel indulgent, not disappointing. Get the timing and texture right, and you’ll have a snack that hits every time.

How to Prep Like a Pro

Can You Add Cream Cheese to Overnight Oats?
Yes, you can — but with a few notes. Classic berry cheesecake overnight oats use Greek yogurt for that creamy, tangy layer. It mimics cheesecake without adding a lot of fat or sugar. But if you really want that classic cheesecake taste, adding a little cream cheese is totally fine.

Stick to a small amount — about 1 tablespoon per serving. Make sure it’s softened and blended with the yogurt and honey so it spreads smoothly. It gives that richer flavor, especially if you skip the protein powder. We recommend pairing it with stronger berries like raspberries or blackberries, which balance out the richness.

Still, most people find that Greek yogurt alone gives just the right texture. It’s lighter, high in protein, and makes the prep super easy. That’s why we use it in most of our go-to recipes — like the topping in our Cottage Cheese Ranch Dip, which also gets its creaminess without needing extra cheese.

Meal Prep Tips for Creamy, Fresh Results
When making berry cheesecake overnight oats, the key is layering and portioning. Use jars or containers with lids — anything you can seal and store in the fridge for 3–4 days.

Here’s our go-to prep process:

  1. Start with oats, chia seeds, and just enough milk to cover.
  2. Mix in a scoop of protein powder.
  3. Add a layer of Greek yogurt mixed with honey (and cream cheese if using).
  4. Finish with berries and close the lid.
  5. Add crushed graham crackers right before eating so they stay crunchy.

Want a smoother mix? Blend your oats with milk before layering for a pudding-like texture. Want it sweeter? Add mashed banana instead of honey. This is your snack — build it how you like.

We prep 3–4 jars at once and keep them chilled. They’re perfect for busy nights when cooking feels like too much. If you’re already making Insulin-Control Meals or doing Sunday prep, these oats slide right into your plan.

By prepping ahead, you always have something ready that feels like a treat — but fuels your body right. Berry cheesecake overnight oats aren’t just easy to make. They’re easy to stick with.

FAQs + Pro Tips

Why You Might Feel Bloated After Overnight Oats

Some people feel bloated after eating overnight oats. It’s often because of too much fiber too fast, or because the oats weren’t soaked long enough. In berry cheesecake overnight oats, chia seeds and oats expand overnight, which helps your body digest them better. If you’re still feeling off, try cutting the portion or switching to gluten-free oats.
Also, watch your mix-ins. Adding lots of raw fruit, dairy, and sweeteners all at once can be tough on the stomach. Keep it simple, and adjust based on what your body handles best. Just like with High-Protein Orzo Meals, balance matters.

What Not to Add in Overnight Oats?

Avoid ingredients that mess with the texture or shelf life. Don’t add fresh bananas, crunchy granola, or raw apples overnight — they turn mushy or brown. Don’t add nuts or crushed crackers ahead of time. Save them for right before eating. With berry cheesecake overnight oats, keeping the base clean is the key to a good snack.

Are Overnight Oats Actually Healthy?

Yes, especially when made with real ingredients like oats, Greek yogurt, chia seeds, and berries. This combo gives you fiber, protein, and antioxidants. Unlike sugary snacks, berry cheesecake overnight oats keep you full and steady without a crash. They’re a much smarter choice than store-bought treats or late-night processed foods.

Can You Add Cream Cheese to Overnight Oats?

You can, and it tastes great if you’re aiming for a true cheesecake flavor. Blend a tablespoon of cream cheese into your yogurt layer. It makes the topping extra rich and smooth. Just be careful with the portion — a little goes a long way. We still prefer Greek yogurt alone for ease and balance.

Why Not Add Berries to Overnight Oats?

You can add frozen berries right away — they thaw overnight and release flavor into the oats. But avoid adding fresh ones too early. They get mushy or soggy. For the best texture, add fresh berries right before serving. That keeps berry cheesecake overnight oats tasting fresh and sweet.

What Is the Healthiest Thing to Add to Overnight Oats?

It depends on your goals. Chia seeds are great for healthy fats and fiber. Greek yogurt boosts protein. Berries add antioxidants and natural sweetness. If you want more staying power, try a spoonful of nut butter. The best part about berry cheesecake overnight oats is that you can build them to match your needs — whether it’s fat loss, muscle gain, or just clean fuel.

Print
clock clock iconcutlery cutlery iconflag flag iconfolder folder iconinstagram instagram iconpinterest pinterest iconfacebook facebook iconprint print iconsquares squares iconheart heart iconheart solid heart solid icon
berry cheesecake overnight oats ready to eat with spoon and toppings

Berry cheesecake overnight oats


5 Stars 4 Stars 3 Stars 2 Stars 1 Star

No reviews

  • Author: Chef Dodos
  • Total Time: 6 hours
  • Yield: 1 serving 1x

Description

Berry cheesecake overnight oats are the ultimate high-protein late-night snack. Sweet, creamy, and easy to prep!


Ingredients

Scale

1/2 cup rolled oats

1/2 cup unsweetened almond milk

1 tbsp chia seeds

1/2 scoop vanilla protein powder

1/2 cup Greek yogurt

1 tbsp honey

1/3 cup mixed berries (fresh or frozen)

1 crushed graham cracker (optional)


Instructions

1. In a jar or container, mix oats, chia seeds, almond milk, and protein powder.

2. Let sit for 5 minutes to slightly thicken.

3. In a bowl, mix Greek yogurt and honey until smooth. (Add 1 tbsp cream cheese if desired.)

4. Layer the yogurt mixture over the oat base.

5. Top with berries and cover.

6. Refrigerate overnight (at least 4–6 hours).

7. Before eating, add crushed graham crackers if desired.

Notes

Use frozen berries for juicy flavor overnight.

Swap Greek yogurt for plant-based yogurt for a dairy-free version.

Use gluten-free oats and crackers to make it gluten-free.

  • Prep Time: 5 minutes
  • Cook Time: 0 minutes
  • Category: Snack
  • Method: No-Cook
  • Cuisine: American

Nutrition

  • Serving Size: 1 jar
  • Calories: 320
  • Sugar: 10g
  • Sodium: 150mg
  • Fat: 8g
  • Saturated Fat: 2g
  • Unsaturated Fat: 5g
  • Trans Fat: 0g
  • Carbohydrates: 35g
  • Fiber: 7g
  • Protein: 22g
  • Cholesterol: 10mg

Conclusion

Berry cheesecake overnight oats are more than just a healthy snack — they’re a smart, crave-worthy way to satisfy those late-night cravings while still supporting your goals. With simple ingredients like oats, Greek yogurt, chia seeds, and berries, you get real food that fuels your body without added junk.

This snack became a game-changer during our 100-day fitness challenge. It gave us a way to enjoy something sweet without breaking progress. And the best part? It’s easy to prep, super flexible, and always ready when you need it.

Whether you’re looking to fuel recovery, cut out sugar, or stay consistent with your eating, berry cheesecake overnight oats deliver. Try them tonight — and let them work for you tomorrow.

Let’s StayFit — together. Follow us on facebbok for more

How To Make Chocolate Baked Oat Cups That Taste Like Dessert

Chocolate baked oat cup served with strawberries
Freshly baked chocolate oat cups in a red silicone muffin tray
Chocolate baked oat cups cooling in a silicone muffin tray—easy, mess-free, and ready to serve.
Table of content

Ever had one of those mornings where you wanted something sweet and chocolatey—but didn’t want to sabotage your goals? We get it. That was us during our first 100-day challenge. Med was craving dessert for breakfast (again), and Kiko had just finished a workout, tired of egg whites. So, we grabbed oats, mashed a banana, added cocoa powder and a little maple syrup—and boom: the chocolate baked oat cup was born.

Soft, rich, and just sweet enough to satisfy, these little cups quickly became a game-changer in our meal prep. Think brownie meets breakfast—with real ingredients and zero regrets. You bake once and have portable snacks for days. No more reaching for processed bars or skipping meals.

And the best part? They’re easy to mix, easy to bake, and even easier to customize. Whether you’re chasing fat loss, need more protein, or just want to enjoy food that fuels your energy—you’re going to love these.

We actually like to pair them with a protein-rich side like these Quick & Easy Cottage Cheese Pancakes or sip on a refreshing Pickle Lemonade Mocktail post-gym for that electrolyte boost.

What You’ll Need for the Base

No complicated blends or expensive powders—just real food. Here’s your basic lineup:

ngredients for chocolate baked oat cups including oats, cocoa, banana, eggs, and chocolate chips
All you need to make healthy chocolate baked oat cups—simple, clean ingredients.
                                                                                                                                                                       
IngredientPurpose
Rolled OatsComplex carbs, fiber
BananaNatural sweetness & moisture
Cocoa PowderRich chocolate flavor
EggBinder & protein
Maple SyrupOptional sweetener
Almond MilkSmooth texture
Baking Powder & VanillaLift and flavor

Feel free to get creative. Toss in chopped walnuts, unsweetened shredded coconut, or even a handful of dark chocolate chips if you’re feelin’ fancy.

To support your goals, check out how these tie into our Insulin Control & Fat Loss tips and try pairing them with dips like our Cottage Cheese Ranch Dip for a satisfying snack combo.

Why Chocolate Baked Oat Cups Are Great for Weight Loss

Real Ingredients That Help You Stay Full

Chocolate baked oat cups aren’t just tasty—they’re smart for weight loss too. Each one is made with real food like oats, banana, cocoa powder, and eggs. They give you energy, help you feel full, and don’t spike your blood sugar. That’s key when you’re trying to eat better and stay on track.

We started eating chocolate baked oat cups during our first 100-day challenge. They became a go-to snack and breakfast fast. Why? Because they taste like a brownie but give your body what it actually needs. And since they’re already portioned, there’s no guessing or overeating.

Want to change them up for your goals? Try one of these easy swaps:

                                                                                       
Your GoalSwap Idea
Cut SugarSkip the syrup and use a ripe banana
Add ProteinMix in a scoop of protein powder
Lower FatUse egg whites instead of whole eggs

Easy Portion Control

Chocolate baked oat cups are already sized just right. No scale. No math. Just grab one when you need a clean, healthy snack.

We like pairing them with Grilled Chicken Bites or Zesty Lemon Chicken Orzo for balanced, protein-rich meals.

How to Customize Chocolate Baked Oat Cups

Easy Banana Substitutes That Still Taste Great

Don’t like bananas? No problem. You can still make chocolate baked oat cups without them. Bananas help with sweetness and texture, but they’re not the only option.

You can use unsweetened applesauce, pumpkin puree, or even mashed sweet potato. Each of these swaps keeps the oat cups moist and adds natural flavor. If you go this route, just taste your batter and add a little maple syrup if it needs more sweetness.

For every banana you skip, use about ½ cup of your chosen swap. We’ve made chocolate baked oat cups with applesauce before a tough leg day, and honestly—they were still delicious.

→ Want to try other flexible recipes? Check out our Turkish Pasta Recipe and Teriyaki Chicken—both super easy to adjust with pantry staples.

Rolled Oats vs. Steel-Cut: What Works Best?

When making chocolate baked oat cups, the kind of oats you use matters. Rolled oats (also called old-fashioned oats) are best. They hold their shape and get soft while baking, giving you that perfect chewy texture.

Steel-cut oats don’t work well in this recipe. They take too long to cook and stay hard. If that’s all you have, cook them first or skip them for now. Quick oats are okay in a pinch, but the texture will be softer and less hearty.

We like sticking with rolled oats for that classic feel—like a muffin and a brownie had a healthy baby.

→ Want more texture-based meals? Try our Cottage Cheese Pancakes and Mediterranean Ground Beef Skillet—both packed with feel-good crunch.

How to Store and Prep Chocolate Baked Oat Cups

How Long Do Chocolate Baked Oat Cups Last?

Chocolate baked oat cup served with strawberries
Enjoy your chocolate oat cup with Greek yogurt and berries for a balanced breakfast.

One of the best parts about chocolate baked oat cups is how well they hold up during the week. Once baked, let them cool completely. Then store them in an airtight container in the fridge. They’ll stay fresh for up to 5 days—perfect for quick breakfasts or post-workout snacks.

Need them to last longer? Freeze them! These cups freeze great. Just wrap them individually or place them in a freezer-safe container. When you’re ready to eat, microwave for 30 to 45 seconds. They come out warm, soft, and ready to go.

Chocolate baked oat cups make busy mornings simple. No mess. No excuses.

→ Planning freezer meals? You’ll love our [Healthy Freezer-Friendly Snacks – Coming Soon] and [StayFit Meal Prep System – Coming Soon].

How to Meal Prep a Week’s Worth Fast

You don’t need hours in the kitchen to meal prep. Making a full batch of chocolate baked oat cups takes about 30 minutes total.

Start by mixing your dry ingredients (oats, cocoa powder, baking powder). In another bowl, mash your bananas (or swap) and stir in eggs, milk, vanilla, and syrup. Combine wet and dry, then spoon the mix into muffin cups.

Bake at 350°F for 22–25 minutes. Done.

Want extra protein? Add a scoop of protein powder. Want more fiber? Toss in chia seeds. Want variety? Use mini chocolate chips in half the batch and blueberries in the other. You’re the chef.

→ Need more batch-friendly recipes? Don’t miss our [StayFit Budget Meals – Coming Soon] and [High-Protein Prep List – Coming Soon].

Chocolate baked oat cups make it easy to stay on track—even when life gets busy. Just grab,heat, and go.

FAQs About Chocolate Baked Oat Cups

Can I make chocolate baked oat cups without bananas?

Yes, you can! If you’re not into bananas or don’t have any on hand, no worries. You can use unsweetened applesauce, pumpkin puree, or mashed sweet potato instead. Use about ½ cup for each banana you’re replacing. Just make sure to taste your batter—you may want to add a little maple syrup or honey to balance the sweetness.

Are chocolate baked oat cups good for weight loss?

They sure are. Chocolate baked oat cups are made with real ingredients, no refined sugar, and they’re already portioned. That means no overeating and no guessing. They’re high in fiber, which helps you stay full longer, and easy to fit into a balanced meal plan. Just stick with healthy mix-ins like dark chocolate or chopped nuts.

How long do chocolate baked oat cups last in the fridge?

When stored in an airtight container, chocolate baked oat cups stay fresh in the fridge for up to 5 days. You can also freeze them for up to 3 months. Just microwave for about 30–45 seconds straight from the freezer. They’re perfect for busy mornings, meal prep, or an after-dinner treat.

4. Can I use steel-cut oats instead of rolled oats?

We don’t recommend it. Steel-cut oats take longer to cook and won’t soften the same way. Your oat cups will come out undercooked and too chewy. For best results, stick to rolled oats (also called old-fashioned oats). Quick oats are okay if that’s what you have, but the texture will be softer.

Wrap-Up: Your Go-To Chocolate Baked Oat Cups

Chocolate baked oat cups are that rare combo of healthy, easy, and crave-worthy. They’re made with simple ingredients, they store well, and they check all the boxes—meal prep, portion control, and real flavor.

Whether you’re eating them for breakfast, snacking post-workout, or curbing a late-night sweet tooth, these cups just work. No fancy tools, no long prep. Just mix, bake, and go.

And remember: real change comes from small habits done consistently. Keeping better food on hand is one of those habits. These cups helped us stay on track, and we’re pretty sure they’ll help you too.

Try the banana-free version. Freeze a batch. Make them your own.

We’ve got your back.

— Let’s StayFit—together.For More follow us on facebook & pinterest

Print
clock clock iconcutlery cutlery iconflag flag iconfolder folder iconinstagram instagram iconpinterest pinterest iconfacebook facebook iconprint print iconsquares squares iconheart heart iconheart solid heart solid icon
Chocolate baked oat cup served with strawberries

How To Make Chocolate Baked Oat Cups That Taste Like Dessert


5 Stars 4 Stars 3 Stars 2 Stars 1 Star

No reviews

  • Author: Chef Dodos
  • Total Time: 35 minutes
  • Yield: 12 oat cups 1x
  • Diet: Gluten Free

Description

These chocolate baked oat cups are soft, healthy, and perfect for meal prep. They’re naturally sweetened, freezer-friendly, and made with real ingredients like oats, banana, cocoa powder, and eggs.


Ingredients

Scale

2 cups rolled oats

2 ripe bananas, mashed

1/3 cup unsweetened cocoa powder

2 large eggs

1/2 cup almond milk

1/4 cup maple syrup (optional)

1 tsp vanilla extract

1 tsp baking powder

1/4 tsp salt

1/4 cup dark chocolate chips (optional)


Instructions

1. Preheat oven to 350°F (175°C) and grease or line a 12-cup muffin tin.

2. In a bowl, mash the bananas and mix in eggs, almond milk, maple syrup, and vanilla extract.

3. In another bowl, combine rolled oats, cocoa powder, baking powder, and salt.

4. Stir dry ingredients into wet mixture until well combined. Fold in chocolate chips if using.

5. Spoon batter evenly into muffin cups, filling each about 3/4 full.

6. Bake for 22–25 minutes or until set and slightly firm on top.

7. Cool for 5 minutes, then remove and let cool completely on a wire rack.

Notes

Swap banana with 1/2 cup unsweetened applesauce or pumpkin puree.

Store in an airtight container in the fridge for up to 5 days or freeze for 3 months.

Microwave frozen oat cups for 30–45 seconds before serving.

  • Prep Time: 10 minutes
  • Cook Time: 25 minutes
  • Category: Breakfast, Snack, Meal Prep
  • Method: Baking
  • Cuisine: American

Nutrition

  • Serving Size: 1 oat cup
  • Calories: 130
  • Sugar: 5g
  • Sodium: 90mg
  • Fat: 4g
  • Saturated Fat: 1g
  • Unsaturated Fat: 2g
  • Trans Fat: 0g
  • Carbohydrates: 20g
  • Fiber: 3g
  • Protein: 4g
  • Cholesterol: 35mg

Muhammara Recipe: How to Make It Healthy Red Pepper Dip

muhammara recipe served with fresh veggies and pita

We first made this muhammara recipe when we found out Kiko had anemia. At the time, we were just starting to take our health seriously — reading labels, tracking nutrients, and trying to figure out how food could actually heal us. We needed something rich in iron, vitamin C, and healthy fats… but we also needed it to taste amazing. Enter: muhammara.

This roasted red pepper and walnut dip isn’t just delicious — it’s powerful. The ingredients are naturally packed with the nutrients Kiko needed to bounce back, and honestly, it became one of our go-to recipes during those first few months of real change. We were both tired of bland “health food.” Muhammara was one of the first things that proved we didn’t have to choose between feeling good and eating well.

That moment — discovering that flavorful food could be fuel — was huge for us. It helped spark the idea for StayFit Recipes. Because we believe real change doesn’t start with extreme diets or strict rules. It starts with real food that actually supports your goals.

So if you’re looking for something that’s as nourishing as it is craveable, this muhammara recipe is it. Let’s get started.

Table of Contents

What Is Muhammara? The Story Behind the Dip

We’ll never forget the first time we made this muhammara recipe. We were in the middle of trying to support Kiko’s recovery from anemia — reading everything we could about iron-rich foods and ways to boost energy naturally. That’s when we discovered this vibrant red dip with Middle Eastern roots. Smoky, tangy, creamy, and slightly sweet — one batch and we were obsessed.

This muhammara recipe is based on a traditional Syrian dish made from roasted red peppers, walnuts, breadcrumbs, olive oil, garlic, and pomegranate molasses. The name comes from ahmar — Arabic for “red” — and it’s a perfect description of its bold color and even bolder flavor.

For us, this wasn’t just a dip. It was a turning point. We were done with flavorless “health food” and tired of feeling like clean eating meant bland eating. But this muhammara recipe flipped that belief on its head. It delivered deep, satisfying taste — and it happened to be packed with real, nutrient-dense ingredients our bodies actually needed.

Since then, this muhammara recipe has become a total staple in our home. We spread it on toast, serve it with grilled meats, and even mix it into grain bowls. It’s a game-changer when paired with our Grilled Chicken Bites or next to our Turkish Pasta Recipe for a full-on Mediterranean night.

If you’re looking for a healthy, flavorful snack that’s anything but boring, this muhammara recipe is where to start. It’s proof that eating well doesn’t mean giving up the foods you love — it means discovering better ones.

Simple Ingredients, Stunning Flavor

So what makes this muhammara recipe so craveable? It’s all about the balance — sweet, smoky, tangy, and rich in every spoonful. And the best part? The ingredients are simple, wholesome, and easy to find. You might even have most of them in your pantry already.

Here’s what you’ll need for a classic muhammara recipe:

ingredients for muhammara recipe on a white counter
Simple, clean ingredients — every item in this bowl serves a purpose.
  • Roasted red peppers – You can use jarred or roast your own for deeper flavor.
  • Walnuts – Adds creaminess, crunch, and healthy fats.
  • Breadcrumbs – Thickens the dip and gives it body.
  • Garlic & cumin – For warmth and bold flavor.
  • Pomegranate molasses – That signature tangy-sweet kick.
  • Olive oil & lemon juice – Brings it all together.

You can customize this muhammara recipe depending on your needs. Want it gluten-free? Use almond flour or gluten-free breadcrumbs. Watching calories? Cut back slightly on the oil without losing flavor. Craving heat? Add a pinch of Aleppo pepper or chili flakes.

Why Homemade Is Always Better

Yes, you can buy muhammara at the store. But making it yourself? Way better. Store-bought versions are often loaded with excess oil, sodium, or preservatives — and honestly, they just don’t match the fresh, bright flavor of homemade.

When you make your own muhammara recipe, you’re in full control. You decide how spicy, how smooth, how tart it gets. You know exactly what’s going into your body — no mystery ingredients, no bloating surprises.

It’s also incredibly meal-prep friendly. Pair it with our Roasted Sweet Potato Salad for a powerhouse plant-based lunch, or swirl it into your next Healthy Marry Me Chicken Soup for an unexpected flavor twist.

This muhammara recipe proves that clean eating doesn’t mean boring eating. It’s simple. It’s stunning. And yes — it’s totally snack-worthy.

Is Muhammara Healthy for Weight Loss? Absolutely.

Let’s be real: when we first discovered this muhammara recipe, we weren’t just looking for flavor — we were hunting for fuel. With Kiko recovering from anemia and both of us trying to lose fat without losing our minds, we needed recipes that could satisfy cravings and support our goals. Muhammara did both.

Nutrient-Dense & Naturally Filling

This muhammara recipe isn’t just a tasty dip. It’s packed with ingredients that nourish your body and help manage hunger:

  • Walnuts are rich in omega-3s and protein — ideal for curbing cravings and supporting brain function.
  • Red peppers bring in antioxidants and a dose of vitamin C, which helps with iron absorption (especially helpful for anemia).
  • Olive oil provides healthy fats that keep you feeling full, not sluggish.
  • Garlic, cumin, and lemon juice add flavor without adding calories.

Each serving of this muhammara recipe delivers satisfying texture, clean ingredients, and enough flavor to keep you coming back — without the crash you’d get from ultra-processed snacks.

Smart Snacking for Real Results

Portion control is key when you’re eating calorie-dense foods like walnuts and olive oil. But that’s what makes muhammara such a powerful tool: just 2–3 tablespoons go a long way. Pair it with crunchy veggies, use it as a spread on a protein wrap, or enjoy it with a boiled egg for a smart, post-workout snack.

Want to go deeper on fat-burning foods? Check out our full post on insulin control and weight loss — it’s the science behind the strategy we use. Or create a full high-protein meal by serving this dip with our Zesty Lemon Chicken Orzo.

blending muhammara dip in a food processor
Blend until smooth — the real magic happens right here.

Bottom line? This muhammara recipe isn’t just diet-friendly — it’s lifestyle-approved. And that’s why we keep it on repeat.

Creative Ways to Enjoy Muhammara

Once we made our first batch of this muhammara recipe, it didn’t just sit in the fridge waiting for the next snack attack — it became part of our weekly rhythm. Because once you taste it, you realize: this dip doesn’t belong in just one category. It’s a spread. A sauce. A game-changer.

What to Pair With Muhammara

This muhammara recipe is incredibly versatile. Here are just a few of our favorite ways to enjoy it:

  • As a dip for raw veggies, baked pita chips, or whole grain crackers.
  • Spread on toast or wraps — layer it with grilled chicken, cucumber, or avocado.
  • Swirled into grain bowls with quinoa, lentils, and greens.
  • As a topping for grilled meats or roasted veggies. It’s fantastic on salmon or cauliflower steaks.
  • Even as a pizza base — skip the red sauce and try muhammara with goat cheese and arugula. Trust us.

Planning a fusion dinner? Serve it alongside our Teriyaki Chicken or Grilled Chicken Bites to add unexpected flavor depth.

Make-Ahead Tips & Storage

This muhammara recipe holds up beautifully in the fridge for up to 5 days. In fact, the flavors deepen over time — making it perfect for meal prep. Store it in an airtight glass container and give it a quick stir before serving.

Want to freeze it? You can! Just portion into small containers or silicone molds, freeze, and thaw overnight in the fridge. We like freezing it in 2-tablespoon cubes for quick snacks or spread-ready portions.

Flavor hack: before serving, stir in a dash of smoked paprika or chili flakes if you like extra heat — or drizzle with a little pomegranate molasses to amplify the tang.

From breakfast toast to party platters, this muhammara recipe adapts to your life. It’s easy, exciting, and just plain fun to eat. And once it’s in your rotation, you’ll wonder how you ever went without it.

Print
clock clock iconcutlery cutlery iconflag flag iconfolder folder iconinstagram instagram iconpinterest pinterest iconfacebook facebook iconprint print iconsquares squares iconheart heart iconheart solid heart solid icon
muhammara recipe served with fresh veggies and pita

Muhammara Recipe: How to Make It Healthy Red Pepper Dip


5 Stars 4 Stars 3 Stars 2 Stars 1 Star

No reviews

  • Author: Chef Dodos
  • Total Time: 30 minutes
  • Yield: 8 serving 1x

Description

This authentic muhammara recipe is a bold, smoky, and satisfying Middle Eastern dip made with roasted red peppers, walnuts, olive oil, and pomegranate molasses. It’s naturally dairy-free, full of healthy fats, and packed with flavor — perfect as a dip, spread, or sauce. Whether you’re fueling your fitness journey or just want a clean snack that actually excites you, this muhammara is a game-changer. Ready in 30 minutes, meal-prep friendly, and 100% craveable.


Ingredients

Scale


  • 2 large roasted red bell peppers (or 1 cup jarred, drained)


  • ¾ cup raw walnuts


  • ½ cup plain breadcrumbs (or gluten-free substitute)


  • 1 clove garlic


  • 2 tablespoons pomegranate molasses


  • 2 tablespoons extra virgin olive oil


  • 1 tablespoon lemon juice


  • ½ teaspoon ground cumin


  • ¼ teaspoon smoked paprika (optional)


  • Salt to taste


  • Pinch of chili flakes (optional)


Instructions

  • Roast the peppers (if using fresh): Place over an open flame or under the broiler, turning until charred on all sides. Let cool, peel, and remove seeds.

  • Blend: Add roasted red peppers, walnuts, breadcrumbs, garlic, pomegranate molasses, lemon juice, olive oil, cumin, and paprika to a food processor.

  • Pulse until smooth, scraping down the sides as needed. Adjust salt and lemon juice to taste.Serve: Transfer to a bowl. Drizzle with olive oil or sprinkle chili flakes on top. Enjoy with veggies, crackers, or grilled chicken!

Notes

Make it spicier with Aleppo pepper or more paprika.

Store in an airtight container in the fridge for up to 5 days.

Great for meal prep: freezes well in small portions.

  • Prep Time: 10 minutes
  • Cook Time: 20 minutes
  • Category: Snack, Dip, Appetizer
  • Cuisine: Middle Eastern, Mediterranean

Nutrition

  • Calories: 140
  • Fat: 12g
  • Carbohydrates: 7g
  • Fiber: 2g
  • Protein: 3g

Conclusion: Real Food, Real Results — One Dip at a Time

This muhammara recipe isn’t just another healthy snack. For us, it was one of those early wins — a reminder that food can heal, fuel, and excite you all at once. It helped Kiko bounce back from anemia, fueled our workouts, and turned clean eating into something we genuinely looked forward to.

We’ve learned that staying fit doesn’t mean being strict. It means being strategic. Finding those go-to recipes that hit the sweet spot between flavor, function, and fun. Muhammara does that — and then some.

So if you’re ready to level up your snack game, support your health, and fall in love with real food again, start here. Start with this muhammara recipe. And trust us — it won’t be your last batch.

Let’s StayFit — together.

For more recipes follow me in Facebook and Instagram

FAQs About Muhammara

What is muhammara made of?

A classic muhammara recipe includes roasted red peppers, walnuts, breadcrumbs, olive oil, garlic, lemon juice, cumin, and pomegranate molasses. Some versions may include chili or Aleppo pepper for added heat.

What is the difference between muhammara and romesco?

While both are red pepper–based dips, muhammara comes from the Middle East and features walnuts and pomegranate molasses, giving it a slightly sweet and tangy flavor. Romesco is Spanish, made with almonds, tomatoes, and vinegar, and has a more savory, nutty profile.

Is muhammara healthy for weight loss?

Yes! This muhammara recipe is full of fiber, healthy fats, and anti-inflammatory ingredients. It’s satisfying, nutrient-dense, and easy to portion — making it a smart snack for fat loss and energy balance.

What to pair with muhammara?

Use it as a dip for veggies, a sandwich spread, a sauce over protein, or a base for grain bowls. This muhammara recipe also works beautifully with grilled meats, roasted veggies, or whole grain crackers.